Putting a little more power in a $15.00 Daisy

IMG_0144.JPG IMG_0145.JPG IMG_0143.JPG IMG_0148.JPG IMG_0147.JPG Finally have the answer to removal and installation on bb loading gate on the RR type guns! To remove, essentially you destroy it. To replace, it is simply inserted through the rectangular hole in the side of shroud. Start it in by hooking the slit of the gate over the lower edge of hole. Then sort of push it it with a rotating motion. It rolls right in with a bit of pressure.
 
Also got #25 shot tube in hand. It will require drilling a locating hole for the abutment, shortening and recrowning. Will be Thursday before I can get it to my brother who has a lathe and Bridgeport mill to do the necessary gunsmithing. He is willing and able to do small machining projects for very reasonable prices. Location is Wichita, KS if there is a need.

Thanks again for the inspiration.
 
You may be onto something, LW. I hadn't looked at it from that angle- I was actually leaning more towards a harder pellet, the thought was that the skirt may go into the barrel w/less deformation. But using a uber soft pellet w/a thin skirt could allow the pellet to engage the rifling easier when the compressed air slams into it.

Did a quick check of the pellets I have on hand, the Daisy sampler pack and JSB Exacts feel like the softest so I'll be trying them first.

On a different note, just took delivery of a Crosman 2400. Mounted a red dot but it's rainy here today so I have to wait before trying it out.

CROSMAN_2400_C.jpg
 
I was thinking exacts or Daisy's myself. Very nice i built a custom 22xx thats a blast to shoot. Gets just over 500fps with valve tunning, that longer barrel probably be able to get 600 if you were inclined to.
 
As tempting as 600 fps sounds, at this stage with the 2400 I'm more inclined to go for a longer shot count with a low ES. My QB78 might get hot-rodded, though. Actually I'm hoping SWMBO takes a liking to the 2400. She loves her Ruger Single Six and also does well with a .45 ACP 1911 I built for her a few years ago, but we can't get to the range as often as we'd like. So I'm hoping something we can do in the back yard will appeal to her.
 
Not a bad option, and yeah getting some back yard shooting in is always a plus. My wife will take potshots at stuff with my airguns some.but dosent really practice much.
 
Please comment if you can view the photo album from the link, thanks. More to come later this week! I'm very interested in anyone else's progress. Thanks again! hinz57
 
Finally have the answer to removal and installation on bb loading gate on the RR type guns! To remove, essentially you destroy it. To replace, it is simply inserted through the rectangular hole in the side of shroud. Start it in by hooking the slit of the gate over the lower edge of hole. Then sort of push it it with a rotating motion. It rolls right in with a bit of pressure.
Thanks for clarifying how the loading gate is installed. I had no idea it was inserted through the door- I had been thinking it went in from the front this whole time!
Also got #25 shot tube in hand. It will require drilling a locating hole for the abutment, shortening and recrowning. Will be Thursday before I can get it to my brother who has a lathe and Bridgeport mill to do the necessary gunsmithing. He is willing and able to do small machining projects for very reasonable prices. Location is Wichita, KS if there is a need.

Thanks again for the inspiration.
I have some updates on the #25 barrel project. It has been shortened, recrowned, and drilled for the locating pin on the abutment. Mike, my brother sent me documentation pics in a google drive album. Trying to figure out how to share them here. My apologies for not being more computer savvy.
I was able to see the photo album just fine. He has some fine machinery! The work looks awesome, too. I'd give a pretty to have that shop- well, along with the knowledge it takes to use it!

The shortened, recrowned, and refitted model 25 barrel looks like a million bucks, can't wait to hear what it performs like. Were you able to get a baseline from the original shot tube? If not, no big deal- the performance of a factory shot tube in a fresh Red Ryder and Model 105 Buck is fairly well documented already. How are you planning to reattach the abutment halves back together?

Also, earlier englertracing (@engleracing-where you be??) mentioned the shot tube locating "key" on the metal half of his abutment was protruding into the ID of the tube. Might want to check yours to be sure the tube isn’t being obstructed as well. I haven't decided how I want to secure my shot tube in the abutment- but I'm leaning towards removing the key and instead use a set screw through the metal half to locate onto a small flat cut into the shot tube instead of the cutout the factory uses. It would be easier for me to do it like that seeing as how I have no mill and would have to make the cutout with a dremel.
 
The Crosman Nightstalker barrel came today as promised- thanks again, noodles, much appreciated!

It has the ideal OD to match up to the Daisy abutment- right at 0.260”. It has two machined steps in it that aren't needed. They don’t line up w/the retainer key of the Daisy abutment so don’t help in that regard, but neither do they hurt anything. I will cut off the end w/the flats when I shorten the barrel because I won’t be loading pellets from the breech, so I don’t need a leade. But I will save the end w/the leade (that also has the flats)- it might be useful for a different project where breech loading would be used. (Photos came from noodles.)

Crosman_Night_Stalker_composite-3.jpg
 
Update. With pics.
 

Attachments

  • IMG_0152.JPG
    IMG_0152.JPG
    60.6 KB · Views: 102
  • IMG_0154.JPG
    IMG_0154.JPG
    37.1 KB · Views: 98
  • IMG_0155.JPG
    IMG_0155.JPG
    43.6 KB · Views: 94
  • IMG_0156.JPG
    IMG_0156.JPG
    45.3 KB · Views: 95
  • IMG_0157.JPG
    IMG_0157.JPG
    40.5 KB · Views: 94
  • IMG_0158.JPG
    IMG_0158.JPG
    65.8 KB · Views: 99
  • IMG_0159.JPG
    IMG_0159.JPG
    46.5 KB · Views: 93
  • IMG_0160.JPG
    IMG_0160.JPG
    68.7 KB · Views: 98
  • IMG_0161.JPG
    IMG_0161.JPG
    74.9 KB · Views: 103
  • IMG_0162.JPG
    IMG_0162.JPG
    92.4 KB · Views: 99
I can see the photos fine. Looks badass. Did you bore out a stock air tube or make one from scratch? That setup should be very close to 350 fps... let us know if you chronograph it. If you don't have a chronograph, HERE is some info on getting the velocity w/o needing one. What's accuracy like?
 
I can see the photos fine. Looks badass. Did you bore out a stock air tube or make one from scratch? That setup should be very close to 350 fps... let us know if you chronograph it. If you don't have a chronograph, HERE is some info on getting the velocity w/o needing one. What's accuracy like?
We bored out the stock air tube to 7/64". .750" Aluminum spacer, new seals, #25 barrel, removed bear trap rachet, cut 2 coils off of the trigger return spring and installed the fiber optic front sight. I did file the barrel to abutment locating pin slightly, as was shown by englertracing. Another thing I discover is that the bb magnet was low, which pulls the bb down into a divot. I used a small punch from the bottom of the abutment to raise it up so the bb is centered on the axis of the air tube. I also smoothed the port on the air tube to minimize turbulence. Who knows if this all matters, OCD probably. The base is actually a model 1998, the pink has been stripped and the wood sanded and waxed.

I don't have a chronograph. I can feel that it hits much harder than a stock RR. I have only put 10 crosman bbs through it at 5 meters. I'm not a very good shot, but it seems more accurate than stock. I need to print some targets and make some sort of bench rest to sort out accuracy a bit. My eyesight is not great anymore. The fiber optic sight seems to help a bit.

More to come. I am interested in the 499 barrel concept. Also interested in your crossman barrel experiment. Thanks again!
 
Thanks for clarifying how the loading gate is installed. I had no idea it was inserted through the door- I had been thinking it went in from the front this whole time!

I was able to see the photo album just fine. He has some fine machinery! The work looks awesome, too. I'd give a pretty to have that shop- well, along with the knowledge it takes to use it!

The shortened, recrowned, and refitted model 25 barrel looks like a million bucks, can't wait to hear what it performs like. Were you able to get a baseline from the original shot tube? If not, no big deal- the performance of a factory shot tube in a fresh Red Ryder and Model 105 Buck is fairly well documented already. How are you planning to reattach the abutment halves back together?

Also, earlier englertracing (@engleracing-where you be??) mentioned the shot tube locating "key" on the metal half of his abutment was protruding into the ID of the tube. Might want to check yours to be sure the tube isn’t being obstructed as well. I haven't decided how I want to secure my shot tube in the abutment- but I'm leaning towards removing the key and instead use a set screw through the metal half to locate onto a small flat cut into the shot tube instead of the cutout the factory uses. It would be easier for me to do it like that seeing as how I have no mill and would have to make the cutout with a dremel.
Does your abutment have a round locating key/pin, or an elongated key as shown by englertracing? I have disassembled 4 abutments, all have the round pin/key.
 
Very nice offer, LoonWulf!

Before I got a chronograph I timed a BB from when shot straight up until it hit the ground (I didn't even use a stopwatch- just "one-thousand one, one thousand two...") and multiplied the time by 32.8 and that gives a close approximation of the FPS. Obviously this requires a still day, if there's any wind to speak of the BB may be blown too far away to hear it hit. And use caution around anything that might be damaged by the falling BB, including kids, pets, etc.

@hinz57 I believe smoothing the airway has to help a little, and everything adds up. Good tip about the height of the magnet- that's also something I will be sure to check. I was wondering about that stock, it didn't look like my Red Ryder stock did when I had it sanded down. Now that you mentioned the base gun being the 1998 it makes sense! haha

On the trigger, I have set up all but one of my Daisys w/o a rear return spring installed. I have one gun set up w/a return spring in place of the sear spring and it is VERY light, but I don't recommend doing that because if the gun was in the wrong hands an accidental discharge could occur. But on a well broken in trigger assembly, this makes for a sweet trigger for bench rest shooting. Not so much for field work, though.

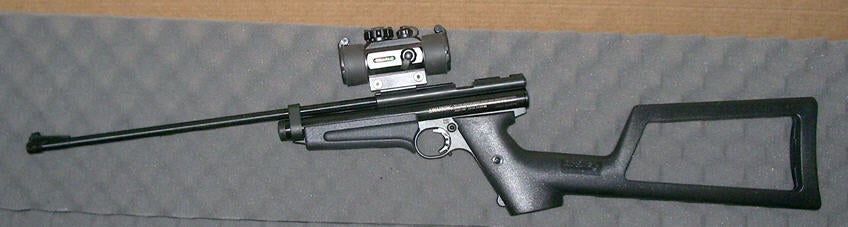
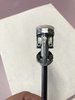
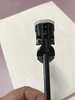
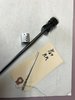
I hope to get the Crosman rifled barrel installed into the abutment today. I will leave it full length for early testing. I have a couple spare sights, I'll use one of them to modify to let the barrel extend out the front.

In the end I suspect what will be found is the 499 barrel will offer the best performance for both velocity and accuracy, especially if using the good Avanti ground shot made for it. But if there's one thing I've learned through this, it is to expect the unexpected!
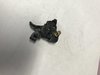
 
Does your abutment have a round locating key/pin, or an elongated key as shown by englertracing? I have disassembled 4 abutments, all have the round pin/key.
Only have had one abutment apart, it's from a 2000 Millennium model Red Ryder. It uses the oval locator pin.

ETA It seems the round locator is the newest part because engleracing's RR and my RR that have the oval pins are both fairly old. Engle's RR was taken apart 10 years ago and who knows how old it was then, and my RR is from 2000...
 
Last edited:
Only have had one abutment apart, it's from a 2000 Millennium model Red Ryder. It uses the oval locator pin.

ETA It seems the round locator is the newest part because engleracing's RR and my RR that have the oval pins are both fairly old. Engle's RR was taken apart 10 years ago and who knows how old it was then, and my RR is from 2000...

Cobalt, any idea if your ME RR is made in the USA or China. My 70th anniversary (2010)RR had a China sticker inside the fore stock. I would like to know about when the manufacturing was outsourced. I would really like to have an American version to put my modified parts into. The 1998 makes a good test bed that I don't mind modifying. Plus it has a really bad paint job over the original paint.
 
A couple details I failed to note earlier. The abutment screws we used are #2-56 x 1/4" long. 5/16" would have been better. I did put a drop of blue loctite on each screw thread. I also used a metal lever.

Loonwolf, very generous offer! What part of the country are you located in. I suspect I know people locally that own a chronograph, just never asked around. Thanks for the offer.

Cobalt, I'm very interested in your adult RR stock. I've tried to discern the dimensions from your stacked photos. Could you post another pic of the RR stock on top of the AJ stock with the levers /trigger stacked as vertical as possible. I would like to see the difference in pull and drop and shape of the butt as possible. I want to make a stock, I have a thickness planer and I'm not afraid to use it!

I would be willing to do the machining of your 499 barrel if you want to send it. Otherwise I'll probably order one to play with in the future.

Thanks again to all!
 
First, the 2000 RR is unmarked as to where it was made. I assumed USA but It does not say made in USA on the gun, nor say made in China. I suspect the packaging would have said where the parts were from or where it was assembled. I commented at the time I took it apart that I was disappointed in the quality of the parts used to assemble it as compared to the China built ones. The gun, resealed and oiled, was only good for about 170 fps! This was due to the poor quality of the barrel- it was so badly made that light could be seen through the tubing seam. I tried to photograph it but the photo leaves much to be desired as far as clarity, but you can see a glow of light- and that glow is coming through the seam. Then there was the spring- it was made w/unground ends and it had fewer coils and less spring rate than the China guns use. A real disappointment. The bright spots were the trigger, which was made sans beartrap rack and the plunger tube is marginally stronger than new production tubes.

Except or a few special edition guns like the ca. ~ 2015 Daisy Red Ryder 75th Anniversary model which was made in the USA, the change to "Made in China" and "Made in USA" happened as early as 2006. This is going by a thread on the subject of the RR being made in China..

ETA There was also this (Dec., 2009): "There were some marked "Made in USA with Chinese parts", [some marked] "Made in China", and some unmarked." So it would appear there was a lot of overlap of older vs. newer stock Daisy BB guns in the supply chain.

I will post a better photo of the stocks for comparison later tonight or tomorrow. Or, if you prefer I could mail you a life-size kraft paper tracing of the stock. Let me know which you'd prefer.

And thank you for the offer to cut down the OD of my 499 barrel. I will keep this in mind.
 
Last edited:
While looking over the 2000 RR, I saw "BRD 18 JAHRE & ALTER" stamped into it. Anyone know what it means?
 
Closest my google foo can come up with is that its perhaps supposed to be info/warnings for the German market. Seen that on a video of another gun also google suggested Brd 18 jahare und alter.....
 
Like you, didn't find much useful info using the internet. I've head of symbols/text used on some European airguns for how much power they produce but I don't know if this is related.
 
Im not sure what measurement of energy it could be, mostly if they dont use ft/lbs than energy (as far as i know) is given in joules which would be bout 13ft/lbs....unless thats a energy limit?
Most energy limits if there are any are bout 5.5ft/lbs or about 7.5 joules.
More playing with google translate 18 jaher und alter = 18 years and older. Im guessing thats what its SUPPOSED to say, but again im just guessing.
 
Back
Top