Welding on Firing Pin to make it longer.

Status
Not open for further replies.

LRShooting

Member
Joined
Jan 10, 2014
Messages
297
Location
Missouri
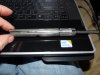
I was wondering if I could weld a small bead on the end of the firing pin on my Stevens 987 22lr. It had been used a lot before I saved it from going to the junkyard. The firing pin was completely wore out and wouldn't fire. After a few strokes with a file to sharpen it, it worked a little better, but misfires occur pretty often. The firing pin just barely leaves a dent and protrusion is minimal. It needs to be made longer and I think a small weld bead on the end would work with some file work and measuring. I need a better opinion then my own though. I haven't done it before.

Heres the link if you wanna see what the firing pin looks like. I don't feel like taking pictures. https://www.gunpartscorp.com/ad/109990.htm#109990G
 
You sould get specs and measure yours to see if it is a length issue. I would weld on the base if it was needed. Also You would probably have some temper issues after welding. You could probably get a new one form numrich or such.
 
Yea, specs are gonna be kinda hard to find. Numrich is the URL I have up. I bought all new springs, new magazine guide, and a couple other things for the 987 off Numrich. They have most stuff. Ill try to find some specs first to make sure.
If you look at the firing pin, you cant weld on the base. The way its made does not allow me to do so. The T-shaped butt of the FP fits snug into the hammer. So the only option is on the tip. Temper would be an issue though. Never thought of that really. Welds are usually pretty hard, but it depends on what it would do to the firing pin around the weld. Ill have to do some research. I suppose at any rate, its not gonna cost me any more to try and fix it first if there's gonna be a temper problem no matter what. I need to find the specs first and make sure that's the problem though like you said.
 
i looked at your link. Check the areas inside the firing pin channel for a build up which could have prevented the firing pin from traveling forward.
 
Might be possible to heat it cherry red in the thick section and peen it to stretch it another few thousandths?

You would still have the tempering issue to deal with, but I think you would be alright if you quenched it in oil from cherry red.

Then polish it and draw to temper to a yellow-brown color (500 degrees).

BTW: I have ask a mod to move this to the Gunsmithing Forum.

rc
 
I have built up entire jaws for bolt and cable cutters with 4130 filler rod and a TIG welder. Should be an easy job if you have the proper equipment.
 
I agree with RCmodel about trying to Peen the end longer.
And if that doesnt work, then try welding the tip area and Oil hardening it.
It is a 22 and is not as critical as a centerfire rifles firing pin as far as strength.
But it will need to be harder than just cold rolled steel.
If you are going to heat it up, Make sure you use a Heat sink of some sort to prevent the whole firing pin from getting heated up.
Something like clamping two pieces of steel on the sides with Vise grips, so you can work on just the tip area.
I have no idea of your skill level , or if you are going to be doing the welding yourself.
But If I were you, I would opt for ordering a new firing pin if the inside of the Bolt body is clean.
Welding of parts, is the last option I would try, and only if new parts can not be found.
Also try Jack First Guns for the parts.
 
I know you said all new springs but your sure its not a weak firing spring issue?
Sounds like a fun project. Good luck!
 
I agree with RCmodel about trying to Peen the end longer.
And if that doesnt work, then try welding the tip area and Oil hardening it.
It is a 22 and is not as critical as a centerfire rifles firing pin as far as strength.
But it will need to be harder than just cold rolled steel.
If you are going to heat it up, Make sure you use a Heat sink of some sort to prevent the whole firing pin from getting heated up.
Something like clamping two pieces of steel on the sides with Vise grips, so you can work on just the tip area.
I have no idea of your skill level , or if you are going to be doing the welding yourself.
But If I were you, I would opt for ordering a new firing pin if the inside of the Bolt body is clean.
Welding of parts, is the last option I would try, and only if new parts can not be found.
Also try Jack First Guns for the parts.
Parts are available. My link is a source for pretty much every part to build that 987 from scratch. Has quite a bit of stuff for every other gun too. Or at least the ones I have checked out. One question though, why would welding the firing pin be the last option? I mean, buying one means $20-25, when welding means basically nothing but a little time. Is Could welding cause issues that would mess up other stuff? Like I said, I haven't done it before, so I wanna make sure I am not gonna end up being worse off then I started.

As far as skill level, I am not trained professionally in anyway, but I have been welding for probably 10 years. Pretty frequently too. Farm equipment always breaks :cuss: I have some expierence with hardening in oil and water. I have everything I would need including oxy-acetylene torch, MIG, bench grinder, hammers, anvils, etc... No shortage on tools.

Basically, if the general consensus here is don't do it, Im not going too. I don't feel like screwing up something else. The 987 is so simple though that it would take something really major to damage it badly. Its not a target gun or anything, but more of just a plinker and "utility" gun for draggin' along with me coon hunting and checkin trap lines.

BTW: Thanks everybody for the replies. This site is great for figuring out stuff.
 
Oh wow. Very cool. After all that work I'd gladly pay $25 for a firing pin I could count on if it was available.
 
@ LRshooting.
When you put it in the context of a Project gun and you are using it to Build your Skills, then I see your point.
And if it doesnt work, then you can always get the part if you need too.
I can relate to that. I often try things like what you are doing, so I know what works and what wont, when I find a gun that I can not get the right parts for.
But Let me ask ?
Have you checked the actual firing pin protrusion ?
It should be between .035 and .040 "
If it already is, and the tip has been cleaned up and De-Burred, then you have another issue.
Also, I am not familiar with this action, or what area of the firing pin actually stops the forward progress of the pin when fired.
There are sometimes ways to re fit the area of the stop and let the pin move forward a bit without lengthing it.
But, Know your protrusion first , and carefully evaluate if anything else in the action functioning will be effected by the adjustments needed.
But, If you find the area that stops the pin travel, It would be Best to do any Fitting or stoning on the Firing Pin Part and not what it stops against.
That way you are still only talking about a firing pin replacement if it doesnt work.
 
Last edited:
Ok, thanks a lot. There is no way to trim a little off the firing pin to make it go further. The only way would be to put the slug on a lathe and trim it down a couple thousandths. I might as well get a new firing pin rather than do that. Its a really weird design so its hard to tell unless you see a diagram or take it apart yourself. Ill check protrusion and see.
 
Something else to check is excess headspace from bolt wear over the years.

Or, a ding in the barrel face under the firing pin from dry-firing.

Either will cause soft firing pin strikes.

Rc
 
I like RC's idea. I would suspect that if it's short, it's only short by a few thou, so peening in the center might lengthen it just enough. It would probably be much easier to do than welding material onto it.

GS
 
Correct protrusion doesn't matter if you have excess headspace.
Or a ding in the breech face from dry firing.

rc
I checked headspace and everything. Heres the deal with this gun though. Its a semi, and there really ends up being no such thing as headspace. If you take the barrel off, the bolt will go .035" farther. Face of bolt and breech are both good and flat too. Also no firing pin marks. Thank you for the suggestions though. It narrows everything down and makes sure it isn't something else.
 
Maybe I missed something but, sorry, I have to ask
Why not just buy the pin you linked to?

That or file/thin the lump at the rear that limits the forward travel
 
I have everything I would need including oxy-acetylene torch, MIG, bench grinder, hammers, anvils, etc... No shortage on tools.

Basically, if the general consensus here is don't do it, Im not going too. I don't feel like screwing up something else.

If you had a TIG and the correct filler rod you would be fine. Maybe a MIG and some Kasenit, if you don't blow the part away.

If the part already needs to be replaced, what are you going to loose trying to repair it?
 
Cant justify a TIG right now, but I would like to have one for auto body repair and some lighter stuff.
 
Maybe I missed something but, sorry, I have to ask
Why not just buy the pin you linked to?

That or file/thin the lump at the rear that limits the forward travel
Well, its a project gun. Goal here is to not spend much if I can help it. 25$ isn't a lot, but the gun isn't worth much in GOOD condition anyways, and it is in no way good condition. At least not original. Also, I can't trim any off the firing pin. The hammer is what stops it.

Here is a link for everybody who wants to see what I'm talking about with this. http://howlandhomesteadfarm.com/mouseguns/www.mouseguns.com/savman/savman05.jpg
 
@ LRShooting
There too is headspace.
The headspace is the distance from the back of the case head to the bolt face.
Take a 22 casing and put a layer of Scotch Tape on the back of an empty Unfired 22 case, and see how many layers ir takes before you see the bolt not be able to close fully.
The rim stops the case from going into the chamber, and the bolt stops on the back of the barrel face.
But there is either a recess in the bolt face, or the rim of the case is rebated into the back of the barrel.
Those recesses can be more than the thickness of the case rim.
But if your firing pin is .025" protrusion, and it might be .010 too short if not more.
You are doing what I do.
I don't call it Gunsmithing, But I refer to it more like Firearms-Recycling.
Taking a piece of junk and putting it back into action for the next generation.
Most people just go out and buy New, or don't posess the skills to do their own work.
And like you said: To take it to a gunsmith and pay for new parts, would be cost prohibitive.
I find lots of junk guns Cheap at Yard Sales for my projects.

Question:
You said the Hammer is what stops the firing pin forward travel ?
How ?
If the hammer hits on the back of the bolt, and drives the firing pin Flush with the back of the bolt, the Hammer is not stopping the forward Progress.
There Can be a Little Gap between the back of the firing pin, and the back of the bolt, and the firing pin acts on Enertia for the final travel.
Many guns like the SKS have a stop for the firing pin, but the firing pin if that stop is removed, will go further forward on enertia than just what the hammer stopping on the back of the bolt allows.
 
Last edited:
"You said the Hammer is what stops the firing pin forward travel ?
How ?
If the hammer hits on the back of the bolt, and drives the firing pin Flush with the back of the bolt, the Hammer is not stopping the forward Progress.
There Can be a Little Gap between the back of the firing pin, and the back of the bolt, and the firing pin acts on Enertia for the final travel.
Many guns like the SKS have a stop for the firing pin, but the firing pin if that stop is removed, will go further forward on enertia than just what the hammer stopping on the back of the bolt allows."

exactly :uhoh::D
 
Last edited:
@ LRShooting
There too is headspace.
The headspace is the distance from the back of the case head to the bolt face.
Take a 22 casing and put a layer of Scotch Tape on the back of an empty Unfired 22 case, and see how many layers ir takes before you see the bolt not be able to close fully.
The rim stops the case from going into the chamber, and the bolt stops on the back of the barrel face.
But there is either a recess in the bolt face, or the rim of the case is rebated into the back of the barrel.
Those recesses can be more than the thickness of the case rim.
But if your firing pin is .025" protrusion, and it might be .010 too short if not more.
You are doing what I do.
I don't call it Gunsmithing, But I refer to it more like Firearms-Recycling.
Taking a piece of junk and putting it back into action for the next generation.
Most people just go out and buy New, or don't posess the skills to do their own work.
And like you said: To take it to a gunsmith and pay for new parts, would be cost prohibitive.
I find lots of junk guns Cheap at Yard Sales for my projects.

Question:
You said the Hammer is what stops the firing pin forward travel ?
How ?
If the hammer hits on the back of the bolt, and drives the firing pin Flush with the back of the bolt, the Hammer is not stopping the forward Progress.
There Can be a Little Gap between the back of the firing pin, and the back of the bolt, and the firing pin acts on Enertia for the final travel.
Many guns like the SKS have a stop for the firing pin, but the firing pin if that stop is removed, will go further forward on enertia than just what the hammer stopping on the back of the bolt allows.
LAGS, Tilos... I understand it is hard to see what I mean, so Im gonna upload a picture. The firing pin is ATTACHED to the hammer. As I mentioned earlier, its kind of a weird design over all, but it works. I think it creates to much drag personally because it has to carry the firing pin the total length of bolt travel. Anyways, check out the picture.

LAGS, thanks for the idea. Ill try it and see. Although I have a micrometer and digital calipers to the .0005 if thatd work better. Since its a semi and not exactly precise, id be worried that it may not be hitting bolt face while adding tape and I wouldn't realize it. Bolt face recess was .0475 on entire recessed area (measured with calipers). Rim thickness on 22lr is .043 according to dimensions I found.
 

Attachments

  • P1060026.jpg
    P1060026.jpg
    111 KB · Views: 35
Status
Not open for further replies.
Back
Top