MarColMar and HMG Cetme L a Detailed Comparison

Status
Not open for further replies.
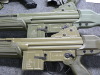
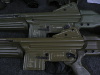
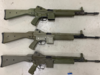
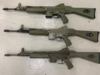
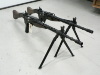
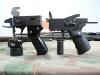
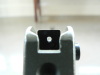
After checking out the barn full of fun, Dave had to take a conference call so Frank and I headed over to the test range with my rifle, an original and a post sample built by MCM. Since it was just the two of us and I was actually involved in the testing/shooting, I set my camera down and didn't take any pictures. There wasn't much to see anywho. We were just shooting. First, we tried shooting at some reactive steel targets at 100 yards but neither of us could hit the bullseye which, if hit, would swing away to the side. Clearly, we would need to use a measurable target.

So, Frank and I set up an extremely sophisticated target at 100 yards involving a big piece of cardboard and a couple rocks. Then Frank broke out a can of red spray paint and proceeded to spray a runny red dot.

"We'll aim for that." NASA would have been proud!

We walked back to the bench, I shot about five rounds and we then walked back down to take a look. We don't need no stinkin' spotting scope. We got two legs!! It was on the cardboard and much better than it was but it was still shooting to the left.

"Can you see the sight?"
"Yes sir, I can"

So, we walked back and Frank had a crack at it. Still shooting left. Then Frank cranked the rear sight all the way to the right and we tried again. It was close but nope, still shooting left.

"It's gonna' need more work."
"Oh well, you'll fix it, I'm sure."

That was all we could do with my rifle for the day. It was clear that something more than simple tweaking was going to be needed. So, we put my rifle to the side and loaded up a couple magazines for the original. I didn't even bother with the semi-auto setting. I already know how that shoots. I pulled the charging handle to the rear and let it fly...…...failure to feed.

"Dump the round and try it again."

That time it loaded. I pulled the trigger and it fired......one round and jammed.
So, I cleared it and tried again. One or two more and another stoppage.
We tried another magazine and had similar issues. Eventually, I think I got through about 40 rounds but it was a struggle. There were multiple failures to feed and it never stopped firing because I released the trigger. No, every time it stopped, it was because of a FTF.
Frank told me it was very magazine sensitive but that it would work decently if it had just the right magazine.
Judging by my test sample of just one rifle, I can see why Spanish troops were less than enthusiastic about the CETME L.

Next up was the post sample built by MCM. I inserted a magazine and charged the rifle. Again, I didn't bother with the semi-auto setting as I have plenty of experience with that already. As there is no detent on the MCM receiver for full-auto, I just pushed it down to where the setting would have been and squeezed the trigger. BRAAAAP! Off went a few rounds and the rifle slowly climbed to the right.

"Lean into it", says Frank.

So, I lean into it and fire off a few more rounds with no problems. This is fun! After finishing off the magazine using small bursts, Frank hands me another and tells me to dump it.

"Okiedokie"

Now, Even though a 5.56 rifle has very little recoil on full-auto, I haven't shot one in that mode for years so I kinda' need to focus on what I'm doing or it's gonna' be all over the place. So, I squeeze the trigger and off it goes, rising to the right again. This time, I kept on the trigger and worked the CETME back down towards my target. I still didn't hit it (yep, still all over the place) but I'm sure I would have scared the hell out of it had it been alive! HAHA!!!
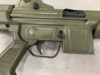
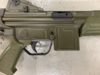
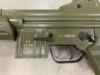
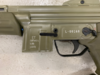
Again, having not shot anything automatic in a number of years, I'm plenty rusty. But, given a little practice, I'm sure the little CETME would be a pussycat. The straight line stock configuration is well thought out and the overall heft helps too. The main thing that impressed me though was the fact that the original was a jammomatic while the MCM ran like a sewing machine. MCM says that their rifle is better than an original. In my limited experience, I'd say that's an understatement.
By this time, Dave was finished with his call and showed up at the range. He asked if we were having fun and was my rifle shooting straight.

"Yes...….and no."
"We'll make it right."
"I have no doubt."

After a little more fooling around and checking out a Swiss 24MM Tb 41 anti-tank gun (the action on that thing is as smooth as a P210), we headed back to the shop. Dave knows how to have a good time.


Alright, let's look at some color variations present in original furniture. Dave told me that one of the things customers often bring up is the shade of green used for the reproduction polymer and Ceracote. I've noticed this too on the various forums I frequent. "Why did they pick this color because mine is that color?" "Why didn't they properly match the green?" Wellllllll, I discovered it ain't that simple. Most people have only ever seen a couple or maybe even a few more parts kits if they are lucky. Prior to my visiting the factory, I'd held a grand total of zero parts kits in my grimy mitts. Of course, I'd done a lot of online research and looked at many a picture but that's simply not the same thing as holding something in your own hands and seeing it with your own eyes. Many times, a color will look quite different in person than it does in a picture and lighting can change colors too but, of course, you already know that. What Dave told me MCM did was look at a good spectrum of the shades present in original parts and pick an average of those shades. He pointed to a door and said there were a few original bits out there in the warehouse if I was interested so we took a walk.

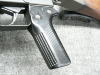
Here are a "few" pistol grips:
P1170144_zpstpebwnzi.jpg


And stocks:
P1170143_zps2kh8xvsv.jpg


And handguards:
P1170142_zps8dnsxvwa.jpg


Looking at the above pictures, it should be obvious that there is no one shade that is "proper" or "correct". Instead, there is an entire RANGE of colors running from grey to forest green. Imagine standing in a pine forest an looking around. Pick any shade you see and you'll find it on a CETME L. I randomly picked some parts from each bin and took them back inside for better pictures.


Here are seven pistol grips in no particular order under fluorescent lighting:
P1170027_zpsbs57fvrk.jpg
Notice that the third from the left is actually grey, not green and the next one to the right is a dark forest green. The remaining five are each a different shade of green.


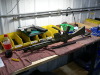
Five random stocks in no particular order:
P1170030_zpshssthgiy.jpg
We see two different shades of grey and three different greens. Also, notice how beat up they are, especially the middle one and check out the rust in the sling swivels. I can 100% understand why MCM had no interest in using this stuff on their new rifles.
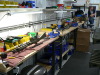

Nine handguards:
P1170023_zpsdyk9yn4i.jpg
There seems to be much less color variation on these. To be sure I didn't just get a bad sample, I went back out to the warehouse and did a fair amount of rooting through the bin. I could find no grey ones at all and, just like the random sample, there was much less shade variation throughout. Dave said that the handguard was the most complex mold of the three so maybe there were fewer contractors used for this part? That's just a guess of course. We'll probably never know.


Here is a picture in natural light:
P1170175_zpsytbiilky.jpg
The MCM rifle has MCM furniture. All the other furniture shown is original.


An interesting variation in the pistol grip mold:
P1170167_zps6dvuddvc.jpg
Note how much longer the serrations are on the left grip as opposed to the shorter ones on the right. The left grip feels slightly more blocky too. I noticed plenty of both type in the bin.


Now, I know what you're thinking and no, MCM will not sell you original furniture. My understanding is that, by law, they are not allowed to. Apparently, any parts that were replaced for 922 compliance cannot be sold to the customer by the manufacturer. Apex bought 100 sets of furniture from MCM for resale and Dave said it took him an entire day of digging to come up with 100 nice sets and even they were not perfect. In the picture immediately above, the loose green stock, handguard and the loose pistol grip on the far right is one of the 100 sets sold to Apex. It shows some use but it's pretty nice. IMO, if you simple MUST have an original set, it's well worth the $60 Apex is charging for them. Here's a link:
https://www.apexgunparts.com/more/furniture/cetme-model-l-stock-set-green-vg.html


Sadly, by the time you read this, all of the furniture shown above in the bins is probably toast. As Dave was looking through them with me he said,
"someone put time and pride into manufacturing all these and they end up as so much trash." It does suck but what's he supposed to do? MCM is a manufacturer, not a museum and storage space is at a premium so they can't just let the stuff sit around collecting dust. It reminds me of the photos you sometime see of military goods being destroyed after the war. Stacks and stacks of German helmets, rifles and various other goodies being rounded up for scrap. Time marches on.


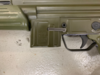
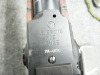
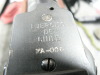
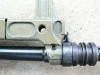
As to the shade variation on the metal parts, I didn't take pictures of that stuff. The furniture was out and available because it was waiting to be picked up for the scrap yard. All of the steel bits are either boxed up awaiting stripping or out on the factory floor having already been refinished. Dave told me that the paint shades on those parts also varied widely and I have no reason to question that. However, I DID find one interesting box of parts lying around:
P1170037_zpswmyaogs3.jpg
These are scope mounts for the LV model. Although they are stripped of parts, notice that they are set up for iron sights as too. They only have parts to build about 145 of the LV so I predict this is going to be a sought after item.
 
Thanks for update and another great write up on MCM, that's awesome you got to tour his shop through invite....and share great pics and info. But wow only 145 of the scoped versions.. But I think Im really gonna need a collapsable version pin n welded
 
One thing I am not clear about: Was the color variation in plastic ****ty QC, fading from use, or deliberate and there are 3-5 actual colors the guns came in?
 
I don't think anybody really knows why there are so many hues of green in the plastic. I have a number of Colt AR's and you see variation in the plastic on those too because Colt has bought from various sub-contractors over the years. I assume it's the same thing here. I doubt the Spanish government cared either so long as the part did its job. The same would apply to the paint too. Referencing my Colt's again, the various uppers and lowers show color variation too depending on when it was made, sometimes even on the same rifle.
 
In this post, we're going to look at few detail shots of an original Cetme L as built by the Spanish. I'm not going into great detail on the rifle because there really is very little difference between it and the MCM offering externally. The HMG rifle is very close too. First, let's start with a word about colors. As noted earlier, the paint and furniture hues varied significantly over the production run of the rifle. When you consider wear, probable multiple subcontractors, exposure to UV light, time, exposure to chemicals and exposure to things I'm not even considering, you're gonna' see a rainbow of greens and even some grey. Again, think pine forest in spring. Another factor is lighting when the picture was taken. Below are two pictures taken of the exact same rifles (an original and a MCM) in the exact same position using the exact same camera. Only the lighting has changed:
P1170062_zpsyoxtqlgj.jpg
P1170059_zps0ar929rl.jpg
If you didn't know better, you would swear we were looking at four different rifles in four different shade of green. Yes, I sound like I'm beating a dead horse here but I know someone is going to ask why HMG and/or MCM didn't finish their rifles in the same color as the originals. The answer is that they did. They just didn't finish it in the same hue you are looking at. Ok, done with that. Moving on.


First up are a few overall comparison shots of the three manufacturers.

Right side:
4_zpsayj8pwky.png
Original is at the top with MCM below and HMG on the bottom.


Left side in same order:
1_zps91rqxnnt.png


Detail receiver right side, Spanish:
7_zps7dd86qkb.png


MCM:
6_zpsxstvhksu.png


HMG:
5_zpsqz1lia8m.png


Detail receiver left side, Spanish:
3_zps8sclpvap.png


MCM:
2_zpsqgmk6yu0.png
The bit of blue tape is leftover from test firing. MCM tapes off various places during testing so that your rifle's finish doesn't get dinged up in the process.


HMG:
8_zps5wft5fle.png
There is a serial number there. It just didn't show up for some reason.
 
All of the pictures in this post will only show an original rifle unless specifically stated otherwise.

A little bit better shot of the Santa Barbara logo:
P1170065_zps4opjxhmw.jpg
Notice that the pistol grip color doesn't match the stock color.

Compare the above to the same shot of an MCM. It isn't 100% exact but as close as can be reasonably expected:
P1170068_zpsxvkcxpxd.jpg


Welds on right side of cocking tube:
P1170073_zpsqkq3tym1.jpg


Top of cocking tube:
P1170075_zpsfwjv5lr1.jpg


Left side of cocking tube:
P1170088_zpsba01g9qi.jpg


Right side of rear sight:
P1170074_zpsqxnabuh1.jpg


Left side of rear sight:
P1170085_zpsqhhkbysg.jpg


Magazine well markings, reinforcement ribs:
P1170082_zpsffrk0fgu.jpg


Selector and serial number:
P1170091_zpsy2emoob0.jpg


Stock pin holes:
P1170094_zpsrwtgm12m.jpg


Ejection port flare:
P1170100_zpsmeu0x8tl.jpg
I originally thought this detail terminated farther toward the front of the port. I was wrong.


Weld at rear of trunnion where it meets the carrier rail:
P1170109_zps3hoopmsc.jpg
One of my original complaints about the welds on the MCM rifle involved them not copying this detail more closely. I REALLY like how well the Spanish addressed this weld. I just looks so intricately done. But Frank explained to me that MCM decided to close this area up a little more completely because of propellant blowback. I do have to say, while the MCM solution isn't quite as elegant looking as the original, it DOES work as intended.


Cross section at rear of receiver:
P1170112_zpsyapsgqiw.jpg


From another angle:
P1170118_zps04xkd9vy.jpg


Back of rear sight and a view along the receiver:
P1170120_zpsfdfais9e.jpg
Note the paint run at the top rear corner of the sight and, more interesting, the fact that there is no divot for a scope mount. Some rear sights have it and some don't. I have no idea why but I'd bet that it's absent on later production.


Trigger box:
P1170121_zpsygdozgor.jpg
It is shown above with the hammer fully down and being held by the safety sear. When the bolt group locks forward and your finger is off the trigger, it will trip the safety sear and the hammer will rise slightly to the position shown below where it is being held by the trigger sear:
P1170122_zpsyqota6dq.jpg
Whoop-de-do! Why does this even matter?? Here's why. Practically speaking, you don't need to remover the trigger box for cleaning every time you clean the rifle; it just doesn't get that dirty. Removing the trigger box is, to be blunt, a fiddly pain in the buttocks so it would be nice if you could leave the box in place, just pull the funky dirty bolt group out, clean it, clean your barrel and then slap it all back together. Well, on an original rifle you can do that because, when you pull the bolt to the rear, the safety sear holds the hammer low enough that it does not interfere with your sliding the bolt group back into the receiver and driving it home. Unfortunately, the safety sear is not present on the either the MCM or HMG rifles because it's a full-automatic part. This means that the hammer is only ever held by the trigger sear in the higher position thus preventing the bolt from being driven home without having first removed the trigger box. That kinda' blows but the alternative is having no rifle at all thanks to silly ATF rules. I hope that all made sense!


Bolt group showing Spanish applied finish:
P1170125_zpscohvdda4.jpg
When I first disassembled my MCM rifle, I assumed it just came out of an unissued rifle because the phosphate finish looked exactly like the finish seen here. Nope. Every single original part has been stripped and refinished by MCM. It just looks identical to the original finish because they REALLY did their homework. Schweet!!


Weld at front of magazine well:
P1170126_zpsagttflvw.jpg
This is another detail that I originally found a bit disappointing on the MCM rifle but have since discovered is done just like an original. On the HMG AMG, this weld is ground flat and nicely dressed. It looks better (and that's nice) but it's not original. MCM left it just as an original would be (and that's nice too). This is one of those little things that makes me like both the HMG and MCM offerings. Both have plenty of things to like.


In my limited experience, Spanish firearms are usually almost completely devoid of markings save for the main ones. They aren't like German or Soviet firearms where you find little inspection marks all over the place. True to form, this marking on the barrel is the only one I found:
P1170127_zpsingzty66.jpg
Maybe if I spent hours pouring over every single nook and cranny, I would have found a couple more but I simply didn't have that kind of time. I asked Dave if I could just take it home with me and I'd return it in a week and he just grinned. Yes, I know that would be illegal. Don't get yourself in a snit.


Alright, that's it for tonight. We're in the home stretch. Just a couple more small things to cover (including a look at what was done to repair my rifle including my first range trip after I got it back) and we're done. As always, thank you for your time and I will leave you with a word of advise. Avoid dropping your rifle from a 100 foot cliff. It may break when it hits the bottom. OK bye!!
 

Attachments

  • P1170062_zpsyoxtqlgj.jpg
    P1170062_zpsyoxtqlgj.jpg
    237.6 KB · Views: 2
  • P1170059_zps0ar929rl.jpg
    P1170059_zps0ar929rl.jpg
    222.9 KB · Views: 2
  • 4_zpsayj8pwky.png
    4_zpsayj8pwky.png
    908.9 KB · Views: 2
  • 1_zps91rqxnnt.png
    1_zps91rqxnnt.png
    905.2 KB · Views: 2
  • 7_zps7dd86qkb.png
    7_zps7dd86qkb.png
    818.6 KB · Views: 2
  • 6_zpsxstvhksu.png
    6_zpsxstvhksu.png
    770.4 KB · Views: 2
  • 5_zpsqz1lia8m.png
    5_zpsqz1lia8m.png
    802.7 KB · Views: 2
  • 3_zps8sclpvap.png
    3_zps8sclpvap.png
    796.9 KB · Views: 2
  • 2_zpsqgmk6yu0.png
    2_zpsqgmk6yu0.png
    728 KB · Views: 2
  • 8_zps5wft5fle.png
    8_zps5wft5fle.png
    735.3 KB · Views: 2
Duplicate post. Please ignore.
 

Attachments

  • P1170137_zpszpl3cngc.jpg
    P1170137_zpszpl3cngc.jpg
    181.6 KB · Views: 1
  • P1170136_zpsmina4nan.jpg
    P1170136_zpsmina4nan.jpg
    214.7 KB · Views: 1
  • P1170139_zpsppw8h84a.jpg
    P1170139_zpsppw8h84a.jpg
    193.3 KB · Views: 1
  • P1170129_zpsbl7f5g2x.jpg
    P1170129_zpsbl7f5g2x.jpg
    206.4 KB · Views: 1
  • P1170131_zpsaddtq3r8.jpg
    P1170131_zpsaddtq3r8.jpg
    156.4 KB · Views: 1
  • P1170132_zpsyt7vky03.jpg
    P1170132_zpsyt7vky03.jpg
    179.6 KB · Views: 1
  • P1170133_zpsfbocejma.jpg
    P1170133_zpsfbocejma.jpg
    212.2 KB · Views: 1
  • P1110544_zps91b5038a.jpg
    P1110544_zps91b5038a.jpg
    72.3 KB · Views: 1
  • P1170188_zpsywnkotr1.jpg
    P1170188_zpsywnkotr1.jpg
    271 KB · Views: 1
  • P1170187_zpsrb825xep.jpg
    P1170187_zpsrb825xep.jpg
    270.7 KB · Views: 1
  • P1170164_zps4f7fitfq.jpg
    P1170164_zps4f7fitfq.jpg
    172.9 KB · Views: 1
  • P1170155_zpszv1rrn2v.jpg
    P1170155_zpszv1rrn2v.jpg
    359.9 KB · Views: 1
  • P1170157_zps16zmoox0.jpg
    P1170157_zps16zmoox0.jpg
    146.7 KB · Views: 1
  • P1170156_zpsfmj1m2pb.jpg
    P1170156_zpsfmj1m2pb.jpg
    149.5 KB · Views: 1
Last edited:
Sorry I haven't been at this for a bit but it's spring and things don't get done around the property unless you take the time to do them!


Before moving on to the repair on my rifle, I just have a couple loose ends to tie up. First, are a couple pictures of a few final assembly stations. This is where assembly of your rifle is finished up and Quality checked prior to test firing:
P1170137_zpszpl3cngc.jpg

P1170136_zpsmina4nan.jpg


I noticed an unbent flat with parts assembled to it showing an "inside" view of the Cetme. I thought it was kinda' neat so I snapped a shot:
P1170139_zpsppw8h84a.jpg


It wasn't all about Cetme's. The guys knew I love Swisstory so they told me they'd have a few things there I might be interested in. One of them was a select fire Chilean contract 510, shown here with my AMT:
P1170129_zpsbl7f5g2x.jpg


Chilean marking on receiver:
P1170131_zpsaddtq3r8.jpg

P1170132_zpsyt7vky03.jpg


SIG built it with a different pistol grip than they offered on the US imports:
P1170133_zpsfbocejma.jpg


AMT grip for comparison shown on the left:
P1110544_zps91b5038a.jpg
There are other differences between the two and Dave had lots of other nice Swiss things including a Tb-41 anti-tank rifle but......that's a topic for a different time. Back to the task at hand.


As I finished up my day with the fine folks at MarColMar, I asked one thing of Mr. Bane. After briefly explaining my fascination with origami firearms I asked it I could take a receiver flat with me. I told Dave that I would not sell it and I would not build a rifle on it. I simply wanted one for a souvenir of a day well spent and I also wanted one because I consider such things as Industrial Art. Dave graciously obliged and he gave me a neato MarColMar cap too! I think it looks good hanging in my home as Art, a vessel for good memories and as a reminder of new friends! I just have to decide which way it looks best :
P1170188_zpsywnkotr1.jpg

P1170187_zpsrb825xep.jpg
My Honey's brother was over today and asked, "What's that bracket for?" He had no idea what it was and I guess he thought it was for hanging a TV or some such device. Everyone has their own thoughts about what constitutes sculpture I guess. LOL.


Alright, time to wrap this up.
I left my rifle at MCM on a Thursday and headed home. They determined that the front sight tower was askew and this was causing the problem. They tried to repair it while I was there and, while it was better, it was still shooting a few inches left at 100 yards with the rear sight moved fully to the right. The following Monday, I received an email telling me that it as now shooting straight and a picture was attached showing me the results on a target at 100 yards. I wrote back, asking what was done and received a highly detailed and technical description which, because I'm not the sharpest tool in the shed, I did not 100% understand. Suffice it to say, they removed the sight, dressed the barrel and repined it using a solid steel pin. I was also told that they are changing production methods slightly so that this does not happen in the future. By the end of the week, I had my rifle back in hand. It was returned to me extremely well packed, the test target was in the box, and the entire rifle was cleaned and oiled. I couldn't have asked or reasonably expected more and I consider what was done to be absolutely Stellar service.

Here are right and left side views showing the new, solid pin:
P1170164_zps4f7fitfq.jpg

P1170162_zpsjaueo53p.jpg
The scuff marks on the sight cannot be helped. Because the heat shield fits tightly on the sight, finish wear is unavoidable if it is removed and reinstalled even a few times. Besides, the marks cannot be seen when the handguard is mounted.


Off to the range I went to find out if it worked. I took the HMG AMG along too to compare. I had to move the rear sight four clicks to the left and it's now zeroed. Schweet! I continue to fight with the front sight on the MCM because, as stated earlier, it's too small for my aging eyes although I'm sure it'll be just fine for the younger folks or those with better eyes than me. Because the HMG has a thicker sight, I tend to shoot it a little better. Apparently, different thickness front sights were supplied for original rifles. However, MCM has replaced the original sight with a new manufactured one and rethreaded the original sight base on their rifles so that a finer adjustment can be obtained and the sight can be adjusted more easily. Unfortunately for me, this change in threads means that I cannot simply switch out the skinny sight for a larger original one. I really wish they would offer a thicker sight.


So, below are my targets at 100 yards using 40 rounds of American Eagle 55 grain FMJ. First up is the MCM. Please remember what I always say......I'm a poor shot. You will most likely get better results than I show because you are most likely a better shot than me so don't judge the rifle by my results!! The most important take away here is that it's now centered after MCM effected repairs:
P1170153_zpshla7wzim.jpg


And the HMG:
P1170155_zpszv1rrn2v.jpg


Here is the rear sight on the MCM after final adjustments:
P1170157_zps16zmoox0.jpg

P1170156_zpsfmj1m2pb.jpg

P1170158_zpsv58obtpn.jpg
It's just a bit to the left but still perfectly within tolerance. I'm quite happy with the results.


Something I would recommend to anyone with an HMG rifle is that, at a minimum, they replace at the original worn out recoil and buffer springs. Ideally, I would recommend that you replace all of the springs for the best reliability but definitely DO replace the recoil and buffer springs. If you do not, you run the risk of your rifle beating the stock and/or the receiver to death. Remember that picture I posted showing a huge bin of stocks headed off to the scrap man? That means original stocks aren't going to be around forever. So, if you want to keep that original stock as long as possible, switch out the springs with new ones available from MCM. Below are a couple pictures that show why I think you should do this.

The first one shows the receiver on my MCM rifle after 60 rounds:
P1170150_zps10eqzva8.jpg
I have placed black electrical tape where the casings bounce off the receiver upon ejection. Notice the absence of marks on the tape.


Here we see the HMG receiver after 60 rounds:
P1170152_zpsvyndpajl.jpg
It bounces the casings off the receiver behind the ejection port. Notice how the tape is chewed up and pierced. Clearly, the HMG rifle is throwing them out much more violently. While the rifle is 100% reliable with good quality magazines with strong springs, the ejection pattern is wildly erratic compared to the MCM rifle and they are thrown much farther too. To me, it's obvious that the new MCM springs are much stronger than the originals in the HMG AMG. I don't know how much MCM is charging for the springs but I'm sure it's going to be a whole lot less than the price of a new receiver or an original stock. Of course, you can but a new made MCM stock too...….just buy some new springs, OK?


Alrighty, on to conclusions.
At this point, I have at least 400 rounds through the MCM. I say "at least" because, while I normally keep track of what I shoot and how many I shoot, I did not keep track of how many rounds we put through it the day I was at MCM and I also have no idea how many were put through it after a I left. To date, I'm aware of two stoppages, both failures to feed and both on the day I got it back.
Thus far, I cannot say enough good things about either the HMG and MCM AMG. While I wouldn't particularly want to take either to war, I do love taking them to the range. Of all the 5.56 rifles I own (and that's quite a few) with the exception of the M249, felt recoil is least with the AMG. Yes, we're only talking about a little .22 rifle here but still, the AMG is at the top. Also, what minimal recoil there is, is essentially straight back because of the well thought out straight line configuration of the design. Neither AMG is a marksman's rifle but then it wasn't designed to be. You are always going to get the idiot asking "what will this rifle do that my craptastic AR won't do already?" Well, for one, it won't be an AR. But asking that silly question in the first place misses the point entirely. I can't speak for MCM and I can't speak for HMG but I can speak for myself and it seems to me that the point of a new made CETME L is, quite simply, to provide you with a Quality reproduction of a late cold war Spanish designed roller lock so that you can have fun at the range and own a piece of firearms History. The point is to build a rifle that is actually better than the original, one that brings a smile to your face and one that might spark a conversation at the range....which could lead to a new friend and new experiences. If I'm right and that is the point, both rifles have succeeded in my book.
I really enjoy both of them and I look forward to many enjoyable and memorable range trips in the future. My advise is to buy at least one AMG. If you want one that is as close to all original as you can get and you don't mind or even like the worn in beat up look, buy the HMG but make sure you replace the springs. If you want a rifle that looks just like an original when it was brand new AND has the added bonus of being chocked full of research, engineering and materials far superior to that found in an original AND is backed up by a company that has customer service second to none, buy the MCM. Either way, buy a Cetme and let the good times roll...er lock! See you at the range; I'll be the guy with the cool, 80's looking, green Army Man Gun!
 
Last edited:
I wish almost anyone else took customer service this way. Not the factory tour and so on, I mean the part where they examined the issue so much they are going to improve their process so it doesn't happen again. We need more of that, across all industries.
 
Today, I received a box of goodies from the good folks at MarColMar! They found a small quantity of first pattern handguards in Spain and managed to get them imported and up for sale on their website https://www.marcolmarfirearms.com/ . I've been wanting one of these for a long time but they have been impossible to find. A little History is in order.
When the CETME L was first designed and produced in the early 1980's, certain features such as the rear sight and handguard were very similar to those found on the HK33/93. Very early on, perhaps even during the trials period, the rear sight was changed to the simpler and less expensive to produce flip sight. At some point, the handguard was redesigned too but I suspect that was done a little later than the rear sight change because many of the law enforcement rifles in Spain still have the first pattern handguard. Apparently, the first pattern did not dissipate heat well enough. After now having the first pattern in hand, I'd be willing to bet it was also more expensive to produce. Whatever the case, the military switched out all of their early handguards for the more heat efficient second model we see today and apparently scrapped the originals making them quite rare these days save for rifles issued to the Guardia Civil. Most of their L's still have the first pattern because they generally don't use their rifles much to begin with, let alone in a full-auto capacity, so melty handguards aren't an issue for them. The moral of this story is that it was believed that almost all of the first pattern jobbers were long gone......until MarColMar hit gold because they refused to give up the search. Yeah, it's just a handguard to many but, to me, it's a little bit of treasure. These have never been documented in detail until right now and I get to be the guy to do it. Let's take a look!


Five examples of the original issue CETME L handguard :
P1180291_zpsdcsknn53.jpg


A closer look at them:
P1180292_zps0unsmewx.jpg
Notice the one on top is a different shade of green. If you look at the picture of a bunch in a box over the MCM's website, you'll see quite a palette of colors were produced.


Left side view:
P1180293_zps87syllae.jpg


Right side:
P1180294_zpsq2jmrmy3.jpg
The little circle towards the rear is a rivet head.


Bottom view showing more rivets:
P1180295_zpskaaju6cp.jpg
Notice that it was molded in left and right halves. That's not a mold seam running the length of the bottom but rather a line created where the two separate halves meet. At first this puzzled me. Why would you mold two "L" shaped halves instead of one unit that is "U" shaped?? Well, the answer revealed itself when trying to install and remove it from the rifle. You have to flex the handguard a little bit to install it and a lot to remove it. If it were one piece, it would crack lengthwise eventually. Molding it in two halves and riveting them to steel and aluminum subcomponents allows the entire assembly to flex without stressing the polymer. This complicated construction quite a bit but it's a clever solution.


Top:
P1180296_zpszlcykf0p.jpg
Note the aluminum heat shield. It probably doesn't do much because it's essentially lying flat against the polymer it's meant to protect. If there is any airspace between the two, it's got to be very little.


Front:
P1180299_zpsn9q411z7.jpg


Rear:
P1180300_zpsdktaprnz.jpg
Notice the various rivets and the small steel plate at the far rear for strengthening.


A detail of the rear showing the strengthening plate and the round sheet metal mounting point that engages the front trunnion on the rifle:
P1180301_zpsqscgxc8z.jpg
When removing the handguard, this area flexes the most. I assume the round mounting point would crack eventually were it not for the strengthening plate taking some of the flex load.


A front view of the rear mounting point:
P1180302_zpskdulxrhx.jpg
Note the clean stamping and rivet detail.


Rear inside view of the nose cap showing how the heat shield disappears underneath it:
P1180303_zps0m6z3ijp.jpg
The fuzzy bits you see are stuck to cosmoline. None of the five a bought show evidence of ever having been mounted on a rifle.
 
Nose cap detail:
P1180304_zpskzac5pat.jpg
Notice the sloppy black paint on the rivet head contrasting with the rough phosphate finish on the steel.


Welds holding the front mounting point to the nose cap:
P1180306_zpszp0x1czp.jpg


One of the five also has what looks to be spot welds too:
P1180307_zpszcv47x3e.jpg


The nose cap with spot welds (shown on the right below) also has slightly different nose rivets:
P1180309_zpsiemd1zjo.jpg
They are more flat as opposed to the ones on the left being domed.


Detail of a recessed rivet head on the right side of the handguard body:
P1180310_zpsaa5zjue8.jpg
Its painted with green paint.


All of the rivets other than those on the nose cap are recessed and painted green:
P1180311_zpsywx3ausv.jpg
You can see where they slurged some paint out of the holes. No, "slurged" isn't a word you'll find in a dictionary but it's my word and now you know what it means. "Awwww man, you put too much jelly on the sandwich and it's slurging out the sides! What a mess!!"


You can clearly see the slurgy paint job on this different shade of green handguard:
P1180312_zpsrxpjnahu.jpg
The green paint is the same shade on all five examples.


Detail of a Quality paint job on the bottom nose cap rivets:
P1180313_zpsgdmxne4h.jpg
Meh, it's fine. Think of it as abstract art.


The one that has spot welds in the nose cap and different rivets also has a shiny aluminum heat shield where the others have dull aluminum:
P1180314_zps4vkefxmr.jpg
I have to say it because somebody will ask if I don't....the shiny one is on top.


Detail shot showing where the aluminum meets the polymer:
P1180315_zpsgnfg24xe.jpg
Again, this is not a very good design as there should be an air gap. I'm sure I'll never get it hot enough to matter though so hey, it's neato!


To beat a dead horse on the heat issue, here we see the rear view of an HK33/93 handguard:
P1180321_zps1kshle7h.jpg

Compared to the CETME L:
P1180322_zps01aqlpvo.jpg
Notice how the heat shield on the HK is held off from the body by the rear mounting point creating an air gap between the two, especially along the bottom. In the CETME design, the shield is simply folded into a "U", dropped into place and the rear mounting point is then riveted in place actually sitting on top of the heatshield, sandwiching the shield between the mounting point and the polymer. Not only that but the CETME shield is actually riveted to the body of the handguard farther forward, pulling them tight together. I guess it's better than nothing but probably not by much. OK, we're done talking about hot stuff.
 
An interesting thing I noticed on the polymer parts of all five handguards is that there is absolutely NO molding differences among them. All five left sides are absolutely identical and all five right sides are absolutely identical. This means that only one mold was used. Let me show you:
P1180323_zpsernhsqeu.jpg
Although only two are shown here, the other three are identical. Look closely at the angled vertical line. Notice the little blob at about the midpoint where the single horizontal line intersects. That blob is identical on both handguards. Now look at 7 o'clock position from the blob. See the little tiny indent in the angled vertical that you might mistake for a scratch. Notice that mark is there on the other handguard. Farther up the angled vertical line is another similar little dent in exactly the same place on both handguards. I'm not going to insult you by pointing out each and every little indicator but keep comparing all the details between the two and you'll come to realize that both came out of the same mold. I find it astounding that you would mass produce something like this and only use ONE mold! Of course, a sample of five is not a good statistical set BUT......it is not unreasonable to infer that there was probably only one manufacturer making this part. That means color variation is due to polymer batches and not to different manufacturers.


Here are two more pictures showing two different hand guards with absolutely identical mold details:
P1180324_zps5j3e97k9.jpg

P1180325_zpsyfd48hpk.jpg
We're mainly focusing here on the little blob in the center of the pictures but compare the edges behind the strengthening plates and other minute details. Clearly, these came from the same mold. I know you probably couldn't care less but I think this stuff is neat!


Although the same molds were used, I did find a slight difference and is was, once again on the handguard with the different nose cap and shiny heat shield. On that one, there is a a squared notch along the top towards the rear where it rests against the side of the receiver. On the other four, that notch is relieved and the contour is angled instead. They were molded that way, not ground so there must have been a change made to the mold at some point. This leads me to believe that the different handguard is earlier production than the other four. In the picture below, the different "earlier" one is depicted at the bottom:
P1180333_zpsreovlhac.jpg


Here are two first patterns compared to a second pattern:
P1180326_zpsbfk7anrd.jpg
Three handguards, three shades of green.


Rear ends compared:
P1180327_zpsoemwmy1s.jpg
The second pattern exhibits better heat dissipation, is simpler in design from an overall manufacturing standpoint, is built of fewer parts and is much easier to install and remove from the rifle. However, the polymer part on the second pattern required a MUCH more sophisticated mold. To me, it's clear that the second pattern must have taken less time to assemble and cost less to produce too.


Front ends compared:
P1180328_zps1gamjb3u.jpg
P1180330_zpsc98ntmak.jpg


Top rear view:
P1180331_zps49fytbll.jpg


Gee, I wonder where Spain got their inspiration from?
P1180332_zpsougj2kdq.jpg
To be fair, both the HK33/93 and CETME L are of such similar mechanical design to begin with, it IS only logical that you might arrive at a similar form with regards to furniture design too.
 
So let's see what the first pattern actually looks like installed. This picture shows a MarColMar with one fitted and an HMG AMG with the second pattern:
P1180340_zpspvlrxocz.jpg
I'd like to show you a picture with one installed on the HMG rifle but, despite my trying all five handguards and spending a half hour doing it, I simply could not make one fit. No matter how much I fiddled with it, I couldn't get any of the handguards to slide far enough to the rear for the mounting pin holes to align with the corresponding hole through the front sight base. So while I can pretty much guarantee you that one of these will fit your MCM CETME L, I cant say the same about the HMG offering. Now, you can probably grind the rear mounting point on the handguard down until it fits but that's not something I'm willing to experiment with on an accessory that's made of near unobtainium. Your mileage may vary.


Installed on a MCM rifle:
P1180341_zps5mpoh5tc.jpg

P1180344_zpsept1ohcz.jpg

P1180345_zpsv4hnmp5a.jpg
I should touch on what it takes to install one of these things on your rifle. The second pattern handguard is notoriously fiddly to install and remove and this one is no different. It's almost as if the Spanish didn't finalize the design and someone said "Good enough. I'm tired of messing with it." And of course, I have no literature telling me the proper way to install this on a rifle so my method was arrived at by experimentation. Having said that, take the following with a grain of salt. Here's what worked best for me.

Installation.
1. Hold handguard at a 45 degree angle to rifle with rear of handguard higher than front.
2. Place rear of handguard over barrel. Slide to the rear while engaging rear mounting point with front of trunnion.
3 Wrap hand around top of trunnion and bottom rear of handguard. While squeezing rear tightly, rotate front of handguard up and over front sight base while pushing entire assembly to the rear, thus lining up handguard mounting holes with hole in front sight base.
4. Insert mounting pin until seated.

Removal.
1. Remove mounting pin.
2. Rotate sling mounting ring up and out of the way.
3. Pull handguard forward as far as it will go.
4. Pull rear of handguard down until it is clear of trunnion. It will flex as it passes over the trunnion.
5. Continue to rotate rear of handguard down while also pulling entire assembly down and to the rear until it pulls off the front sight base.

While thee above sounds straight forward, you'll find it can be a fidgety process getting it up over the front sight base during assembly. It can also be a bear during installation getting it far enough to the rear for the pin holes to line up. In fact, I had to hold the rifle by the handguard and bump it on the floor several times to get it to seat properly. It helps if you're squeezing the rear tight onto the trunnion while doing this. It got easier after a few times on and off but it's still enough of a fight getting it on that I have no desire to remove it for a while. I think the main problem is getting the mounting ring to pop into the front of the trunnion. As I said, I never could get it fully seated on the HMG rifle. This just might be another reason the entire assembly was redesigned. Still, it WILL seat with a little work and I think it looks pretty nifty. Being that it's flat on the bottom, it should be pretty stable on a rest at the range too.


These last photos just show details of how nicely it fits the contours on the MCM rifle:
P1180346_zpsf1qd1xgb.jpg

P1180347_zpsobc5iyfd.jpg
Notice that the Cetakote on the rifle is an almost exact match with the original Spanish paint on the rivets. Nice!

P1180350_zpsvw1rqwgw.jpg

P1180352_zpsxo7j1hdw.jpg

P1180353_zpsyfr76hyf.jpg
The little angled feature on the handguard near the end of the charging slot is what we were previously comparing to the same feature only squared off on what I believe is an earlier version of the first pattern handguard.

P1180354_zpsi5oi8uhv.jpg

P1180355_zps5hrh3zuh.jpg


This concludes the first ever detailed look at a first pattern handguard for the CETME L rifle. MarColMar discovered only a small number of these and I wouldn't be surprised if this is the one and only time these will ever be available in what is essentially new and unissued condition. I can tell you that, despite my best efforts, I've never been able to find one before in any condition beat up or otherwise so I was absolutely delighted to have the opportunity to get these pristine examples. They aren't cheap but MarColMar says they had to shell out quite a bit of dough to get them in the first place because the source in Spain knew what they had and how rare they are. In my opinion, if you have a CETME L for collecting purposes, you really need to buy one of these because this may well be the only time you ever see one for sale. Likewise, shooters will enjoy this model because the flat bottom will set very stable on a rest. So whether you are a shooter or a collector, this extremely rare first patter handguard is likely one of the nicest CETME L accessories you're going to find.
 
Last edited:
Makes the blocky style of butt and pistol grip make more sense. The handguard was the same squared off style originally. Always fun to see the original pattern of any gun, and what of their design style and intent made it to the end (was recently checking out trials that led to SIG 550, for example). Interesting stuff.
 
Cant really say I need another 5.56, but if I happen to stumble across one of these for a reasonable $$ I would at least consider it.

Do they make a .308? Now thats something I DO need, but Ive been hesitant as so many of the G3/CETME kit guns have spotty reputations. Its ironic that the Germans originally thought up stamped sheet metal guns as quick and easy to produce, yet with todays CNC milling tech, its actually far harder to get a stamped gun right.

I kinda want to buy one just to support these guys, they really seem like a class act. And, as you say, its great to have more choices than just another AR or a Mini.......:D

Love the tank pics too! Especially the Cheiftan Stillbrew and the T72.
 
Yeah, I long coveted the CETME L, but:
  • Have a nice 33 that satisfies a lot of this
  • Have less money than I did to blow on stuff
  • Stumbled across unpassupable deals on Galil and SIG rifles recently, stretched to make those already
I also hope to find one of these lonely and neglected in a rural pawn shop sometime, but right now, not super likely to be able to just pick one up.

Now... if they were doing AMELI... Those are neat. Have handled a few of those, and love them in the hand, not just in concept. Nice.
 
Last edited:
I'd like to add a short addendum to this. While researching the 5.56 CETME, I often come across information about the original magazines for these rifles referring to them as being designed by the Spanish specifically for the CETME but that's not correct. What they actually are is a carbon copy of an early design FNC magazine. Let me illustrate. NOTE....If you're bored easily or really don't care about magazine minutia, now might be a good time to make your escape. You have been warned.


In the pictures that follow, a CETME Magazine is in the middle, an early FNC is on the right and a later FNC/STANAG 5.56 magazine is on the left. For identification purposes, I've marked the later one with a "-" using a white china marker.

Right side:
P1190249_zps8dwjulrc.jpg
The feed lip contour is a little different on the later FN. We'll get to that in a bit. All are steel.


Front:
P1190250_zpsprrl0xp7.jpg
That's not an illusion you're seeing. The later one is taller and is the exact same height as a standard STANAG magazine.


Left side:
P1190251_zpsjbm3dmyr.jpg


Rear:
P1190252_zpskdmcwvbt.jpg


Top:
P1190253_zpstlioakiy.jpg
Notice that the newer magazine has a plastic follower designed to actuate the bolt holt open on a SCAR 16. Whether this magazine is an FNC that was upgraded or it was for a SCAR from the outset, I cannot say. What I can say is that both FN's are exactly as they were when they left Belgian service.


Bottom:
P1190254_zps1urdnksn.jpg


Closeup of the top rear:
P1190255_zpsx4svmyub.jpg
Notice that the newer follower is designed to actuate the bolt stop on a SCAR 16. It will also work just fine in an M16/M4/AR-15 . The CETME and early FNC will work in those rifles as well but your bolt won't lock back automatically. The FNC never had a bolt hold open feature.
Also of note is that the bolt carrier clearance notch is the exact same width on all three magazines. A STANAG magazine has a more narrow notch. For that reason alone, I suspect that the magazine on the left is an FNC that was updated for use in a SCAR 16.


In this picture, I have added a Colt STANAG magazine on the extreme left for comparison:
P1190256_zpsesnsxhnb.jpg


Here's a detail shot of the top of the earlier FNC magazine:
P1190258_zpsi4b6cy5j.jpg
The CETME is identical.


And here is the same area on the newer design:
P1190259_zpsjewoswb0.jpg
The distance between the feed lips is the same on both magazines but the overall shape and geometry is different. I assume this schtuff was changed for reliability reasons. That's a guess but I think it's a pretty safe one.


A comparison between the Colt (top) and the later FNC (bottom):
P1190261_zpsngkjyoud.jpg
In every way that matters, they are identical.


And here is the Colt compared to the early FNC (which is identical to the CETME:
P1190262_zpslcdfnqrr.jpg
There are so many differences, I'm not even going to attempt to point them all out because I'll probably get it wrong anyways. Cut me a break Francis....I'm not an engineer you know! But if you study them closely, you'll see the differences. You're probably smarter than me anyways!


Alrighty...I'm done. Be honest;that was mind-numbingly dull wasn't it? Now you know more than you probably ever cared to know about FNC and CETME L magazines. YaY!!!
 
Last edited:
Status
Not open for further replies.
Back
Top