View attachment 815594 View attachment 815595 View attachment 815596 View attachment 815597 I had some unexpected time this morning, and with Appendix G of "Swedish Mauser Rifles" in hand, I attempted disassembly. Removed the bolt, cleaning rod, and 2 screws, not a problem! The base of the magazine and trigger guard are fitted quite tightly and the two barrel bands are also snug. Disassembly stopped at this point. It's not worth the effort wrapping screwdrivers in masking tape to depress the spring holding the barrel to the stock, wiggling magazine base and trigger guard when no movement is discernable, etc., when this rifle looks very good in obvious external places. Correct me if I am wrong. Photographs attached, plus the import marking on the barrel.
View attachment 815594
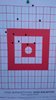
Given that you have not seen any pitting etc. and the stock seems solid, I would reassemble and shoot it with factory ammo of a known quality at this point first. If you get patterns instead of groups, then reassess what is going on. A lot can be discerned by checking the crown, making sure the sights are properly aligned and not loose, checking headspace and the condition of the fired brass (don't use reloads for a test fire. If you use calipers you can measure the brass in key areas before and after firing to determine how the chamber is. If you have the Hornady headspace/comparator kit, you can get a pretty good idea outside of a chamber cast of the condition of your rifle.
For future reference to the OP and others using search function.
The trigger guard should be able to be removed after you remove the floor plate without removing the band springs if you wish. When you look inside the receiver after the bolt is removed and the magazine floorplate, follower, mag spring, you should see a slight gap between the trigger guard and the receiver. This is good btw. You can tap the trigger guard out at that point. You should be able to see any problem internal to the stock such as softened wood around the trigger or a deteriorated wood around the front receiver screw/trigger guard boss.
On the barrel bands, those are a pain regardless of the model. To remove, first take out the cleaning rod as it passes through the channels of the barrel bands. I generally depress the barrel band by one hand (the off hand) and use a wood block to tap the barrel band off the band spring with a soft plastic hammer. On difficult ones, like in the picture, you can use a soft faced wood clamp (harbor freight about $2-3 dollars or walmart) but I use a stick of bamboo bbq skewer instead of a punch as they did.
The lower band (closest to the sights) is big enough to go over the front sight (without sight hood that is) by angling it off. The upper band (closest to the muzzle), depending on the rifle, may have up pressure and be difficult to remove. Tight is good. Removing the upper band is similar to the process of the lower band.
Now, where problems lie--one if the rifle has been finished in shellac, varnish, paint, etc. the removal of the barrel bands can mark it up, especially the lower band, it can also scratch the metal upon removal. In military use, these were treated with some sort of oil, linseed, tung, birch, (leaving out pine pitch for the moment). That would fill in and harden the wood a bit and simply be reapplied upon removal. The metal of the barrel and barrel bands would be oiled slightly to reduce friction and the carry any debris that might scratch away with the band. The other thing is that the handguard must be rotated off around the sights after lifting slightly unless you remove the sight pin (not recommended). Once the upper band is loosened slightly, you can get the handguard edge out from under the band and the rear handguard retaining ring and remove it which makes the upper band slide freely.
Here is a step by step with pictures from the defunct website of surplus rifles which has been archived elsewhere,
http://thisoldrifle.com/mauserswedish/rifledisassembly/index.asp


")