rfwobbly
Member
Interesting that this Lee Press Stand thread came up at the same time. Seems to be a great product at the right time.
http://www.thehighroad.org/showthread.php?t=577171
But a quick Google of "grinder stands" turns up this link....
http://www.nextag.com/grinder-stand/products-html
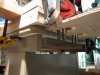
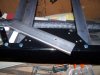
....with similar machine stands for as low as $30. In such a stand, height is very important as most presses are better off near the 36" level.

In the stand pictured above, the weight issue can be quickly overcome by simply piling a bag of play sand or lead shot on the accessory shelf.
http://www.thehighroad.org/showthread.php?t=577171
But a quick Google of "grinder stands" turns up this link....
http://www.nextag.com/grinder-stand/products-html
....with similar machine stands for as low as $30. In such a stand, height is very important as most presses are better off near the 36" level.
In the stand pictured above, the weight issue can be quickly overcome by simply piling a bag of play sand or lead shot on the accessory shelf.
Last edited:
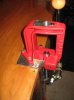
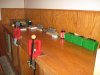
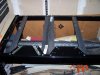
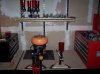
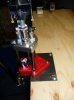
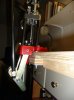
") ) would it be possible to get some pics of your mounts? I am much better when I can see it rather than try to picture it in my mind.
) would it be possible to get some pics of your mounts? I am much better when I can see it rather than try to picture it in my mind.