Bedding a Rifle

Status
Not open for further replies.

kis2

Member
Joined
Jun 16, 2006
Messages
925
Hi Folks,

I've seen some good youtube videos, my rifle bedding kit comes with some detailed instruction, but I want to open it up to any suggestions you guys may have!

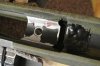
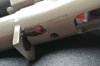
Saturday I'll be epoxy bedding my 700 into its HS Precision stock. Tips, tricks or lessons learned are appreciated!

Thanks!
 
Don't skimp on the release agent!!!!!
I don't like to come back and fill voids so I use a little more bedding compound than I really need. I mask the stock to prevent run-over from messing up the outside of the stock.
Other than that, follow the instructions in the kit.
 
Will not skimp! Got it, thanks!

Thinking I'm going to bed the chamber area, recoil lug, rear action screw area. I'd like to do around the sides and trigger area just to make it a bit weather resistant.
 
I'll suggest if you plan on doing several I would do away with any of the kit forms and get a pound of MarineTex or Devcon and either Johnson's paste wax or Kiwi neutral shoe wax for a release agent. They will provide excellent results and will be cheaper to boot.
 
If the unthinkable happens and the action won't release from the barrel (it happens), don't panic and break something. Find someone with a large freezer. Stick the gun in for a day. Come back, and often the metal will have contracted just enough to pop out.

That being said, just make sure you have enough release agent...
 
Use plenty of release agent. :)

I recommend Johnson's Paste Wax or Kiwi Neutral shoe polish. Use two coats, just in case you miss a spot on one pass.

Be especially careful of any nooks or crannies where the epoxy can get into. A wax release agent and/or tape can block/fill them.

Tape up the front, sides and bottom of the recoil lug. You want a good solid bed against the rear of the lug to handle recoil. You don't want any chance of the action teetering on the bottom of the lug.
 
Bedding Rifle

All good suggestions. I use modeling clay on the bottom of the action where the trigger pin holes and on the bolt release slot. Keeps the glass bedding from getting in them. Al
 
K, it's sitting now. Used lots of release agent. Shave some of my stock up front to get it free floating while I was there.

Things I think I messed up:

-I failed to tape the front and sides of the recoil lug.


Think the rest went OK though. Just did the first 1" of barrel, recoil lug/front action area and around the rear action screw. Didn't use hardly any epoxy, just enough to make good contact.

I supposed we'll see how it goes in another 15 hours! If me failing to tape off the recoil lug seems to be not a good thing, I suppose I could always take a dremel or something and shave a little off the bottom?
 
Yes, you want no contact on the bottom of the recoil lug. That can prevent the action from fully snugging up. I always just clear out the bottom lug area of all glass with a straight chisel. This gun should shoot like magic...
 
Thanks all for the help

Here's what I ended up with. Took a blade and whittled out the bottom of the recoil lug area, seems like I got plenty out.

Some of the epoxy stuck to my metal on the recoil lug and like 9 o clock of the action. Don't know if I should leave that or remove it. Seems like it'd be OK to leave.

Not tons of epoxy on the back wall of the recoil lug slot, but it clearly made contact. Rear action screw area looks good. First inch of barrel channel I'm not convinced made any contact, the epoxy doesn't look very squished.

What do you think? Good enough? Shoot it and see how it does, or do some additional epoxying?

Keep in mind I was happy with my accuracy before, I just figured while I was free floating the barrel a bit (which is good to go now) I may as well.

Thanks for the help
 

Attachments

  • DSC_0852.jpg
    DSC_0852.jpg
    83.2 KB · Views: 43
  • DSC_0854.jpg
    DSC_0854.jpg
    53.9 KB · Views: 31
part of me feels like taking a dremel grinder to it and trying again, this time grinding a bit into the aluminum block and having the recoil lug taped up. more epoxy under the barrel too.

but I hate waiting 24 hours!

EDIT TO ADD:

and so I did. I dremeled off the front epoxy and what was in the recoil lug gap. gave it some additional room down in there. got the epoxy off the metal, retaped and release agented everything. dremeled the aluminum block a bit. re applied epoxy up front, added more to the first inch of barrel area. got it back in, screws in, rubber band on.

wait and see again.
 
Last edited:
was hoping someone would say so mountainbear, thanks. I didn't take much off the aluminum block, but based off the wear marks I had lots of room in there anyway, and it is currently sitting at its same, pre-epoxy height in the stock. I think thats a win.

I think part 2 is going better. little more coverage, better fit, and recoil lug taped right.
 
hey all,

just to put some closure on this, my second attempt went much better. metal was still sitting at the correct height in the stock, first inch of barrel now has support, the recoil lug got bedded right and the action has a much better fit. very tight taking it in and out of the stock now and you just about don't need to bolt it down for it to look like it is. despite all my release agent, I still had some of the epoxy come up with the metal. It was just a bit though, and came right off.

Still not a professional level job, but all that matters is what happens on paper right? so here are my three-shot groups for today. I consider it a great success. while the rifle itself may have gained a little bit of accuracy, I really like the consistency I see now.

thanks for the help and advice
 

Attachments

  • 27aprgood.jpg
    27aprgood.jpg
    67.3 KB · Views: 28
Status
Not open for further replies.
Back
Top