
You are using an out of date browser. It may not display this or other websites correctly.
You should upgrade or use an alternative browser.
You should upgrade or use an alternative browser.
Birth of a blade
- Thread starter messerist
- Start date
- Status
-
Not open for further replies.
messerist
Member
BRad, the blade is 3/16" thick and the tang tapers to the end where it is a little over 1/8" thick. HSO, I use pine 2X4s so when I clamp the tang down it seats itself into the wood but I see the importance of making a clamp. I was in the process of making one before our shop was flooded with 7' of river water during last month's heavy rains. We are busy trying to rebuild and dry out so the clamp project is on hold..as is my smoker . JShirley, thanks for your comment on the design. I like the shape alot. It is a cross betwixt a skinner and a Bowie...sort of a "Skinowie."
. JShirley, thanks for your comment on the design. I like the shape alot. It is a cross betwixt a skinner and a Bowie...sort of a "Skinowie."Fergy35
Member
Nice work. I also like that blade shape and I am enjoying the progress. For those of us in the cheap seats, how often do you stop to clean the file? Do you use chalk or anything to help prevent clogging?
messerist
Member
Fergy, when I draw file I use a double cut file with very aggressive teeth so I rarely have a problem with them clogging up. It also depends on the type of steel that I am making the knife out of. If I am making a knife out of a forged file the teeth tend to get clogged more than on other types of steel. My guess is the composition of the steel used to make the file(which has a higher carbon content than most blade steels)lends itself to clogging the teeth. My kids sidewalk chalk is just the ticket to keep the teeth from catching too much detrius.
messerist
Member
I am getting close to finishing the filing part of this knife. I now need to finish up the tang, the choil and the false edge. I use the same jig for filing the tang that I used on the blade's bevel. The jig helps to make a nice even joint for the guard, which helps immensely when soldering. I use a round file in order to maintain a rounded corner where the guard meets the blade. A square corner can create a stress point and could result in a fracture at that point. Once the tang is finished I use my trusty Sharpie to mark out where I want to file to for the false edge. Here it is all free-hand so I just take off a little bit here and a little bit there until it looks like a false edge. I am now done with most of the major removal of metal. I will touch up points here and there but now I am going to start working on a guard and deciding what type of handle this knife needs....any suggestions. I am considering some type of antler. I have to dig through my box and see what I can come up with. I probably spend more time trying to pick the handle that I do on other parts of the knife. I have to forge some tomahawks this weekend(weather permitting) so I will try and post some photos of that and maybe some knife forging shots. Thanks for the questions and gracious comments. Messerist.


Readyrod
Member
This is an awesome thread messerist. Love the pictures. It's very informative. I vote for antler handle with lots of bark. It would look great. Tho I'm partial to antler.
wheelgunslinger
Member
Very nice. I love these kinds of threads. I have a great interest in doing things in simple ways with basic tools and this is really right up my alley.
No suggestions for the handle. I'm just happy to read along and learn a bit.
Thanks for doing this and for listening to your wife who suggested you show more detail.
No suggestions for the handle. I'm just happy to read along and learn a bit.
Thanks for doing this and for listening to your wife who suggested you show more detail.
Outstanding effort.
Hollywoodb6
Member
- Joined
- Dec 23, 2007
- Messages
- 10
This is very interesting. I might have to try making a knife or two.
Quick question...Can a newer leaf spring be used? Any other source for re-claimed metal to start with?
Quick question...Can a newer leaf spring be used? Any other source for re-claimed metal to start with?
messerist
Member
Hollywood. I have not used "new" leaf springs but I suppose it would not hurt to give it a try. I have used relatively new files, Nicholson, Save Edge etc. and they make good knives. The leaf springs I use come from a salvage yard. I buy whole springs not broken ones. There could be hidden cracks in both kinds but I will take my chances with what appears to be an intact spring rather than one that has an obvious flaw. I have, of course, found defects in sound springs so it is a crap-shoot You could also buy knifemaking steel from several suppliers and have the piece of mind that you have metalugically sound steel that won't reward your days of work with a nice crack right down the middle of the blade!:banghead:
Tim the student
Member
Very cool thread! Looks great!
Readyrod
Member
You're not finished are you?
messerist
Member
Not done yet. No time to work on the blade. Promise to post some more this weekend....or to die trying!
messerist
Member
Yes I am delinquent to say the least but I had some computer issues earlier this week and am only now able to update you all with how far the knife project is progressing. I have chosen a piece of sambar stag for the handle and some 1/4" brass for the guard. To fit the guard I drill a series of holes a bit undersized from the actual size of the tang. Then I use files to get as tight a fit as possible. This is important when it comes to soldering the guard on. Sometimes I don't get the guard as tight as I want it to be but there is a little wiggle room. Next step will be fitting the handle.


messerist
Member
I actually had a few minutes today to get a lot of work done on the knife. After fitting the guard and roughing it to shape I sawed off the crown end of the sambar stag antler. I use a 1/4" drill bit, a round rasp and a drywall saw to hog out most of the spongy pith in the center of the antler. Sambar has very little pith and more solid antler so it takes a little elbow grease. I use to have some nice bits called "Saw Bits," they were just the ticket for grinding out the center of an antler because they have teeth along the shaft of the bit which helps out immensely when trying to open up a hole for the tang. I have not seen any in the local hardware store in a few years. Mine are very dull. If anyone has seen such a bit for sale anywhere drop me a PM...please. Anyways, back to business. Now I am ready to heat treat the blade. 5160 steel is very forgiving in the heat treat process but it pays to follow certain guidelines to ensure success. I have been following Ed Caffrey's process pretty much for about 20 years and I have never had a problem. I have had blades that cracked during the heat treatment but that was a result of poor steel and not the method of treatment. http://www.caffreyknives.net/journeymanarticle.html Ed's heat treatment of 5160 is relatively easy and if I can do it anyone can. Right now I am right in the middle of tempering the blade so I will post an "after" photo before I start soldering the guard on.
 parts ready to come together
 Sorta what the finished product will look like
 blade after first quench
 Yours truly forging another knife. Wife would only take one photo because she kept getting splattered with red-hot scale...yeah, what a baby!
parts ready to come together
Sorta what the finished product will look like
blade after first quench
Yours truly forging another knife. Wife would only take one photo because she kept getting splattered with red-hot scale...yeah, what a baby!
Last edited:
MattTheHat
Member
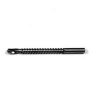
Drill Bits
Cool stuff, man!
Is this the type drill bit you're talking about?

If so, they're available at Home Depot for about $9. I've always heard them referred to as drill saws. You can find them online for as little as $3.
-Matt
Cool stuff, man!
Is this the type drill bit you're talking about?
If so, they're available at Home Depot for about $9. I've always heard them referred to as drill saws. You can find them online for as little as $3.
-Matt
Attachments
shevrock
Member
Are you heating your metal in an old grill?
BTW awesome looking knife.
BTW awesome looking knife.
messerist
Member
Thanks for the heads up Matt. "Mr. Lazy" here did a Google search and found a bunch online too. I'll check out HD. Shevrock, It appears that I am using my Weber but if you look at the lower right corner of the photo you can see the front of my forge. It is a propane "knifemaker's forge" from NC Tool Company. Thank you for your comments
Readyrod
Member
Yea stag. That knife gets better and better looking all the time.
messerist
Member
Sorry, but I have no progress to report this weekend. The Wife has a mess of papers and presentations due for school so that leaves me with the "Children of the Apocalypse"...well, they are really not as bad as minions of satan but it does not leave me with much time to work. I am ready to solder on the guard and I must get to that this week because it looks like we are in for a deep freeze and it really bites working in the garage when it is cold. I have finished heat treating the blade and sanded it again to 220 grit. Will get some photos posted soon. Thanks for looking.
p.s. here is a tutorial I found over on the Bladesmith Forum. It bears some looking at. He makes an interesting knife with some nice photos as wellhttp://forums.dfoggknives.com/index.php?showtopic=18288&st=0&gopid=171273&
p.s. here is a tutorial I found over on the Bladesmith Forum. It bears some looking at. He makes an interesting knife with some nice photos as wellhttp://forums.dfoggknives.com/index.php?showtopic=18288&st=0&gopid=171273&
Last edited:
Readyrod
Member
p.s. here is a tutorial I found over on the Bladesmith Forum. It bears some looking at. He makes an interesting knife with some nice photos as wellhttp://forums.dfoggknives.com/index....&gopid=171273&
Great thread, thanks.
that leaves me with the "Children of the Apocalypse"
I hear ya, I had to take care of "Sean the Destroyer" the other day.
ccsniper
member
subbin
messerist
Member
Lots of progress to report but alas, no photos. I had to send the camera off to the "dropped you camera eh?" "Dumba##!" repair center. Don't fret, I do have pictures but I can only download them with the camera. Should be posting in a few days. Sorry for the delay.
- Status
-
Not open for further replies.
Similar threads
- Replies
- 13
- Views
- 635
- Replies
- 18
- Views
- 2K
- Replies
- 27
- Views
- 2K