First reload

Status
Not open for further replies.

KJurick

Member
Joined
Apr 19, 2018
Messages
4
Hoping I can get some guidance from you guys. I just finished my first reload. I read my Nosler book that came with my RCBS rock chucker twice over and followed the directions to the letter. I would like some extra reassurance that I did this right before I go to the range and blow my face off. I would appreciate if someone could read through the steps I took and tell me if I went down the right path or if I'm way off in the rhubarb.

J72G.jpg
Bc5L.jpg

The first thing I did was use my Lee depriming die to remove all of my primers. I then took the casings and cleaned them with my Frankford Arsenal media tumbler which uses water, lemi-shine, and stainless media. I tumbled for a total of 6 hours which I realize is overkill. After tumbling, I seperated the casings from the water and media, then rinsed them off. To try to prevent any contaminants from getting in the casings, I only used reverse osmosis water for the entire process. Again, probably overkill. After rinsing, I spread the casings out on a baking sheet and put them in the oven at 200 degrees for 2 hours to dry them off.

With the casings clean and dry, I used an RCBS full length resizing die to resize the cases. First I lubed them with the lube mat and lube that came with my kit. I ran the ram up until the shell holder made contact with the bottom of the die. This is where I have my first question. Is there rhyme or reason to how the height of the die is set? Is this just user preference? It seems that the only thing that matters is that the shell holder come in contact with the die. Any variance in the height of the die will only change the swing of the arm, right?

Next, I measured all of my cases. I found that all of my cases were 5-10 thousands shorter than spec. One of them was slightly over spec and I trimmed it down to exactly spec. Should I be concerned that most of my cases were under spec? Is it critical to have them within a thousands of each other and within a certain parameter of spec?

Next, I primed. I used the hand primer that came with my kit as opposed to priming on the press. I used CCI primers. This operation went smooth, no questions or concerns.

Next, I charged. I set my powder measure to throw just under the minimum load per my book. I then placed the powder on the scale and used a powder trickler to bring all of my charges up to spec exactly. I did this for every charge. I noticed that sometimes when I would throw a charge with my powder measure, the action would stick. I assume this is because the cylinder shape of my powder caused occasional jamming. Forcing the handle got it moving again. I then visually inspected all of my cases to ensure I did not miss a charge or double charge.

Next, I installed my RCBS bullet seating die. The first bullet that I seated did not seat the bullet below the groove in the bullet around the circumference. So I adjusted my height until that groove was below the neck of the case. Was it important to have this groove below the neck? After doing this, I found that my overall length was quite a bit under the maximum length, but was very close to some factory ammo that I had. What should I be taking into consideration for how far under the max overall length my round is? How far under is too far under? I also noticed when seating my bullets that some of the copper got shaved off the jacket of the bullet. Brass is harder than copper, so this makes sense to me, but is this normal?

g4Vg.jpg

Te7T.jpg

My overall lengths were all within 5 thousands of each other. Should I be trying to target a consistent overall length?

The last thing I did was weigh all of my cartridges. I found that they were all within a grain of eachother. I thought this was very promising.

I did have one mishap. During bullet seating, I tried to set the depth of the bullet deeper by forcing the ram harder. This caused by case to crumple. I used a bullet puller to remove the bullet and powder, then deprimed. I wadded the powder in a paper towel and burned it outside. I did not know how else to get rid of it. The primer is sitting on top of my safe right now until I figure out what to do with it. I am thinking about putting it in the vice to detonate it and then throwing it away. The case is obviously junk.

x9hx.jpg

I used the 90 grain e-tip bullets with the yellow highlighted minimum load

0oaf.jpg

That's it. I think I am ready to go to the range and see if I did this right. Wish I had an old timer that could've watched over my shoulder the first time I did this, but unfortunately I don't. Any help from you guys is much appreciated.
 
Looks like you did it right. The powder I would have reused or put back in the trickler. If the primer looks good I’d put in in a case and use it.
 
You would have been fine reusing the powder.

I wouldn't detonate the primer in a vise unless you we wearing ALL the proper PPE. Personally, I've re-used primers that I was careful to remove. I just made sure they were in my plinking rounds and not my self-defense rounds.
 
Sounds ok from what I saw. I will say as far as OAL that is kinda gun to gun. Each one is a little different. When the hubby and I test a new load we usually do a few close to mid way in the load data, then go a little under and then a smidge under that.. like when testing out BE-86 9mm loads we tested 4.0, 3.8, 3.6, 3.4.. we also tested the OAL. we found through testing that my glock with a 147 gr semi wad cutter loves the BE-86 at 3.4 with an OAL of 1.150 but in my friend's M&P it liked a tiny bit shorter round at 1.145 OAL.. It has to do with how the bullet lines up with the rifling.. you want it to seat just right.. too far away you get a jump when it goes of.. too close it is crammed in the rifling before it ignites.. You want it to sit right next to it but not touching for optimal accuracy.. You will have to play with loads and track your data to see what works best for your guns.. but you seem to be on the right track.
 
You are not seating your bullets correctly. Not having worked with the e tip I am not sure what the groove is for. It most likely is a cannelure which is a groove for crimping the case mouth into. This is to secure the bullet more tightly than simple neck tension for certain applications. You cannot crimp in an area that does not have a cannelure with a standard die. Both the crumpled case and the non crumpled case show a heavy crimp. Your die was adjusted to low. When you tried to go deeper the case couldn't stand the strain and collapsed. From the pictures I cannot see a bulge in the non collapsed case. If the rounds will chamber you can fire them accuracy may not be very good. Before you load any more read the die manufacturers directions. Call RCBS if necessary as they are very helpful. The rest of your process looks good.
 
I agree with Stringnut. Read the die instructions again. It seems like you screwed the sizing die in first and are running the ram up until the shell holder touches the die. You should be running the ram up to the top of the stroke by pulling the handle all the way down THEN screw the die down until it touches the shell holder. As for the seating die, put a sized case in the shell holder and run the ram to the top then screw the die in until you feel the die touching the case. At that point back it out according to the instructions probably a full turn. That way you won't be crimping the case. I do not crimp my .243 cartridges for use in my bolt action rifle. Neck tension holds the bullet in. Seat to data specs for that bullet and disregard the Cannelure.
 
Last edited:
Thanks all. I definitely better understand how to position my dies now and see how that will affect my product when done.
Does anyone feel these rounds would be dangerous to shoot?
 
Everybody
Looking at the pics I see a ring around the base of the case that has me maybe a little concerned, may be fine.
OP did you check for incipient case head separation on the brass?

https://www.thehighroad.org/index.php?threads/incipient-case-head-separation.734058/

Even if it is only once fired you should check it.

One note about weighing loaded rounds, all the cases may not weigh the same, (weigh some empty ones) and all the bullets may not weigh the same. (for fun weigh some of them to)
 
Last edited:
Thanks all. I definitely better understand how to position my dies now and see how that will affect my product when done.
Does anyone feel these rounds would be dangerous to shoot?
I would pull them and start over using the correct OAL because IMO being your first reloads they need to be 100% on the money. I would also not use the same primer you seated and then removed from the case.

FYI when you pull them you will need to resize the case. To answer another question about how much to size the case, are you using a bolt or auto? Get some reloads under your belt and keep track of the number of firings on a case. On the 2nd firing of the cases i would buy a Hornady headspace comparator for your respective caliber and follow the measurements for moving the shoulder of the case back creating more headspace than needed.

Your shorter cases are okay as long as they are not below the SAMMI minimum case length which should be listed on the main page of 243win. Once you fire them a time or two they will grow.

Also kind of looks like you either crimped while seating and it shaved the bullet or you didn't chamfer the case mouth so it doesn't cut the copper jacket off the bullet. If I'm shooting a bolt action i don't crimp so adjust that seat die to the directions for no crimp and then maybe another turn outwards. You shouldn't be turning the whole die to seat deeper but turning the seating stem with the screw driver if using RCBS die. You should feel an ever so slight resistance when seating and anymore your crimping while seating which could have cause the shaved copper. Use a chamfer tool and lightly touch and turn it to smooth the case mouth.
 
As far as adjusting dies goes Bandit67 covers it. The dies should be adjusted so that every stroke of the handle is a full/complete stroke.

Just a few odds and ends....

The crumpled case shown is most likely due to the bullet seating stem still pushing the bullet down when the die is starting to crimp.

Once you get your seating die correctly adjusted make a dummy round to help you adjust the seating die for that particular bullet in the future.

It is case mouth tension not crimp that holds the bullet into the case. You probably don't need/want a lot of crimp.

Unscrew the set screw on the RCBS die lock ring and put a piece or two of shot from a shot shell in there to protect the die body threads from the set screw.

Inspect all of your cases as Dudedog stated.

Get a stuck case remover tool.

The COAL you are measuring is really just a reference because as others have said different guns and for that matter different bullets have different profiles and dimensions so for now find a COAL that works and use that. Once you have an understanding of exactly what you are doing and what you are trying to accomplish you will then start looking for ways to measure headspace and cartridge length from the ogive for better accuracy. That and neck sizing but that is down the road.

One tool that you might find helpful now is a case gauge to check finished cartridges for proper size. Cost is about $30.00

Label the box you put your finished ammo in, note caliber, bullet model and weight, COAL, power and powder charge weight, primer, brass and date. Six months from now you will have a dozen different bullets and half a dozen powders and numerous charge weights and without labeling you will have no idea what you have.

Keep an open mind regarding powders and bullets. What you are using is fine however and may work fantastic for you but just know that there are 100s of options out there so a little trial and error is typical on the road to happiness

Accuracy is somewhat defined by group size shooting from a bench. Load for smallest group size. This is achieved from a combination of bullet, bullet seating depth, powder, powder charge weight, case (headstamp) and possibly primer. Also care in case prep.

As long as you are using the correct powder, your charge is within published load manual weights for the bullet you are using and you are using the proper size bullet for your rifle and the rifle itself is in good repair, you have little to worry about taking that first shot. Trouble follows only those that don't follow the safety rules and published load data. My personal rule is to follow my gut, if something doesn't seem right or if my mind wanders during the process I pull that cartridge(s) apart and start over.

All of what you are hearing may sound like a lot to digest but it really isn't. The good news about making small mistakes (the ones that are not in violation of the safety rules) is that we learn from them. Of course we learn from the big mistakes also, those are the ones that result in ruined firearms and body damage, that is why we are strict about the safety rules. Those we try to avoid.
 
The first thing I did was use my Lee depriming die to remove all of my primers. I then took the casings and cleaned them with my Frankford Arsenal media tumbler which uses water, lemi-shine, and stainless media. I tumbled for a total of 6 hours which I realize is overkill. After tumbling, I seperated the casings from the water and media, then rinsed them off. To try to prevent any contaminants from getting in the casings, I only used reverse osmosis water for the entire process. Again, probably overkill. After rinsing, I spread the casings out on a baking sheet and put them in the oven at 200 degrees for 2 hours to dry them off.
Yes, 6 hours is overkill. I never go more than 2 hours and have never seen a need to go more, could actually probably do less.

RO water is overkill. I have very hard, alkaline water, so I need the Lemishine. I also use Armorall Wash-n-Wax as the soap. The brass can be dried many different ways, I have started using a dehydrater but just air drying is sufficient.

With the casings clean and dry, I used an RCBS full length resizing die to resize the cases. First I lubed them with the lube mat and lube that came with my kit. I ran the ram up until the shell holder made contact with the bottom of the die. This is where I have my first question. Is there rhyme or reason to how the height of the die is set? Is this just user preference? It seems that the only thing that matters is that the shell holder come in contact with the die. Any variance in the height of the die will only change the swing of the arm, right?
Having the die touch the top of the shellholder insures that the shoulder gets set back to the same location every time. Once you get more experience, you will learn about how to measure the headspace of your fired rounds, which will allow you to adjust the die up (not in full contact with the shellholder, or by using Redding competition shellholders) to bump the shoulder back just enough to insure proper chambering IN YOUR GUN (bolt action only). This will help keep the brass from stretching each time it is fired, which could lead to incipient case head separation.

Next, I measured all of my cases. I found that all of my cases were 5-10 thousands shorter than spec. One of them was slightly over spec and I trimmed it down to exactly spec. Should I be concerned that most of my cases were under spec? Is it critical to have them within a thousands of each other and within a certain parameter of spec?
Not critical, but the key to consistency is consistency. If you are crimping, having all the cases trimmed to the SAME length will help get consistent crimps. And there is a max length and a "trim-to" length, which is usually 0.005-0.010" shorter than the max length. If you trim to the shorter length, then you may get 1 or 2 loadings before you have to trim again.

Next, I installed my RCBS bullet seating die. The first bullet that I seated did not seat the bullet below the groove in the bullet around the circumference. So I adjusted my height until that groove was below the neck of the case. Was it important to have this groove below the neck? After doing this, I found that my overall length was quite a bit under the maximum length, but was very close to some factory ammo that I had. What should I be taking into consideration for how far under the max overall length my round is? How far under is too far under? I also noticed when seating my bullets that some of the copper got shaved off the jacket of the bullet. Brass is harder than copper, so this makes sense to me, but is this normal?

Shorter seating depth than the load data will result in higher pressures. Since you have the load data from the manufacturer of the exact bullet you are using, I would seat to their spec. If there is a "groove" then that may be a crimp cannelure, or it may be space between driving bands (if the bullet has them). Again, I would seat to the spec in the load data, as long as it properly chambers in your gun. Later, you can seat longer if desired, once you have determined the distance to the lands in your rifle.

I did have one mishap. During bullet seating, I tried to set the depth of the bullet deeper by forcing the ram harder. This caused by case to crumple. I used a bullet puller to remove the bullet and powder, then deprimed. I wadded the powder in a paper towel and burned it outside. I did not know how else to get rid of it. The primer is sitting on top of my safe right now until I figure out what to do with it. I am thinking about putting it in the vice to detonate it and then throwing it away. The case is obviously junk.
If you have your seating die properly adjusted, you should not be able to seat deeper by forcing the ram harder. You need to go back to the instructions for your particular seating die and start over. For most seating dies that also crimp, you would adjust the die body up or down to adjust the crimp. There will be a seating stem that you adjust up or down to control the seating depth. The ram should always go full travel for consistency.

For a bolt action rifle, I would not crimp. I would adjust the die body so that it stops just short of crimping. The easy way to do this is to adjust the seating stem way up (or out of the die altogether) and, with the ram all the way up at full stroke, adjust the die down until you feel it touch the case mouth, than back off about a 1/2 turn. Lock the die down. Then adjust the seating stem as needed for proper seating depth, with the ram at full travel.

I would not detonate a primer in a vise. They are extremely powerful and can send shards of the cup flying fast enough to cause injury. If you really don't want to use it but want to render it safe, seat it in an empty case, chamber it in your rifle and fire it
 
Going forward
1. The length of your loaded rounds can be established from the combination of magazine length and distance to the start of the rifling.
2. Flare your cases slightly or use a Lyman M die to expand with a step to prevent jacket peeling during seating.
3. Do not trickle loads into a digital scale unless you pick up the pan an set it back down to verify the scale did not stick during the trickling process.
4. As a beginner always choose powders that will fill the case with your maximum loads. This will prevent double charging. As you develop good loading habits you can try other powders.
 
Even though you are supposed to "screw down the sizing die until it touches the shell holder at the top of the stroke then screw it in an additional half turn", you are correct that it really doesn't matter if the die touches the shell holder at the top of the stroke or 1" below the top of the stroke because you can't push the press any farther than when the shell holder touches the die. Some presses cam over which means at the top of the stroke the press can go even further like a vise grip. This is bad because you don't know exactly how much more force you are putting on the die and carbide dies can actually crack from excessive force.

The important thing is that you push down on the press lever until you are sure the shell holder touches the die. This not only sizes the wall, but for rifle rounds, it sets the shoulder which is the headspace for most modern rifles. If you don't bottom out the press, you may end up with rounds that will not camber properly.

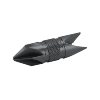
The close up of your seated bullet with copper shavings shows that the neck is scraping off the bullet jacket as you are seating it. Usually with boat tail bullets, this won't happen but it would be a good idea to chamfer the mouths of your case necks just a tiny bit. One little twist using one of these will do it.

rc_09348_deburringtool.jpg.jpg

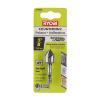
You could also use one of these if you're really cheap

ryobi-countersink-bits-a10cs82-64_1000.jpg

But the RCBS tool also deburs the outside of the case when you trim them.

Deprimed primers are almost always still good unless maybe you've mangled them when trying to seat them crookedly. Pulled powder is also completely usable. If you want to dispose of powder, spread it thinly over your lawn or your flower bed. The nitrocellulose makes a decent fertilizer.

We've all been there with first reloads. I wanted to either shoot my 1911 from under a concrete table or with the gun tied to a tree and pulling the trigger with a string. Everything turned out fine and there was no need for concern.

The best practice when making new loads is to load no more than you are willing to disassemble in the event you goof up.
 
My first fired round was done on a concrete bench using a string to pull the trigger with me nowhere near the bolt, barrel or vent hole.

I wouldn't mess with a five cent primer and since you are learning (as we all are every day in reloading) be aware you will be making mistakes costing more than a nickel.

OAL is a reference number to not EXCEED if you have a magazine. If over, it won't load properly. You can be under the Saami spec but not over. If you have a single shot manual loading rifle, you can be way over the SAAMI spec on OAL depending on your chamber.

For consistency, all cases should be prepared the same way, trimmed to the same number, sized and seated with the appropriate numbers. Consistency leads to tighter groups.

If you have strong fingers, use that torpedo trimmer for inside and outside neck chamfering. Otherwise, see on line for a power screwdriver attachment and putting an RCBS or Lyman or whatever inside or outside $12 chamfer they have. I would bet that everyone on this forum has the torpedo but very few actually still use it.

I am really not happy with the way the seated round and case look in the third picture.
 
Others have pointed out some "overkill" but reloading methods are largely a personal choice. If you want to use ultra filtered water, no harm, no foul. I have never been concerned with contaminating the interior of a case and even though I tried wet tumbling, I've found plain old corn cob blast media to be more than sufficient. If you want pristine cases, both inside and out, and are willing to go through the process, fine do it. It's your ammo, your guns, your time and your money...

I only have one suggestion; disregard the cannalure and seat the bullets to the bullet manufacturer's specs. K.I.S.S. You are using Nosler bullets so use the OAL Nosler suggests for that particular bullet (the pic of your manual shows 2.680" OAL, but the pic of your cartridge shows 2.598", which is .082" shorter than manufacturer's suggestion (that's a lot). If at a later time you wish to "customize" the seating depth to fit your particular gun, then there are several easy methods to find that dimension for your gun.

Go slow. Double check everything. Most important, have fun.
 
I really do appreciate all of the help here guys. I realize some of the things called out may seem remedial, but as a beginner (that doesn't want to blow his face off) the advice is very helpful. Tonight I am going to pull all of my loads and redo them with the advice you guys have contributed. Plan is to read through my instruction books for my dies and then:
1) Pull loads, dumping powder back into the powder measure
2) Remove the decap pin from my sizing die (I think this is possible) and resize my brass again with the die set to contact the shell holder at the top of stroke
3) Inspect my cases again. The ring mentioned was not present on the case until I sized. I think that this may be a story mark from the die
4) Chamfer my cases inside and out
4) Recharge (great call out on trickling onto a digital scale, I am using a balance, but was thinking about going digital)
5) Properly position my bullet seating die
6) Seat again

I will post some pictures again.
Sounds like you are headed in the right direction. Just follow the instructions make sure you understand what you are doing at every step and don't load to many at one time. I've been reloading since the early 70's and I only load 10-15 rifle rounds at a time.
 
Digital is not a great way to go unless you want to fork out enough money to get a quality scale. Any balance scale in good condition is better than a cheap digital. As has been pointed out trickling powder directly into the pan on one may not work well. Most I have tried will not show an increase and then suddenly jump .2 to .4 of grain. Not a huge issue when loading large rifle cartridges below max, , but, sure doesn't lend itself to precision
 
  • Like
Reactions: mdi
Reloading isn’t rocket surgery. You got a primer and an acceptable amount of a proper powder in the case, and capped it with a bullet. If it fits it shoots. Go slow, learn from your mistakes, and report back here when you have questions. Most important though, have fun in a safe manner. We are here to enable. Or fuel the addiction. And we do occasionally help a new guy out. :thumbup:
 
I can't comment on the nuances of loading for rifles, but it appears your proofing your process with live rounds. When you're figuring out how to adjust the die for seating and crimp skip the primer and powder. It's not unusual to make mistakes working with a new caliber. I mean you can use live rounds, but the likelihood of the first 1/2 dozen not having to be pulled might be pretty small.
 
[

We've all been there with first reloads. I wanted to either shoot my 1911 from under a concrete table or with the gun tied to a tree and pulling the trigger with a string. Everything turned out fine and there was no need for concern.
I felt the same way on the first one:)
 
Last edited:
Flaring the case mouth enables the bullet to enter the case straighter and easier, regardless of the bullet being cast, plated, PCed or jacketed. For experienced reloaders in may be common to just deburr the case mouth ID, but the OP is new at reloading and flaring the case will have no detrimental effect on the finished ammo. The extra step of flaring and very lightly "crimping" or just removing the flare is little to pay for getting good, shootable, safe ammo now. Most brass is still cheap and easily found so case life shouldn't be a problem for the new reloader...

Since I damaged my hands and am getting old, I flare all my case mouths; semi-auto hand gun, revolver,bolt rifle, semi-auto rifle and single shot rifle, for cast and jacketed bullets, as it's so much easier to get a bullet started straight. A flare that looks like a powder funnel isn't necessary, just enough to enable the bullet an easy "entry way" into the case...
 
Looking at the pics I see a ring around the base of the case that has me maybe a little concerned, may be fine.
OP did you check for incipient case head separation on the brass?
Yep, may be a normal line from sizing, but may be the start of a problem. The thread Dudedog linked to will explain it and how to check it. (Edit I see now that you responded to this already.)

A normal "line" from sizing an expanded case.
Expansion at web on .35 Remington case - Case shown unsized after 8th firing - Pic 1.JPG

A problem line.
Rut in Kent's .308 Case #1 Pic 1.JPG

Well past a problem line.
Rut in Kent's .308 Case #2 Pic 1.JPG
 
Last edited:
Status
Not open for further replies.
Back
Top