What gunsmithing or repairs have you done today

Measured the endshake on a nice "new to me" Model 64-5 3 inch barrel and b/c gap was .007 cylinder pushed back, less than .002 forward for endshake of .005+. I put one .002 cylinder bearing in giving me .0035 endshake now. I may put another .002 in at some point. I changed the wood Magna grips that were punishing my arthritic hands and put on an old Uncle Mikes rubber grip I stole off a Model 10 RB. I had a bear of a time getting the Magnas off until I did a search and learned the best way to do it without damage. I backed the grip screw out until it was above the wood and put a 4" 1/4" diameter wood dowel on the screw head and gently tapped it a couple times with a tack hammer.
 
Hogue facing right.jpg

I managed to find a pair of Jerry Miculek grips from Hogue for my 617 - 4 Round Butt Revolver. I've tried a number of grips but none have fit my hand as well.

I also took a .22 caliber finishing reamer to the 617. I was having problems with cases sticking after shooting only 2 cylinders full. I want to be able to fire upwards of 500 rounds before having to clean my cylinders.

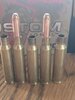
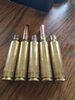
Using Federal BYOB and Remington Golden Bullets I have no troubles but unfortunately I'm running out of my stash of both.

I've been trying other brands of ammo with no success including CCI - SV and Blazer, Norma Tac 22 and Aguila.

The SV will start to bind after 3 cylinders full. Blazers go 2. Norma Tac 22 has a very greasy lube on it and I expected troubles. After the first reload I couldn't extract the empties without force to the ejector rod. Aguila lasted 5 reloads.

I can shoot CCI Mini Mags and CCI Clean .22s with no troubles but the way ammo is these days I want other options as well.

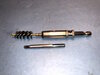
I thought my cylinders had been reamed years ago. Today I took my finishing reamer and found it wouldn't go all the way in on the first cylinder I tried. I then proceeded to ream the rest of the cylinders with plenty of cutting oil and my reamer.

It surprised me on how much steel came out, so it looks like I used the reamer on another cylinder and not this one.

Wednesday I will test 100 rounds each of Norma Tac 22 because it groups very well. Next will be CCI-SV because I have a few bricks of it and Blazers which I have the most of, 2 cases.

After each 100 rounds I will clean the cylinders using a portable electric drill and an oversize brush.

I
 
Thomas Edison famously stated: "I have not failed. I've just found ten thousand ways that won't work."

Uninhibited by real knowledge and training, such have been my gunsmithing adventures.

I abandoned the above small chuck idea to hold gunsmith-sized fasteners and pivoted to this fabrication. I have used the same host housing for fabrication of cordless drill use of cleaning rods to get rotating Dremel accessories down in deep channels.

The various size 2-piece fastener holder host is available as an inexpensive set of door hinge drill guides, ~$10 @ Home Depot / Harbor Freight.

I modified the drill guide bushing lengths, and internal drill size bore to precisely accept the hex shaft bit drivers, sourced from Wiha torx tool, cut to length with Dremel and cleaned up on grinder / buffing wheel to transit the close quarter boring smoothly. The existing set screw is nice to act against the hex shaft surface to prevent rotation of the bit driver. Making the bushing flush with the housing, after being secured with Loctite 620 small gap adhesive, allows for a fastener specific size nut to be applied externally serving two purposes. First it provides a bearing surface with the housing to maintain concentricity of the fastener with the housing and when removed will clean up the threads as necessary depending on the work done. Fortunately the nut also will be positively engaged with the fastener during right hand rotation of drills / mills / lathes.

These holders shown are for #4-5 / #6-8 screw size. I plan on making some for #10 & 1/4" fasteners to have a reasonable set.

Looking forward to experimenting with them.
IMG_0348.jpg IMG_3170.jpg IMG_3171.jpg IMG_3172.jpg IMG_3174.jpg IMG_3175.jpg IMG_3176.jpg IMG_3178.jpg IMG_3180.jpg IMG_3181.jpg
 
I found some hornandy custom 160 rn 6.5x55 ammunition this weekend and was going out to a friend's house for a get together. I took my mauser build though not completely finished, to try and zero and function test. The rifle functioned very well, but wouldn't zero due to what I believe to be a scope mount issue. 20220530_101218.jpg

The chamber seems tight which is good the once fired brass almost looks like new unfired in size with no indication of pressure issues that I can see. Gave mild recoil similar yo a 243 win.
 

Attachments

  • 20220530_101152.jpg
    20220530_101152.jpg
    77.8 KB · Views: 4
  • 20220530_101118.jpg
    20220530_101118.jpg
    89.7 KB · Views: 4
I found some hornandy custom 160 rn 6.5x55 ammunition this weekend and was going out to a friend's house for a get together. I took my mauser build though not completely finished, to try and zero and function test. The rifle functioned very well, but wouldn't zero due to what I believe to be a scope mount issue. View attachment 1081542

The chamber seems tight which is good the once fired brass almost looks like new unfired in size with no indication of pressure issues that I can see. Gave mild recoil similar yo a 243 win.
Brass looks good, did you run out of travel in the turrets.
 
I finished up bedding the receiver and floating the barrel on my Rem 7mm Mag. Used my West System Epoxy, tinted it black, and added the high density filler to thicken it up. I've had this gun since the 70's and has always shot good. The grease dried up in the trigger and I had to clean it up. When I installed it back I noticed the stock was pushing the barrel up and right. After cleaning ever thing up it was moving it about 2.5". I need to put a good trigger in this old horse, it's way heavier than I like. Besides being a Walker with all the know problems.

. Rem 7mm Mag Bed & Float.jpeg
Rem 7mm Mag impact surface.jpeg
 
A couple of related gunsmith projects, fabricating some; extensions to use Dremel accessories down in deep channels;

Dremel arbors for use with drill press / lathe applications; adjustable length cleaning rod-hex drive assemblies using standard stainless shaft (male / female matings) rods shortened with milled flat for set screw stabilization, same door hinge host as small fastener holders.

The Dremel chuck is interesting in that it employs a metric major diameter axle (7 mm) with 40 TPI imperial threads; the unusual sized die is commonly used in the watch making industry.

A brief photo journey of some that I have done.

Screen Shot 2022-06-01 at 5.48.16 PM.png Screen Shot 2022-06-01 at 5.48.26 PM.png Screen Shot 2022-06-01 at 5.48.34 PM.png Screen Shot 2022-06-01 at 5.49.31 PM.png Screen Shot 2022-06-01 at 5.49.45 PM.png Screen Shot 2022-06-01 at 5.49.53 PM.png Screen Shot 2022-06-01 at 5.50.10 PM.png Screen Shot 2016-05-07 at 6.38.49 PM.png Screen Shot 2022-06-01 at 5.50.01 PM.png
 

Attachments

  • Screen Shot 2022-04-02 at 2.43.08 PM.png
    Screen Shot 2022-04-02 at 2.43.08 PM.png
    166.8 KB · Views: 0
Last edited:
I ordered a Pachmayr Compact grip to try on the "new to me" S&W Model 64-5 3". It arrived and fit perfectly but the grip screw wouldn't go through. When I held the gun up to the light I could see the main spring dead center in the grip screw hole. I tried the grip on a Model 10 and the screw fit through with no problem. The problem was a loose strain screw on the model 64. Tightening the strain screw moved the spring out of the way of the grip screw. It's not really gunsmithing but I did learn something.
 
While I'm in the holding pattern waiting to pull the trigger on small ring Mauser parts. Pun intended. I decided to take the actions off of two Type 99 Arasaka's barrels that I have had on the shelf for the past couple of months. I bought them at a local gun show a couple of months ago to the tune of $10 apiece just to challenge myself in making something special out of nothing. Another resurrection if you will. They are not last ditch models. They are both early war models with the Mum's ground off for import. So any collector value is really gone. So why not make a sporter's out of them?

I had always heard that they were difficult to get apart without great effort. That is an understatement. They must have had a 450 pound silverback gorilla put them together. I'm no small man 6'1" 205 pounds. I't took a 4 foot cheater pipe on the end of my action wrench to get them apart while the barrels where chucked in my barrel vise. Savage barreled actions don't even hold a candle to separating an Arasaka.

The original barrels are 7.7mm and are Crome lined with decent rifling left. I do have the dies for 7.7mm Jap and have made brass for them out of 30-06 brass. I just feel it isn't worth the hassle to do that for some sporter's. If they were complete and in excellent condition then I would consider that as an option.

Stay tuned for pictures later.
 
I ordered a Pachmayr Compact grip to try on the "new to me" S&W Model 64-5 3". It arrived and fit perfectly but the grip screw wouldn't go through. When I held the gun up to the light I could see the main spring dead center in the grip screw hole. I tried the grip on a Model 10 and the screw fit through with no problem. The problem was a loose strain screw on the model 64. Tightening the strain screw moved the spring out of the way of the grip screw. It's not really gunsmithing but I did learn something.
I like those grips on the 64 the original wood grips make my fingers bunch up and I can't get natural aim.
 
While I'm in the holding pattern waiting to pull the trigger on small ring Mauser parts. Pun intended. I decided to take the actions off of two Type 99 Arasaka's barrels that I have had on the shelf for the past couple of months. I bought them at a local gun show a couple of months ago to the tune of $10 apiece just to challenge myself in making something special out of nothing. Another resurrection if you will. They are not last ditch models. They are both early war models with the Mum's ground off for import. So any collector value is really gone. So why not make a sporter's out of them?

I had always heard that they were difficult to get apart without great effort. That is an understatement. They must have had a 450 pound silverback gorilla put them together. I'm no small man 6'1" 205 pounds. I't took a 4 foot cheater pipe on the end of my action wrench to get them apart while the barrels where chucked in my barrel vise. Savage barreled actions don't even hold a candle to separating an Arasaka.

The original barrels are 7.7mm and are Crome lined with decent rifling left. I do have the dies for 7.7mm Jap and have made brass for them out of 30-06 brass. I just feel it isn't worth the hassle to do that for some sporter's. If they were complete and in excellent condition then I would consider that as an option.

Stay tuned for pictures later.
I have two japs that are in limbo for years, they were cut down sporters. One I am making into a light pack rifle in 7.7. The other I may make some wildcat when I have a lathe to spin a barrel up. I misplaced some parts somehow, mainly both firing pin springs so I'll have to order some one day. I've got a bare m38 bolt to but needs anew bolt handle put on.
 
While dry firing my 617 yesterday the cylinder was binding even though I was using empty cases as snap caps. The trigger would work normally for a cylinder or two but then lock up. I finally decided to open the cylinder and see what was amiss.

I couldn't open the cylinder. That was one guess to what had happened. When I finally got it open the marks on the cases were not in the same spot as normal so I thought it must be out of time.

Then, a piece fell out. The firing pin had broken and locked everything up. Fortunately, I have a number of extra firing pins since this seems to happen with extended pins so I put a new one in.

Instantly my trigger pulls became consistent and I was getting good edge hits on my new set of dummy cases.
 
I managed to work on 6.5 sweede more today,, as I figured the optic was twisted between rings and base, caused in part a minor height difference in the rings plus brand new leupold rings in a 1 piece mount.i shimmed the front ring the recounted optic, lo and behold the windage screws in the base worked fir griss windage adjustment with fine adjust with turrets. The end result is an old school bore sight job.

Will give range report tomorrow.
 
As promised a range report. Still had trouble with the 7mm,optic isn't likely culprit. My 6.5 mauser was zeroed at 50 yds about an in high so should be good to 200, group size was about an in, but shooting factory ammo it's not terrible. Certainly good enough for z woods deer rifle. I'm pretty certain with a proper load work up that group will tighten up.
 
Back
Top