Heck it was nominated for SG of the year...
http://www.shootingindustry.com/02pages/02prenoms.html
")
ADCO is a funny company
they take the 30 dollar Blazer red dot sights and sell them to the paintball crowd for 100 bucks with a lifetime warrenty
ADCO Diamond" Brand Shotguns
4 Draper St.
Woburn, MA 01801
781-935-1799
Fax: 781-935-1011
http://www.adcosales.com/diamond.html
Contact: Alfred DePaoli
Recently introduced Diamond" Brand shotguns from ADCO sales include a gas-operated semi-automatic 12 gauge featuring fine craftsmanship and superb Turkish walnut stocks. A 20 gauge semi is planned. The second Diamond Brand shotgun is a pump version with synthetic stock and sighted deer barrel. Contact us for more information, location of nearest dealer.
Pump Shotguns
28" Vent with 3 Choke Tubes & Walnut Stock - Select 1005 $359.00
28" Vent with 3 Choke Tubes & Black Plastic Stock 1006 $319.00
24" Slug with Sights & Walnut Stock 1007 $359.00
24" Slug with Sights & Black Plastic Stock 1008 $319.00
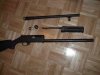
are there any manufacturer marks on the SG?
it does look like a nova:
http://www.vaapensport.com/novastrip.jpg
http://www.benelliusa.com/owners_manuals/nova/
Disassembly Procedure
Barrel
1. To remove the barrel, unscrew the magazine tube cap (fig. 17); by turning it counter-clockwise.
2. Depress the action release locking lever and pull the forend partially rearward to release the bolt from the barrel extension.
3. Holding the barrel, pull it forward along the magazine tube until the ring clears the tube. Lift the barrel slightly up and away from the magazine tube and slide it forward (fig. 18);
Trigger Assembly Group
4. Using the peg on the end of the magazine tube cap, start pushing the trigger guard pins out from the right side (ejection port side) of the receiver. Using the open inside edge of the magazine tube cap, hook the heads of the pins now protruding from the left side of the receiver. Pull them completely out of the receiver (fig. 19-20).
NOTE: The larger of the two pins fits the front hole and the smaller, the rear.
5. Rotate the shotgun so the trigger guard is facing upward.
6. Remove the trigger guard assembly by pulling the trigger guard upward and away from the bottom of the receiver. (fig. 21).
7. Turn the shotgun over so the receiver opening is facing down and slide the forearm fully rearward. Insert your thumb inside the receiver from the bottom and push the bolt upward against the top inside of the receiver to separate it from the action bars.
8. Compress the bolt assembly by squeezing the bolt head and body together with thumb and index finger and pull the bolt up and out of the receiver (figs. 23-24).
9. Remove the forearm assembly by sliding it forward and completely off the magazine tube.
Firing Pin Removal
CAUTION: The firing pin is under spring pressure from the firing pin return spring when assembled in the bolt. To prevent loss or possible eye injury, depress and hold the rear of the firing pin with your thumb or finger. Pull the stop pivot pin (with rubber "O" ring) out from the bolt, and gradually release pressure on the firing pin until spring pressure is relieved. The firing pin and spring can now be completely removed from the rear of the bolt. Your shotgun is now disassembled for routine cleaning or maintenance.
Note: Further disassembly of the trigger group assembly is not recommended unless you are a trained gunsmith.
IREARM ASSEMBLY
Follow the assembly instructions carefully to ensure proper placement of all components. Do not us excessive force. If components do not assemble easily, re-read instructions or call Benelli USA for assistance.
1. Slide the firing pin spring over the front of the firing pin and insert the assembly into the rear of the bolt.
2. Depress the end of the firing pin with your thumb and hold it in that position while inserting cross pin which retains it in the bolt. Push the cross pin in fully against the side of the bolt. The resistance of the "O" ring is designed to prevent the pin from working loose during normal operation.
CHECK: When properly assembled, the bolt head and firing pin should both be free to move into the bolt body and should spring back (outward) when released.
3. With the flat side of the bolt assembly facing your hand, compress and hold the bolt head against the bolt body by squeezing the assembly between your thumb and forefinger.
4. Turn the gun with the open underside of the receiver facing upward.
5. Position the bolt head opposite the middle of the ejection port, insert the assembly through the bottom of the receiver. Holding the bolt assembly at a 45Æ’ angle to the receiver and inserting the bolt head first, will simplify this procedure.
6. Tilt the firearm upward and allow the bolt to slide to the rear of the receiver.
7. Slide the forend assembly over the magazine tube and guide each action bar into the corresponding slot in the front of the receiver.
8. Slowly slide the forearm toward the receiver. As the action bars move rearward inside the receiver, they may stop when they contact the front of the bolt assembly. Do not force. Lift each action bar upward slightly so it can slide over the bolt assembly.
9. Continue moving the forend rearward slowly until the ends of the action bar stop at the rear of the receiver.
10. With the bolt and action bars fully to the rear, move the forearm forward about º inch so that the notches in the action bars line up properly with the corresponding surfaces in the bolt assembly. Push each action bar downward to be certain they are positioned properly.
11. The bolt, action bars, and forend should now be locked together and move smoothly.
12. Slowly slide the forend fully forward until the bolt stops on the front of the receiver.
13. Push downward slightly on each action bar once more to be certain they are properly engaged with the bolt. If they are not, the trigger group will not seat properly.
14. Be certain the hammer is fully cocked in the trigger assembly.
15. Insert the front end of the trigger guard in the front of the receiver opening, and then swing the rear portion downward until the assembly locks into position. Do not force.
16. Insert the trigger group pins (longer pin in front) through the receiver until the large heads are flush with the sides.