New build in progress, lightest one yet...

Status
Not open for further replies.

MachIVshooter

Member
Joined
Aug 11, 2005
Messages
17,934
Location
Elbert County, CO
Kinda had one like this in mind for a bit, even before the single shot pistols or 9mm pack rifle, but was still working out the idea in my head. Well, I finally decided to get into CAD with Fusion 360, and that kinda helped get the ball rolling on this one, giving me a tool that aids in seeing the thing with actual eyes rather than mind's eye before cutting material. Still learning, but I can see that it'll be a useful tool, especially once I better learn to use the animation functions.

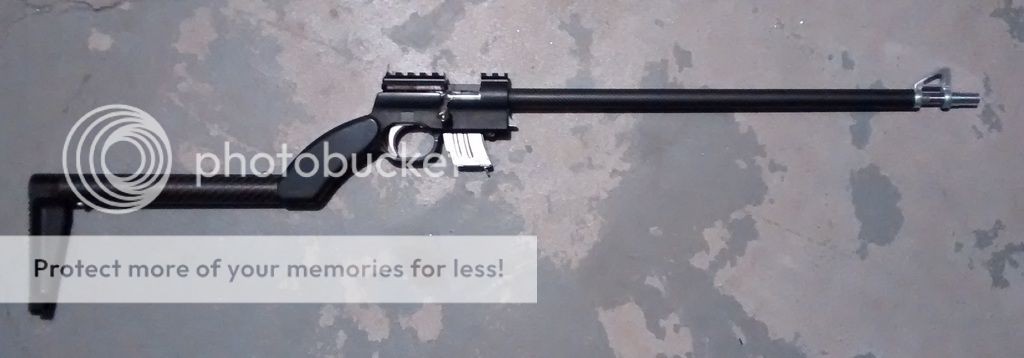
Anyway, the idea was to to make the lightest possible take down repeating .22 with the equipment I had, very compact, pretty tough and highly weather resistant. So, the only carbon steel parts are the barrel, extractor and springs, everything else 7075-T651 aluminum, 6Al-4V titanium, 18-8 stainless, 416 stainless, carbon fiber and ABS plastic.

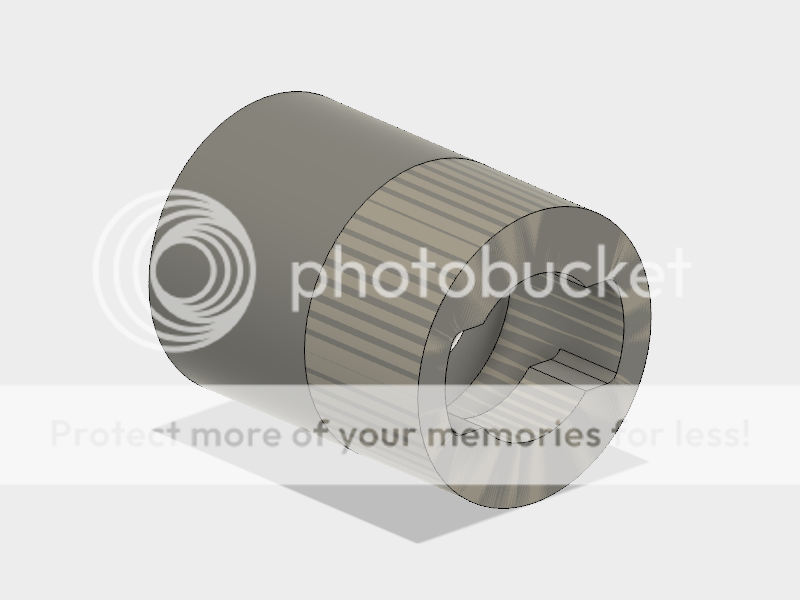
This is my first build using CAD, and while I did not and will not design every single part before building, I did do the major components, and it has helped a bit. These are the CAD renderings of the receiver, chassis, bolt, bolt tail and barrel extension:

22%20ULPRBA%20Receiver%20v2_zpsqhp8ydjm.png


22%20ULPRBA%20Chassis%20revision%20v2_zpsknvt7yqk.png


22%20ULPRBA%20Bolt%20v1_zpsgq3lxnxk.png


22%20ULPRBA%20Bolt%20Tail%20v1_zpshffamryv.png


22%20ULPRBA%20Barrel%20Block%20v2_zps6xvssmcv.png


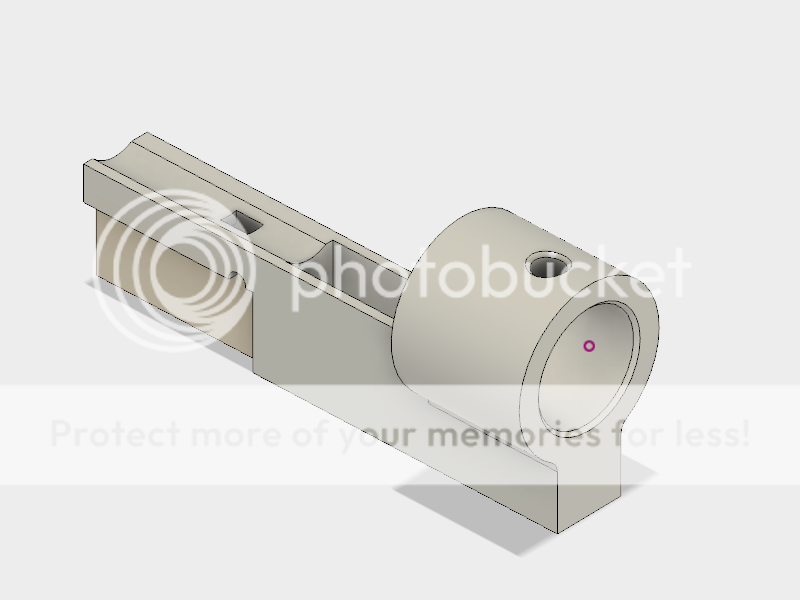
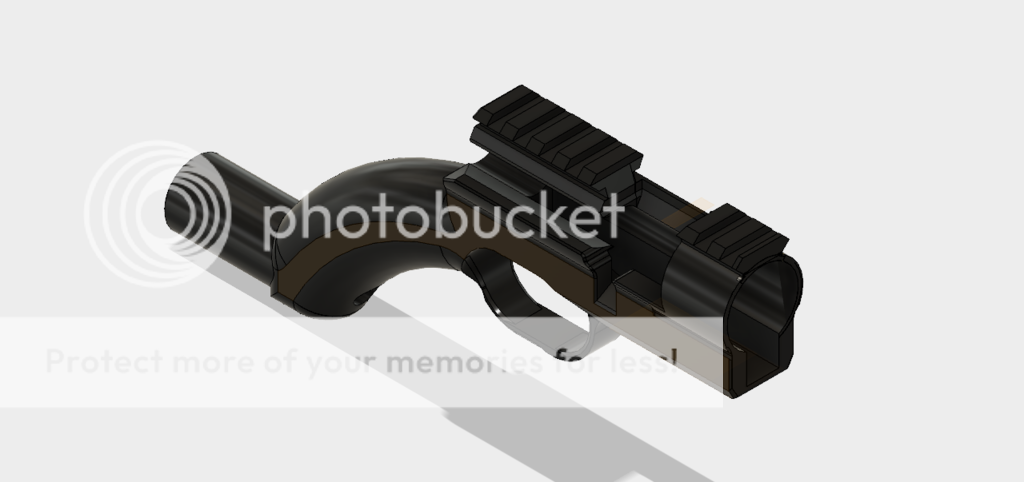
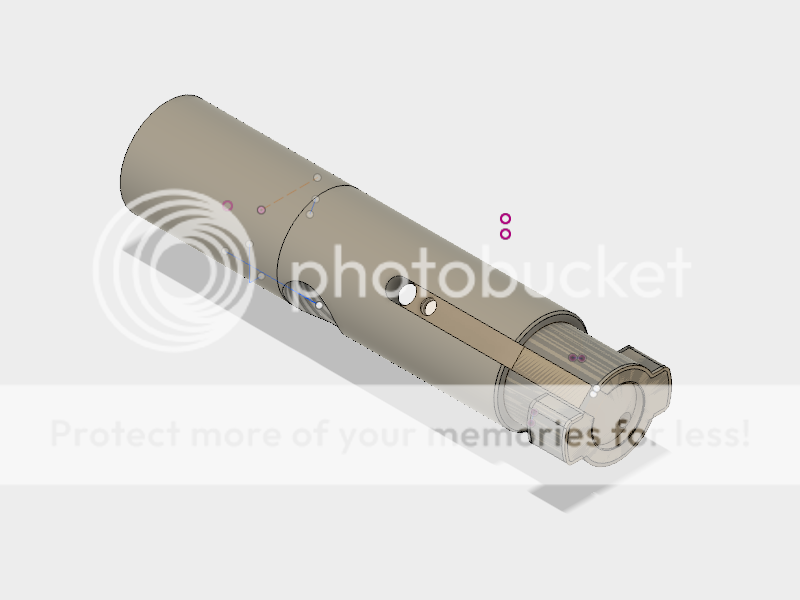
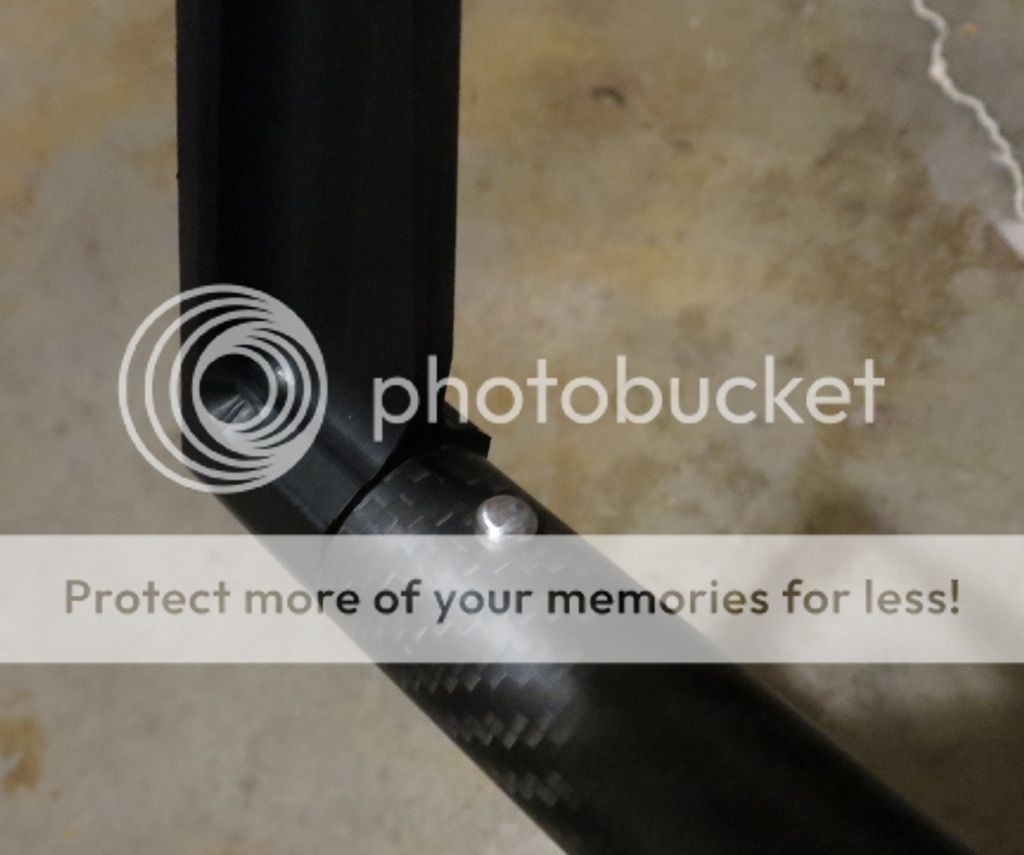
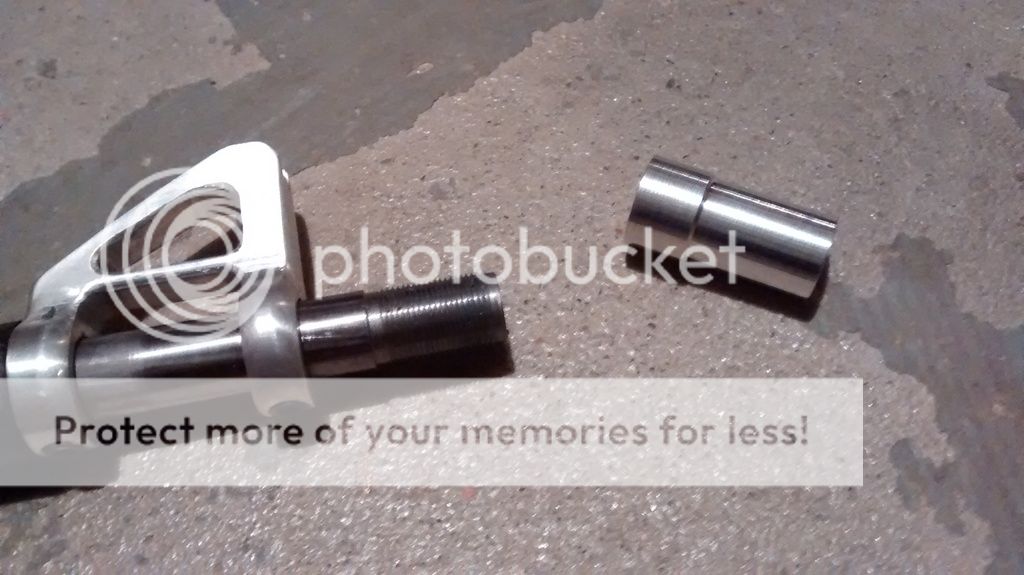
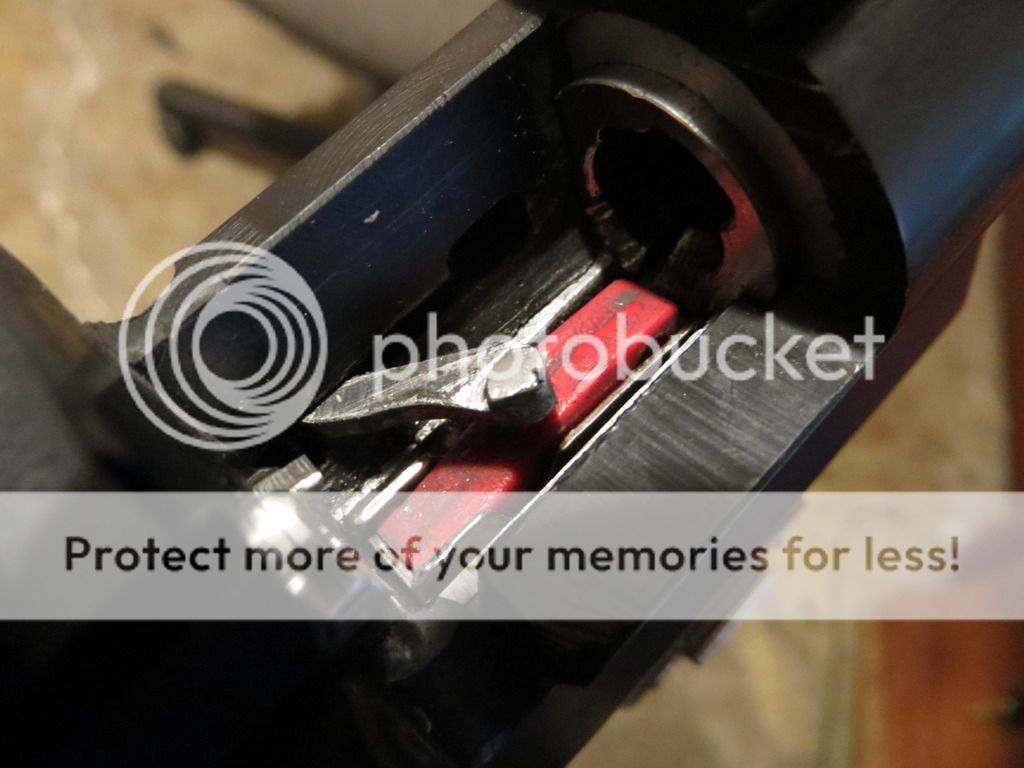
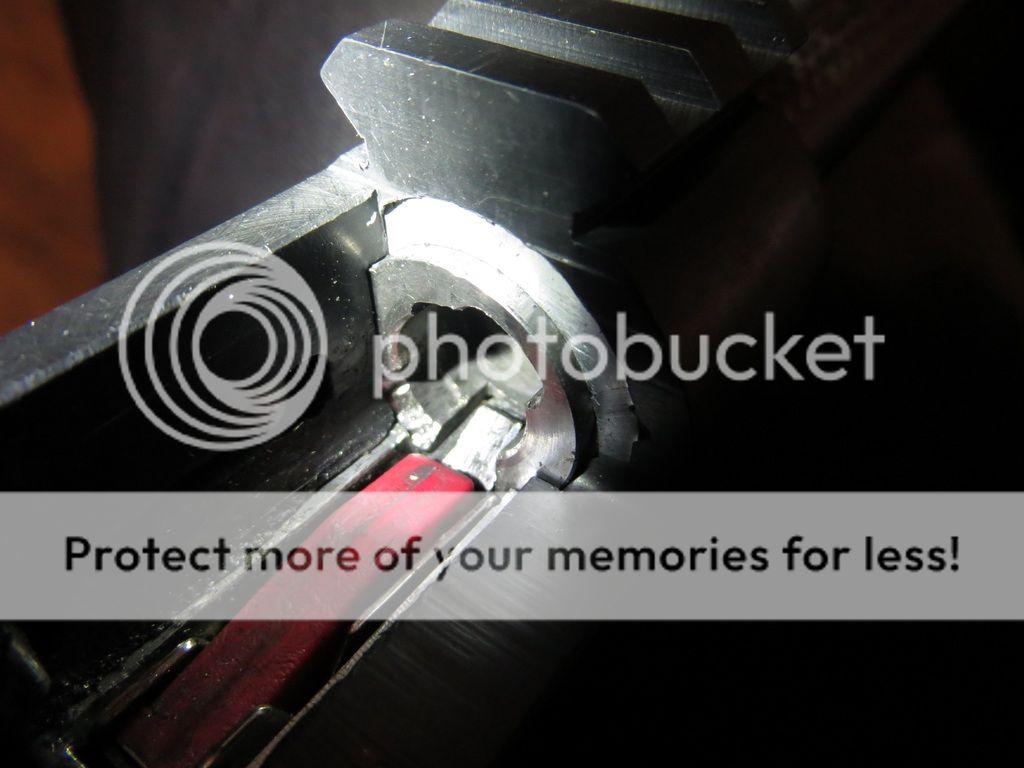
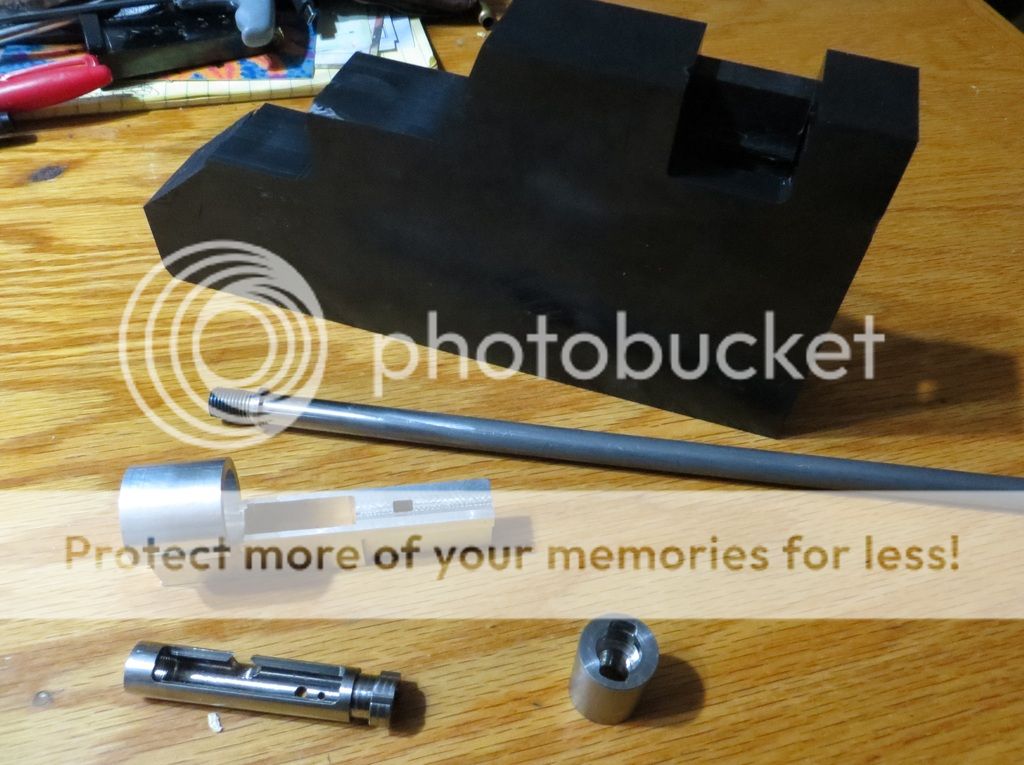
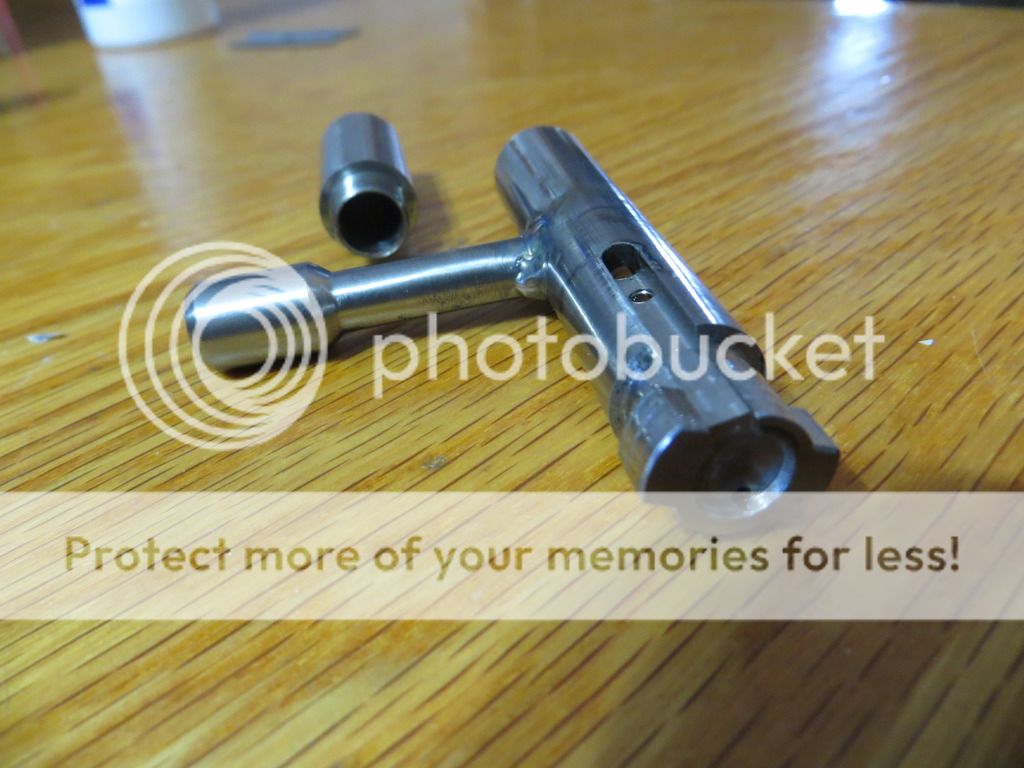
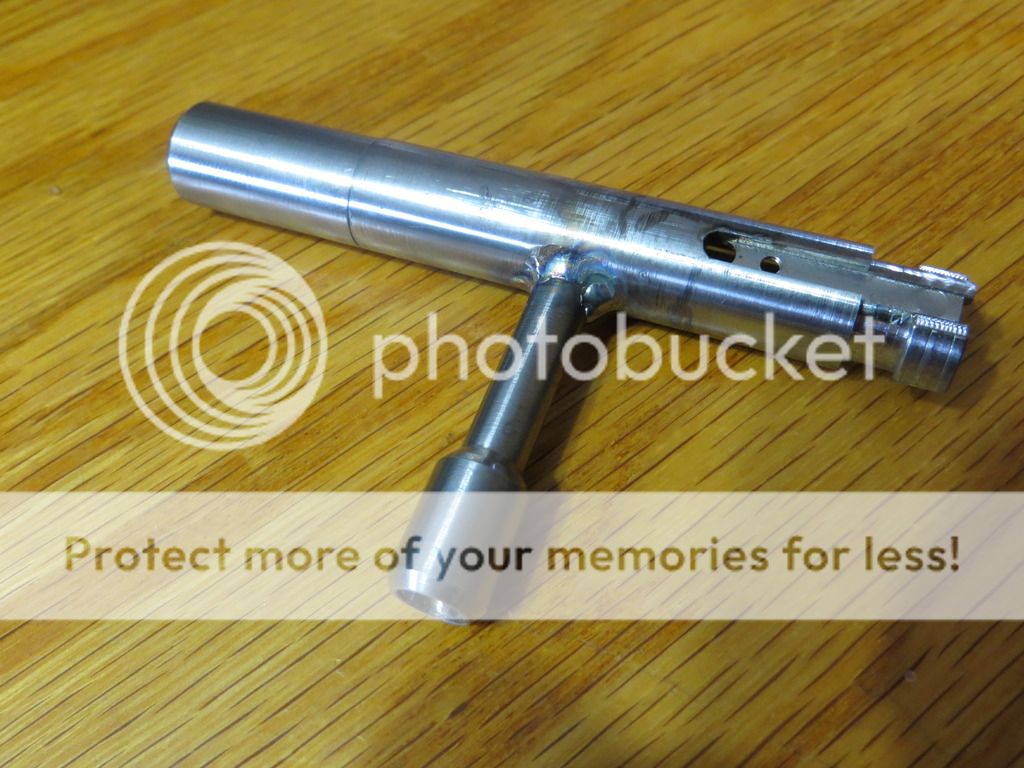
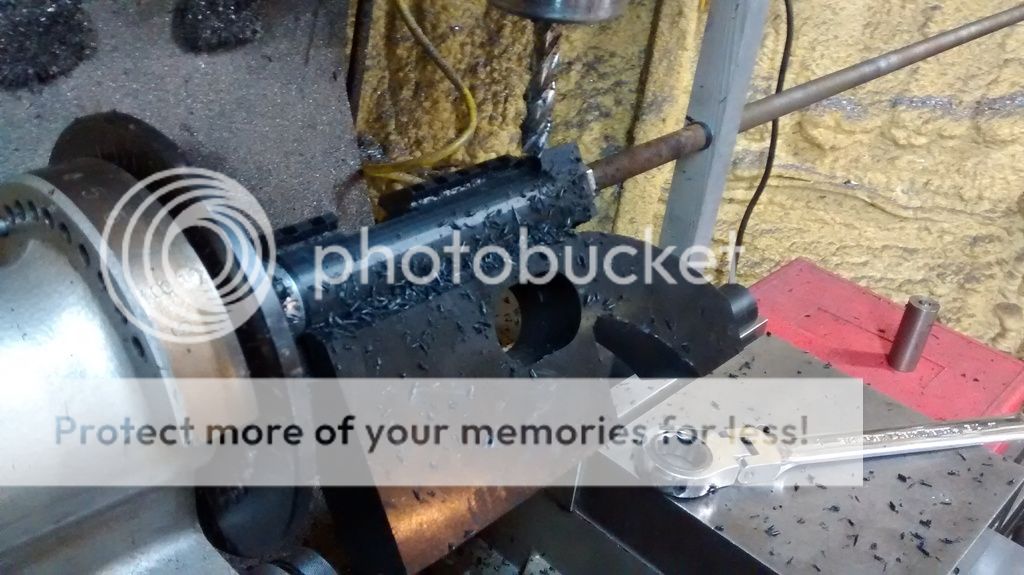
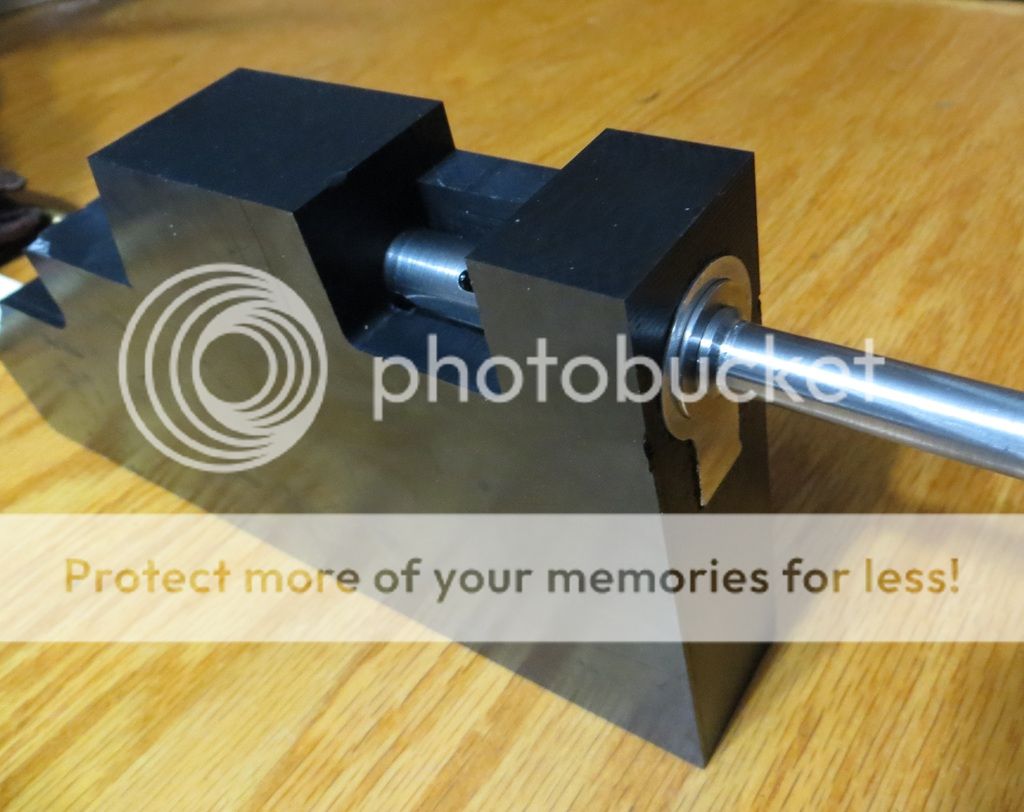
Unlike typical rimfires, this rifle uses a centerfire style twin lug bolt which engages the extension. It is also a cock on close design like an SMLE. The cartridges are stripped from the magazine by the left bolt lug, which is relieved slightly for the feed lip, and sits about 15° clockwise of vertical orientation when the bolt is open. The barrel is threaded into the extension (3/8-24 NF). I had to weld material onto the barrel and then turn it to create a stop point, which can be seen here with the actual physical parts:

IMG_1788_zpsf4hdlpue.jpg


Receiver is 7075-T651 aluminum. The bolt body, tail and handle are all 6-4 Ti, as is the barrel extension. The tail threads into the body (3/8-40 NEF). My original plan was for the handle to also be thread only, but there was so little engagement that I decided to TIG weld it to the body. (P.S.-I'm not a master welder, but before judging my welds, please bear in mind that the bolt handle is just 1/4" diameter where it meets the bolt, and the bolt body walls only .095" thick, so heat is an issue, making blending out beads a challenge):

IMG_1805_zpsof7u9kuv.jpg


IMG_1806_zpshwohlhhi.jpg


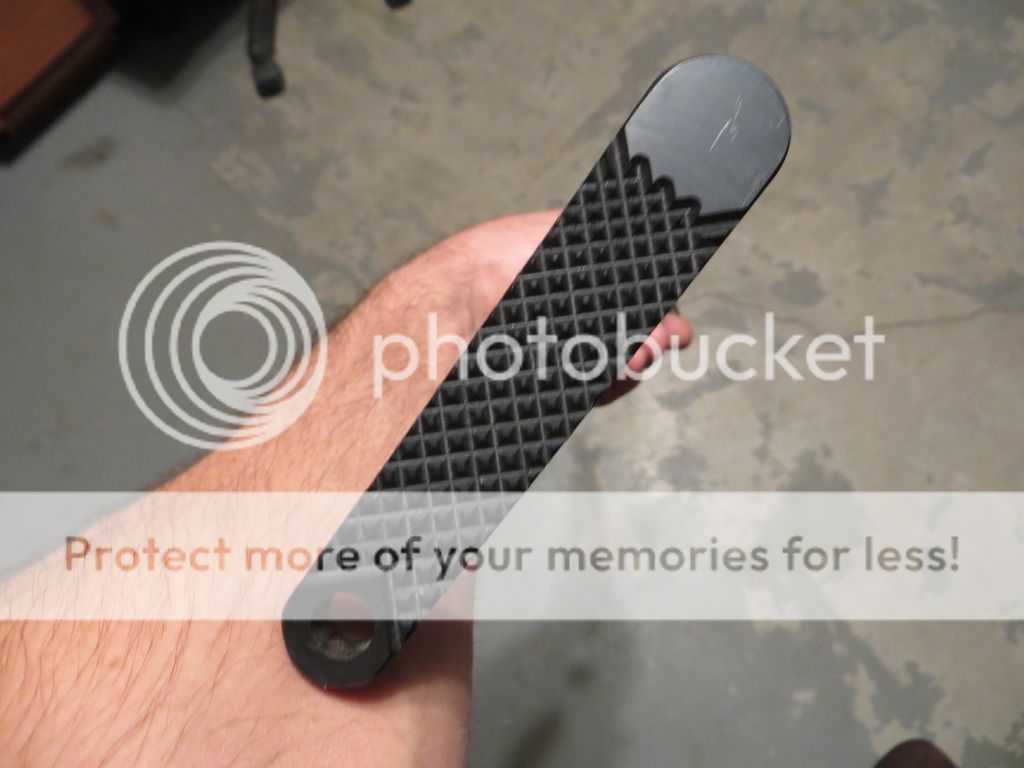
The chassis is nearly complete, and has been a pretty tricky part on manual equipment, with lots of rotary table work, rotary indexer, and tilt/swivel vise set up:

IMG_20161129_225544435_zpshnnqqd8v.jpg


IMG_20161129_231720985_zpslp4wjcge.jpg


IMG_20161129_232544404_zpsajyiwiht.jpg


IMG_20161130_122409171_zpstmrbjkby.jpg


IMG_20161130_152305992_zpsvmhr7eao.jpg


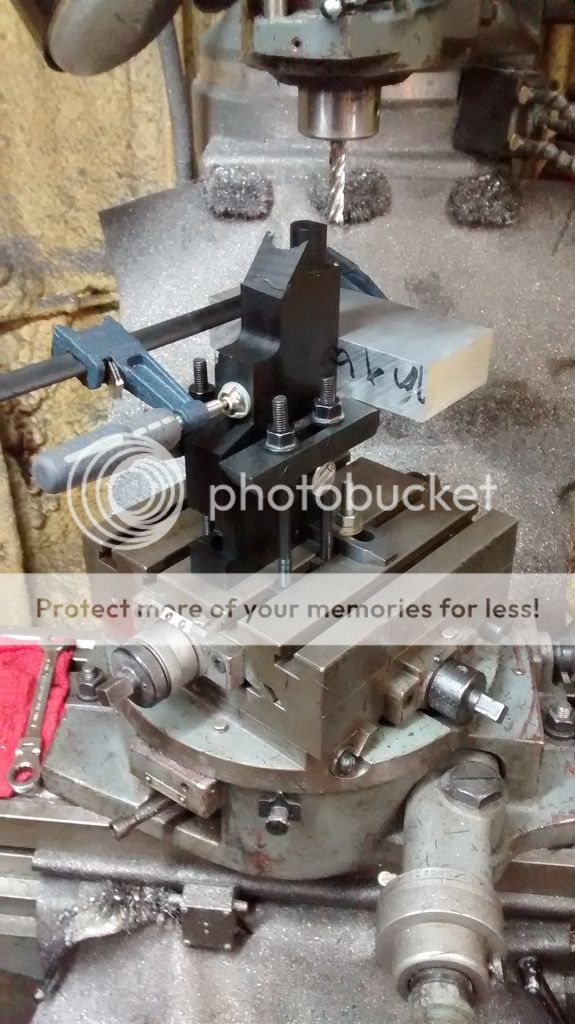
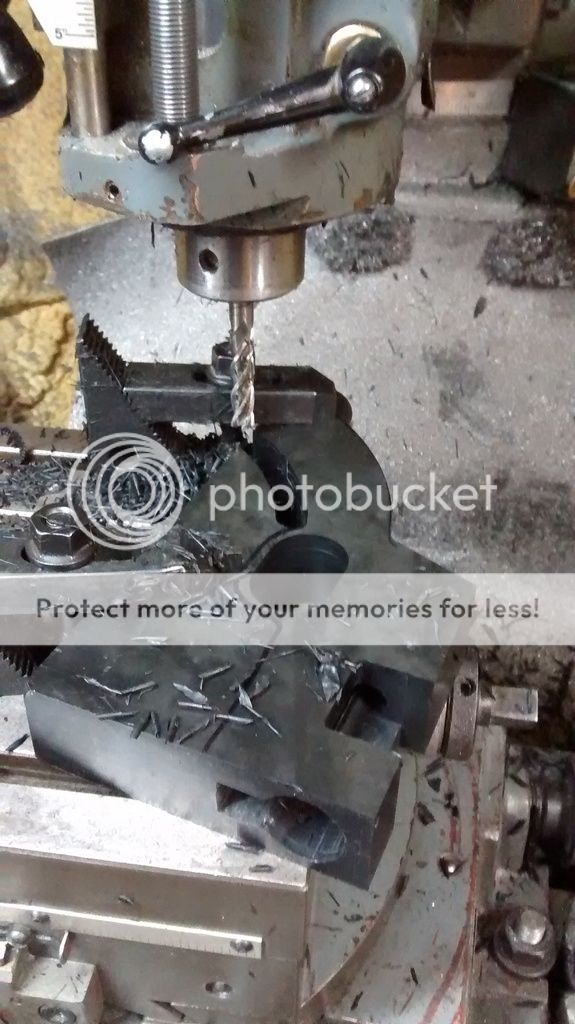
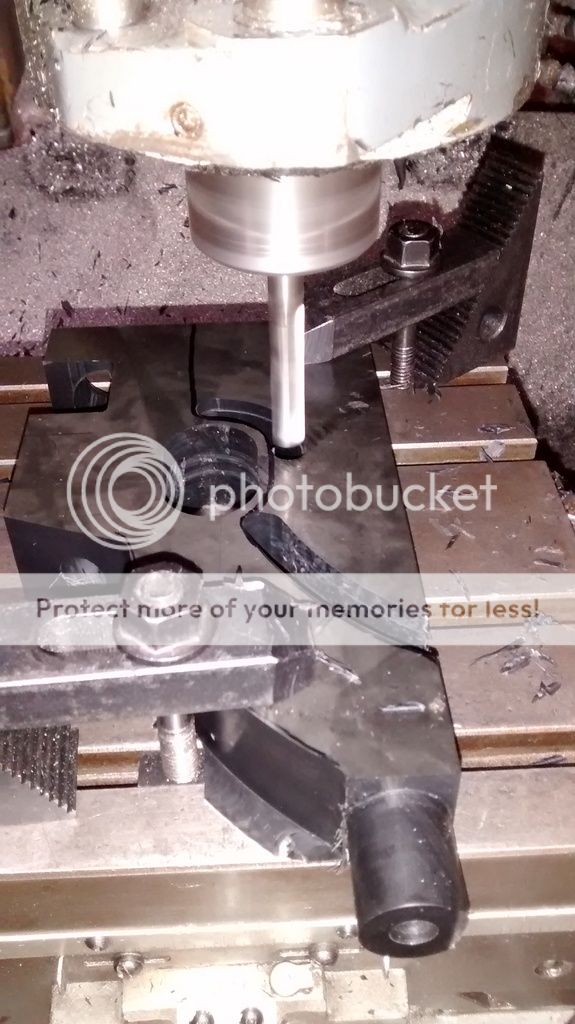
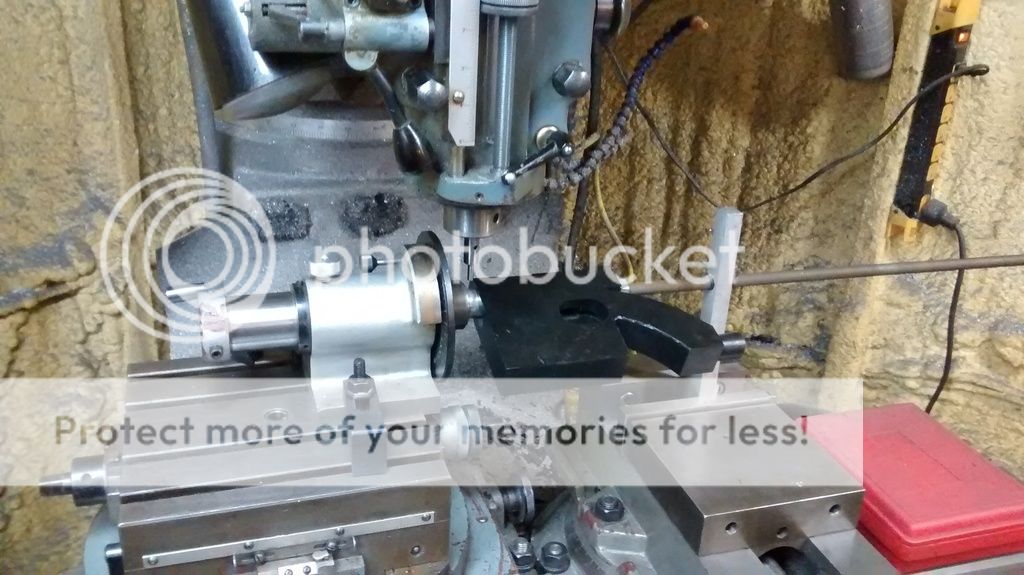
Carving it out to house the receiver was also arduous, much of it done by hand with small chisels and files due to the inside square corners that are impossible to mill

IMG_1790_zpszzuczmde.jpg


IMG_1791_zpsiax9gjim.jpg


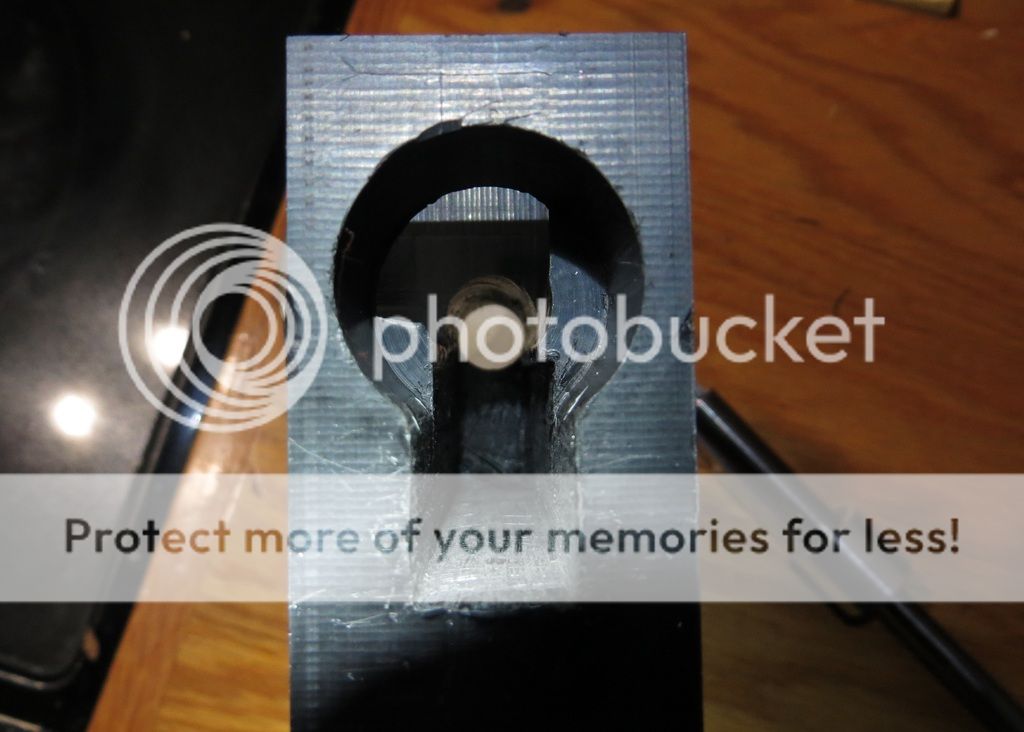
After profiling the receiver, I broached the bore for the bolt lugs with the bolt itself (before welding the handle on), then used the tilt/swivel vise to cut the handle channel

IMG_1800_zpshysakvsz.jpg


IMG_1801_zpsv8wt1amx.jpg


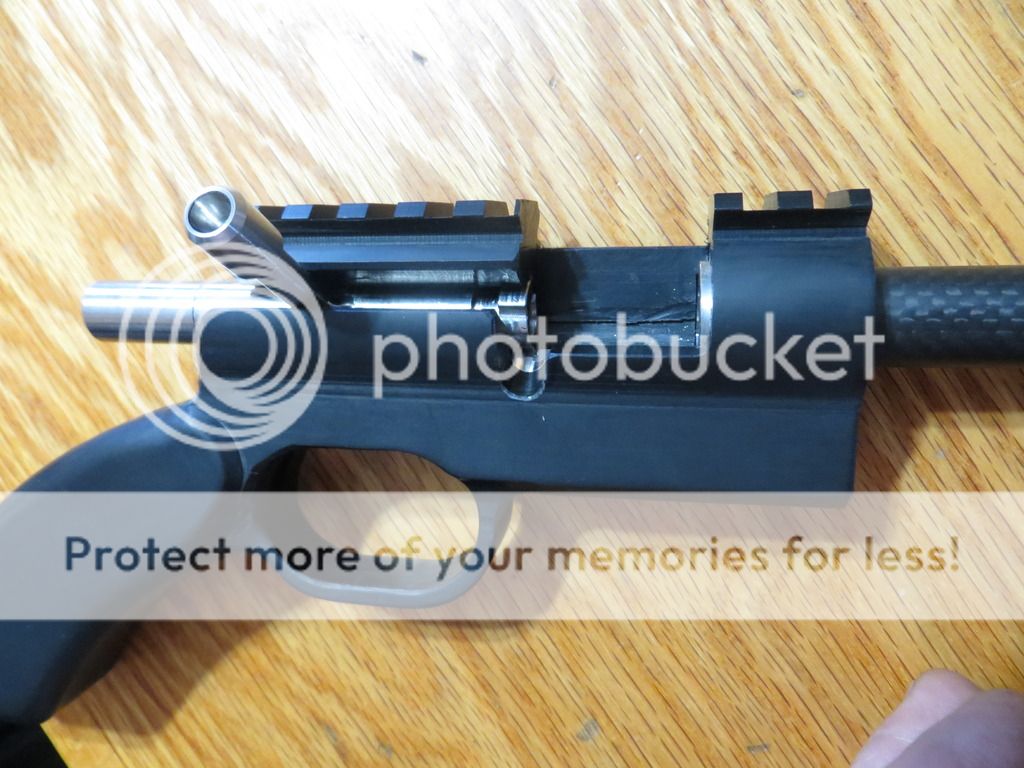
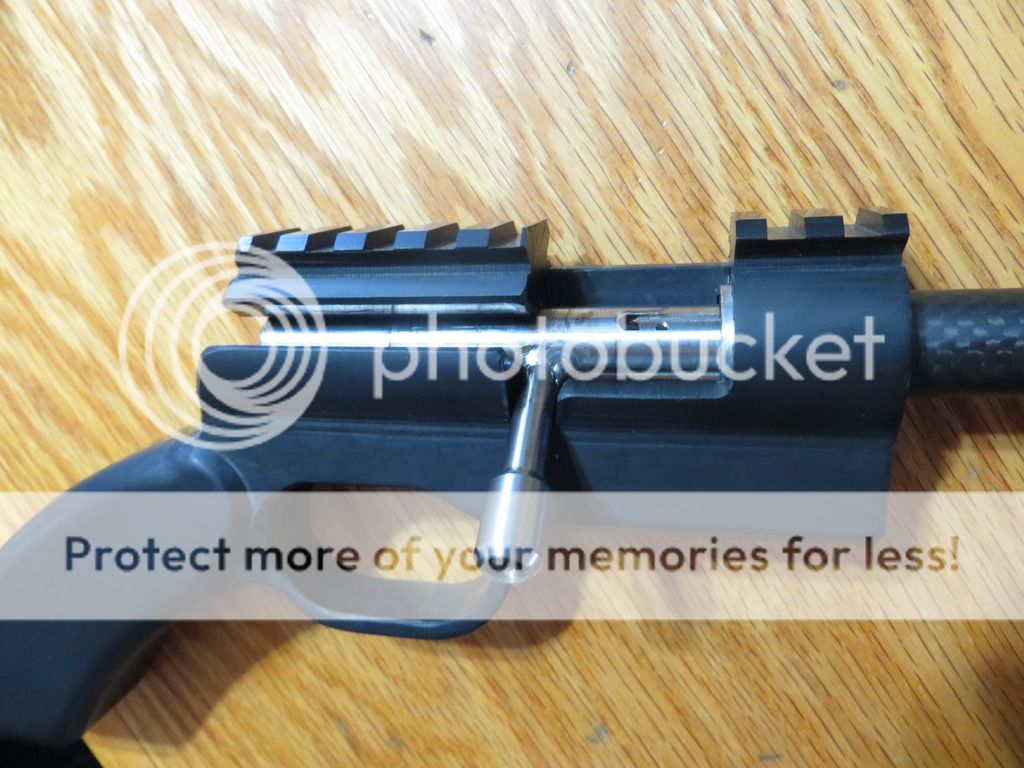
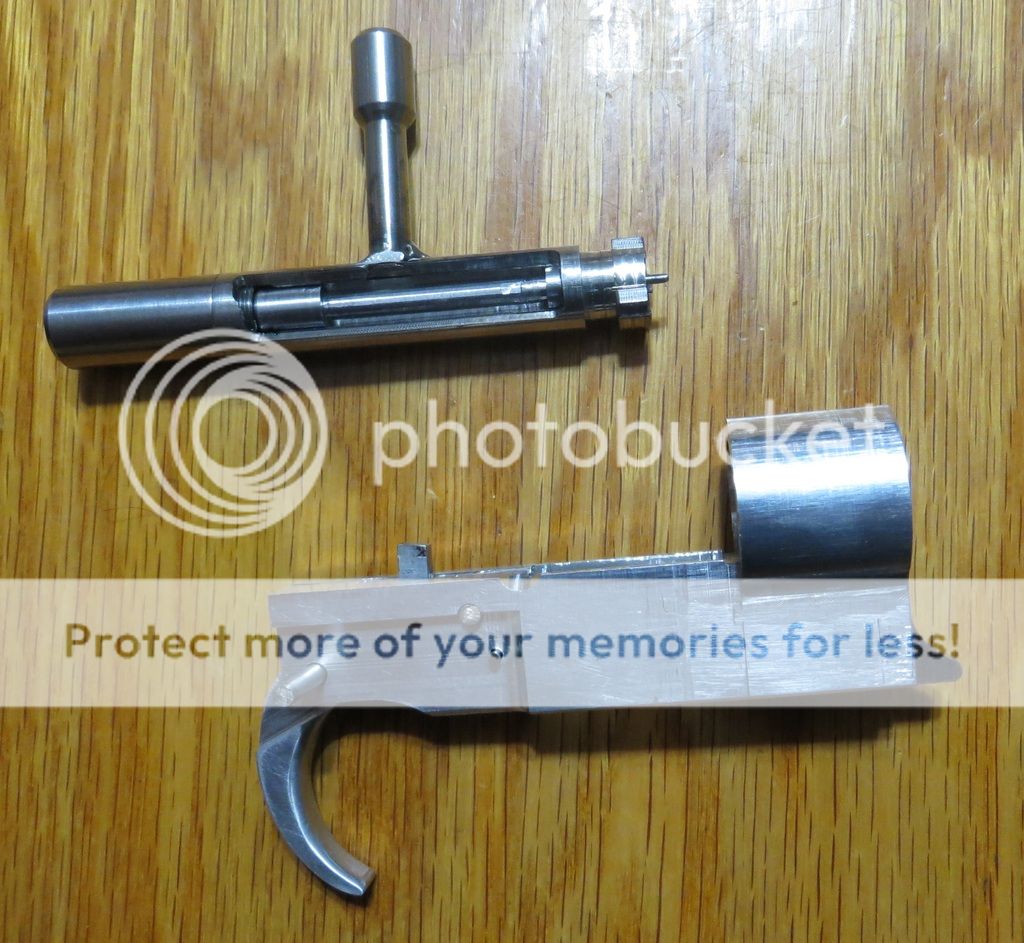
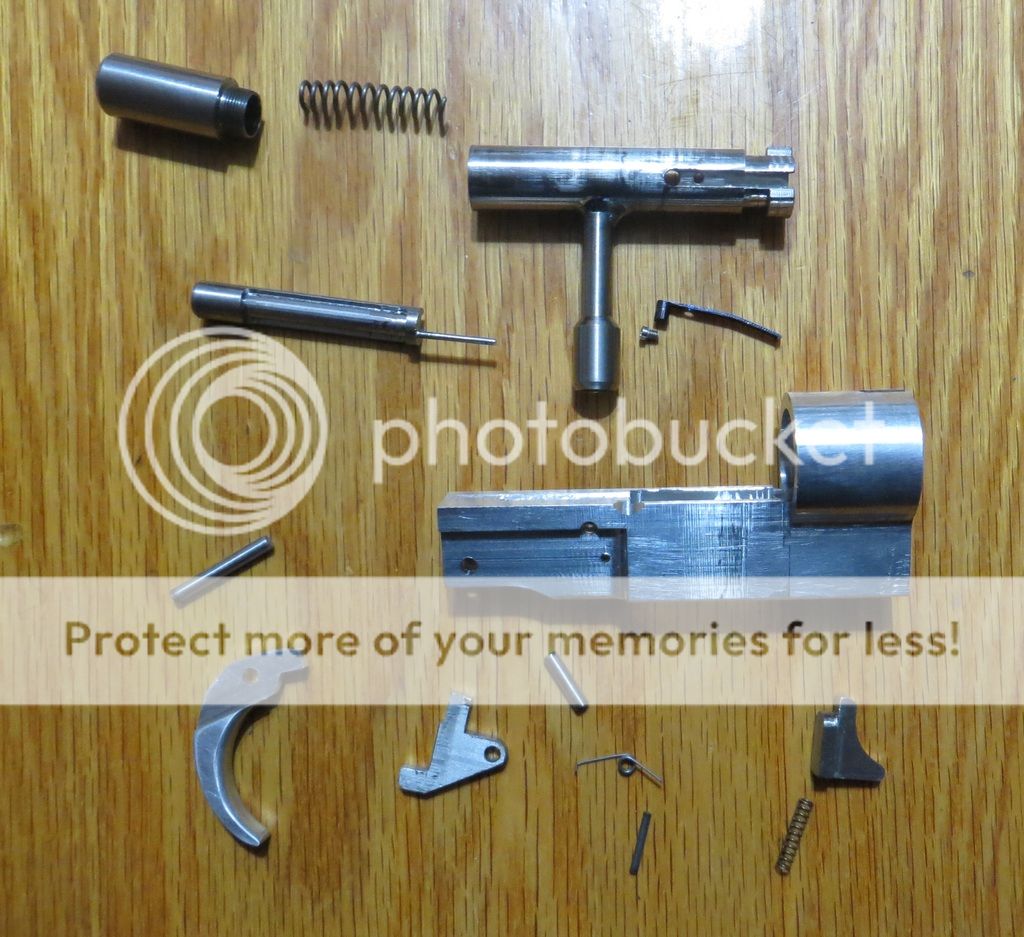
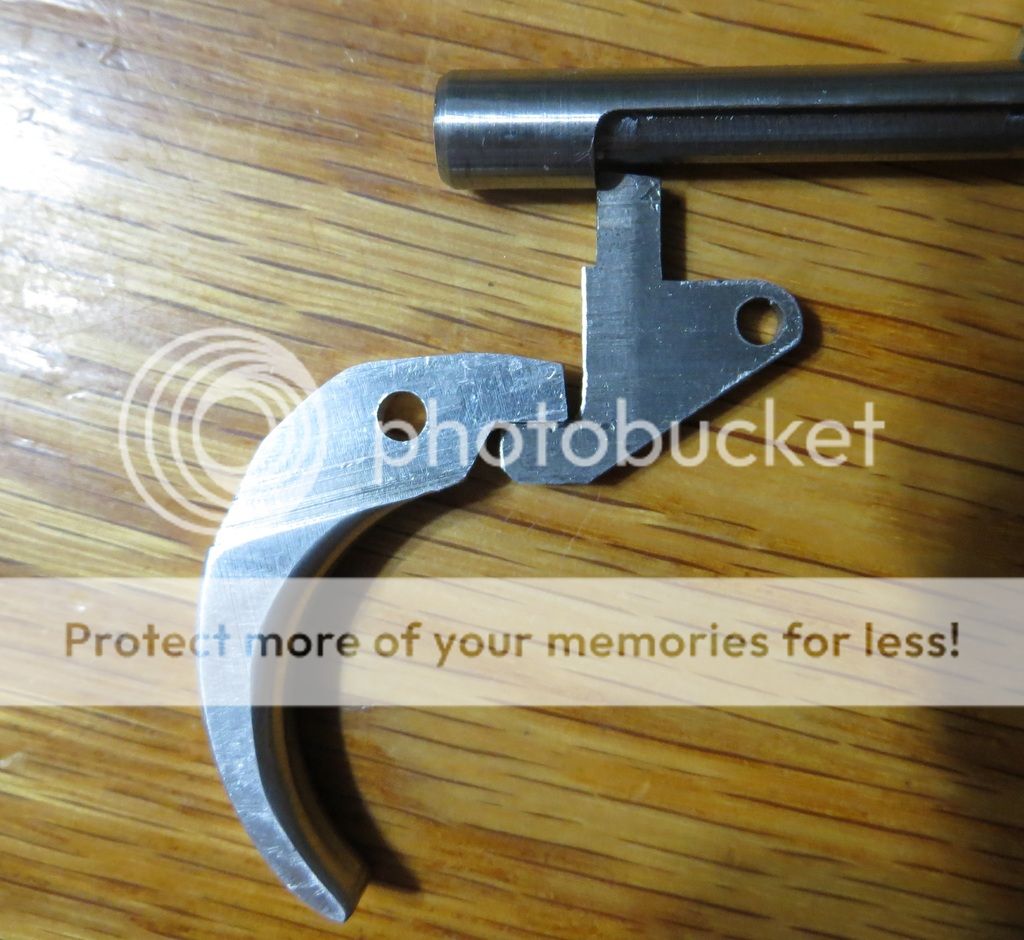
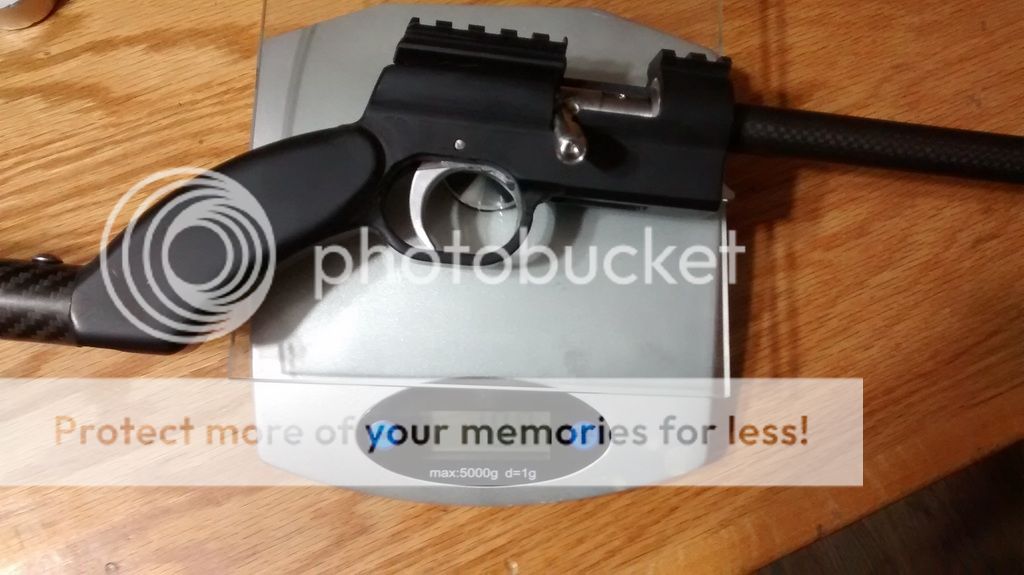
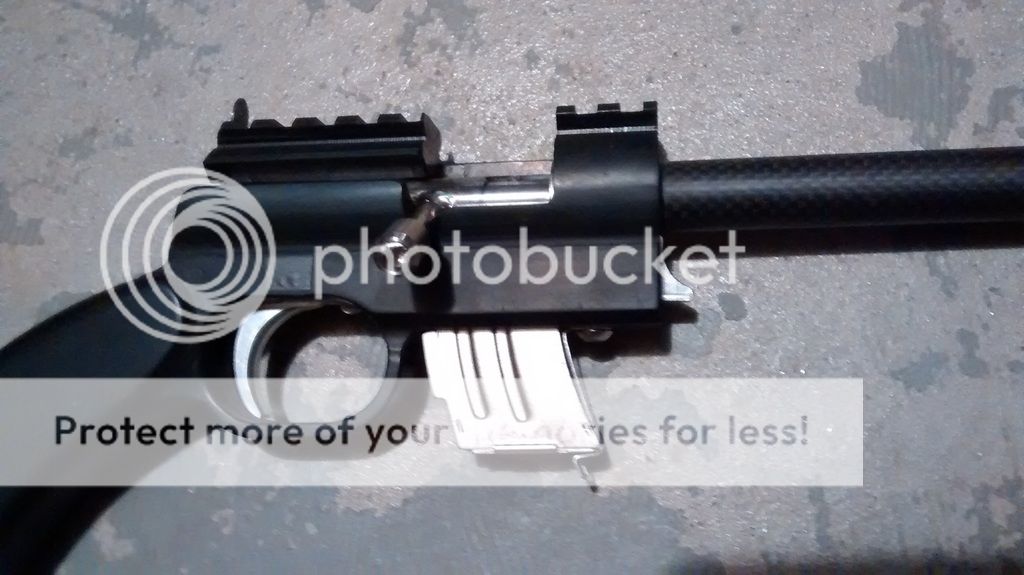
And this is where we're at now, just needing striker, trigger, sear, mag catch and a few other small parts and cuts:

IMG_1808_zpsl5rlylaf.jpg


And taken down:

IMG_1803_zpso3sv62ql.jpg


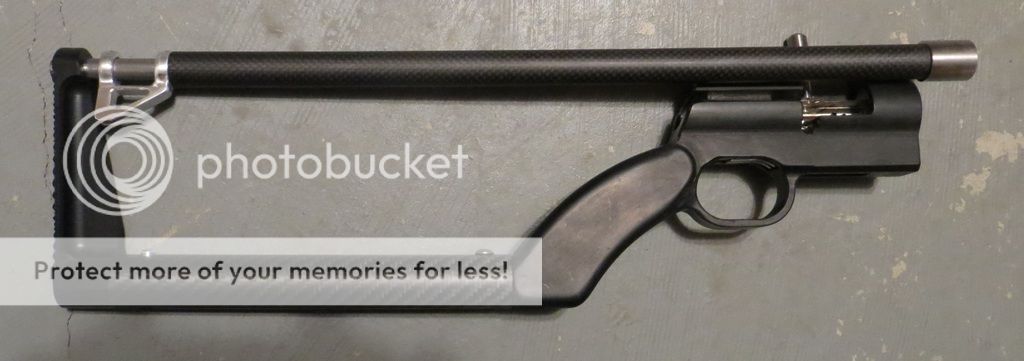
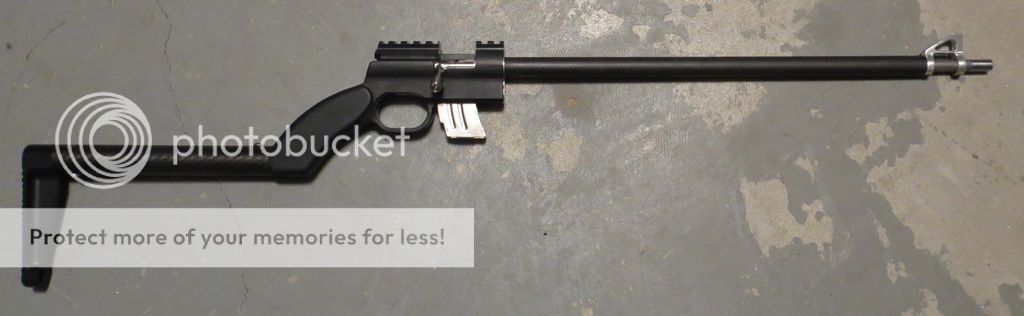
The height of the buttstock to the receiver looks a little awkward, but it's actually not bad at all when holding the thing. Can either use a low cheek weld, or rest your cheek on your firing hand, just behind the thumb.

The barrel assembly will be held to the receiver with a simple stainless sheet metal clip that engages the Picatinny slots.

Is 31.25" with a 16.5" barrel. 16.5" long, 5.4" tall and 1.25" wide at the receiver when the bolt knob is up in the stowed configuration. Current weight is 18.2 ounces, which I expect to increase to 20.7 with the additional parts, very close to my 20 ounce goal :D
 
Last edited:
With an AR carbine for perspective:

IMG_1804_zps5ba65tjf.jpg


The buttstock rotates 85° from the storage to firing position, locked by a spring loaded aluminum detent:

IMG_1797_zpshwfn3hej.jpg


I also decided to checker the butt on this one, done with a 1/4" 90° end mill (double 45°) on the swivel vise:

IMG_1809_zpsiz9fsvhf.jpg


Anyway, that's it for now, but hopefully we'll be firing it by Christmas. I'll update when there is one!
 
wow ! I am super envious , well envy is not what I hold your talent in , but awe ! Thank you for advancing my beloved firearms technology.
 
What are the details on the barrel? Did you do the carbon wrapping yourself?

It's not a wrap, just hollow tube. Arris makes all different sizes of CF tube for hobby; the butt tube is 23mm x 25mm, the hand guard tube on this one is 14mm x 16mm. There will be cartridge storage in the stock tube, too, as the butt plate is removed as easily as repositioned by depressing the button. Been pondering how to make them easily removable but also secure so they don't rattle around in there.

The barrel itself is a purchased liner, same one I used in the folding pack rifle: http://www.ebay.com/itm/22-Caliber-...110908?hash=item1c5b50defc:g:qCcAAOSw9j1XEU2~

I have a rifling jig in the works, but as I lack the ability to bore true holes deeper than ~10", I'll still be buying liners and blanks for rifle builds. This jig is a fixed 1:14 twist rate for doing handgun barrels that would otherwise require pressing or welding into larger pieces. I need a threaded barrel for my 4506, I have a vision for a gas operated 10mm version of the Hammerli 280, as well as some revolver and multi barrel designs that are better suited to homogenous pieces of 4140HT or 4142HT than. The jig isn't far removed from a lot of the DIY rifling jigs you can find pics or videos of, except it is much more precise and substantial, and powered by a linear actuator instead of manual. Where most home made jigs are something like 3/4" OD 1/16" wall ERW pipe with a Dremel cut slot, my helix tube is 1" ID .250" wall DOM with a CNC machined 3/8" slot that will guide the hardened pin pressed into the 1" arbor (I paid to have the slot done on CNC because I'd have spent more on gears or cogged pulleys and belts to set up for a helix cut on my manual machines than what it cost me to just have it done). I think I'll be able to pull a 3 point cutter through bores, make 6 grooves in 2 operations. It may even be able to pull a button.
 
Outstanding work as usual Mach!

Thanks for all the pictures, I like to see how other people set up for individual machining steps. Very creative tail stock for the spindexer!

I can't help but to look at something and try to figure out how it was made.
 
Outstanding work as usual Mach!

I like to see how other people set up for individual machining steps. Very creative tail stock for the spindexer!

I can't help but to look at something and try to figure out how it was made.

Thanks! It worked well for this, although wouldn't have been nearly rigid enough for cutting metal. If I were doing multiples, I'd have made a cutter with that .625" radius, and the .125" radius at the bottom. But that's a lot of work for a one-off when it's so easy to make longitudinal cuts every 5° and then just knock down the highs by hand for a radius that, though imperfect if checked with an indicator, looks and feels totally round. Lots of latitude with purely aesthetic contours :D
 
Your build really makes sense to me. So often light weight builds are seldom lightweight. This is something you could put in your pack and use for survival/defense in a jam without taking up space or weight.
 
So often light weight builds are seldom lightweight. This is something you could put in your pack and use for survival/defense in a jam without taking up space or weight.

That's kinda been my inspiration. Of the "pack" or survival rifles out there, only one is actually light weight, and it's an ugly, unergonomic, overpriced ($425!) single shot:

fkr2h2.gif


I'll be a tad heavier, but I feel the ~5 ounce penalty is well worth having a repeater that actually looks and feels like a rifle, not a few pieces of round stock affixed to each other that takes substantial time to load for each shot.

At 2 lbs, 6 oz, my .22 semi auto pack rifle is also considerably lighter than it's nearest competitors, but this one will be barely more than half that.
 
Of the "pack" or survival rifles out there, only one is actually light weight,

So, true. My kimber mountain ascent,308, weighs 4lb 13oz. Most of my 22's are heavier. What you have made is actually useful.
 
Getting there! Been busy with work and holiday stuff, but still finding some time to work on this critter!

The striker I was originally planning to make from 416 stainless, but I just didn't feel like turning 1" stock down to 5/16", so I used some 3/8" 8620 I had for that. The firing pin portion is a 1/16" diameter, .600" long protrusion cut eccentrically to the body of the pin, and then the body of the striker is cut in for the sear engagement, which is a 1.4" long cut, .060" deep, 130° wide, as the striker rotates with the bolt. The barrel retainer is the little radiused protrusion on the front of the receiver, spring loaded, made from 6/4 Ti. Sear is 416 stainless, heat treated, and I went with 7075-T6 for the trigger. The trigger is inserted through the guard, then the receiver, then a pin through the chassis, receiver and trigger. The sear spring is a torsion type, bent from 0.020" music wire, and also serves as the trigger spring. Extractor is cut from 3/16" music wire, attached with a #2-56 screw, and I'm gonna have to redo that, as I cut the tolerances a little too close, and it sometimes fails to snap completely over the rim. Bolt removal/installation is accomplished by pulling the trigger and then grabbing the portion of the sear that becomes exposed in the trigger guard and pulling it down further.

It is a single shot at the moment, and I'm going to have some problem solving to do with feeding, but I have fired about 30 rounds through it so far. And we're still under 20 ounces with only the mag catch and tiny rear sight to add. I'm pleased!

IMG_1811_zps4cbublbn.jpg


IMG_1812_zps0va676nw.jpg


IMG_1813_zpsrykmv0bc.jpg


IMG_20161215_191033769_zpsumn14xgf.jpg
 
Barrel threaded, rear sight done, mag catch installed

IMG_20161216_223313136_zpsq2rfgfhw.jpg


IMG_20161216_223243572_zpsekzjjd3a.jpg


IMG_20161216_223234146_zpsftren281.jpg


Also O-ringed the butt protrusion to waterproof the compartment, and hogged the grip a bit to fit a Gerber Dime inside. Still have to sort out the feeding issues and do a little hand finishing of the chassis, but final weight is 19.1 ounces, 26.6 with magazine, 40 rounds in the stock tube and the Dime in the grip.
 
Well, we've pretty much got it as much of a repeater as it's going to be. That is, with some ammo (CCI, Federal, Fiocci) it'll feed and eject reliably so long as it's not held at really wonky angles, like rotated >60° CCW (and it actually will feed laying horizontal on it's left side if the bolt is closed really fast). With other types (namely Winchester and Remington), feeding is fine, but the weaker brass bulges just enough that the extractor won't hold onto the cases once they're out of the chamber, so the live ejector can't knock them out. These rounds will eject if the rifle is held with the muzzle at some angle ~60° to where gravity will position them in the path of the ejector after the extractor drops them.

I've got about 600 rounds through it now, and I'm happy to report that the Ti bolt and barrel extension seem to be more than up to the task here. Not that I doubted it, but the fact that is hasn't loosened up one bit with that round count actually surprised me a little. 6/4 Ti does resist deformation as well as heat treated chromoly steels, though.

As an aside, my thumb is sore from working that tiny bolt knob so much! Being a cock-on-close design with barely an inch of bolt knob sticking out that has only a 3/8" diameter head, the PSI one's fingers are subjected to in manipulating it is a bit higher than most bolt guns!

I knew making a front lug .22 bolt rifle was going to present some real challenges with feeding and ejection, which is why no production .22 rifle I'm aware of uses a front lug bolt. That distance created by the barrel extension/trunnion is a real problem with cartridges that are only an inch long. The rim pops out of the magazine long before the nose of the bullet enters the chamber when you have an extra .400" to the chamber mouth because of the front lug design, so I had to get pretty creative to keep the back from popping up too far and causing the bolt to smash the case or the cartridge to eject itself from the gun. My solution came in the form of a dual function swiveling ejector. When the bolt is open, it's swiveled out, and at a height that allows the cases to pop up to where the bottom of the rim is still in contact with the magazine lips. As the bolt comes forward, it pushes the ejector back into it's recess just as the bullet enters the chamber mouth. The L-shaped ejector has a rear tang that rides in a groove on the bolt, and that groove is terminated just shy of the front of the bolt body. On extraction, the tang is caught by the end of that groove and swivels out just before the bolt reaches it's furthest rearward point. That is when it knocks the case out:

IMG_1818_zpssq4zz0vu.jpg


For proper feeding, I had to make a tiny spring loaded feed ramp

IMG_1820_zpsppoqsoaq.jpg


You can see where I had to relieve the left side of the feed ramp for the bolt lug, and this is what creates a problem if the rifle is canted CCW at a significant angle, which causes the bullet nose to slip off the left side of the feed ramp and fall out of alignment with the chamber. But as long as the rifle is held more or less normal (or muzzle up/down), feeding is golden.

So, that's pretty much it for this build other than finishing out some cosmetics on the chassis. I wish I could get it 100% reliable with all ammo types and regardless of handling, but it is what it is. A drastic departure from conventional rimfire rifle action design, I knew I may have trouble getting it to the level of reliability we see with designs that have been vetted over a century and continue to be used with pretty much no changes. But it does function, and I think that's something! I'm all ears if anyone knows of another .22 with twin front lugs on a 1/2" diameter bolt I can study, though!

I will do another iteration of ultra light weight take down bolt action, but the next one will use a conventional rear locking bolt, probably in a titanium tube receiver.
 
Last edited:
Status
Not open for further replies.
Back
Top