What gunsmithing or repairs have you done today

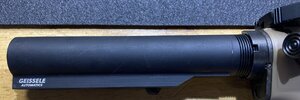
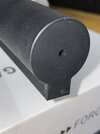
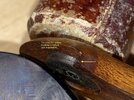
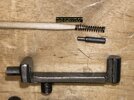
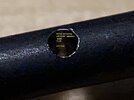
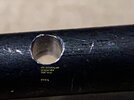
Some back story related to the single hole in the rear surface of the AR 15 / 16 MA1-A2's receiver extension.

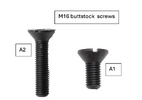
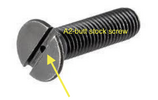
The original AR15/ M16 (with rubber butt pad) used a single screw (with no drain hole in the fastener) to secure the pad and fiberglass (Colt) buttstock into the single hole in the rear of the receiver extension (buffer tube). Later a short style screw with a drain hole was used.

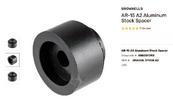
The M16A2 was adopted in the mid-1980’s, it had a length of pull ~1” longer than the A1(LOP ~13.25”) however the receiver extension was not lengthened. The A2 used a plastic spacer (available in aftermarket aluminum) to make up the difference in length thus a longer single screw with an integral drain hole, was then necessary to secure the butt plate to the receiver back surface.

The 1960’s Vietnam era M16 buttstocks had fixed rubber butt plates.
The 1970-80’s M16A1 models added the trap-door feature to a checkered rubber butt stock.

I am speculating that current multi-hole profile in the underside of modern extensions is to allow faster egress of any accumulated of fluid e.g. water during maritime or swampy operations; the rear side single hole now acts as a vent (like a gas can has) for faster fluid elimination from the tube. The cylindrical locking lug on the adjustable stock only uses one of the 6-7 positions at time so at least 3 would be available for passive drainage of the tube.


IMG_0543Gunsmith Receiver Extension Buffer Tube 4 Holes Plus Geissele Style MJD 03.29.24.jpg IMG_0544Gunsmith Receiver Extension Buffer Tube 4 Holes Plus Geissele Style MJD 03.29.24 2.jpg IMG_0546Gunsmith Receiver Extension Buffer Tube 4 Holes Plus Geissele Style MJD 03.29.24.jpg Screenshot 2024-03-30 at 4.40.50 PM.png Screenshot 2024-03-30 at 4.44.35 PM.png Screenshot 2024-03-30 at 4.42.28 PM.png
 
Thought I needed two screws to get my old Marlin 60 back in spec.

Turned out to be just one...


Anyway - glad I never sold it since it was my first .22 rifle. It's way down on the totem pole at this point and I haven't fired it in 20+ years but I'm still happy to have it properly fixed.
 
Today I had time on my hands and tinkered with a 10 shot AK magazine that had given me problems in years past. (At first I thought I'd thrown it away long ago out of frustration. But when I checked, there it was in a pocket of a range bag.)

Using a working magazine as a template, I got the magazine spring properly mated to the follower and base plate and removed rough excess metal from the back of the follower. Got it feeding properly.

When checking the sights of my AK from the bench, a 10 shot or 20 shot magazine requires fewer sandbags than a standard 30 shot magazine.

(If I charged myself minimum wage to fix that problem magazine, I could have bought a better one cheaper.)

Added: but saving money is more fun than spending it.
 
Last edited:
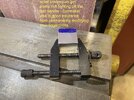
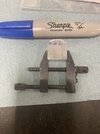
I find 90% of the difficulty related to working on small or irregularly shaped gunsmith parts is figuring out how securely hold the part.

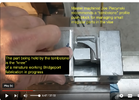
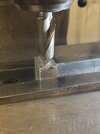
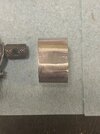
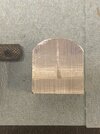
I fabricated a 1" x 1", "headstone or tombstone" profiled push block to assist in holding small or odd shaped parts in the vise.
The method is that of Joe Piecynski, master machinist, recommended while demonstrating his fabrication of the knee for a working
minature Bridgeport model project.

At 6:16 min mark in the video.
https://www.youtube.com/channel/UCpp6lgdc_XO_FZYJppaFa5w/videos


Made mine from 6061 T6 aluminum. Looking forward to putting it to good use.

Screenshot 2024-03-29 at 6.44.14 PMGunsmith Advanced Innovations Vise Tombstone Push Block Fab...png IMG_0530Gunsmith Advanced Innovations Vise Tombstone Push Block Fabrication MJD 03.29.24.jpg IMG_0532Gunsmith Advanced Innovations Vise Tombstone Push Block Fabrication MJD 03.29.24.jpg IMG_0533Gunsmith Advanced Innovations Vise Tombstone Push Block Fabrication MJD 03.29.24.jpg IMG_0535Gunsmith Advanced Innovations Vise Tombstone Push Block Fabrication MJD 03.29.24.jpg IMG_0536Gunsmith Advanced Innovations Vise Tombstone Push Block Fabrication MJD 03.29.24.jpg IMG_0537Gunsmith Advanced Innovations Vise Tombstone Push Block Fabrication MJD 03.29.24.jpg
 
Call me out if I am off base, but my view is that part of gunsmithing is its tranquility of acquiring some guns to smith-about.

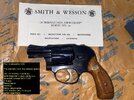
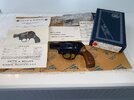
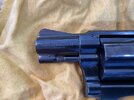
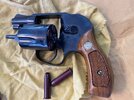
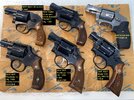
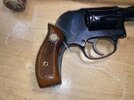
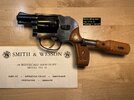
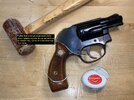
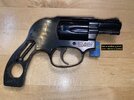
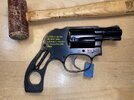
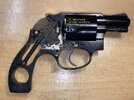
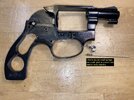
Just acquired a new-in-the box SA/DA shrouded hammer pinned barrel Smith & Wesson Model 49 no dash 1971-72 with mystical "floating J" serial number. The J-frame serial numbers prior, had the "J" leading the numbers. Apparently in 1971-72 S&W used up all their available sequenced j-frame serial numbers, so their solution was to "float" the "J" amongst the other 5 numerical positions until a better solution was secured. This one was resting in Cut Off Louisiana of all places. It's pretty handsome 2" 5-shot round butt.

Work in progress, rounding out my old J-frame inventory.

IMG_0578.jpg IMG_0576.jpg IMG_0579.jpg IMG_0584.jpg IMG_0585.jpg IMG_0586.jpg IMG_0591 ANNOTATED COLLECTION 04.01.24.jpg .
 
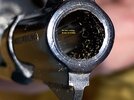
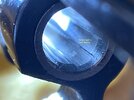
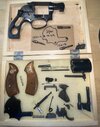
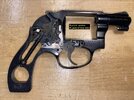
I had some time to check-under-the-hood of the "new" 1971 S&W Model 49 to see what 50+ years of aging lubrication looks like.

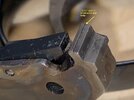
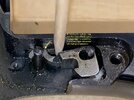
No surprises on disassembly except for the extraordinarily close fit tolerance of the cylinder stop assembly, which made both removal / installation challenging.

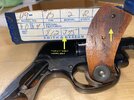
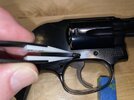
I prefer to use dental floss for first time removal of grip-frame separations rather than single-edge razor blades; the steel ones can damage either the grip / frame finish, the plastic ones usually too thick to insinuate into a really tight frame-grip fit.

I like to use a cardboard template to secure the frame screws for installation to their original locations.

A photo tour.

IMG_0625 copy.jpg IMG_0621 copy.jpg IMG_0623 copy.jpg IMG_0624 copy.jpg IMG_0629 copy.jpg IMG_0633 copy.jpg IMG_0636 copy.jpg IMG_0639 copy.jpg IMG_0645 copy.jpg IMG_0647 copy.jpg
 
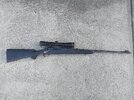
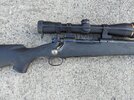
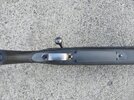
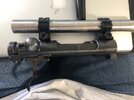
The bolt handle on the classic m70 is shaped different from the pre 64 bolts, since I'm going to camo the stock I filled the gap with jb weld. Drilled a bunch of holes with a 1/8" bit about .100"deep to help the jb stick, I wrapped the bolt handle in a few layers of tape and some paste wax. The shape and grip angle for the pre 64 m70 is different then the classic stock I'm using, so the trigger guard has a flare on the rear screw that normally flows well with the wood stock but not on this synthetic. I didn't want to file the trigger guard even tho there no bluing there still worth some money. I decided to fill the area and blend it with more jb, feels much better on the hand.

The stock will soon get a good rubbing with some scorch Brite and get camo painted so I'm not worried it looks like crap now. It still hurts to think this gun is a super grade but this is way better then the condition I found the rifle in. I think the stock looks nice and should be a good working rifle if it shoots good.

Rings are talley lightweights 30mm medium, think I could have went lows but I think the bolt may have hit the eye piece if not very close. Scope is a leupold vx-3hd 3.5-10x40 with the twilight hunter fire dot reticle. I'll probably try getting some cold blue on for now, I'd like to rust blue everything but I'd need to strip everything down and pull the barrel.

20240405_165731.jpg 20240405_165812.jpg 20240405_165831.jpg
 
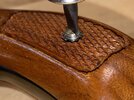
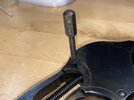
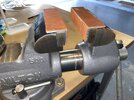
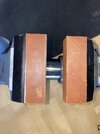
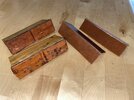
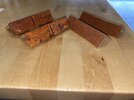
When removing the ejector rod from the cylinder on the M49 I used my old laminated wood- leather vise jaw inserts. The wood backing
seemed to give too much, not allowing the leather to engage a good bite on the rod.

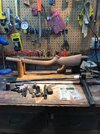
Fabricated some new 5" leather lined aluminum backed inserts today. Radiused the sharp corner free edges on the belt sander and climb milled the exposed edges to exactly 5.00" just because. Applied 3M spray adhesive to aluminum, then the leather positioned in place and held in vise jaws one side at a time for 15-20 min until glue cured. A peaceful task in the shop today.

IMG_0716.jpg IMG_0718.jpg IMG_0722.jpg IMG_0724.jpg
 
Last edited:
A while back I picked up a Savage 1907 from a yard sale. Whoever the previous owner was thought that it needed to be spray painted silver. On top of that, the grips were smooth, brown, and shiny. I reblued the gun a while back, and ordered a set of Indian head grip panels for it, but never got them installed. I spent hours sanding the panels to make them fit, but never could get them to snap in (no screws are used). So I shelved the project. Well last night I decided to give it another try, and without any effort at all, both panels snapped right in like they were meant to. I have no idea why they wouldn't fit before, but they fit great now.
 
Man those alumina leupold caps are nice, big step up from butler creeks lol, tho I never had any problems with bc caps once you got good fitting ones. I'm surprised leupold didn't put 2 small cuts in the knurled ring you tighten them down with, would be nice for years down the road if there hard to get off. They work perfectly tho.

Many places have them on sale right now, if they made them for my old vari-xii on my ruger I'd get a par but think that would be custom shop work.
 
  • Here is what used to be many peoples trash that has become my treasure. The type 99 Arisaka project in its infancy. It all started a couple of years ago with the purchase of 2 orphaned barreled receivers for 10 shekels each and now has turned into pile of parts with a stock that nobody else wanted. When I first took up the challenge I found out very quickly that separating the barrel from the receiver wasn't a joke. To say that a 400 pound silver back gorilla put it together is an under statement. So I pursued it undeterred and refused to be beaten with the idea that someone had put it together and it could be taken apart by someone else. So success came in the form of the wrench, barrel vice aided by the assistance of a 4 foot cheater pipe and a whole lot of grunting and farting on my part.
    Fast forward 9 days ago I got industrious when my daughter went down for a nap and slept for 2 hours. I took the stock apart and sanded the old finish and got down to the wood. I was pleasantly surprised to discover that the fore-end tip is solid ebony. The recoil pad had to come off in pieces because it was so decayed from years of being hosed down with WD40 and the screws were all buggered up. The fore-end tip just un-screwed it was installed with what one could only describe as a homemade stud that was made using a large wood screw. When I finally got the re-coil fad off there was the label right in front of my face that said Bishop all over it.
    Four days ago I drilled and tapped the receiver for a scope. Success came 2 broken drill bits a lot of cussing and a day later but I got it done. I'll tell you all the receiver is as hard as a witches heart. After installing the mounts for pre-fit I had to modify the rear mount to get the bolt to close and lock into battery. Now I'll have modify the scope ring locking clamp which is no big deal once that is done forging the bolt handle will needed and I'll also re-shape the knob from the plum shape into a pear shape because I just like that look better with an added 3/8" of handle length. The scope base mounts I'm using are the Weaver #11 and #35.
    Yesterday I scored 200 .312 180gn remington core lockt bullets that were NOS and 36 once fired 7.7 Jap brass made by Norma. Besides I have the dies for 7.7 Jap and the case length gauge and plenty of 30-06 brass to make more 7.7 Jap brass. So I can shelve the idea of making a .312-06 at least for now and save the wear and tear on a reamer to do it. After all the barrel is crome lined with excellent rifling. I will however shorten the barrel from 26" long to 24" long and re-crown the muzzle.


Attachments

  • IMG_1196.jpg
    IMG_1196.jpg
    95.6 KB · Views: 8
  • IMG_1197.jpg
    IMG_1197.jpg
    117.7 KB · Views: 5
  • IMG_1198.jpg
    IMG_1198.jpg
    86.1 KB · Views: 5
  • IMG_1194.jpg
    IMG_1194.jpg
    182.4 KB · Views: 7
  • s-l500.jpg
    s-l500.jpg
    29.3 KB · Views: 4
Last edited:
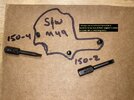
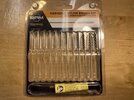
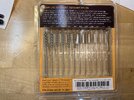
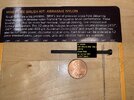
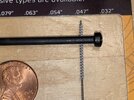
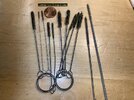
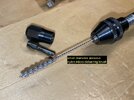
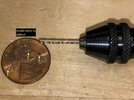
So, I was pondering the the manner in which to de-burr that #53 cross-drill hole (0.052") in the #4 screw. The smallest reamer I have is a 1/16th (0.062"). I came across these flexible nylon brushes coated with abrasive, designed for "micro-deburring"; they can be hand turned or powered.

I have the usual small nylon / brass brushes for cleaning holes, pushing chips out of threaded passageways, but not a de-burring function.

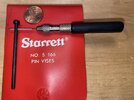
The 12 piece set is made in the USA by Brush Research Mfg (BRM). Using a hand powered pin vise, I road tested the 0.047" brush on the #4 screw hole. The brushes are designed for right hand only rotation.

Might be a consideration for cleaning up nasty firing pin / ejector pin, spring-plunger holes etc.

IMG_0605Gunsmith Brush Research Mfg BRM Small Diameter Abrasive Nylon Brushes 04.05.24  copy.jpg IMG_0604Gunsmith Brush Research Mfg BRM Small Diameter Abrasive Nylon Brushes 04.05.24  copy.jpg IMG_0726Gunsmith Brush Research Small Diameter Abrasive Nylon Brushes 04.07.24.jpg IMG_0728Gunsmith Brush Research Small Diameter Abrasive Nylon Brushes 04.07.24.jpg IMG_0729Gunsmith Brush Research Small Diameter Abrasive Nylon Brushes 04.07.24.jpg IMG_0733Gunsmith Brush Research Small Diameter Abrasive Nylon Brushes 04.07.24.jpg IMG_0734Gunsmith Brush Research Small Diameter Abrasive Nylon Brushes 04.07.24.jpg IMG_0735Gunsmith Brush Research Small Diameter Abrasive Nylon Brushes 04.07.24.jpg IMG_0737Gunsmith Brush Research Small Diameter Abrasive Nylon Brushes 04.07.24.jpg
 
  • Here is what used to be many peoples trash that has become my treasure. The type 99 Arisaka project in its infancy. It all started a couple of years ago with the purchase of 2 orphaned barreled receivers for 10 shekels each and now has turned into pile of parts with a stock that nobody else wanted. When I first took up the challenge I found out very quickly that separating the barrel from the receiver wasn't a joke. To say that a 400 pound silver back gorilla put it together is an under statement. So I pursued it undeterred and refused to be beaten with the idea that someone had put it together and it could be taken apart by someone else. So success came in the form of the wrench, barrel vice aided by the assistance of a 4 foot cheater pipe and a whole lot of grunting and farting on my part.
    Fast forward 9 days ago I got industrious when my daughter went down for a nap and slept for 2 hours. I took the stock apart and sanded the old finish and got down to the wood. I was pleasantly surprised to discover that the fore-end tip is solid ebony. The recoil pad had to come off in pieces because it was so decayed from years of being hosed down with WD40 and the screws were all buggered up. The fore-end tip just un-screwed it was installed with what one could only describe as a homemade stud that was made using a large wood screw. When I finally got the re-coil fad off there was the label right in front of my face that said Bishop all over it.
    Four days ago I drilled and tapped the receiver for a scope. Success came 2 broken drill bits a lot of cussing and a day later but I got it done. I'll tell you all the receiver is as hard as a witches heart. After installing the mounts for pre-fit I had to modify the rear mount to get the bolt to close and lock into battery. Now I'll have modify the scope ring locking clamp which is no big deal once that is done forging the bolt handle will needed and I'll also re-shape the knob from the plum shape into a pear shape because I just like that look better with an added 3/8" of handle length. The scope base mounts I'm using are the Weaver #11 and #35.
    Yesterday I scored 200 .312 180gn remington core lockt bullets that were NOS and 36 once fired 7.7 Jap brass made by Norma. Besides I have the dies for 7.7 Jap and the case length gauge and plenty of 30-06 brass to make more 7.7 Jap brass. So I can shelve the idea of making a .312-06 at least for now and save the wear and tear on a reamer to do it. After all the barrel is crome lined with excellent rifling. I will however shorten the barrel from 26" long to 24" long and re-crown the muzzle.

You can have that 312-06 barrel of my 09 argentine mauser when I finally get to putting the 9.3x62 barrel on,
 
the m70 synthetic stock for my sg has a length of pull just a hair over 14", I was going to just put a 1/2 pad on it but I decided to cut 1/2 of the stock off to. I prefer stocks not to be over 13.5" so even if I use a 1" pad again I'll be at 13.5 at most, for hunting in the cold 13 or 13 1/4 is preferred. I used my calipers and set to 1/2 and scribed a line around the butt, then used the calipers to make a trench that works like a knife wall for when I cut the butt off. I really need to pickup a nice thin Japanese pull saw someday for jobs like this, I ended up using a tenet saw which isn't preferred but worked. The shadow line I scratched in helps keep the edges nice and square.

Luckily the plastic molding for the screw threads where over 1 inch into the but but the heal thread hole was cracked inside, I drilled that one about 3/8"deep with a 3/8" drill and filled with jb weld along with all the edges and the toe as well. Some johnsons paste wax on the butt pad, I used a drill bit that was the miner diameter of the screw with some paste. That bit helped make sure the new hole would be lined up perfectly, screwd in the toe screw the slid the brill bit shank into the top heal screw hole. Worked out perfect, lop is now exactly 13.5" I do have a limbsaver 1" pad I could fit if I don't get a 1/2 pad. At the toe of the old pad there's now a little lip but that should sand down if I keep it on there.

Picked up some rustoleum camo paint from Walmart yesterday, got khaki, deep forest green, flat black, and espresso, they didn't have any of the dark brown camo paint but the espresso looks near the same. Got a can of rustoleum matte clear I'll give a few coats after it's camoed. Still have to decide what colors and what order of coverage I want. I'll probably paint the hole stock in black inside and out to cover up all the bedding and work done.
 
Last edited:
Tinkering in the shop yesterday.
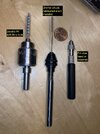
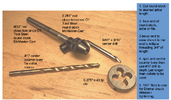
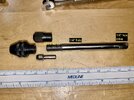
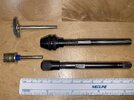
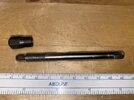
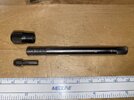
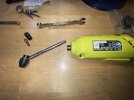
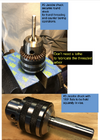
Years ago I fabricated some arbors, long and short, for using Dremel tool accessories in cordless / drill presses etc. The problem with the Dremel power plant, even the cordless, is that several thousand rpm is the slowest speed!
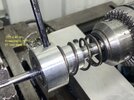
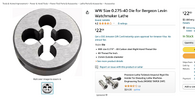
Dremel threads are the same as a watchmaker's arbor, an odd combination of metric diameter with imperial threads, 8 mm x 40 tpi.
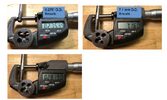
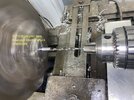
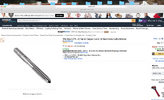
You can get close tolerance tool steel rod in 0.281" or 9/32" and a 0.275" x 40 tpi die to make the threads.

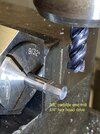
I made this short arbor with a hex drive option on the end for very slow rpm in a handheld cordless screwdriver, specifically for using those micro-deburring abrasive brushes.

A photo tour of the fabrication.

Screenshot 2024-04-13 at 8.32.04 AM.png Screenshot 2024-04-13 at 8.32.14 AM.png IMG_0770Gunsmith Round Die Holder Lathe Tail Stock 1%22 & Dremel Arbor 04.12.24 copy.jpg IMG_0772Gunsmith Round Die Holder Lathe Tail Stock 1%22 & Dremel Arbor 04.12.24 copy.jpg IMG_0775Gunsmith Round Die Holder Lathe Tail Stock 1%22 & Dremel Arbor 04.12.24 copy.jpg IMG_0783Gunsmith Round Die Holder Lathe Tail Stock 1%22 & Dremel Arbor 04.12.24 copy.jpg IMG_0787Gunsmith Round Die Holder Lathe Tail Stock 1%22 & Dremel Arbor 04.12.24 copy.jpg IMG_0793Gunsmith Round Die Holder Lathe Tail Stock 1%22 & Dremel Arbor 04.12.24 copy.jpg
 
Back
Top