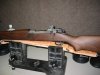
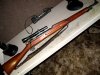
DMK this is what I have come to learn about this. In the stock you have the spots that contact the receiver and barrel. Of course at the receiver recoil lug, which handles pretty much the force of the recoil but there is the tang area also and the flares on each side by the tang. This area is to help hold the receiver straight in the stock and if not properly seated can cause the stock to split. There is a metal sleeve at the rear screw that goes in the stock between the receiver and the trigger guard. So bedding these areas is important but pretty straight forward. These areas are there no matter what kind of stock, military or commercial. The difference with the mil-spec 03 stocks is you have the whole forearm and handguard to deal with. So having said that here is the process I go through to bed these 03s. This will be a bit lengthy if that's ok?
First you must know it is like a house of cards meaning one thing relies on the previous thing to be right. So first you got to get the receiver and trigger guard mated correctly. This is how. Separate the stock from the barreled action. Knock the pin out of the trigger and pull the trigger assembly out. Push the metal sleeve out of the rear of the stock. Assemble the trigger guard to the receiver (no need to have the magazine follower and sping here). What needs to happen is that the trigger guard contacts the receiver ONLY at the front screw at the lug and at the rear with the sleeve in place. This may require filing down a little bit of the side walls of the magazine at the front and at the back of the trigger guard so that a little daylight can be seen between the receiver and the trigger guard magazine walls. Of course not including the front and back of the magazine walls as these ends protrude into the receiver. It is very possible that the metal sleeve could be to long or too short. If it has not been tampered with it should be ok though. When you get it so the trigger guard and reciever meet only at the front and rear screw contact spots you can now torque down the screws without putting any undue stress on the receiver. Are you with me so far? Now having said all that we get to this. The goal is to be able to assemble the rifle with the stock and the screws torqued down and not having any undue stress on the receiver while accomplishing a compression fit of the wood of the stock between the receiver and the trigger guard. Remember how I said the sleeve can be too short or long? Inspect the stock in the rear tang area on the receiver side to see if there is imprinted in the stock the impression of the "D" shaped area around the screw. If so this is good. If no impression that means the sleeve is too long and should be filed so to allow that impression to show in the wood when torqued. The next area is the lug area. With just the action and trigger guard tighten the front screw and count the number of turns it takes from beginning of the threads to drawing the trigger guard tight. Then either mark or what I do is take a picture of the screw so I can see the screw orientation when tight. When you have done this assemble the receiver and trigger guard with the stock in place and make note if the screw comes tight before the stock gets compressed or if the screw requires too much torque before it seats the receiver and trigger guard together. Are you with me so far? If the stock is not compressed enough the receiver will be loose and never seat properly in the stock. Proper torque is about 65 in/lbs. or if you have experience you know when you are torqued. If the screw requires too much torque then the reciever and trigger guard never meet and so cannot complete the dimensional integrity of the structure. 1903A3s have stamped trigger guards. 1903s have machined trigger guards. The machined trigger guards are more rigid and thus lend more support to the receiver to help keep it from "flexing" under load. The differnece is quite minimal though. Once again the goal is to have the receiver and trigger guard become one while tightly compressing the stock between. If the trigger guard won't pull tight against the receiver some very careful inletting is required in the stock at the front of the trigger guard area of the stock. Of course being careful to not remove too much material, so go slowly. If the stock is not tight enough between the trigger guard and the front lug area at the screw this can be handled when using the epoxy to bed it. The way I get to the "sweet spot" in this case is this. Go to the auto parts store and get a set of automotive feeler gauges. You will destroy these in this process. Start by cutting the thin feeler gauges to use as shims to fit in the area of the stock that is immediately behind the recoil lug that is the roughly 1 inch square area that faces in the horizontal plane between the recoil lug and the magazine hole in the receiver. OK? Now start to use increasing thicknesses of feeler gauges until you reach the spot that makes the stock tightly compressed but still allows the receiver and trigger guard to draw tight. You will know this because remember, you made note of the number of turns and the indexing of the front screw earlier. Also let me mention too that not a bad idea to do the same indexing procedure on the rear screw also for later use. Ok, keep these carefully cut to fit shims for later. Now you should have a barreled action, stock and trigger guard that when assembled with the shims in place if needed that will be one when torqued. Now look at the forearm of the stock. You will see at the end of it a section that is perhaps 2 to 3 inches long that when assembled supports the barrel. Using printer paper cut a strip 9 inches long and 3/4 inch wide. Assemble the stock, shims if needed, the receiver and trigger guard with the strip of paper under the barrel the entire length of the support section of the stock. Torque the whole mess down. The paper strip should be in there with enough resistance that if you try to pull it straight out it will tear or come damn close to tearing. In other words you want that stock to be pretty heavy against the barrel, ok? If all that comes together like it should you have done real good. Congrats
")
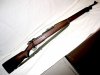
Now we can start to think about doing the epoxy bedding. Go get some JB Weld and NOT the quick set stuff. In reality you will use only a small portion of it. So you'll mix up way more than you need but epoxy is cheap. Now you are going to take the stock and where the metal sleeve goes in the rear screw hole you are going to drill out the hole in the stock just a bit so the sleeve will fall out if in the hole, OK? Make sure to drill the hole out straight, so no bong hits from now on until your done ok? Now get some Gorilla Glue. I use it cause it expands when it cures so use it not too much, not too little if you know what I mean. Get some heavy gun type grease or axle grease ok? Coat the rear screw, the inside of the metal sleeve, the stock side of the rear of the trigger guard and the stock side of the tang of the receiver. Apply the glue to the inside of the hole in the stock and the outside of the metal sleeve. If you are using the shims in front apply glue to the area and position the shims. Now very carefully slid the sleeve into the stock and assemble the barreled action, stock and trigger guard and torque down. Note before you get it all the way torqued down stand the rifle on the ground butt down and with a mallet lightly tape on the muzzle of the barrel to asure that the recoil lug is firmly against the recoil pad in the stock. Now fully tighen it all down. Go to bed. Next day take it all apart. you will see the shims if used are glued in place as is the sleeve in the stock. Next the actual bedding of the receiver to the stock. You are going to apply epoxy to these areas of the stock. Remember the "D" shaped impression at the rear tang location of the stock you are going to put a small amount of epoxy there around the screw hole but not in the screw hole, ok? Making sure to have good contact of the epoxy to the spot of the "D" and around the actual area where the tang fits in the stock. In other word on the floor of the stock at the "D" but not in the hole and on the vertical walls of the tang area. And it needs to go no further forward than the "D" spot. Remember this, apply only enough so when it is all put together that just a very small amount of epoxy squeezes out of the stock. The in the "flare" areas which is the areas that is just in front of the "D" on the sides where the reciever spreads out to the sides. In that area of the stock apply a little apoxy and once again apply just enough so that when put together it just squeezes out of the stock. Now the recoil lug area. Look at it, you will see a a square cut-out that is where the recoil lug of the receiver sits in the stock. The vertical face of the stock that the recoild lug sits against is the recoil pad of the stock. The top section where the receiver sits down on and where the shims are glued if used is 7/8 inch from the recoil pad to the magazine well. then you have the side walls of the stock. Look at the receiver, you have the side walls of the receiver below the rounded portion of the receiver at the recoil lug and going to the rear. If you were to measure the width of this portion of the reciever and then measure the dimensions of the side walls of the stock in this area you would see that the walls of the stock are a bit wider that the corresponding walls of the receiver. We are going to eliminate this difference from the front of the square cut-out in the stock where the lug sits to 3/4 inch past where the magazine well starts on each side. You will put enough epoxy to make it so when it's all put together that is squeezes out a bit around the front screw hole in the stock and between the receiver and the magazine well of the trigger guard. The point is to make this area a tight fit for the receiver recoil lug so it can have no lateral movement in the stock. Also put a thin coat of epoxy over the spot where you glued the shims if you used them . If you did not need to use the shims still apply a thin coat of epoxy to that 7/8 inch long spot of the stock. Oh and before I forget the wood of the stock has to be clean and dry, no oil or grease where the epoxy will be, ok? JB weld pretty much sticks to everything but still no contamination in those areas, ok? Now we go to the forearm. In the barrel channel in the 2 to 3 inches that support the barrel. You will lay a bead of epoxy down the center of that area. Not too far forward cause to don't want it to squeeze out the front but apply enough so that when its all put together it will squeeze out the sides. Now remember when we checked earlier with the paper strip how much pressure the stock was putting on the barrel? If there was plenty of pressure under the barrel from the stock when you checked it previously then use some sort of clamp to clamp the barrel into the barrel channel when the epoxy is there. So it pushes it out from underneath and displaces it to the sides. If you had good pressure there before then all you are doing is putting epoxy on the sides so the barrel is held tight laterally. If there was not enough pressure under the barrel when we checked earlier then when the epoxy is there do NOT clamp the barrel down in the barrel channel. In this way we will provide both lateral stability and allow the epoxy to provide underneath support also, OK? Now before you do any of this epoxy stuff you need to prep the barreled action and trigger guard. With the heavy grease smear a light coating on the receiver in every possible spot that epoxy might come in contact with, OK?
Then do the same with the trigger guard and the screws. Be sure to get grease into the threads of the screws and the receiver and in to the inside of the metal sleeve that you previously glued into the stock. Ok, I think we might be ready to do the dirty deed. Now with the stock mounted in some type of holding device carefully lower the barreled action into the stock while pushing down and rearward. When in the stock hold it all together and then push the trigger guard into the stock. Now put the screws in and torque. But before you completely torque the screws just as before with your mallet tap on the muzzle to make sure the recoil lug is against the recoil pad of the stock. Clamp the barrel at the forearm if that is what you need to do as we talked about earlier. Be sure to clamp stright down into the stock if you do this. Oh, one thing I missed is that in the exposed areas of the stock that are visable that epoxy might ooz out at, very carefully smear a very light coat of grease on the wood in those spots but be carefull not to get grease in the areas where the epoxy needs to contact. This will makes for easy finish when you are trimming the squeezed out epoxy off later. Are you still with me? Now go to bed. Let it set up for 24 hours. Now comes the fruit of your labor. Loosen and remove the screws. With a wooden dowel and mallet carefully knock the trigger guard out the bottom of the stock through the magazine well of the receiver. Then support the stock and carefully with your dowel and mallet knock the receiver from the bottom in the magazine well area out the top of the stock. Do not try to pull it lose by grabbing the barrel and forearm and pulling apart. When you get it apart wipe off the grease. Inspect your work. Trim off the excess epoxy where it obviously needs to come off and from the areas of the front screw hole in the stock, the magazine well and possibly in the trigger hole in the stock. Having done that now fit the receiver back into the stock. You will find a fit that is almost bordering on a religious experience. At this point you do not want to take it apart more than necessary because each time it's taken apart the fit becomes slightly looser. So do whatever else you need to do so that you put it together only once. So don't forget to slide the barrel band back on before final assembly. Not that anyone would forget to do that
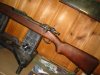
Now you can deal with the hand guard
Look at the hand guard, it has two clips. These are spring steel. Make sure they are seated in the hand guard as far as they will be allowed. Meaning so the sides sit in the little cut-outs as far as possible. Then take your paper strip again and in the same fashion place the paper strip under the clips and place the handguard in place and hold down and see how tight it holds the paper in place. If it was like the pressure we wanted under the barrel then you are good to go. But I think without any type of help it will be a bit loose. If that is the case you need to find a material that you can place under the clips. What I have found works rather well is Velcro. You know the kind you can buy at the hardware store that has adhesive backing. The felt side I cut a square that I adhere to the clips in the handguard. Pretty simple.
Please pardon my grammar faux paus.
I hope this is enough of an elaboration.