Those were made in rather primitive conditions. I'm just now nearing the end of 2 1/2 years of renos to my new retirement house and the workshop areas are the last to be done. So the only tools I had to make those scales were hand tools and my drill press which just happens to be at the edge of the moutainous pile in my garage.
There is no reason at all why I could not have done these completely with handtools though. The drill press was only used to drill the pin holes and screw holes in the wood for the alignment pin at the base and to accept the bushings for the screw. Both jobs could have been done with a hand drill and stop collars on the drill bit to limit the depth.
The shapes were cut slightly oversize with a coping saw other than the butt end which was left a few inches long so that I could hold the wood safely in my metal working vise for shaping. Once done the butt ends were cut off and shaped.
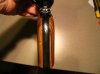
The critical parts are the square corner that fits into the frame up by the trigger guard and the alignment pin hole. I first fine tuned the upper corner with sandpaper on a block and then pushed out and used the pin hole in the frame as a guide to drill the hole for the alignment pin. If doing this with a hand drill it would be wise to sacrifice the drill bit by stoning the sharp spiral edges starting from just behind the tip and on up to dull the edge and avoid cutting into the metal of the frame.
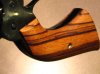
With these key alignment points done I located the wood on the frame and with a very sharp pencil marked the margins. A basic coping saw was used to cut the rough shape and to carve away the outer corners to waste the lion's share of the wood. The wood was then shaped with a half round and 3/8 round coarse cut metal files that I use only for wood. By reserving them for wood only you get a great carving tool which cuts fast but not TOO fast.
Once down to nearly at the margin lines I switched to sandpaper wrapped around a stick to act like the files and checked the fit and angles of the grips on the gun both for fit to my hands and fit to the frame. When doing this it's best to work a smaller area down then move on to the next. Remove a little, check, remove a little more, check, etc.
So all in all it's fussy but not difficult work. Mostly it's about the small things and sneaking up on the shaping to get a good fit to your hand and to the frame of the gun.
You don't need to start with a blank of expensive wood either. In fact that's the LAST thing you want to do because it'll make you afraid to take off that last few strokes of wood for fear of going a "stroke too far". Instead buy a length of 1/2 x 4 hemlock or fir trim wood from the local lumberyard and do your first few sets with that to get in some practice and to play with the shapes that fit your hands the best.
Having at most a buck's worth of wood involved you can afford to be brave In fact work your first set down in stages from "they feel a little fat" to "that's too far" in stages with shooting sessions at each stage. This is the time to find out what both feels right and what works. Our hands can be fooled into accepting a fairly wide range of nice shapes that feel right. But the target will quickly tell us when the shape is truly right. And we simply don't know where that point is until we go a little too far.
At that point do up a second hemlock/fir set shaped to the optimum that you found.
With that second set on the gun for longer term testing you can go shopping for some nicer hardwood. By this time you're looking at your third set of scales and the methods and techniques should be pretty well practiced. And at that point I think you'll agree that it's one of the easier, if somewhat fussy, bits of wood working that anyone can do.
Hints for shaping if you have a go at this.... Most new wood workers for stuff like this tend to think "square". And square is certainly good where it's needed. But our hands are NOT square. So try to think "organic" so you achieve a nice flowing "ovality" to the grips where your hands tell you during the shaping.
Despite priding myself on being an "organic" thinker I was surprised that the scales on my guns came out looking rather flat and simple. But my hands don't lie to me.... much

and the shape shown works well for me. But there may be some room for improvement with a palm swell or heel recess. I'll have to try another set at some point. But there's no doubt that the basics of a fatter neck area and less flare at the butt works in the hand.
I've already got another set of grips in mind for my SBH. The ones shown solved the trigger guard bite but I find that my pinky extending down over the lower edge of the butt tends to get scraped hard by the edge during the recoil which leads to some discomfort. So my next set will have an extended butt that fills inward like to mirror image "L" shapes. The lower end will have a finger groove for my pinky along with a set back rest hook in the butt end extention for it to park around for consistency and comfort. And this trial set will be done in the "buck a set" hemlock wood for all the reasons mentioned already.
Hey, as long as you keep the sandpaper and files away from the gun itself ALL your risk is concentrated in that buck's worth of wood. So if it doesn't work or something goes badly simply sigh and start over with another buck's worth of wood.