junkyard cutlery

Status
Not open for further replies.

sakimoto

Member
Joined
Sep 5, 2005
Messages
44
This is my 5th attempt at making make-shift knives. I only have an angle grinder, hack saw and files plus lots of sand paper. I make them out of leaf springs that I straighten out with a sledge hammer. I try to keep the metal cool with water so the temper will not be lost. I am not a bladesmith but I would like to be. Maybe in the near future if my finances permits. This is just something I was messing around with in my backyard. Its better that just sitting and watching the tube! Maybe I can make something more pretty later on. :D
 

Attachments

  • P010309161924[1].JPG
    P010309161924[1].JPG
    96.2 KB · Views: 230
  • P010309162026[1].JPG
    P010309162026[1].JPG
    78.1 KB · Views: 225
  • P010709171946[1].JPG
    P010709171946[1].JPG
    82 KB · Views: 194
Good for you!

You'd have an easier time of it if you annealed the leaf springs and then ground them.

Ask Fuad and Stephen about primitive heat treat techniques or look up Tai Goo and his primitive methods.
 
Nice work there!

I do some primitive knifemaking myself, but I chose a different approach. Your approach is basically stock removal.

I use a charcoal forge and do the bulk of my work with hammer and anvil. I also commonly use bench grinders, angle grinders, files, etc. I don't aim for a polished look, but usually leave my blades "as forged" these days. Finish work has never been a passion of mine.

You'll find the steel easier to straighten/file if you anneal it as mentioned above. A simple way to do this would be to start up a charcoal grill, and place the steel in the middle of the coals. Be sure the coals are well lit, and the steel well buried. Leave the pile alone until it's burnt out and cooled without beeing hurried by wind/water/oil, etc. This will leave the steel soft enough to work. I've done this for threading tangs, ie on the dagger below.

Most leaf springs are 5160 or a similar steel. Being that my equipment is VERY crude, I use classical forge heat treating techniques as I would if it was simple 1080 steel, with decent results. That is, after forging, filing, grinding, etc. is complete, I heat the piece to a low red heat (magnet test useless on this steel, goes non-magnetic while quite black), quench in OIL NOT WATER, then draw temper per classical tempering, straw for small knives, blue for swords/daggers etc.

Here're a few of my own junk yard knives:

insheathbackLarge.jpg
frontLarge.jpg

daggeroutofsheath.jpg
100_3725Small.jpg


Knife005.jpg

scissors1.jpg

100_3715Small.jpg
100_3717Small.jpg
100_3588Medium.jpg
100_2742Small-2.jpg
100_2737Small-1.jpg

Hope you like'em!

J
 
WOW!!!

Man!! Those are nice!! How long did it take you to learn the forging methods. I know it's like an art, and I believe that you have to have a knack for it, but I could be wrong. Did you take lessons? Watch DVDs? Books? I tried the forging on and off for about 6 months and maybe I didnt give it enough time. You guys are right about the stock removal. It seems to be easier for me, but like I said I have only made about 5 of these junkyard blades. I use the leaf springs because the are already tempered and the steel is strong, and you guys are right about it being hard, but I use this method at this web site using a rail road track to make them straight. http://www.livesteelarmor.com/how/spgavl.html
It seems to work for me, and I try to keep the steel cool by keeping a spray bottle and a pail of water. I am presently working on a junkyard dagger that I will post as soon as I finish it. I really appreciate you information!! Any advice will be greatly appreciated. VERY NICE WORK!! Thanks all!!
Saki:D
 
You're chunk of RR rail can be used as an anvil for forging. Just cut your section, heat to red, allow to air cool hanging, then grind away. When done, heat to orange, quench in transmission fluid.
 
I will give it a whirl!

Thanks for the information. I will try that. Do I need to do anything else? I am really soaking up all this advice! Thanks all! Keep up the good work!
Saki:D
 
sakimoto, You sure have the ambitions part down.

Most of my work is done with old files and the older and rustier the better they are steel wise.

7X57chilmau has given you some very good info too. The thing about knife makers is probably no 2 men make and or use the same tooling. So everyone of them has their own ways.

It is a rare man who can hammer to a finished blade too.

So I use both a coal fired forge I try to burn charcoal in because I hate the sulfer stink 'coking' coal makes before the stink goes and you have a 'clean' fire.

Lets talk tooling because you need more. I suspect you will have many of what I list right now.

Keep an eye out for a real anvil, but you can use rail road track, and you can even have a section of some milled flat for not that much money. If I were going to do that I might select either a piece 12 inches long milled flat, and or combine about that much leaving the curved part alone.

Many shapes will have many uses, so that curved part will have it uses.

Collect old tools at yard sales.. This can be a cheaper way to come by odd tools that will lend to many things making a knives.

Get a bigger grinder than what you have when it comes to you. 8 inch or better is good.

Other heat sources are good too, like a old beat up wood stove that can sit in the weather and some fuel for it. This stove may need apx 6 feet of smoke stack to get a draft, and by leaving ashes in it, and sand if no ashes are available at first you have a tool that can anneal steels, or normalize them.

It can be the source of heat to harden and then temper too, the hardening being the easier of the two heatings than the tempering would be.

A 2x4 like size block of steel apx 12 inches long, or a section of railroad track you can place in the fire for tempering would be handy as well. This might be best with a ring about 4 inches across, so with a look made of a steel rod you can snag the hot block from the fire, and drop it in sand screamin hot.

Welders gloves are not very expensive. These are the very same things sold for wood stoves for much more money. Welders use these and burn them up faster, so that is where to buy these gloves.

A clear face shield to protect your eyes is a must have item, and when you are grinding you should be wearing it NOW. You loose your eyes and yer all done!

Hammers , pliers and when your ready tongs... A bucket of water.

Power drills and bits. Wire wheels mounted on a motor, able to take other wheels made of stone, and or rubberized abrasives.

Save plastic caps is assorted sizes, and these will prevent marring fancy wooden or antler grips when you drill holes in them and or soft metals as bolsters.

Wire cutters that are strong enough to cut a 8 penny common nail, or brazing rod, which I use as pins.

Wooden blocks to be made into custom forms and use with sand papers. A good hard glossey paper magazine wrapped in tape to become a round sand paper form.

A few cakes of bee's wax, boiled and un-boiled linseed oil. Masking tape.

A metal box made like old window boxes were once made for a quench tank.

It should be no less than 6 inches wide 8 inches deep in oil level, and about 2 feet long, and have a wooden cover, or a metal cover, to pul out any flame up and or to keep weather out of. (The last thing you want in the oil is water on the bottom.)

Never ever quench any tool steel to harden in water! If you do, there is a good chance you will crack the piece you just worked so hard to shape.

Water is for working a hardened piece as you work it, and not for much more. And or chilling a piece that is already soft.

Even with a oil quench you can expect to crack an occasional piece.. It just happens.

A magnet from some old speaker, and a small chain to hang it, mounted in such a way that you can dangle the magnet on a bright red hot blade in day light.

As many good working files as you can get and in every shape known to man in time. No less than a flat file, a round file and a 3 corner file. In time finer cuts of all of these as well.

The oil I try to get for quench baths is used canola oil from a restaurant. This smells more pleasing and may make you hungery. It has a higher flash point, so is less likey to flash when you quench.

A metal trash can with a lid for oily rags or you will get a fire from the rags called spontainous combustion when you are not looking for any fire!

Any kind of blower. Mine is a old rivet forge blower I can run by hand, but any motor you can run with a squirrel cage blower will work. You might want a varraible speed switch in line so you can controll the air blast..

That with a pile if sand and some fire bricks will make about any forge you want.

With the above and a wooden tray you can make a forge that will not soon burn up the wooden tray, odd as it seems.

A vise and the bigger a vise the better, and a way to mount it so it is stable.

Various padded jaws to fit that vise, as hard studded vise jaws are a tad too much for certain items. Alumium angle stock is one way, as is copper plates made of roofing copper mounted on wooden blocks can be another way, as well as wooden blocks coated with thicker leather. It all depends on what you are going to hold.

The only best thing about store bought is it come faster, so long as you have a bucket of money, and I don't.

I can take a old file and make a blade of it that will cut, hack and slash another old same file that has been annealed.

I may have skipt over some tooling as all of this is coming off the top of my head.. so sorry, and like I said there are no 2 men who work the same way.

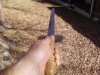
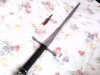
All but one are old files here, and the one that isn't is a old power hacksaw.
5a2b.jpg

Probably the next post will be more on How To my way... and stock to get.
 
I found the book "The Art of Blacksmithing" by Beale to be most helpful. It should be available at your local library, at least. Another smaller, but still usefull book was "Farm Blacksmithing", a reprint available thru Lee Valley.

I built my forge from flea market finds and junk, inspired by the design published by Tim Lively (Lively knives, google!). Tim also has some useful tips on getting started, tho I've found his design to have some drawbacks. My forge is large enough to properly heat treat blades up to 16", if I'm very careful to balance the fire.

Another great resource is the forum called Anvilfire.

My forge blower is a hand crank antique unit, I also have a bench vice, a huge anvil 250# (tho I started with an anvil made from RR track, 12" long, 25#, and it was serviceable). A few tongs, and a cheap bench grinder are about all I have for this work. Fewer tools don't limit what you can do, but do require you to stretch your imagination a little further to accomplish your task.

My setup is NOT fancy: (this photo predates a new anvil and some other improvements, but represents the forge that made many of those blades I posted).

S2020008Small.jpg

When forging, I wear simple leather work gloves, that fit well enough to be comfortable all day. For quite some time I didn't even do that, but had frequent blisters to show for it. My first successful knife (second attempted, 4th object forged) took me about 8 hours to turn out, and worked out OK.

hunterno1small.jpg

A blade like the 8" OAL hunting knife (on the green hobby board in my post above) takes me about 4 to 5 hours to forge (starting with a coil spring from an old Toyota in that case), an hour to sharpen to razor for the first time, an hour to make the sheath. That particular one was made with and for a co-worker on New Year's Eve. It dressed it's first hare on New Year's Day.

Ambition and some basic resourcefulness are your most important tools. That and some time. I believe when I started forgeing, at the time that first hunting knife was made, my costs were about $300 all-in.

You can learn to do this, it's not terribly hard. Basically, you just hit stuff where it doesn't look right until it does.

Good luck,

J
 
7X57chilmau, Forging with gloves On is a sin.. Heat treating to harden only a fool would not wear gloves..

odd huh?

But when you are forging a glove can become so hot your own sweat becomes stean and then there is no possible way to shake a glove free.

And so then at hardening time there is a possibilty of getting splashed with oil at or over 600 degrees, and a flash fire, so then you want gloves on.

I don't have hardly any pics of any of my work, as i wasn't into documtneting anything back then.

I made what I made and pretty soon it was all gone, and I made more.

............
Your forge is almost the same exact thing as mine, mounted in a square steel section.. I wonder how that happened? In fact if i didn't know where it was i would swear it was my forge! Mine has legs made of short srteel pipe to raise it a bit and when it is set up, which it isn't at the moment it rests in one of those orange fire places made of ceramic coated steel. Sum wicked ugly Mista' that thing is... :D

.................

sakimoto,
http://www.livesteelarmor.com/how.html as you can see I backed off to the main site and spent a great part of this afternoon reading that site.

For cold work I agree with most everything he says. I made truck spring packs as a lad, and I know what cold shaping a truck spring pack is and in circa early 20th century.

That type of stock comes long and straight, all the heat treating has been done. With a chalk you measue and cut the steel.

What cuts it in this time frame is a guillotine, which at the time I worked there was a big electric motor with a really big fly wheel. You started the guillotine and placed the steel sometimes 1/2I thick by 6 inches wide to where the cut would be and when the flywheel was at speed, stepped down on a bar. Then a big flat block slammed down on a offset table and cut off the steel spring stock cold.

If this were the main leaf then it needed eyes, and a big set of torches were used to heat up one end to bright orange hot, and you placed that part in a bender, which rolled most of the eye, but not all. Still while the steel was red hot, that eye was pl;aced on a big anvile and the worker (me) hammered the rest of the eye closed with a 4 pound steel mallet.

Then the other end got the same treatment.

Once that was cold it took two men, one to hold and the other to strike with a 8 pound sledge with a long handle. The man who held wore heavy gloves and padded them more with as many rags as he could, and the striker swung, hitting a heavy steel block hollowed in a larger "U" than you can make of railroad track.

So we hammered the curve into a new spring. That was the easy part, because each smaller leaf had to match the same curve..

A note of caution. In a spring pack still with a center bolt, when you cut the nut there is plenty of stored energy to be released.

It is a good idea to tie a wrap of most any cord around such a pack. You don't bind these tight, but wrap them loosely so when the pack pops the pack stays where it is. Placing a foot on the same side the nut is send the pack the other way.

On the other hand I do not agree that this steel is as hard as it can ever be, by any means. These springs are hardened and then tempered, often called 'Drawn'. You can anneal them, work them and harden them to glass hard, which most blade makes do one way or another.

Glass hard is so hard, that if a knife were left this way and was dropped on a rock it would shatter just like glass.

Working hardened and tempered steel is very hard to do in terms of long labor. Annealed and or normalized steel is still plenty hard enough to work too.

Working hard steel is harder on tools than it has to be, and so I don't wholley agree with working cold, and what he says about these cold steel parts being as hard as they ever will be.
 
MacMac, it's such an easy way to make a forge, there's no wonder yours and mine are plenty alike....

Mine's a 12x18x8" galv. steel box, with deep notches cut in the ends. 1-1/4" steel pipe, slotted for about 14" down the middle laid in the slots, and refractory cement cast in a dish inside the box. A flange for cleaning the air pipe at one end, and a blower at the other.

Springs are tempered nowhere near as hard as a knife wants to be to hold a real edge. Springs are tempered to be good springs!

Classic carbon steels were relatively simple to harden and temper in the forge. While even better results can be achieved with the high carbon varieties with more elaborate heat treating techniques, the basic idea was to heat the steal above it's critical temperature (which is near the temperature where plain carbon steels become non-magnetic.... This is not so for spring steels!), generally a low red heat, hotter than cherry, cooler than orange, as judged in the shade (sun makes the glow look redder, duller). The piece is quickly plunged into water, brine or oil (oil is safest, but water or brine will cool the piece faster, make it harder... and risk warping/shattering it). Piece should be held so both sides are cooled equally, to avoid warping. Whole lotta swirlin'. Smoke begins to clear.

The knife is now very hard. Brittle. Fragile, but oh what an edge it would hold.... Useless, tho, so brittle. So we have to temper it.

Classic carbon steels are tempered by simply gently re-heating the steel to a specific temperature, under about 550F, for the hardness/toughness you want. It's a trade off, harder is brittle, tougher is softer. Judging the temperature is helped by the oxide layer that forms on the freshly cleaned steel (I usually wire brush it clean).

The colors vary from pale yellow which would make a fine razor blade, great edge, but fragile, to dark yellow, great for utility knives, to blues, where springs and swords live. Leaf springs, as is, are a decent temper for stock reduced swords, daggers and fighting knives. Not so much for the EDC knife... Here's a color chart from Anvilfire....

http://www.anvilfire.com/index.php?...per Colors and Steel Hardness : anvilfire.com

I find when using spring steels, I have to draw a shade or 2 less temper than I do for 1085 to get similar edge holding. Where 1085 gets a straw yellow, 5160 gets pale yellow. Purple instead of true blue.... 5160 is plenty tough anyway. Pale yellow holds a polished, hair popping edge just wonderfully.

The beauty of forge tempering as opposed to oven tempering, is I can draw different tempers on different areas of my blades....

On a hunting knife, for instance, by moving the blade around in the fire while tempering, I draw the handle/tang, spine and point to a purple-blue color, making the blade springy and resilient, perfect for piercing, light prying (knives are not prybars), popping joints while skinning small game. I keep the belly and main edge a bit cooler, however, drawing it to straw yellow at it's lightest in the belly sweetspot, where a really sharp edge is needed for skinning. And a dark yellow to brown at the heel of the blade where heavy cuts can be made... Fun stuff.

I've babbled enough. I barely need an excuse to talk about this stuff....
:D

J
 
Last edited:
7X57chilmau,

Outstanding work! You'd like the neo-tribal smith crowd a lot.

Between you and Sakimoto and Macmac and all the other new and experienced makers we've had come in we're doing very well having members that can make a tool or weapon out of basic materials.
 
Excellent Advice!

I want to thank all you guys for your advice! I will take it all to heart.
I will also try the forging again. Thanks for the pictures and the ideas. It has help me out alot. I will also try to post more pictures of my set up in the furture.
Best regards,
Sakimoto:D
 
MacMac those are impressives blades and several appear to be 'period correct'. I have made some knives - the ones I carry mostly including my favorite 'Bowie' style with antler grip and 8" blade.
if you can find the old air-cooled VW rear suspension springs are flat and about the right thickness to begin makeing larger blades out of.
 
Since I am a Buck Skinner, there is some interest in showing the blade was a file. So somewhere a part of the teeth the file had will show on my work. The buyers want that little portion to show it was a a file because that was how a knife was proved in earlier times.

So most of the time I have no idea what the steel is. No factory is going to tell you what they use. I found out of all things that the steel straps on a phone pole that lond a wood cross bean is 'priority' as well, when I made a queery.

They simply would not tell me what the type of steel was.

So it was off to find out my old ways. The first thing I did was toss the stell in a brush pile fire, as Ineeded to get rid of a fair amount of slash. This burned off the heavy galvi coating and left me a fair distance away from the fumes, with the heat carrying any toxins away from me.

When the steel had cooled I wire wheeled it, and then took a edge to the stones, where I shot dull short sparks showing it was a milder steel than I was hoping for. It was fit for gurads and pomels, and items like that pretty much.

I made a stock removal Atlatal point, and tried to harden it full, via magnet method. When that was quenched I cleaned it up some and ran a file over thew work and it filed fairly easy, but had hardened somewhat.

For this type of service as a point on a 6 foot lance/dart it worked out pretty well at full hard. The point could hit ricks and get a ragged edge, but not break, and it did resist bending, and so to me it was a pretty good point for the job. I don't hunt with the atlatal, and so it is like a bigger set of darts a game like tossin hawks into a stump target.

So I made more points like that one and some were sold.

7X57chilmau, I can see you do what ever you need to do.. That works for me.. My hopes are to keep sakimoto in the loop.

There is all sorts of tips you and I can lend to him.

One might be with Magnetic hardening the quench can be a partial dip and no where near to cool, just to chill the cutting edge and leave a spine plenty hot, quenching several time and each dip a bit deeper..

And Yes I quench horizontal..

Some times I triple temper polishing between tempers.

The double edge blade you show above shows that the last quench anyway for that particular piece was allowed to boil and gas out in the oil and that you for what ever reasons didn't wiggle the blade to force the gasses off of it.

I suspect this was done for decorative reasons, or perhaps you get like me and plain ol' fergit...:D

The good thing is there is always some way to skin cats...

I also work in what I think is W-1 as horse shoe rasps.. I understand thew cutters should be revoned for strenght, but i just can't bring myself to do it, and so instead hea them up and pound them down into the work and get a scale pattern for the effort. These are 1/4 thick to start with and so unless someone is extream, not many people can break one.

That stuff goes to glass hard easy and once i got hurt after dropping a piece glas hard. The whole thing shattered and a sliver got me!

I have ruined my fair shar of steel, and probably that was cracked.

I have plenty to learn too, like the lesser than heats, but I don't know how I would tell when I had a steel like 1085.

How do you know what you have unless you bought it new?

The files I get come from ski tuning shops, and small engine, or machine shops as trash. I prefer the old yard sale files better, and these are best is rural farm areas where you can guess maybe the steel is older yet.

I like to do decoritive file working, and almost as much forging shepards hooks on the grip end of a file.

It is easy and yet has a sort of complicated look. When you tell someone you moved the tang over the reaction is pricless, and it is getting more so these days when so many jobs are dealing in paper text, rather than bending steel, or forming wood.

I kinda look stupid too, :D so it is more of a surprise to folks who don't know me, that I can do something they didn't think was possible.

I need to get what more pics I can of the little that is left. My wife had the fore site to demand a few pieces for her, other wise I would have sold them all.

The only real keeper to me was a blade I broke in the full hard quench. It cracked in 3 places and i got a mite pissed, and threw it in the corner where the trash was.

The tip came zinging back to land at my feet, and I took another look at just that little bit and was able to forge it again with a tiny shepards hook, and make a knife apx 1.5 long over all. That one lives tied to a ribbon in the hem of my Balmora Bonnet. It is a sewwing tool pretty much as it will slice elk neck with ease..


sakimoto, right now what I am hoping for is to ease the work, and get you to anneal the steel which will then 'stock remove' faster, and allow any decorative file work you might want to try easier.

I do both rough forging and combine stock removal to get what I want. I am no master, but my work works and seems to sell ok when I have any, so I guess it looks pretty good too....
 
Micmac,

That double-edged blade was an early work.... It actually isn't quench markings on the blade. At the time, managing my fire was a difficult thing for me, and this was the largest object I'd attempted to forge. I was having difficulty achieving a good even heat for hardening the blade, and ended up over-blowing the fire for some time. The free oxygen in the fire etched those "water markings" into the blade. They stand about 1/4mm deep. They're present on all my early work, and none of my later stuff, once I learned how LITTLE air is really required to make ALOT of heat.

Some of my stock I do purchase new. Many of those little knives I posted, like the pair in the palm of my hand, are forged from 1/4" music wire, essentially 1085 plain carbon steel. Available at hobby shops, it's a good challenge to be able to make a sizeable blade outa stock that small.

Most old leaf springs and coil springs from vehicles are 5160 or very similar steel. It's a chrome-carbon steel, very tough, easily worked in a forge. A favorite of mine.

Spark testing tells ALOT about what steel you have. Observing the life of the sparks off the wheel, their color, where they burst, if they do, etc. gives alot of clues to the composition of the metal. That's what I often go by.

I've made some nice spear points (socketed spear heads, roughly Norman/Anglo-Saxon style) from RR spikes. RR spikes with "HC" stamped on their heads are 1040 steel, just enough carbon to be "hard enough" with just a quench, no tempering. My best ones end up about 13" OAL, with 7 or 8" of that being socket. Nice leaf blade is my favorite topping. Stick'em on a 1-1/8" dowel, and you've a fearsom weapon. My own will penetrate 3/4" plywood with a good thrust. Porcupines don't seem to exist to it.....

Anyway, I'm babbling again.... Too bad it's -33C out here today, I'll not be firing the forge till it warms up again....

Take care,

J
 
I hear ya -24 here early moring and it never went over +9, and is on the way back down.

I understand smaller metals hold lesser heats, and cool faster for it.

You have more hands on than I do as far as forging goes. I can tell by what I see that is true. Also I have been away from making knives for several years.

There are many reasons for that, not just one, but I this Spring I hope to start with it again.

Being a country dweller it isn't wise tp pull all ones eggs in the same basket. One part of why i stopped was the time it took to build a knife and sheath was a bit more than i could justify, and so I lost money, while my work was popular.

That and below a basic price for a knive I had nothing else to sell.

In a round about way that lead to something called Trade Silver, and now with silver hitting the roof that idea went out the window too.

I hadn't changed any pricing since the early 90s, and at these new prices i am unsure of my market.

That is Buck Skinners and historical re-enactors... Not amoungst the most wealthy of peoples see?
 
MacMac,

I've never sold a piece in my life.... Been at this a half dozen times a year for 3 years now... I'm just a guy with too many hobbies....

Mostly I just run the forge a dozen or so times a year, usually when a friend is visiting. We make whatever catches our fancy for the day, and usually the friend takes the piece home when we're done. Sometimes they bring me charcoal to feed the forge, but whatever. A little music wire knife takes 2 hours or so to forge, a large hunter 4 or 5 hours.... Last friend to drop by got a hunter, the one before we made flint/steel and charcloth tinderboxes... Forged the steel, scavenged for flint by the city harbour....

Running it for a full day costs only about $15 in charcoal.... Had good results with Royal Oak natural lump (not briquettes, they have green sawdust and sand in them to slow their burn rate... Not what we want). I've got a bag of Pennsylvania coal in the shed to try next time I fire up...

To me, this is a fun hobby... Along with RC aircraft, astronomy, airguns, hunting, woodworking, small engine repair, DIY, 20 month old daughter...

Jack of all trades, master-o-none,

Stay warm. -27C right now, dropping fast. House says *pop* *BANG*

J
 
Last edited:
You guys just gave me a tremendous amount of information, when (not if) my left hand starts working again, I am gonna give this a try
 
7X57chilmau ,

If it ain't any too much trouble call me plain ol' MAC..... I am only macmac since most everywhere mac is used already.

At times I have used Mac_Muz because I shoot flinters and they are muzzeloaders.

Trying to break this habit I have tried to log on at other places as King William Three Coons, but most places say that is too long and so I go to William Three Coons :D

See my real first name is Bill... I do Ron Dee Voo! And so there will be a bunch of guys all named Bill and nearly all of us are near to deaf.. Some good lookin gal will call out 'Oh Dear!!!! Bill, and as a group we all say WHAT ! :what:

Se we sat and thought, while 'tippin' the jug and came up with otyher names... I became Mac. Another became Billy Mac, yet another became Wild Macy Bill, and so on for about 40 of us Buck Skinners...

25 years ago is a long time and we are old grizzes these days called Grey Beards.. but we were Green back then

So it would be remarkable if I could just convey that I am Mac... nuthin' more than just ol me, a long hair country hick.

That Mic-Mac had me in fits of howling..

In the 20th and now this 21st century all I have is motorcycles. What else is there beside good black powder guns and motorcycles?

Thar's no savin this here post to be on topic, so in a day or so I will make it go away as best I can.... That 'MC' bit is just to show I have a bit thicker skin anyway... Don't much care what folks call me so long as it ain't late ta' dinner'.
 
7X57chilmau , Of what do you make steel stikers of? I have always used files.

And you can't know how upset I am the secret of finding flint at the harbor is out and turned loose! I do that along the coast of NH and Maine. I find both Yunquiese Flint and Francee' if I get lucky.

I have no idea where you are so my best guess is you find black flint whjich of course in Yangweish.

Now I am horsin around and mis spelling English, but it is historically accurate and about has 1,001 spellings since the French told the Natives who told more Natives, and all of them had different accents.. and directly where Yankee comes from..

A fire steel is useless with out a flint of some sort, so my play in words is valid to the topic.

As to selling any I didn't start out that way. I had a small family now History as I am re-married. But in my eary days of Voo i couldn't take dollars from my family to support a hobby. So I made my garb by hand.. I made every iten I could and made up kits of other things as i could slowly afford them.

I made a few blades to use in pre 1840 life and found other people wanted blades like them, so I made more.

I tried making for sale many things.. Some worked out ok and others didn't, and some I just didn't like making.

It turned out my pot hooks were better than about anyone elses for 'Trecker's' Far lighter and as strong as any trecker ever would need.
So I left off with fire sets as too heavy, and in their place made a folding trivet as a light weight kitchen tool, and assorted other more trecker like kitchen tools..

That led to blanket pins in steel, then copper and some brass. Which led to bigger hooks that wind on to a line of pre hung rope to hold a long gun in camp. A type of hook that would not fall off the line it was wound on too.

This looks like a bigger pot hook half and a the rest looks like a over large cork screw at 90 degreees to the hook.

To get the idea you need a cork screw and a little twine. Tie the twine to two things pretty tight, and screw the cork screw on to the twine with out moving the twine from where it is tied. Then just imagine a hook is a part of the rest all one piece.

I found in 'camp' having things to trade all made by hand was more interesting than just selling items for cash, and with my own hand made items i could trade for other people hand made items, and either add or take some cash too, at times.

Another thing I learned was i might have a item someone wanted, and yet another man would have something i wanted and he the 3rd man would want what the 1st man had and a 3 way trade was some great fun.

I almost recall, I said almost, because the trade involved a little something called Apple Jack, and at the time I had no idea what it was other than dammned good stuff..

I had no idea that stuff could effect the way a man walks, or even that it could effect the way a man stands up , that is until I did.. I went up ok, and even took a step ok and then it all went plain wrong!

I have no clue what happened after that other than what ever it was it wasn't pretty. I ended up covered in mud. :D

No idea what I traded but I did end up with 3 bottles un-opened too.....

I had the idea it would go good with breakfast since I like apple juice.. This was really a honest mistake at that time.

I think this goes under forging ideas for hitchen wares.......RIGHT? :confused:

You have a 20 month old daughter? Why you no good ol' grey beard scoundrel you! N' heya; I took ya for a mountian man... I have no idea why, but I think of everyone on these boards as old grey beards, and as crusty as this heya' ol chil is... You mean ta' say you ain't? My son is 28 and has his own son in the oven right now!

-27'C' ???? Whar in jumping blue blazes are you? Even most Cdn folks still use 'F' when they say how cold it is, and you still find flint... hmmm

Don't mind me I get confused easy. :D
 
Thar's no savin this here post to be on topic, so in a day or so I will make it go away as best I can....

I wouldn't worry about it. Though I have the idea you don't worry too much about stuff, which is a good policy in general. :)

John

Mm...Apple Jack
 
Sorry for spillin' the beans, Mac. Where there were British ships, there be flint... I'm near Saint John, NB, Canada...

Get fist sized pieces of anything from half-dark almost flint chert that works pretty darn well, down to chert that flakes roughly and really sucks. And a few pieces half that size of beautiful smooth charcoal colored stuff that holds the best edge.

IMG_1581Small.jpg
^^^^^Before the wire wheel.....


The box I found at the dollar store, used to be Ozzy Ozborne bubblegum :uhoh:, some jute twine pieces ($1.77/100', Wallyworld), some charcloth made from flannel the wife had in her sewing closet, and some harbour flint shards....

100_3701Small.jpg
100_3705Small.jpg

I forge the strike-a-lights from music wire, 1/4". Nice light hiking steels. Oil quench, then temper, the last inch or so on each end to brown/purple and the striking area to light straw at softest.... Not quite as sparky as the only professionally made one I've ever seen, which I think came from track of the wolf... Probably 80% as good, but plenty adequate for this amature to have flame in 15 secs.... Most times.... :uhoh::banghead::D

I'm a few years older than your son, not many. No grey hairs yet, but she's workin' on em :). Saw flint and steel for the first time in my life 3 months ago, had to have one....

J
 
More junkyard cutlery

I really appreciate the advice guys. You all should give a tutorial on the wooden sheaths and how to get the shape and patterns on the blade. I would be the first to buy the DVD or the book!!!! I made a junkyard dagger, and I also included a better picture of the leaf spring sword. I still got alot to learn especially the forging part. For fun I added a Gaffi Stick that I made for a halloween costume. It is fake but it looks real and I fooled alot of people with it. Thanks again for the advice and the pictures.
Best regards,
Sakimoto
 

Attachments

  • dolly dagger.JPG
    dolly dagger.JPG
    112.8 KB · Views: 26
  • gaffi.JPG
    gaffi.JPG
    99 KB · Views: 38
  • sword on the bed.JPG
    sword on the bed.JPG
    49.8 KB · Views: 30
Status
Not open for further replies.
Back
Top