13/64-24 Die - Source

Johnm1

Member
Joined
Feb 24, 2008
Messages
1,881
Location
Mesa, AZ
In a rather long thread regarding a Queen Anne turn off pistol I am trying to restore the top jaw screw that is stripped. I now have an impression of a functional screw that I may be able to measure a casting from. But the screw the impression was cast from aside from being very small is also over 200 years old and may not provide enough information to absolutely determine the thread diameters and shape. The latest the screw could have been made is 1815. Earlier the Whitworth standards. This screw would have been made to the gunsmith's standard. Whatever that was.

I am certain the major diameter is very close to 13/64" as a #10 screw is too small and a #12 screw is too big. Using wood dowel in the bottom of the jaw I am certain it is 24 TPI. If it's different it isnt measurable. But the wood is too soft to rely on the impression to confirm the depth oh the minor dimension or angle or shape of the thread. Every attempt to get an impression from the bottom jaw with a stiffer material has failed.

I suspect that once done with casting from the impression have now I will still not know for sure the actual diameters or thread angle or shape. I may very well be left with rethreading to a modern thread. 13/64-24 certainly isn't modern and likely obsolete, but it is going to be the closest to what is actually in the screw now. 13/64-24 isn't available on the internet but maybe someone here has a source of obsolete tap and dies.

I could rethread to a modern 12-24 but would prefer to remain as close to the original as possible. Although I haven't figured out how, I'd love to be able to build up the original screw to fit the thread instead of making/using a modern top jaw screw. Welding material onto a 200 year old screw is hit or miss according to my local gunsmith.

Here is a link to the original thread. It is long and address' many topics. It's a fun read if you have a lot of time.

https://www.thehighroad.org/index.p...-own-queen-anne-turn-off-pistol.889724/page-4


And at least @Big Bore 44 has seen it in an old manual.

Just looking in my old lathe manual, there is a 13/64 X 24tpi listed. Major dia.(o.d.) is listed as .2031" Minor dia (inside of cock) should be around .1490" (wear may cause slightly bigger measurement.)
 
I don't have much experience with older guns, but the little I have taught me that even screws that were nominally the same size... were not. They were hand made by the gunsmith as the gun was being built with varying degrees of consistency in thread diameter and pitch.
Some options -
1. Make a casting of the screw hole with moldable plastic. There are various brands on Amazon. Here's some that I've used. - Moldable Plastic Thermoplastic Beads 8OZ (amazon.com) . I've used it to make a reverse impression of some small machined areas on a gun, but not a screw hole, so no guarantee that it will work for that.
A link to more brands/varieties - Amazon.com : moldable plastic I was originally looking for this specific brand based on a recommendation here or on another site - Amazon.com: InstaMorph Reusable Moldable Plastic | Thermoplastic Beads, Meltable Polymorph Pellets | Lightweight Modeling Compound For DIY Crafts, Sculpting, Cosplay Accessories | Temporarily Repair | White, 12oz , but it was and remains out of stock.
2. Make a holding fixture for a #2 x24 screw and chase the threads down to size in the lathe.
 
Offer is still open. Send me the original, and the cock, and I'll whip one out.

That would entail disassembling the lock works. Something I am not likely to do. Although I possess the spring compression tool, I am deathly afraid of the over compression of a 200 year old spring required for disassembly. But thanks for the offer. Again.

Currently I'm turning down a 12-24 top jaw screw just to see how close it would fit. Doing it by hand, so it'll take a little while.
 
You need to find a machinist or gun smith that you can take the gun too and have them turn a custom screw on their lathe. With female threads present the lathe operator can cut a screw and custom fit it to the hole it must go into. Once the thread pitch is determined (which you have already done) they can start slightly oversize and slow work the pitch diameter down until it threads in correctly. They can even grind a custom thread tool if the thread profile is not a standard 60 degree thread we use now.
 
  • Like
Reactions: beag_nut and Johnm1
If it's a British/Whitworth screw it highly possibility the thread pitch is going to be 50° not the std 60° we have here.

Not Whitworth thread. Whitworth thread was devised and specified by Joseph Whitworth in 1841. Though I'm beginning to think that it might be a 50 degree thread. A 10-24 threads in but is loose. The threads are close enough that the 10-24 screw has to be unscrewed to remove it. If the female threads are 50 degree and the 10-24 threads are 60 degree that could explain the looseness. A different diameter would also explain it. The screw was made in Birmingham between 1776 and 1815. Probably in the late 1790's.


Not yet. I'd need to be able to describe the thread accurately. I had hoped the impression would help me do that. But I'm not sure it will. The condition of each of the samples I've seen are less than pristine. And I haven't figured out how to measure the thread pitch (as blue68f100 calls it). The actual angle of the shape of the thread from base to point. If I can't accurately figure out what it is I might as well rethread to modern standards. I'd rather not do that though. I was hoping there was a source for a 13/64-24 not so I could buy it but to see the specifications of it.

You need to find a machinist or gun smith that you can take the gun too and have them turn a custom screw on their lathe. With female threads present the lathe operator can cut a screw and custom fit it to the hole it must go into. Once the thread pitch is determined (which you have already done) they can start slightly oversize and slow work the pitch diameter down until it threads in correctly. They can even grind a custom thread tool if the thread profile is not a standard 60 degree thread we use now.

@Jackrabbit1957 has offered to help me do just this but I was hoping to get more information from the impression before we tried that. I think it is going to come down to the angle of the threads. 50 vs 60 degrees.

In the end I'd like to keep the thread in the bottom of the jaw untouched and fit a screw to that. Im not trying to make this harder than it needs to be. But I'm also not in a rush. The pistol is functional if I use the 10-24 replacement top jaw screw as long as I wrap it with teflon tape. So before I suck up a machinists time or the expense of a custom die I want to try and understand all I can first.
 
That is a pretty cool looking piece. Do you still shoot it?

Its hard to see clearly but it appears the threads near the head of the damaged screw looks in better shape I assume you have tried to take measurements off of that?

For casting the female threads in the hammer have you tried Cerrosafe? It is a very low temperature metal that can be melted with a hot hair dry or head gun (melts at only ~190F) The trick would be getting the casting out after pouring. You would have to clean the threaded hole well and lubricate it. I would then cast it with the end of screw driver partially in the hole to help extraction. Given the low melting temperature if the casting fails you can gently melt it out of the hammer without damage.

Good luck!
 
  • Like
Reactions: Johnm1
That is a pretty cool looking piece. Do you still shoot it?

Absolutely I do. This link should get you to a short video.

https://photos.app.goo.gl/WSioUnRcbdnL2d98A


Its hard to see clearly but it appears the threads near the head of the damaged screw looks in better shape I assume you have tried to take measurements off of that?

Your observation is correct. Unfortunately before I realized that I was dealing with a unique thread I chased it with a 10-24 die. So I can’t rely on anything I measure on the screw.

For casting the female threads in the hammer have you tried Cerrosafe?

Although I was able to get a good enough impression to confirm 24 TPI with a wood dowel, it was not stable enough to reliably gather any more specific information on the thread dimensions. Every attempt to cast the female threads failed. There are only 2 or so threads in the lower/female threads and I was never able to remove the cast without destroying it.
 
How about casting inside the hole and unthreading it?

Tried that. I wasn't able to remove the cast without destroying it. The cast is tiny. I estimate there are only two threads in the bottom of the jaw/cock and it is only 3/16" in diameter.

I bought some steel stick. Some type of steel reinforced epoxy. The thought is to fill the threads of a 10-24 screw and screw it into the female side hoping to get a decent impression. I've tried once unsuccessfully but it shows promise and I'll try again. There is some timing involved.
 
These eye bolts are 7/32"-24 . Maybe turn down the major diameter 0.015" to a 13/64" for fitment reference.

Screen Shot 2023-02-26 at 6.59.42 PM.png

Screen Shot 2023-02-27 at 5.55.39 AM.png
 
  • Like
Reactions: Johnm1
I think i would just tap it out to a modern thread, myself. No shame.

Although I’d rather not, I could live with a modern thread. The consideration one has to think of is the amount of material that would have to be removed for a new thread and it’s location. The mainspring is very strong and where the material being removed is not very thick. I have a concern about weakening the cock to where it might break.

I will exhaust every other option before I remove material. And in the end if that is the only option I may elect to do nothing. It can be displayed with the original screw and reliably fired with a #10-24 replacement screw wrapped with Teflon tape. Keeping with the mantra of “Do No Harm” I will err on the safe side.

The more I think of it, it may not be 13/64-24. It very well could be 3/16-24 but with a 50 or 55 degree angle on the threads. That might mean going from 3/16” (#10 or 0.1875” to 7/32-24 (#12 or 0.210). That might not seem like a lot, but this isn’t steel. At least not as we know steel.

I’m finally going to do the cast this afternoon. Although I don’t have the correct equipment to measure the threads I can view the cast at very high magnification to compare the shape of the old and new threads. Maybe I’ll be able to see the difference in angles of the threads. Maybe not.
 
Tapco will make you one. Tapcotaps.com.

Problem is, I don't knownwhat to tell them to build. If I could define it correctly, I'd spend the money on a custom die before I'd drill it out and tap it to a modern thread. The casting of the original from Houston is setting up as I write this. We will see.
 
An idea occurred to me. OP is looking for a die that is approximately 13/64-24 which as he has already said is very close to #12-24. An ideal 13/64-24 calculated using modern thread tolerances is only ~.013 inches smaller in diameter than standard #12-24.

15-670-000_04-10-18.jpg
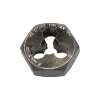
Inexpensive thread dies you get from Home Depot and similar are solid and most often hex in shape. Thay are primary for chasing damaged thread not necessarily for the best cutting new threads in raw material (all though they will do it).

Z3o67xqcpEx_.jpg
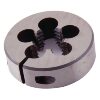
A proper thread cutting die usually used by a machinist is round in shape and they are often (not always) are split on one side so that machinist using the internal screw in the die and the screws on the die holder can make fine adjustments to the resulting threads diameter to make it slightly larger or smaller thread than nominal. It might be possible to take a #12-24 dies (preferable one made on a small die blank like 13/16" or 1" OD so that is it more flexible and adjust it down to the point were it cuts something approximating a 13/64-24 thread.

It might be worth a try.