My new Turkish made semi automatic is not cycling

Status
Not open for further replies.
No no no, it's new, it's a berika/fedarm semiautomatic self defense model, anything lighter than pheasant loads won't cycle anyway, I got a buddy that had problems with his cheap target loads. As we consulted over the phone, I suggested he grab his most powerful loads on hand (high brass 6 shot) and try again, he called back a few minutes later to inform me that he had hope again (he had started pretty downtrodden) as these loads cycled much better! A few months later we got together and he brought his shotgun, I threw him some #2s, slugs, and bb shot shells and she chewed through EVERYTHING beautifully. Those shotguns were designed to be abused with true stopping loads, I know you had a bad experience with the slugs but that was the best thing to do to that shotgun, I'd strongly suggest waiting until you can get to a different range. In the interim, break that puppy down, no need to disassemble the trigger or bolt assembly, just read the manual, take the barrel/action off the stock, and look for blatantly obvious rough spots on every metal piece you can see. First time I had to field strip a semi auto, it took 30 minutes with the manual. I understood what had to come off but nothing else. You can do it too.
Ultimately, a return trip to a place where you can test heavy shells with a better grip and stance will tell you plenty. Watching the light loads fail to cycle will tell you nothing, if you lived closer, I'd bring you along for some educational fun, both the field stripping and field testing should be approached with more grins and less frowns.
There are probably members here willing to assist, I don't know many folks on that side of the country and really, the only one that jumps to mind from here is @627PCFan . Perhaps you could start a new thread with "Shotgun lessons, Virginia?" in the title? Some new york hunters found a bunch of conversation with a similar thread awhile back, just a thought....
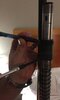
Is this similar to your shotgun?

No no no, it's new, it's a berika/fedarm semiautomatic self defense model, anything lighter than pheasant loads won't cycle anyway, I got a buddy that had problems with his cheap target loads. As we consulted over the phone, I suggested he grab his most powerful loads on hand (high brass 6 shot) and try again, he called back a few minutes later to inform me that he had hope again (he had started pretty downtrodden) as these loads cycled much better! A few months later we got together and he brought his shotgun, I threw him some #2s, slugs, and bb shot shells and she chewed through EVERYTHING beautifully. Those shotguns were designed to be abused with true stopping loads, I know you had a bad experience with the slugs but that was the best thing to do to that shotgun, I'd strongly suggest waiting until you can get to a different range. In the interim, break that puppy down, no need to disassemble the trigger or bolt assembly, just read the manual, take the barrel/action off the stock, and look for blatantly obvious rough spots on every metal piece you can see. First time I had to field strip a semi auto, it took 30 minutes with the manual. I understood what had to come off but nothing else. You can do it too.
Ultimately, a return trip to a place where you can test heavy shells with a better grip and stance will tell you plenty. Watching the light loads fail to cycle will tell you nothing, if you lived closer, I'd bring you along for some educational fun, both the field stripping and field testing should be approached with more grins and less frowns.
There are probably members here willing to assist, I don't know many folks on that side of the country and really, the only one that jumps to mind from here is @627PCFan . Perhaps you could start a new thread with "Shotgun lessons, Virginia?" in the title? Some new york hunters found a bunch of conversation with a similar thread awhile back, just a thought....
 
That is the only range I can find in Virginia close by until I return to New York. As you know I did try 23/4 and 3" high brass slugs at 1600 velocity. They are powerful but the gun constantly Jammed. The gun looks like the one swingmaster is showing, thank you. I will watch it. I am determined now to take it apart to see what is going on. In the mean time I was searching you tube and found this interesting video:
talking about the gas and O ring. They are easy to get to and replace. This is interesting and have to give credit where credit is due to the "Virginian" recommended by cdb1, who also told me to check the gas ring and the O ring. One thing for sure, I am going to have a busy weekend.

Correct that you tried the slugs, but trying something heavy again with a corrected stance might yield different results, where as light loads will likely just yield more frustration.
 
I am done with warranty and manufacturers. The question is if I should let the gunsmith check the gun for an $80 minimum fee or pick it up and try shooting it again with a tighter grip and cleaning it again.

These guns are not complicated. Watch the videos, take pictures of each step (or video) as you disassemble, and you should be fine.

I assume that means he is very popular/very good if he so busy.

Or it means there are few gunsmiths in your area.
 
Yes my gun looks exactly like this one. This is a good starter video. I can do this, I will do it. Thank you. Let me know if there is a part 2 to disassemble all the trigger parts.

Again, check your manual to see about removing the trigger assembly.

the trigger parts will come out as a sub-assembly, likely held in with a pin or two that run through the receiver. They’re all attached to a “trigger plate” and will come out of the gun as a chunk of parts. Take out the chunk, but don’t disassemble beyond that. You should be able to clean that with some solvent (doesnt need to be harsh), small brushes, a cloth, compressed air, and some oil.
 
From the manual:

9193CB46-5412-4801-8580-6DDC5DC90D2F.png

The trigger group should be cleaned as a unit, and then re-installed as part of reassembly. Follow the order prescribed in the manual.
 
...One thing for sure, I am going to have a busy weekend.
"Kitchen-table gunsmithing" can be time-consuming, but also: 1) fun, 2) interesting, 3) relaxing, 4) challenging, 5) frustrating.

Couple of hints I use to avoid #5: 1) document before & after for each part removed (a quick pic taken w/ phone or tablet) so you'll know where and how it goes back; 2) be prepared for parts under spring tension to launch themselves and their springs (if one does, find it before you do anything else, or the dog may eat it!!); 3) retain all the small screws, pins and other parts in a container so they're not lost (I also like to tape them to a card and label them), 4) don't force anything that doesn't want to move (it might be seized - which is a different matter, or it might not be intended to be removed in the way you're attempting), 5) not too proud to reference a YouTube video when I get stuck.

Good luck!!
 
Last edited:
"Kitchen-table gunsmithing" can be time-consuming, but also: 1) fun, 2) interesting, 3) relaxing, 4) challenging, 5) frustrating.

Couple of hints I use to avoid #5: 1) document before & after for each part removed (a quick pic taken w/ phone or tablet) so you'll know where and how it goes back; 2) be prepared for parts under spring tension to launch themselves and their springs (if one does, find it before you do anything else, or the dog may eat it!!); 3) retain all the small screws, pins and other parts in a container so they're not lost (I also like to tape them to a card and label them), 4) don't force anything that doesn't want to move (it might be seized - which is a different matter, or it might not be intended to be removed in the way you're attempting), 5) not too proud to reference a YouTube video when I get stuck.

Good luck!!
Thank you good advice
 
Dear Friends, I picked the gun today from gunsmith, took apart as the video you sent showed. I could not take all the way like the video because the bolt pin mechanism is different, so was not able to bull out the polt pin. I cleaned all the parts that I disassembled as in the attached photo.: IMG-1538.JPG IMG-1536.JPG IMG-1537.JPG
Now came the assembly part. Instead of taking 2 minutes like the disassembly, it took almost an hour along with almost part of my finger. Blood and all it was worth it. Here is why. I was sure I was putting everything back in the reverse order I took it apart. But as much as i tried, the barrel would not click back in position. Look at that plastic screw setting on the butt of the gun. I could swear I put back the way it was in the gun. But as much as I tried, the barrel would go in but does not quit click in. So finally after about an hour of trying to shove it in position and a bleeding finger, I decided to reverse the position of the screw, the barrel clicked in smoothly and I was done in 2 minutes. Pulling back the bolt now felt much smoother. Now it could be just the lubrication. I do not know. Unless I am mistaken, I think that screw was installed out of order when the gun was delivered. This may happen because the gun came as one piece with barrel on, while many guns are shipped in two pieces with barrel off. Tomorrow will be the test at the range. I am keeping my fingers crossed.
 
Glad you seem to have had success in disassembling and reassembling your gun. It really is a rewarding feeling to take apart a complex mechanism and put it back together. Best of luck at the range!
 
By “factory” I mean factory rep in Arkansas.

now that i read your post about how you are shooting it, I’m going to guess i may be on to something.

your shotgun has an action spring coiled over the magazine tube. Its job is to return the action bar to a ready position. I’m betting the action bar connects to the breech bolt and other parts inside the receiver-those parts must move backward, which drops the carrier and allows a shell to drop on to the carrier, and the carrier then presents it upward to the breech bolt. This also draws the empty hull out of the chamber and ejects it. Then these parts must move forward to pick up the new shell. When this happens the carrier moves down out of the way. The bolt has by that point picked up the shell off the carrier and shoves it into the chamber and locks to the barrel for the next shot.

if you do not have a firm mount to the shoulder, with the butt of the gun seated firmly (not loosely) into the pocket of the shoulder, then the recoil of the gun causes backward movement that is sort of equal to the backward movement of the breech bolt. This means the bolt can’t reach its end travel point because the end point is now moving backward with the bolt. The bolt will then try to return to battery without having completed its full travel path, causing a jam like the one you describe.

Shooters that are unfamiliar with long recoil style actions encounter this problem sometimes. Working on a more solid mount usually corrects this.
Truth. And it'll save you a tender shoulder after a box as well.
 
"but I am not confident to take it totally apart into little pieces, one mistake putting it back together and it could
lead to a dangerous situation"

Hopefully you learned that you didn't have to totally disassemble it down to every nut, bolt, washer, pin and spring. Just a basic field strip should reveal any obvious problems. Fore-end off, barrel removed, bolt out and trigger group dropped (but no further disassembly ). Perhaps with that little screw issue you discovered you will have diagnosed and fixed your problem. Keep us posted. Pictures are appreciated. Good luck.
 
Dear Friends, rain and all, I went to the range today. Good news, my gun worked beautifully cycling without a single Jam. I thank you all for your advice and help. Even though I was allowed to only use 12 gauge 71/2 shot, I am convinced it was never the type of shell, or the lubrication, or holding the gun. The gun was simply assembled improperly from the retailer. As the attached photo shows the piston O ring screw was in the lower position, below the piston rather than where it is now in the photo above the piston. The only thing that was holding the barrel in place was the upper cap. Lesson learned, make sure to field strip your gun and like one of you said, it should assemble back like jigsaw pieces. When I disassembled the gun, the barrel with the piston came off right after unscrewing the top cap then I unscrewed the O ring (I am not sure that is the right name for it). When I tried to do same when assembling, the barrel would not quit click in properly as much as I tried drawing blood in the process from the bolt action. That is when I decided to move the O ring screw above the piston rather than below and then the barrel clicked into position. I am happy now and glad I took your advice and picked the gun from the gunsmith.
Now my wife is happy and is not calling my gun, a hunk of junk any more, although she still calls my car that. I will drop my dispute against the
retailer, but I am still disappointed by their lack of any support whatsoever.:thumbup:
 

Attachments

  • IMG-1541.JPG
    IMG-1541.JPG
    51.4 KB · Views: 34
Glad it worked out for you, and it's good to know when a member has a problem with a manufacturer or dealer, it helps us to look out for bad customer service and support ... kind of like watching each other's backs, I suppose.
 
Status
Not open for further replies.
Back
Top