For about a decade now, I have really liked the Sunday Scabbard that was designed by one of the Captains in the Texas Rangers. The Rangers had been moving from the range into the big cities and the genteel population decided they did NOT want to see cartridge belts and holsters. Rather than have his men go unarmed, Captain Hughes took a serious look at what, in his opinion, was needed to carry a revolver. He took his ideas to about a dozen saddlers in and around Austin Texas. They all built what was to become known by the Rangers as the Sunday Scabbard and by today folks as the Brill. Built of lightweight leather with a half lining, the holster was meant to be worn under a vest or jacket on the then new trouser belt. The half lining was to protect the clothing, not the sidearm. A contoured welt along the seam, pressed against the frame of the handgun and forced it into the fold of the holster carrying it securely. No retreat strap was necessary if the welt were properly built. The closed toe was stitched to the fender of the holster and often a wedge was added at the stitch to kick the muzzle out and force the handle of the sidearm into the side of the wearer. These holsters were also built for specific handguns. A Sunday Scabbard built for a fixed sight N frame would not fit an N frame with adjustable sights.
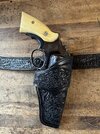
I have had a couple of leathersmiths try to make one for me. Most could make a decent copy of the Mexican loop but did not get the details that separated the ML from the Sunday Scabbard. I asked on several forums for someone to tackle the project. One fellow recently took up my challenge. Here is the holster he sent to me.
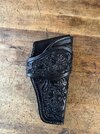
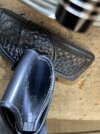
This image shows the welt stack. Mike skived the layers to provide a thinner welt.
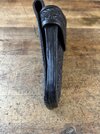
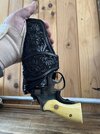
This is the back, showing the cuff attachment.
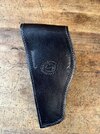
Here is the folded edge, showing how the belt loop is formed.
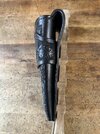
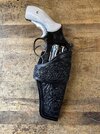
The toe, stitched to the fender. The wedge is present.
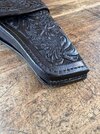
Mike has done a very respectable job considering it is his first attempt at this style of holster.
Kevin
I have had a couple of leathersmiths try to make one for me. Most could make a decent copy of the Mexican loop but did not get the details that separated the ML from the Sunday Scabbard. I asked on several forums for someone to tackle the project. One fellow recently took up my challenge. Here is the holster he sent to me.

This image shows the welt stack. Mike skived the layers to provide a thinner welt.

This is the back, showing the cuff attachment.

Here is the folded edge, showing how the belt loop is formed.

The toe, stitched to the fender. The wedge is present.

Mike has done a very respectable job considering it is his first attempt at this style of holster.
Kevin


