AR15 Recce Build - P1 - Upper

Status
Not open for further replies.
attachment.php

Carrier and key assembly into the upper. Brownells gauge is inside the carrier key.


attachment.php

Almost .. just needs to be tightened a scotch.


attachment.php

A scotch did it. Cool.


attachment.php

Larue spacer. Don't forget it needs to be on before the gas block is pinned ..
I almost forgot .. luckily, no pins had to be removed.


attachment.php

Gas block was placed on the barrel and eyeballed for pin alignment.
Gas-tube shown pushed in an extra bit, then 'rotated' widdershins to line up with the gas block gas-tube port.

Sold original doorknob to buy gas-tube. Replaced with cheaper "tactical" doorknob :eek:


.
 

Attachments

  • L1020577-60.JPG
    L1020577-60.JPG
    54.9 KB · Views: 411
  • L1020578-60.JPG
    L1020578-60.JPG
    39 KB · Views: 409
  • L1020583-60.JPG
    L1020583-60.JPG
    49.1 KB · Views: 409
  • L1020608-60.JPG
    L1020608-60.JPG
    63.3 KB · Views: 407
  • L1020624-60.JPG
    L1020624-60.JPG
    61.5 KB · Views: 408
Last edited:
attachment.php

Eyeballed.


attachment.php

Temporarily (no loctite) snugged up for tests.


attachment.php

Captured gas tube.


attachment.php

Off the block.


attachment.php

Charging handle clears with no drag.
Carrier and key assembly clears with no drag.
Shown is the whole shebang .. BCG and charging handle, together pass the test.
Yeah!
 

Attachments

  • L1020614-60.JPG
    L1020614-60.JPG
    48.8 KB · Views: 402
  • L1020616-60.JPG
    L1020616-60.JPG
    59 KB · Views: 399
  • L1020628-60.JPG
    L1020628-60.JPG
    59.9 KB · Views: 447
  • L1020629-60.JPG
    L1020629-60.JPG
    68.7 KB · Views: 394
  • L1020634-60.JPG
    L1020634-60.JPG
    70.9 KB · Views: 398
attachment.php

Driving in the gas block retaining pin .. gas block wanted to spin on the barrel axis, so I had to tighten the set screw a bit more. Once the pin got started in far enough, the block centered itself. Not shown, but I tested the BCG and charge handle (again) for gas-tube clearence :p


attachment.php

After satisfying my paranoia, I dripped o drop of blue loctite and snugged the set screw down.


attachment.php

Bip, bip. bip.


attachment.php

Tap, tap, tap.


attachment.php

Bling, bling, bling :D


.
 

Attachments

  • L1020619-60.JPG
    L1020619-60.JPG
    60.4 KB · Views: 394
  • L1020623-60.JPG
    L1020623-60.JPG
    60.5 KB · Views: 395
  • L1020638-60.JPG
    L1020638-60.JPG
    50 KB · Views: 395
  • L1020639-60.JPG
    L1020639-60.JPG
    47.1 KB · Views: 392
  • L1020640-60.JPG
    L1020640-60.JPG
    49.2 KB · Views: 396
Last edited:
attachment.php

Larue free float ready to install. Note the locating pins.
Once this opening is past the gas block, you can press the spacer onto the pins .. if you need to get the spacer off the pins (fairly tight fit), a bent paperclip works great.


attachment.php

Docking.
(Spacer installed inside of handguard, does not show in picture.)


attachment.php

Twisting the handguard toward me while tightening the handguard nut.


attachment.php

Craftsman 1/2" strap wrench (Sears item# 00945533000)


attachment.php

'Tis straight!


.
 

Attachments

  • L1020641-60.JPG
    L1020641-60.JPG
    50.1 KB · Views: 386
  • L1020643-60.JPG
    L1020643-60.JPG
    61 KB · Views: 386
  • L1020644-60.JPG
    L1020644-60.JPG
    57.2 KB · Views: 385
  • L1020647-60.JPG
    L1020647-60.JPG
    47.8 KB · Views: 385
  • L1020649-60.JPG
    L1020649-60.JPG
    61.6 KB · Views: 386
Last edited:
attachment.php

For the keeper lock-screws, the instructions say 25-30 in-lbs .. since I don't have a in-lb torque wrench, I'd estimate it was like picking up a half-gallon jug of water with tip of the index finger.
(Used blue loctite on screws)


attachment.php

Final lab test .. Colt field gauge.


attachment.php

Into the chamber it goes.


attachment.php

Pushed the rear of the BCG until the extractor popped over the case rim.


attachment.php

This is as far as it would go .. test passed :D


.
 

Attachments

  • L1020651-60.JPG
    L1020651-60.JPG
    74.8 KB · Views: 382
  • L1020653-60.JPG
    L1020653-60.JPG
    25.1 KB · Views: 382
  • L1020654-60.JPG
    L1020654-60.JPG
    38.9 KB · Views: 381
  • L1020656-60.JPG
    L1020656-60.JPG
    37.6 KB · Views: 381
  • L1020658-60.JPG
    L1020658-60.JPG
    31.9 KB · Views: 381
Last edited:
attachment.php

The completed upper and my favorite cleaning rag :p

Final specs:
The changes from the original specs are the standard F/A BCG rather than the enhanced and I went with the hK style front sight without noveske markings.


I'll get a pic or two up of the complete rig soon..

If there is interest, I'll post a range-report.


Good fun! :D
.
 

Attachments

  • L1020659-60.JPG
    L1020659-60.JPG
    66 KB · Views: 383
Great post Sylvan Forge - thanks for taking the time to share everything with us. Those Starret punches are top notch - you have to work really hard to break them (but it is possible :))

I am going to put this in the Reading Library so it doesn't get lost.
 
Thank you for the kind words Mr. Roberts. It's an honor to have this included in the library.

Before the Starretts were added to the toolbox, I had a haphazard collection of rather poor quality punches and half-broken punches .. I just couldn't bring myself to use any of them on this build.

Did I mention the Brownells roll-pin punches are pretty handy? I only needed to use two so far but they worked just fine.
 
Here's a few pics:

attachment.php


attachment.php


attachment.php


attachment.php


attachment.php
 

Attachments

  • L1020665-60.JPG
    L1020665-60.JPG
    65.5 KB · Views: 362
  • L1020676-60.JPG
    L1020676-60.JPG
    58.1 KB · Views: 361
  • L1020678-60.JPG
    L1020678-60.JPG
    64.4 KB · Views: 361
  • L1020680-60.JPG
    L1020680-60.JPG
    68.4 KB · Views: 357
  • L1020682-60.JPG
    L1020682-60.JPG
    67.6 KB · Views: 362
attachment.php


attachment.php


attachment.php


attachment.php


attachment.php
 

Attachments

  • L1020683-60.JPG
    L1020683-60.JPG
    59.9 KB · Views: 360
  • L1020684-60.JPG
    L1020684-60.JPG
    61.7 KB · Views: 359
  • novbbldet.JPG
    novbbldet.JPG
    61.5 KB · Views: 411
  • troybuiscu.JPG
    troybuiscu.JPG
    14.9 KB · Views: 358
  • troyspr1.JPG
    troyspr1.JPG
    5.9 KB · Views: 357
nice build thread.

i enjoyed it very much.

excellent photography and illustration.

this makes me want to do something technical so im going to go set up a progressive 5 stage loader press with case and bullet feeders, powder drop system, factory seat and crimp dies, and a quick change shell plate.

and its all your fault >:)
 
My pleasure, Mr. Roberts :)


Following is some of the prep performed before the live-fire test..

L1020737-60.JPG
Various brushes (mostly pistol type) used to clean the insides of the carrier.

L1020740-60.JPG
Carrier key brushing.

L1020689-60.JPG
Carrier in ATF to soak for awhile.

L1020741-60.JPG
Pushing out the extractor pin.

L1020745-60.JPG
Bolt and bolt parts into ATF to soak.


While the BCG parts were soaking, I did a cursory cleaning on the upper ..
mopped out the receiver, cleaned the locking lugs, mopped the chamber, brushed out the bore, and finished with a couple patches down the bore wet with ATF.


.
 
Last edited:
L1020747-60.JPG
Wiped down the carrier and bolt to remove excess ATF.

L1020748-60.JPG
Reinstalling extractor pin.

L1020749-60.JPG
Bolt going back into the carrier .. extractor orients to the right.

L1020750-60.JPG
Pipe cleaner to swab the key followed by one drop of ATF.

L1020755-60.JPG
Applying ATF to carrier/receiver contact points.
Cam pin shown in its proper orientation.


.
 
L1020756-60.JPG
One drop of ATF in each hole.

L1020757-60.JPG
Just in case there is contact with the buffer retainer.

L1020758-60.JPG
ATF on rear of carrier where it contacts the buffer.

boltCarrier lube.GIF
Lube points focus.

bolt lube.GIF
Lube points focus II.


Reinstalled the BCG and worked the bolt several times, did some dry firing, checked all the mags for function..

One pull through with the bore-snake and I'm
ready to go get some ammo and shoot this thing! :D


.
 
heck yea i wanna know the range report and like has been said a couple of times thank you for sharing. especially in the quick and informational way. hope to see more of your threads
 
:D Thanks for the kind words and interest ..

Shoot? I did!

All went well .. average group size at 50 yards with BUIS was grapefruit-sized .. had to hold low, as shots were hitting 10-13" high and I didn't have a front sight tool (since rectified - thanks Brownells) ..
No failures except for me loading 21 rounds in a 20 rd mag causing a first round feed jam, Doh!

Ammunition tested:
Winchester 5.56mm 55gr. FMJ Q3131 - 20rds
Federal 5.56mm 55gr. MCBT XM193 - 20rds
Remington UMC .223 Rem 45gr. JHP L223R7 - 20rds
American Eagle 5.56mm 64gr. Tracer XM856 - 20rds
Remington UMC .223 Rem 50gr. JHP L223R8B - 40rds

Going to go soon and test some more and make sure the irons are zeroed.

I'll do something a bit more comprehensive once I get some optics and a bipod and/or rest.


.
 
Some thoughts and notes:

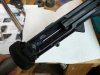
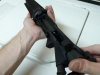
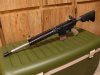
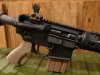
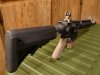
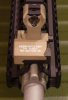
I didn't like the sopmod stock, my skinny self and the generous butt pad width = discomfort .. I could get a nice cheek weld though.
Going to sell it and try something else.

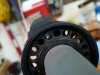
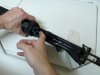
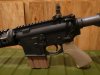
Switched my "modified" BattleGrip out for an unmodified one .. much better.
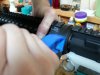
Bright idea+Dremel tool = $30 lost :rolleyes:

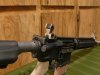
Need optics! Nightforce 1-4x looks good .. Maybe a Trijicon Accupoint .. depends on the money available.

Need a sling! Vickers 2 point or something more traditional ..

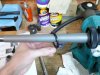
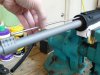
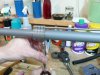
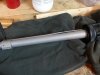
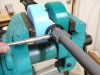
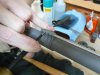
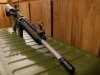
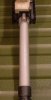
A 24" rod is too short for use with the rod-guide and solvent port ..
Got a 30" and returned the 24".

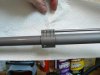
Interesting and rather pretty sounding ringing note w/sustain after firing .. emitting from buffer tube area .. or maybe I'm just crazy :p

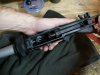
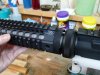
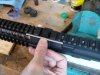
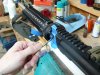
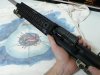
Got some Magpul rail covers and ladders .. scratching my head on the covers, wondering how much gorilla I'll need to bring forth to install 'em ..
Ladders went on easy and look cool.

The 1st 1/2" or so of the mini Maglite's head fits perfectly into the back of the upper receiver (with BCG removed) for inspection lighting..


.
 
Dude, you are seriously anal! :D

I don't even have half the tools you have. Just a receiver block, multi-tool, a few punches and an Army TSM I printed from a PDF file. ARs get cleaned with an old toothbrush, a .22 jag and brass brush on a Dewey rod, just the same as my 22LR rifles. Any fluids that drip into the action, get wiped out with a rag (probably a dirty one).

When I build my new ARs, I put a few drops of CLP on the bolt and carrier then a few weeks later, I go shoot them just like that, mostly with surplus XM193 or Guat. ammo.

Nice thread, though. Although I've never had a single problem with my ARs, I'm sure your way is better than mine.


Edited to add: If this comes across as sarcasm, it's not. I'm just contrasting my nonchalant method with a very meticulous one.
 
Status
Not open for further replies.
Back
Top