How hard is installing an LPK?

Status
Not open for further replies.
I've probably done over 100 of them (worked in a gun shop, and in the military I repaired small arms). I think they are easy, but I struggled at the beginning. I'm sure there are youtube videos that explain it well. My suggestion is you do it under the supervision of someone who knows how- at least the first time. It is easy to lose or damage parts or scratch up the receiver if you aren't educated. on the process. I would do it in exchange for you buying lunch, for example- I think its easy and I like showing people how to do these type of things.
I would go for that deal, assuming buying you lunch means making you a peanut butter sandwich from my kitchen.:D
 
First, you read a lot of recommendations to use roll pin punches, but nobody tells you that as a new assembler if you hit them and they come off the pin, they will scratch and groove the finish, marring it nearly permanently. The better method is to use a Vice Grip pliers with the jaws taped, and slowly adjust the screw lock in short compressions to force the pin in.

Another finesse point is that there are two types of pins, the single roll heavy wall pin, and the wrapped thin leaf spring type. The former can be a bear to start which is why it's recommended to bevel them. The second are a joy and preferred, use them whenever possible. They are worth the higher price.

The front detent spring for the takedown pin is very much overrated in difficulty, with all sorts of complication involved. The better method is to depress it with the "wrong" side of the pin - the channel 90 or even 180 away from it. Once the pin start in capturing the detent you then rotate it to engage it and done. Extremely simple that way and the pin itself is the tool. No other is needed.

A few years back someone posted pics of the Colt assembly tables on the M16 line and remarkably a lot of the tools suggested from the armorer's kit aren't there. The reason is that the armorer's kit is just that, a collection of tools needed to service ALL the organic weapons in the unit, from pistols to heavy machine guns like the Browning .50 cal. It's also institutionally traditional and meant for experienced repairmen at depot level - NOT company. Most of those needed repairs are sent up the chain. And one tool we all find extremely convenient, the one with multiple wrenches on it for things like castle nuts and stuff? Up until recently it wasn't found in the kits.

Don't read too much into what tools someone suggests are mandatory. Old mechanics know what tools can substitute and if they are experienced with them then so much the better. The less you mar the finish the better. I've assembled two AR's, no special punches, no hammering, no scratches. And if you can do the lower, the upper is no more difficult. It isn't rocket science to slide a barrel assembly with headspaced extension already installed into the upper receiver and then turn the barrel nut until the teeth line up to let the gas tube pass. The posters who suggest it must be torqued to a certain value are misreading the directions - it will get torqued to over 30 foot pounds in most cases, what you AVOID is going more than 85 INDICATED foot pounds to keep from stripping the threads. It's really that simple but like most things on the internet some want to explain their prowess about being a expert.

Always keep in mind that a Colt assembly line worker puts these together and doesn't hold an MOS as a job requirement, nor is gender any exclusion.
 
Make it easy on yourself by installing the mag release before the bolt release and have pivot pin
in place when hammering on bolt release.
 
Another tool to have on hand is a drill and small drill bits.

I did a build a couple of weeks ago the detent and spring for the thumb safety would not fit in the channel. I ran a drill bit at slow speed with a drop of oil through the channel afterwards everything dropped in just fine.

On the MidwayUSA video he recommends running a drill bit through all of channels and holes before starting your build. I checked my other stripped lowers and they are all fine. Just had one pesky gremlin that would had prevented completing the build if I have not had the right size drill bit handy.
 
...use a Vice Grip pliers with the jaws taped, and slowly adjust the screw lock in short compressions to force the pin in.
This is the second worst advice I've seen in this thread. Never use Vise Grips when assembling an AR. Vise Grips have teeth that will mar the finish if you slip, even with tape on the jaws. When pushing a roll pin in place, the end of the roll pin will cut through the tape. As the jaws are not parallel to each other, they will slip as pressure is applied. As the slip, the tape either slips or tears. Much better is the smooth jawed Knipex pliers that are similar to Channel Locks. Not only are the jaws smooth, but they are always parallel to each other, greatly reducing the chance of slipping and marring.
View attachment 767156

On the MidwayUSA video he recommends running a drill bit through all of channels and holes before starting your build.
This is the worst. Running a drill through the pin holes runs the risk of enlarging the holes too much and removing the Anodizing and exposing the softer aluminum underneath. The Anodizing is important as it hardens the surface and keeps the holes from wallowing out from wear.
 
Yep, big negative on the vicegrips. I would rather use a phillips head screwdriver as a punch than use vicegrips. I don't know who came up with that idea, but no way.

And I definitely wouldn't go reaming out the holes unless it was absolutely necessary and sending the receiver back to the manufacturer wasn't an option for some reason. I wouldn't be too heartbroken about reaming out the channel for the front detent since it doesn't ever get used, but as far as the others, no way jose. Unanodized aluminum is like butter.
 
Like others have said, there are 100s of videos out there that will show you how to build a lower. Watch a few of them. Some will make it look easy and others could use divine intervention. And no, you really don't need a bunch of special tools, just a few that help to do the job easy.
This is a great started kit.
https://www.brownells.com/gunsmith-...ches/ar-15-armorer-s-punch-set-prod75010.aspx
Painter's tape or masking tape will be your friend.
Use a small hammer to drive the roll pins, because it doesn't take that much to put them in.
I have only built about 100 lowers and my 13yo has built two.
If you have a friend that has built an AR, see if he will give you a hand. I have friends that always stopping by to change out parts or just need a little help on a build. One came by to do his first lower.
 
Get this video and watch it a couple of times, you will be able to put a rifle together. It is in 4 or 5 parts. You can watch the part on the lower and build it, then move on to the next part.

Building your AR-15 from scratch
By Jim vanMiddlesworth
 
I had zero experience my first time. The position of the hammer spring was not clear to me from many of the videos, look at the diagram the was posted. A couple place holding punches (cheap ones from harbor freight are fine) a clean work area in case you throw a spring across the room, some lube for the pins, and a vise (with a Block of wood) is about all you really need.
 
I appreciate all the posts guys. I'm going to go ahead with the build, just ordered a Ruger lower and the LPK and stock won't be far behind it.

Get roll pin punches and a small non marring tack hammer and the roll pin is simple. The rest is so easy even I can do it. Just make sure to put the hammer spring in correctly.

I've got roll pin punches, check.

Well, almost everything else is simple. Since there has already been a lot of warning about roll pins, it should be mentioned that pivot pin assembly (spring and detent) installation can be VERY frustrating. In fact, if you look on ar15.com at their document about lower receiver building, (link here), the pivot pin assembly section states, "This is perhaps the hardest part of the lower assembly ..."

They encourage using an installation tool. I have used the tool and have launched springs, so it still can be challenging. I also have installed it flawlessly (even without the tool) and it takes only a few seconds. Just be careful, go slowly, and have a way to catch the spring and detent just in case.

I really enjoy building lowers. Get the right tools, practice by building and un-building several times, take your time, and have fun.

Yeah. I watched a few videos and you can just see that the front detent pin is under a lot of tension, it looks like it would fly across the room if you looked at it funny.

The AR-15.com link is pretty good too, I will probably end up building off that. Thanks.

Anyone can put a lower together. There's a guy on Youtube that goes by 50% Tactical. He only has one arm. He has a video that shows you that even a one arm Vet can build an AR..
An OOPS Kit is nice to have on hand because things do fly.
http://www.jsesurplus.com/jseoopsrepairkit.aspx
The bolt catch is really not that hard. Just use a small allen wrench to line it up. You insert the small end of the wench from the front to hold the bolt catch in place. As you tap in the roll pin, it will push the allen wrench out.
Most often the hammer spring is the one that people put in backward. This Pic. should keep you from putting it in wrong.
View attachment 766898

Another tip. the trigger and hammer pins are the same. There is a notch in the center and a notch closer to one side. It really doesn't matter which way you put the trigger pin in. For the hammer pin insert the smooth side of the pin first.

Thanks for the heads up about the hammer spring.

Here is a link to the Red & Black my youngest son built with very little help from me. If a 13 year old can do it, I don't think you will have any trouble.
https://www.thehighroad.org/index.php?threads/red-black-ar-build.824308/
Oh! if you launch and loose a spring or detent, just shoot me a PM and I'll send you a replacement.

Thanks for the offer. I think I'm going to just add a spare front detent and spring onto my order, but if anything else goes flying I might have to talk to you.

I've probably done over 100 of them (worked in a gun shop, and in the military I repaired small arms). I think they are easy, but I struggled at the beginning. I'm sure there are youtube videos that explain it well. My suggestion is you do it under the supervision of someone who knows how- at least the first time. It is easy to lose or damage parts or scratch up the receiver if you aren't educated. on the process. I would do it in exchange for you buying lunch, for example- I think its easy and I like showing people how to do these type of things.

Watch and learn would probably be the best way to do it, but I don't really know anyone who builds ARs.

I'd love to take you up on that offer, but I am a long ways away from FL and NC :)

Yep, big negative on the vicegrips. I would rather use a phillips head screwdriver as a punch than use vicegrips. I don't know who came up with that idea, but no way.

And I definitely wouldn't go reaming out the holes unless it was absolutely necessary and sending the receiver back to the manufacturer wasn't an option for some reason. I wouldn't be too heartbroken about reaming out the channel for the front detent since it doesn't ever get used, but as far as the others, no way jose. Unanodized aluminum is like butter.

Thanks for clearing up some fake news. I may have tried that vice grip trick, because I could see how it could be easier to control than a hammer.
 
Last edited:
Roll pin starters are not absolutely necessary, but nice, and a better choice than vise grips. I made these, but numerous places have them.
Roll Pin Starters for AR15 - Three Thirty Seconds & One Eighth.JPG
 
This is the worst. Running a drill through the pin holes runs the risk of enlarging the holes too much and removing the Anodizing and exposing the softer aluminum underneath. The Anodizing is important as it hardens the surface and keeps the holes from wallowing out from wear.

Oh really. Then how am I suppose to cleanout the channel?
 
if you have any problems, post your city, and maybe someone can come walk you through too. Don't worry too much if you scratch it up either. I have one that made it through the build looking pristine, but since has been beaten on pretty hard.
 
This is the worst. Running a drill through the pin holes runs the risk of enlarging the holes too much and removing the Anodizing and exposing the softer aluminum underneath. The Anodizing is important as it hardens the surface and keeps the holes from wallowing out from wear.

Oh really. Then how am I suppose to cleanout the channel?
Not by removing the anodizing. There are other, far less invasive methods, such as applying a little grease and carefully pressing or tapping the pin into place. If teh fit is too tight, something is out of spec and requires further investigation. Why would anyone want to risk removing the anodizing and oversizing the hole? There will be premature wear and can have an impact on trigger function.
 
Last edited:
Roll pin starters are not absolutely necessary, but nice, and a better choice than vise grips. I made these, but numerous places have them.
View attachment 767325

Yup, I've got a set (Grace) for that very reason, it's one of those proper tool for the job things.....I got mine when I started playing with HKs. I've got those, short roll pin punches and a set of long roll pin punches. There's even "special" flat on one side punches you can get for installing the bolt catch that won't mar the finish.

Tools are one of those things I don't mind spending money on. Take care of them and generally they'll out last you.

Another couple of cool, make the job easier, but not absolutely needed, things are a bolt disassembly vice for getting the ejector out without having to look for it later after it flys across the room.

https://www.brownells.com/gunsmith-...locks/sinclair-ar-15-bolt-vise-prod34719.aspx

Used mine just this week to check headspace on a guys carbine at work. Another is the Trigger Guard Roll Pin pusher:

https://www.brownells.com/gunsmith-...-trigger-guard-roll-pin-pusher-prod55709.aspx

Makes it very easy to swap out trigger guards without scratching chit up. My favorite trick for installing the front pivot pin is to use a 1/4" clevis pin:


Chuck
 
Not by removing the anodizing. There are other, far less invasive methods, such as applying a little grease and carefully pressing or tapping the pin into place. If teh fit is too tight, something is out of spec and requires further investigation. Why would anyone want to risk removing the anodizing and oversizing the hole? There will be premature wear and can have an impact on trigger function.

Ah...If it doesn't fit use a bigger hammer technique.

As versus using a proper size drill bit to remove the small amount of offending material. Come to think of it pounding the detent through the channel will remove anodizing also.

Since you said it how does the detent and spring for the safety "impact" trigger function?
 
I picked up a pair of parallel-jaw pliers that had smooth jaws except for one small groove that ran length-wise down the center of each jaw. I think that it was intended for stained-glass work, but i found it very useful for starting pins in LPKs.
 
Ah...If it doesn't fit use a bigger hammer technique.
My mistake. I thought tapping carefully was common sense.

Since you said it how does the detent and spring for the safety "impact" trigger function?
As you're smart enough to know the detent and spring have nothing to do with the trigger function, you must also be smart enough to know that the trigger and hammer pin holes do.

It's your money, it's your rifle. If you want to use a drill bit to open up the pin holes of your receiver, be my guest.
 
The hardest part is getting the roll pin for the bolt catch started. Everything else is pretty simple. Just make sure your springs are in the correct order. Its easy to find install them backwards. I'm sure there are tons of YouTube videos.

+1. I usually install the bolt catch last for this reason.

Everything else is simple enough if you know and are physically capable of handling small parts. If you have issues such as hand tremors, unsteady fingers, etc, then it might not work out for you. But in general, assembling a AR15 lower is very easy and can be done in under an hour. 30mins if you're fast and have done it many times. I built another lower last night and it took me about 30mins in my room.
 
Let me suggest the least expensive tool you can use for installing the tiny bolt catch roll pin:

A round toothpick.

- Insert the toothpick through the front roll pin hole, capturing the bolt catch, detent and spring.
- Extend it past the rear roll pin hole far enough to slip the roll pin on the end.
- Use a tiny dab of grease or synthetic oil on the toothpick where the roll pin is 'captured' .
- Gently tap the roll pin to start it firmly in the rear roll pin hole.
- Seat the roll pin with a roll pin punch of the correct size or, as I do,with a section of round plastic rod.

As you finish seating the roll pin, you'll drive the toothpick out the front roll pin hole. No muss ... no mar!
 
Another question:

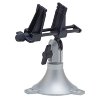
I've got a circuit board vise, from my other favorite hobby, that I was planning to use for this lower. The jaws are kind of a hard ABS plastic. Would they mar the lower, or would it be better to cover them with something?

41ZsRsroceL._SX342_.jpg
 
Status
Not open for further replies.
Back
Top