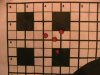
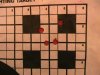
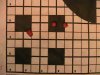
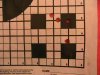
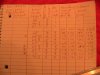
Here are my measurements in the pic below. Note that the distance from POA to POI on some of the3 shot groups are the same as the 4 shot groups. this is because the furthest bullet hole for the three shot group was also he same bullet hole that was farthest for the 4 shot group as well. If you note on E above, you will see what looks like 3 holes. There are 4 shots in three holes there. I had some contact paper behind my target to see if there was any fliers. I would have had to miss by 8 to 10 inches to miss on E's target and not hit the contact paper. I didn't hit the contact paper anywhere other than where it was behind the 2 targets seen in these pictures.
As you can see on my tablet below I have chosen 4 groups to further explore. From what you see here, am I going about this correctly, in a logical manner? What would you do differently if you were working up a new load for this rifle? If anything?