Some ramblings...>
I'll give some general ideas based on my methods and then show some pics. Of course, there are always multiple ways to achieve any result and in the end people need to use what works for them.
- use diffused light source(s). Harsh direct artificial or sunlight will often result in high contrast and overexposed highlights. By diffusing the light a more even, but not necessarily bland, light is provided. This reduces the dynamic range the camera's sensor (or film) has to cope with, and can limit overexposure as well as giving a more evenly lit image. By adjusting the level of diffusion varying results can be achieved. The type of diffusion material used or the distance it is placed from the light source will affect the degree of diffusion. I use sheets of draughtsman's tracing material, available from art stores. This is a flexible translucent plastic material, a modern version of vellum. I don't use a set lightbox but that can work well. Due to the variety of setups I shoot I generally handhold the diffusion material or form a temporary tent over the subject. By handholding I can readily change the position and orientation of the material to provide the result I'm after. I use a single overhead fluorescent lamp on a flexible arm. Supplementary lighting is provided by the use of reflector cards to bounce light back into shadow areas.
- A tripod is always used. Due to the need for reasonable depth of field, (amount of image that is in acceptable focus), I am generally using quite small apertures and subsequently long shutter speeds. I recommend a sturdy full size tripod with a pan/tilt head for easy positioning of the camera. A geared center shaft for raising and lowering the camera is very handy. If you don't have a remote shutter release use the self-timer facility to ensure the camera is not jiggled by pressing the shutter button.
- the type of camera, surprisingly, isn't all that important. Of course it needs to meet certain requirements, but there are many types and formats that will do the job. It's up to the individual to decide how far they wish to take things. Many of the more advanced point & shoot digicams are good and due to their smaller sensor size can provide good depth of field which is important when shooting close-up subjects, such as handguns. Digital SLRs can be very good but much comes down to selection of suitable lenses. They are also, on the whole, more difficult to use for beginners. About half of the images shown below were shot on a Nikon Coolpix 880 3.3Mp digicam, the rest on a Coolpix 8700 8Mp digicam.
- lighting (already addressed) and composition are the basics of photography. Spend time looking though the viewfinder to ensure the composition looks good. If it doesn't, change things - the subjects, the camera position, the lighting - all of this if necessary. There are photographic compositional rules - look them up on the net. Look at images that you find attractive. Get an idea of why they look good. The rules are not hard and fast but until you realise why they do generally work you'll probably have a difficult time breaking them successfully.
- adjust your camera's white balance function to suit the lighting. Look at your use manual for info on how to do this. This will eliminate most of the colour casts that can make image look odd, and provide a more faithful colour reproduction. Colour adjustments can be made later in editing but it's better and easier to capture the cleanest image possible in camera.
- don't be afraid to use image editing software. Post-processing is as natural to the photographer as shooting the image. Throughout photographic history photographers have processed their images, either in the darkroom or now on computer. Use whatever software suits you. I use a mix of both Paint Shop Pro and Photoshop as there are certain functions of each I prefer. Tools such as colour correction, contrast, gamma correction and sharpening are commonly used, and there are a slew of other tools and filters that can be used as required. Post-processing can enhance a good image but it will rarely save a bad image. Always aim to capture the best image in camera. This will make things much easier thereafter.
- save original/master image in lossless formats (TIFF for example). If you shoot in JPEG, for example, be aware that it is a "lossy" format, and that each time it is re-saved some image compression occurs and image information is lost. In short, the image is degraded and it shows very quickly. This shows up via compression artefacts - jagged edges, loss of detail, glitches in colour. So, edit in a lossless format so that you can make changes to your heart's delight without degrading the image. When the image is finished make a JPEG copy for uploading to the net, (because it is a compressed format it allows relatively small file sizes good for use on the net).
OK, on to the pics
")
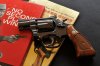
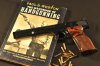
Below are some images in which I have tried to present the handguns in a different way.