Rifle Cartridges

Status
Not open for further replies.

film495

Member
Joined
Aug 26, 2019
Messages
2,842
I've only done straight walled handgun cartridges and the last few nights, I've read through some of my reloading manuals to wrap my head around how the bottle neck of most rifle cartridges changes the reloading process.

I don't get sizing and how the shoulder gets resized and or sized through the process. I didn't see this spelled out in my reloading books, so was hoping to get a really basic understanding of how rifle cartridges that are bottle neck differ from straight walled handgun cases.
 
On rifle rounds when you fire it the neck expands to seal, in the chamber. The pressure hold the neck in place and pushed the base back against the bolt face. This stretches the body. When you FL size the die contacts the shoulder and the brass moves forward as it's reduced in size. This cause the brass to grow in length. This is why you want to do minimal sizing, move shoulder back 0.001"-0.002" in bolt gun, 0.002-0.003" in simi. Doing minimal sizing will get you max brass life and good function. This is why you trim too. If you load for several guns either keep brass separate or size to the shorter chamber.
 
With some exceptions, bottleneck rifle cartridges headspace on the shoulder. By controlling the amount of shoulder bump you can get a better handle on how much the case stretches during firing. This has implications on case life, accuracy, and pressure.

A misnomer often attributed to sizing is that you are setting headspace. Sizing does not set this, the chamber in the barrel does. Your task is to match the brass to the chamber (with some wiggle room). While this sounds like a simple thing, the devil is in the details.

Bottleneck rifle brass needs to be trimmed frequently. You will need tooling to accurately and consistently trim each case after sizing. Sizing is kind of like squeezing toothpaste out of the tube and causes the case to grow. Having each piece a consistent length will make crimping more consistent if that operation is desirable for a given cartridge. If this gets out of control you could run into problems chambering rounds as well.

I can't stress enough the importance of a case gauge. You don't have to have a fancy Sheridan cut-away gauge but they do help you visualize the process. Wilson also makes very good gauges for this. Gauge each and every piece of brass. Some brass in a batch can be harder or have thicker walls and may need additional work or even a small base die to make it fit the gauge.

It can get much more complicated but this is a basic description.

.40
 
Last edited:
shoulder bump and moving the shoulder back? I haven't found this yet, in looking through 5 or so reloading manuals, it must be in there and I'm just missing it. I may have some instructions with the old dies that I have, but maybe not - will have to look. I guess I just can't conceptualize how this is set or how one would know how to set it, and how it actually takes place inside the die. I'm not doing any loading currently, I just want to study it and collect any missing tools or things I don't have - and then maybe try to make a few dummy rounds, just to see how it goes.

In all honesty, having only done handgun cartridges with 3 or 4 grains of powder, and the notion of loading 30 or 50 grains in a rifle cartridge scares the crap out of me. I guess it probably should, so - part of it is to educate myself and overcome the fear with learning and skill development.
 
Don't over think this. When setting up the resizing dies you want to adjust it so that there is just a slight pressure at the end of the lever pull as the cam rolls over. Too little and you may not bump the shoulder back enough. Too much and you bump it back too far. I will resize 3-4 cases and check for fit in all of my rifles in that cartridge.

If they are tight going into the chamber you need to adjust the die just a fraction of a turn more to bump the shoulder back a bit more. Resize those rounds and try again. It is better to err on the side of not bumping back enough initially. You can always move it back a hair more if the brass doesn't fit. Once you get a good fit you're ready to size the rest of the brass.

If you bump the shoulder back too much you will create excess headspace. This means there is a gap between the shoulder of the cartridge and the chamber. When fired the case will stretch to fill that gap and the brass may actually break into 2 pieces 1/4" to 1/2" from the base. This will also happen if the brass is reloaded too many times so it isn't always due to excessive head space. But if it happens on the 1st few times the brass is loaded or to several cases it means you've bumped the shoulder back too far.
 
Checking shoulder position is easy. Measure the shoulder position of your fired cases with the tool of your choice, lots of them, cheap to expensive. Size the brass, measure the shoulder position again and see what it did. It could be farther forward if you set the die up incorrectly, or not moved at all, or moved too far.

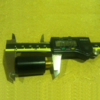
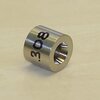
You can use a Wilson or Sheridan case gauge to do this, a home made "button", a purchased "button", Hornady makes tools, Sinclair makes tools, etc etc.

CTS
case-gauge.png

Home made.
308 Shoulder Gauge Pic 2.JPG
308 Shoulder Bump Gauge - 20 Degrees In Use - Pic 2.JPG

Sheridan or Wilson case gauges
Wilson & Sheridan .223 Case Gauges.jpg

Sinclair Bump gauge body and inserts
.22, 6MM, & .30 cal bullet comparators
and a 30 degree shoulder bump insert.
Sinclair Comparator Body, .22, 6MM, .30 Cal inserts, 30 Degree Shoulder Insert @ 40%.JPG

Whidden case gauge for checking shoulder position
Whidden 6 Dasher Case Guage.JPG

RCBS Precision Mic
760338.jpg

Long winded, but gives the basics.


Dang I hate You Tube, but it does have good info here and there.
Mostly long winded guys with poor verbal skills. :)


Measuring where the shoulder is is very easy. If you simply buy a Wilson or Sheridan case gauge and size to fit it you won't get in trouble, but you can also use the to get measurements so you can control the shoulder position.
 
If you bump the shoulder back too much you will create excess headspace. This means there is a gap between the shoulder of the cartridge and the chamber. When fired the case will stretch to fill that gap and the brass may actually break into 2 pieces 1/4" to 1/2" from the base.
Technically it is excess head clearance, but most people just say headspace. Headspace is a static measurement of the chamber in your gun. Either way, it ends up with the same issue and can be trouble as @jmr40 posted.
 
looking at those pictures part of what I need to do is inventory my Dad's stuff to see what is there, probably some of these tools are in storage, I just haven't figured out what they are or how to use them to date.
 
You are a beginning bottle neck loader, follow the manual on the die set up and you will be fine. ALL of the instrictions above are good but you probably don't need all that now. You will soon need a case trimmer though. Keep lurking here on the reloading board, there are lots of good people here that will help.
 
I agree with PWC just start off full length sizing the case each time. The brass will stretch and you will need to trim it and check for case head separations. Call this basic rifle ammo reloading and you will make perfectly good ammo doing this. The talk of bumping the shoulder back or some call it partial resizing was never covered in any of the manuals I read back in the day. I had to figure out that fireforming my brass each time and then cutting off what stretched out the end every time I resized a brass caused the case to rip apart in the middle after a few cycles. The procedure is basically how to stop most of the stelretching and take advantage of the fireformed case at the same time. This increases case life. Now this type of info that is an advanced item in reloading is talked about all over the net. It does confuse the new reloader the same as two guys talking about quantum physics would to a guy listning that had only been to high school.;) My advice is to learn the basics of bottle necked reloadimg first without worrying about that advanced stuff until you can visualize what they are doing and why it matters. Just my 2 cents.
 
made a few 30-06 dummy rounds to match an old one my Dad had made. I just followed the die directions, went pretty good. I didn't bother with trying to mess with the amount of bump or anything like that, didn't measure, just set the die per directions.

made with same old components as the old dummy round that I would guess was put together around 1980

dummy-old-new_2020-05-02.jpg
 
Last edited:
here's a good one. I made this 30-30 dummy round, and looking at it - there is a crease around the neck about 1/8" down, goes pretty much right around like a nice ring. Haven't figured out what caused that yet, any ideas?

30-30_case-crease_2020-05-02.jpg
 
here's a good one. I made this 30-30 dummy round, and looking at it - there is a crease around the neck about 1/8" down, goes pretty much right around like a nice ring. Haven't figured out what caused that yet, any ideas?

View attachment 913529
If that is not a brand new case I would say that you did not cause that ring at all it's the original Factory crimp
 
Reading some folks explanations and cautions about loading for rifles makes it seems like bottleneck rifle rounds are magical items which require a PhD to successfully reload. It’s a simple process just like anything else.

pop old primer, lube, resize, wipe lube off, prime, powder, seat, crimp, shoot, repeat. Exactly the same as everything else.

The only things to watch in addition to pistol or other reloading processes is length and incipient case head separation, and that’s a whole lot simpler than people make it out to be. About 1/4 inch up from the rim or extractor groove there will either be a suspiciously shiny ring or not. If there’s a shiny ring, your case is stretching just above the case head and the brass is now trash. Yes you can check with a pick but once you learn to SEE it you can catch it quickly.

Beyond that, the goal with rifles is generally to do the least amount of sizing possible and be as consistent as possible.
 
The 30-30 dummy round with the ring 1/8" down from the mouth on the neck is once fired factory brass I shot last year and just made that dummy round. I used RCBS sizer and seat/crimp dies. That's interesting it may not be from anything I did and may be from the factory. I think I have another box of that same factory ammo, so I'll have to give it a look and see if the ring is on the factory round or if I added that somehow.

Thanks for the input guys. Sorry if I kind of jump all over the place and if I confused people about what I was doing and posting. I uploaded a bunch of pictures from my phone today, and figured I'd try to go back up add some pictures to threads on here - cause people like photos.
 
Status
Not open for further replies.
Back
Top