SSD's PTR44/BD44 In Detail The Semi Automatic MP44

Status
Not open for further replies.

Combloc1

Member
Joined
Oct 8, 2017
Messages
187
NOTE:
I've already been working on this on other forums for a while now so I already have a number of posts ready to transfer to this forum. I will transfer them pretty much as written in the interest of saving time. After I have done this, I'll keep it updated here as I post on those other forums as well. I discovered this forum while doing some research and it appears that some here may like to read what I have written. If I am correct, please let me know and I will start a similar thread on the reproduction FG42 currently being made by SMG in Decatur Texas. I have an ongoing write-up about that rifle too. So, here we go.


To anyone who is interested in military firearms, the MP44 needs no introduction. It has been so well documented both in print and online that, like the P08, it is recognized even my many non shooters. Other than in a most general way and a few of my own musings, this is not an essay about that rifle. Rather, it is about the modern replica built in Germany by Sport Systeme Dittrich (SSD) and imported in small numbers back in 2009 by PTR Industries.
When the first 200 were imported, it was supposed to be the beginning of regular shipments from SSD. Collectors were VERY excited because, while the rifles cost approximately $5000 new, that price tag was still far less expensive than the cost of an original example and you didn't have to register them on a Form 4 because they were not readily convertible to select fire.
Called the BD44 by SSD but marked "PTR44" for US importation, the rifle was so precise a copy of the original that many (myself included) believe that they were/are made using WWII era stamping dies and molds. In essence, it is a "real" MP44, just made 65 years later. What was not to love?? Various things as it turned out. While the rifle appeared to be exquisitely made, serious fatal flaws started showing up almost immediately. Of the 200 imported, only about 150 were actually offered for sale due to serious issues running the gamut from poor quality control issues with both German and US compliance parts to accidents during the US conversion from importable "sporting guns" back to intended original configuration. Worse, the ones released for sale soon started having issues with parts breaking and flawed modification design intended to prevent original, fully automatic parts from being installed on the rifles. We will cover these issues in more detail as we study the PTR44. The problems were so severe that PTR cancelled further orders of the rifle from SSD after just one shipment, causing these replicas to begin climbing in value immediately despite their almost fatal flaws. Before long, they were selling on Gunbroker at prices as high as $8000. They were still so sought after that even many of the approx. 50 rifles that had originally not been available for sale were offered one at a time on Gunbroker for $5000 apiece......and they sold. Since that time, prices on Gunbroker have come down somewhat but they can still command relatively high prices. Over the years, there have been various rumors of other companies planning to import the BD44 into the United States. Even as I type this, there is word that more are coming. However, none of these rumors has yet come to fruition although the collecting community remains hopeful.
So........what about the PTR44 almost eight years after it was imported? What has become of it? What exactly were the flaws and can they be corrected? Is it a useable rifle or just an expensive wall hanger that has a nasty tendency to self destruct? This thread intends to answer those questions. It is also intended to give a good detailed look at the rifle so that you can see just what you can expect to get when you buy one. I will also cover what should/must be done to it if you do plan on using it to any real extent. I will also document my experiences over time spanning from what I got when I bought it to through what will be done to improve it and ending with (hopefully) the first thousand rounds out the muzzle. Hopefully, my work and tears will help YOU make an informed decision about whether or not you want to actually buy one if you have been interested in owning one over these years. Or, if you are just curious about what the PTR44 is (and is not) you will get some amusement out of my stupidity! This thread is going to take a long time and many posts so let's get to work!

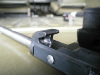
Here it is.....the PTR44:
P1150096_zpska8vidim.jpg
P1150097_zpsz0qvutjt.jpg
I'd wanted one of these in the worst way since I was a kid playing with plastic army men in my yard back in the 70's!! None of them were carrying an MP44 but I had seen them in books and they just looked sooooo neato so I just pretended that my little plastic dudes were carrying one! I got crazy excited when I heard I.O Inc. was planning to import these back in 2007 or 2008 (I forget just exactly when but that's pretty close). I saved up all my money like a good boy. But they just kept dragging it out; promising that they were coming and making a list of people who wanted one but not delivering on those promises. Then the price started going up because they were deluged with phone calls and emails from potential buyers. I guess they figured they would soak us poor saps for all they could get out of us. After a while, I got tired of the delays and price hikes so I took my money and bought an NDM-86 (Chinese made SVD) instead. They never did show up through I.O. Inc.. A little while later, the PTR deal came about. By then, I had researched these rifles thoroughly and, even though I don't speak German, I meticulously translated everything I could find on European gun forums pertaining to the BD44. I was aware that people were having issues with parts breaking and I decided to hold off, waiting to see it the issues would be ironed out before I plunked down my hard earned money. I am NOT a wealthy man after all! Well, I've already told you what happened and there was NO WAY I was going to spend 5K on a rifle that I would potentially have to sink thousands more $$$ into if I wanted to MAYBE work. Nope, I didn't need one that bad.
But it nagged at me. I still wanted one but I was angry too. Why couldn't they have just done it RIGHT the first time??? My pride wouldn't let me spend the money. Well, after 7 years of being pissed off about the whole affair, I decided that the whole thing was cursed. Despite MANY claims that more were coming, I came to feel that more simple were NOT coming. I still feel that way but I sincerely hope I am wrong. Whatever the case, I started looking again; casually at first but more actively as time went on. When this one came to my attention through a guy I know who has one of his own, I figured I had better get one now or accept that I was probably never going to get one at all. I contacted the owner who told me that he had put 50 rounds through the rifle when he first bought it new and then put it in the safe to sit. He still had everything it came with including the cheap Plano hard case, two magazines, manual, PTR supplied lock and other assorted paperwork thrown in by PTR such as a catalog and safety brochures. It even came with the cardboard shipping box. Well, knowing my luck and still believing that the whole modern MP44 thing was cursed, I drove to his town in a whole other state to transfer the rifle to me legally through an FFL. My thinking was that, if I was to have it shipped, it would probably get destroyed or lost in transit so I'd better cut that variable out of the equation!! It turned out to be fortuitous because the seller turned out to be just a really, really nice guy. He even bought me lunch at a local micro brewery with a bit of the money I had just given him. Thanks Richard! You have Class sir!!
OK. Moving on. Before I get into the nitty gritty of the PTR44 proper I want to touch just briefly on my thoughts about the MP44 in general. The Sturmgewehr is something of an odd bird. Being that it is the first of it's kind in known History, it's a little crude by modern standards. It's very slim and not particularly long but it's also kind of bulky. By that I mean that, although it's about the same overall size as an AK47/VZ58/HK93/take your pick, it just looks bigger unless it's side by side with one of them. It feels like it was built for Lego people. <--You either get that or you don't. And it's HEAVY, weighing in at just a bit over 11 pounds. The action also feels ratchety. When you grab the charging handle and run the action back and forth, you can feel the parts locking and unlocking in there. I imagine that it feels about the same as something built in Ape City (Charlton Heston PotA, NOT that new stuff). It's not a smooth action at all. BUT, when you shoulder the rifle, you find that the ergonomics are spot on; even better than many of today's offerings. And the recoil impulse is just phenomenal. The straight line design coupled with the weight (in 1945, men were men and weight was not the issue it is for us modern wussies!) means that there is minimal muzzle rise. You can still feel and even hear all the innards gnashing around in there but it works. In many respects, the ancient and crude MP44 still feels like a relevant design today. Yes, you can tell it's old but it's competent.
Here is an original (owned by a friend) compared to an AK, VZ58 and an HK93:
P1140027_zpsmsipgrjo.jpg

And the PTR44 shown a bit closer with two of the above rifles:
P1150095_zps96fz3gg8.jpg

With SMG's FG42 showing just how small the FG42 really is considering it fires a full size 8mm round:
P1150092_zpsfgp0ddfi.jpg

In the next post, we'll do a short comparison of the PTR44 to the HK93 and a Zenith Z43 to show just how close many of the features are between the two designs. To my mind, it's really quite remarkable how closely one follows the other. Then we'll get into the real crux of the thread. See you soon!
 
In this post, we're going to look at just how similar the design of the HK93 (HK33 in military designation) is to the MP44. The following also applies to all of the HK roller lock (half lock if you want to get technical) designs in general but it is especially apparent in the 5.56 caliber rifle. Yes, the operating system is completely different. We all know that aspect of the HK is a near copy of the STG45. But many design features are derived straight from the MP44. I believe very possible that the STG45 would have shared a pin mounted swing down trigger group too were it not for the fact that they were trying to built them as absolutely inexpensively as they could. So, while the STG45 is the "missing link" between the MP44 and the post war HK's, I think it most accurate to describe the HK as an amalgam of the MP44 and the STG45. Let's take a look.
Here again is an original Steyr produced MP44 sitting with it's grandkid:
P1140033_zpsen7zjpsb.jpg

The take down pins compared:
P1150098_zpsnvdz0bgz.jpg
P1150099_zpsd7zv4kzq.jpg
P1150100_zpsc6k1loh9.jpg

Stocks:
P1150101_zpsei3g7ahz.jpg
To be honest, to my knowledge no HK33 ever came with a wooden stock from the factory; it would have been polymer. The one shown was taken off of a G3 and mounted to the HK33 stock ferrule. I like wood. I especially like walnut.

Bottom of ferrules:
P1150104_zpsrqh81drc.jpg
The HK is more eloquent in its overall design and has a nice beaded weld compared to the drunk spot welds on the MP44 but both get the job done.

MP44 is on top:
P1150107_zpsqdr9orz5.jpg
The operating spring fits inside the MP44 stock whereas the HK spring rests in the cup at the top of the ferrule. The HK has a buffer built into it as well while the MP44 just has a steel tube at the top for the back of the bolt carrier to ram into. Quite sophisticated!

A shot showing the trigger groups swung down:
P1150110_zpsilnisaxd.jpg
The rifle on the bottom is Turkish made. I used it because it retains the pivot pin for the lower. All of the fire control bits are contained in a removable box on the HK and that box is held into the lower by the safety lever. The STG45 has a similar trigger box but no swing down lower. The MP44 has no such box; the innards are just mounted on axle pins mounted in the grip frame in a traditional manner. In fact, the fire control bits are not even intended to be dismounted because their axles are peened in place!

Bottom of the receivers:
P1150113_zps6qukx6ly.jpg
Notice how much more polished the work is on the HK. Original MP44's are just as crudely put together as the SSD model.

Rear of the receivers:
P1150116_zpsfa55fqr8.jpg
Even though the operating systems are night and day different, the family lineage is readily apparent.

A close up of the sock mounting pin holes: HK is at the front:
P1150117_zpsqqflhh9g.jpg
SSD has slightly modified this pin area in an effort to make it so that you cannot install an original WWII bolt and/or bolt carrier. We'll look at that more closely later.

Here we see a general shot of the receivers compared:
P1150118_zpspwgatw2l.jpg
They are very different yet very much the same. The HK clearly displays the benefit of decades of advancements and experience but it wouldn't exist without granddad.

Magazines compared:
P1150274_zpsbvlsqz53.jpg
P1150272_zpslzdzzrwd.jpg
Sorry about all those fiber strands. You're going to see them all over the place in these pictures because there was a new rug underneath the liebermuster backdrop and it acted like a magnet for those cursed stray fibers. The more I moved it around, the more the tagalongs that attached themselves to it. I really do vacuum....I swear!

That's it for tonight. In the next post, we'll start looking at the details of the PTR44. We'll do it in much the same way as we did the FG42; that is to say starting at the front and working our way back. As we go along, I'll tell you what you are looking at and point out potential problems and flaws. Thanks for your time and patience!
 
We start looking at the PTR44 proper with the front of the rifle.....what a novel idea!
Here are a few shots of the front sight:
P1150122_zpsshotcvz3.jpg
P1150126_zpskj3gnbix.jpg
P1150127_zpscoplh0mk.jpg
One of the neato things about the SSD reproduction is that they built it authentically. That is to say that stamped, cast and machined parts on an original are stamped cast and machined on the new made one as well. And they didn't drastically over prep the parts either. Notice the casting pits on the side and the mold line at the rear of the front sight tower. Similar to an original, dressing of the casting was mostly limited to what was needed for it to function as designed. Little thought was put into cosmetics. Still, the SSD's cast parts could be a little more rough. Here is the rear of a sight tower mounted on a 1945 produced MP44 for comparison purposes:
P1130578_zpsw6yws7vi.jpg
So, a little more rough would be a little more better! Nice grammer huh? The above holds true for all of the cast parts on the SSD; they are close to originals and even interchange but they are just a bit too good. For me, part of the MP44's allure is the utilitarian look to it. If it was pretty, it wouldn't be as interesting and, for the most part, this rifle very much captures that utilitarian look. The only other slight drawback is the deep bluing on everything. Personally, I think the rifles look better with the mix of blued, phosphate and bare steel parts so often seen on late war examples. Of course, earlier ones were totally blued like the SSD so it is still "authentic" but it would look better with either a mixed and/or well worn finish.

The muzzle nut is removed by pushing in on the retaining pin and unscrewing it:
P1150124_zpsdjx8wbx0.jpg
The retaining pin is supposed to stick out farther but it wants to catch inside the sight tower for some reason. It presses in fine but you have to fiddle with it a
little for it to pop out completely. It still works fine either way. Notice that the barrel is NOT chrome lined. Originals weren't either.

On the right side of the barrel is the caliber marking. The "k" stands for "kurz" or "short":
P1150129_zps3agxguvv.jpg

Above the barrel and sticking out of the gas block is the antenna used to transmit and receive transmissions from Haunebu craft and the secret base in New Swabia:
P1150130_zpsprnib1kq.jpg
P1150131_zpsybsuldas.jpg
It also doubles as the gas plug and stacking hook. I don't know what the copper colored gook is on the antenna. I assume it's anti seize grease as it wipes off pretty easily but it may also be some sort of futuristic superconducting compound used to increase the range of the antenna. It's a long way to Antarctica for low powered R.F transmissions to travel you know. I've seen other PTR44's with this stuff on the gas plug too.

To remove the gas plug, it simply unscrews:
P1150134_zps97kk9vju.jpg
P1150132_zpsjpltygvw.jpg
Notice that it is a cast part. I assume the fine threads are intended to prevent gas blow-by. The hole is to pass a rod through to help unscrew the plug if it sticks. This part should only be hand tightened, NOT torqued down.

Here is the gas block with the plug removed:
P1150135_zpszwcj6pli.jpg
Again, notice the casting marks. With the plug removed, it is a simple thing to run a cleaning patch through the gas tube for cleaning. You can just make out the mold line on the bottom of the gas block and hole where the bit passed through during manufacturing to drill the gas port prior to assembly onto the barrel.

The left side of the gas block:
P1150137_zpsaaxtnau0.jpg
Note the two pins holding it in place on the barrel. Also seen towards the left of the picture is one of the two gas vents on the gas tube.
 
The handguard is held onto the barrel by spring tension. There are no mounting bits as the shape of the part itself does the job. To remove it, simply grab the front and pull down, pivoting it at the rear. Just keep pulling and it will pop off with a metallic "twang". If you drop it on the floor it sounds a cheap as it really is. In typical German fashion, the stamping is overcomplicated but that just makes it look more interesting. I'm a sucker for stamped parts. I just find it fascinating that you can take a flat an flimsy sheet of steel and origami the hell out of it into something useable. Take a look:
P1150139_zpsbamepnby.jpg
P1150138_zpsu2wi33ag.jpg
P1150143_zps1tm1kbm1.jpg

Note imperfections or stretch marks in the steel:
P1150141_zpsjbq6behc.jpg
Or maybe they are just scratches in the steel underneath the bluing. Whatever they are, they just make it look that much more utilitarian and that just makes me like it that much more.

We'll finish this post with a look at the rest of the markings on the barrel. We already saw the caliber marking on the right side of the barrel between the gas block and front sight tower. There are three more marking on the bottom hidden by the handguard. The first one is "DE":
P1150149_zps0rkx8jta.jpg
This stands for "Deutschland" (Germany) If I remember correctly, the German government requires all German made export firearms to be marked with this stamp.

Number two is the serial number:
P1150150_zpsywoumujr.jpg

And the last marking on the bottom of the barrel is the SSD logo:
P1150153_zps2oaqp0ds.jpg
To the right of the picture, we see the front of the milled trunnion with the pressed steel receiver shell wrapped around it. We'll pick up there in the next post.
 
Picking up right where we let off, lets move on to the receiver.
In front of the magazine well on the bottom of the receiver we see some markings just like an original would have:
P1150157_zpsuz5rf8o3.jpg
Starting at the upper left and moving clockwise we have:
fxo: This is the code for Haenel. If this was produced in WWII, that would be the company that assembled the rifle
cos: This is the code for Merz Werke, the company that made the receiver stamping. If I understand correctly, they just stamped it while Haenel then formed it.
SSD mark: The company that actually built it and the only marking here that has any real meaning! The others are on there just for fun.
E/37 waffenamt. This would be a Quality control mark applied by Haenel during assembly.
The line running along the center of the receiver is where it meets and is crimped and welded together once formed around the trunnion.

Here are some spot welds at the front of the magazine well where the stamping overlaps once shaping is complete:
P1150179_zpssqdxyx03.jpg
Looks kinda' cheap and shoddy doesn't it? Originals do too. Steel origami.....I love it.

Looking up into the magazine well, we see something interesting going on:
P1150177_zpsddy250pn.jpg
P1150178_zps5nj5sqnr.jpg
Notice on the outside left and right sides of the magazine well that there are two corrugated bumps (also known as reinforcement ribs) stamped into it for strength. There should be corresponding divots apparent on the inside and there are on the upper corrugations . But the lower corrugations appear to be welded over on the inside; that's because they were. You see, in order for these to be imported, the magazine well was required to be incapable of accepting standard double stack magazines in order for them to be considered as "sporting firearms" so.....they welded a plate up in there. After they were here, that plate was milled out and the weld smoothed over a bit so that magazines could be inserted but evidence of what was done remains. It looks like they applied some cold blue up in there too. I talked to a guy who bought a stripped receiver from one of the 50 unsold rifles. Apparently, someone slipped during the removal process and milled an approximately 1/4" notch out the side of the mag well....oops! That one became a parts gun is a split second.

Here is a shot of the right front half of the receiver:
P1150160_zpsrvvzgul4.jpg
There are lots of neato torpedo things to see here. First, we see several reinforcement ribs, two on the magazine well and a larger/longer one starting just in front of a round indented area. This whole section of the receiver pictured above is wrapped around and spot welded to a large milled trunnion. You can't see it but it's in there. All of the indents we see in this area, the round indent just referenced, the indent running parallel to and above the large reinforcement rib and the two vertical indents at the front of the receiver, all of these correspond to identical indents milled into the trunnion and they act as positioning and grasping points to locate the trunnion exactly where it needs to be inside the receiver shell and keep it there. Then spot welds were liberally applied all over the place to make sure everything stays put. This way of building things is straight up blasphemy to old world craftsmen but it works! In 1945, this was considered to be an extremely inexpensive way of building a rifle but modern technology has made it expensive and generally obsolete. There are still many rifles out there built this way but it's almost dead what with modern molded polymers being all the rage these days! I hate to see it go. It just has such cool utilitarian character.
Just behind the vertical indents is the barrel retaining pin. Remember, these have press fit barrels, not threaded ones. Just below the large reinforcement rib is a line of four spot welds and to the rear of those are two pins that hold the ejector in place. Below that is the magazine catch, a few more random looking spot welds holding a reinforcement plate inside the receiver shell and, finally, we see the non-removable pivot pin for the swing down trigger housing.

Above the long reinforcement rib is the spring loaded dust cover for the ejection port. Stoner pretty much straight up lifted this design for use on the M16. And, just like the M16, it automatically opens any time the bolt moves to the rear. Here, it is shown open and ready for dirt:
P1150166_zpsyaz3jdgt.jpg

Here is a close-up look at the right side of the trigger housing:
P1150169_zps0venusqn.jpg
Just like the receiver, it has a bunch of reinforcement ribs all over it. They are probably not all necessary but this was still a relatively new way of building and I guess they figured it was better to err on the side of caution. They make it look interesting but I'm sure that was not a consideration in the design stage! We see various pins holding the hammer, trigger and various other internal bits in place. Above the pistol grip is a checkered button. On an original, this button sticks out both sides of the trigger housing and is slid back and forth to select either semi or full automatic fire. On the SSD version, it does nothing and is screwed in place to a bracket welded inside the housing. Notice that the trigger guard has another piece of stamped steel circling inside it. This both strengthens it and seals up what would otherwise be a large opening to the insides of the trigger housing.

Here's an even closer shot showing both the import mark and the how the axle pins are peened in place to their bearings:
P1150167_zpsaqqudfmt.jpg
The import stamp is a bit hard to read in the photograph because it's imprinted so shallow but it reads "Made in Germany by SSD for PTR-91 inc Farmington CT. USA". At the top of the picture is the scope rail. It's spot welded in place and was designed to use the same scope mount as was used on the G43 rifle. I don't have an original mount anymore but, when I did, I tried it on a PTR44 owned by a friend of mine. The rail was cut too small so, while the mount would slide on, it would not properly tighten down and thus was pretty wobbly on there. I have seen these rifles with scopes attached so maybe one can be made to fit properly? I don't know but be aware of this potential problem if you plan to install a scope.

Moving up top we have the rear sight:
P1150172_zpsrxmeunef.jpg

Left front side of the receiver:
P1150174_zpspj6g54tr.jpg
Much of what was observed on the right side is repeated here. We see the serial number in the same place it would have been back in the day. Missing are the manufacturer and year of production stamps. We can also see the magazine release button and charging handle.

Left side of trigger housing:
P1150175_zpsgnvhcs6a.jpg
As with the receiver, much of what is seen here is a repeat of the right side. The safety is set in the "fire" position and the "PTR44" model designation stamp is seen just below the charging handle slot. Notice the large rectangular bump at the upper front of the trigger housing. On an original, this is a clearance bump for now absent full automatic internal parts. It is also where a waffenamt would be stamped. Some PTR44's do have a fake inspection stamp here but this one does not for some unknown reason.

A close-up of the safety lever set between the "Safe" and "Fire" positions so that you can see both in one picture:
P1150194_zpsqramafgq.jpg
There is WAYYY too much glare in the picture but it's better than none at all I guess. While the "F" and "S" stamps look fine, the position detents stamped into the housing are much less distinct than on original examples that I have seen. They do their job just fine though and hold the lever in place with a positive "click".

Here, we have removed the walnut grips:
P1150183_zpsoctfjcjz.jpg
The little blued washer looking thingees set into the backs of the grips go over the bumps stamped into the grip frame to keep them from moving around. The cutout in the grip frame is to hold one last round for yourself in case your position is overrun. No, not really but it is kinda' funny that it's bullet shaped.
The grips are made in the USA. While we are on the subject.....supposedly, the US made parts are as follows:
All wood parts, charging handle, trigger, hammer, sear, disconnector, magazine follower and magazine floor plate.
BE ADVISED, there have been instances of broken hammers, triggers, and disconnectors. All can be replaced with original parts BUT remember that the axles for these parts are peened in place. Peening in place is "authentic" but it's also a vexing problem for the home gunsmith if any of these parts need to be replaced. Personally, I recommend replacing them BEFORE you have a breakage. I'm NOT going to get into a 922 compliance debate here so I'll just say that, with regards to sourcing Quality parts in this area, you need to figure that one out on your own. Whatever the case, you need to get someone who knows what they are doing if you wish to go about working on the trigger housing. Let me repeat that.....you NEED to get someone who knows what they are doing if you wish to go about working on the trigger housing. If you screw it up, you are REALLY going to screw it up!! Is that clear?

Last picture for this post is the bottom of the pistol grip:
P1150184_zpstcg5sj9j.jpg
P1150186_zps8yxzu8x8.jpg
Are they stress cracks? It sure looks like the one on the right is. I think the one on the left is just a stress mark. I wouldn't worry about it as this appears to be a common occurrence on originals too. The design of the MP44 was and is pushing the limits on what can be done with forming steel and similar marks are seen all over this rifle albeit not to the extreme seen here. It just adds character if you ask me.
 
Picking up right where we left off, let's rip this thing apart and take a look inside. Everyone reading this most likely knows how to take the MP44 apart so I didn't take any pictures of that. If you don't know how it comes apart, it couldn't be easier. Remove the magazine, remove the pin holding the stock on and pull the stock off. Swing the lower down and dump the contents out the back of the receiver. Done.
Let's start by discussing what was done to the PTR44 to prevent you from easily dropping original WWII reciprocating parts into the receiver. The answer is....something but not much and what was done does not always work. What?? Let me explain. Take a look at this photo taken at the rear of an original MP44 receiver:
P1130781_zpsjhmzsfyd.jpg
We can see that there is a simple tube welded in place at the bottom of the receiver where the takedown pin passes through.

Now take a look at this picture showing an HK93 receiver on the left and the SSD MP44 receiver on the right:
P1150116_zpsfa55fqr8.jpg
The HK93 has a simple piece of tube welded in place just like an original MP44. But the SSD receiver has a steel block welded in there instead. If you look very closely, you will see that there is a small ear rising up from this block at either side. The purpose of this is to keep a WWII manufactured bolt and carrier from being inserted as they will hit these ears. The SSD produced bolt and carrier is made just a bit more narrow at the bottom than original parts so that they clear these ears. And it seems to work on SOME rifles. But, on other rifles, original parts will slide right past these ears. It seems that on some of them, the ears must have been machined too thin to do their job. Now before any of you folks start questioning whether or not this makes some of the PTR44 rifles illegal, consider that the receiver is still not cut for the full auto trip lever. I'm not the ATF and I won't discuss legalities but I will say that, even if you can/do fit an original bolt and carrier into your PTR44, you're still not going anywhere without cutting holes in your receiver and modifying it further to fit an original lower. No, I'm not going into details.

Here's a look at the bottom rear of the PTR44 receiver where the takedown pin passes through:
P1150204_zpssdhqhiym.jpg
Lots of sloppy weld going on there with a tear in the sheet metal thrown in for good measure. Who cares so long as it works.

Here are a couple angles showing the bottom of the receiver at the rear of the magazine well:
P1150203_zpsfoauzyjl.jpg
P1150200_zps5lxoq6pg.jpg
In the first picture, we can see a slot cut into the side of the receiver. This is where a lever (mounted in the swing down lower) passes through. The purpose of this lever is safety. It sticks up through this slot when the bolt is not in battery and prevents the trigger from being pulled. When the bolt is fully locked in place, there is a lug on the bolt carrier which presses down on the lever allowing the trigger to be pulled and the rifle fired. On a select fire rifle, there is an identical slot cut into the other side of the receiver where the full auto trip lever passes through.
In both of the above pictures, we see a slot cut into the bottom of the receiver running back from the magazine well. This is where the hammer passes through and it is one of the potential problems in the SSD rifles. The problem is two fold. The first part of the problem is that, because the bolt has been modified to pass the ears on the block mentioned earlier, it is narrower at the bottom than the width of this slot. If the rifle malfunctions the carrier sometimes pushes down on the rear of bolt forcing down through this slot. Something has to give. The bolt is made of hardened steel and the receiver is made of thin pressed steel; guess which one gives. Over time, this can create a bulge in the receiver which, needless to say, is very bad. On original rifles, this cannot happen because the bolt is wider at the bottom than the slot. This can be rectified by welding a piece of steel along the bottom of the receiver and cutting a new, more narrow slot. The second part of the problem is hammer related. One of the US made parts on the PTR44 is the hammer. Apparently, some of these were either made wrong or installed wrong preventing them from pivoting straight along the longitudinal axis of the rifle. As a result, the hammer hits this slot as it rises beating up the receiver and/or the hammer. It can be fixed too but it requires someone who knows what they are doing because, as mentioned earlier, the pins holding the fire control components are peened in place. Mine exhibits this problem. After fewer than 100 rounds, here is what my hammer looks like already:
P1150286_zps1nejtlhs.jpg
Notice how it is getting chipped away at the edge. Pretty isn't it?

In the next post, we'll take a look at the bolt and carrier.
 
Next up is the bolt and carrier:
P1150212_zps7kwxtamp.jpg

If you own an SKS, you will immediately notice some striking similarities. No, I'm not saying that the SKS was based on the MP44. What I AM saying is that the locking system is essentially identical . Here is the PTR44 bolt compared to the bolt from a Soviet SKS:
P1150214_zps7pstbtjq.jpg
Note the twin unlocking lugs sticking up at the rear of the '44 bolt and compare them to the single lug at the rear of the SKS bolt.

Bottom of SKS carrier showing twin lugs hanging down compared to the single lug hanging down from the bottom of the '44 carrier:
P1150228_zpskdglpgym.jpg

Both mechanisms as they would look in the locked position:
P1150239_zps9fxbkx4h.jpg

And unlocked:
P1150240_zpscubqixzx.jpg
Neato! Moving on.....

Both the bolt AND carrier (but especially the carrier) in the PTR44 are prone to failure. Apparently they were over hardened and MAY (I'm being polite) destroy themselves sooner or later (most likely sooner) if you actually shoot your rifle instead of just stare at it or play with it while you watch war movies. According to SSD, they had an outside company doing the hardening when these rifles were imported. Once they became aware of the problem, they started doing the hardening in house and say that new made parts are properly hardened. Whatever the case, if you plan on shooting your rifle any real amount, I would greatly recommend that you either find yourself an original WWII bolt and carrier or buy new made SSD ones. While the rifles are not being imported at the moment, some parts are and at present (09/28/2017) are available here:
http://www.dkproductiongroup.com/
In addition to other parts, new made operating rod/carrier assemblies are available. Bolts are not for sale as of this writing but are in the works according to the owner, Tor, who is based in Kentucky and is working with SSD to make BD44 available in the US again. I have bought a carrier already and will cover it in an upcoming post. Additionally, I will be buying a bolt and 10 round magazine as soon as possible as well. I have found D-K Production Group to be easy to deal with and responsive to any questions I have posed. I'm usually a somewhat picky customer and I have nothing but good to say about them to this point.
Alright, lets look at the bolt first. We already saw it in 3/4 view above. Here is the top front showing the serial number:
P1150215_zps5zdptxf1.jpg

Two views of the unlocking lugs:
P1150216_zpsqnie9hpd.jpg
P1150218_zpsppjwdg6n.jpg
If I remember correctly, some people have noticed chipping in this area. I have not yet but these pictures were taken with only 50 rounds through the rifle.

Top rear of the bolt showing the area the bolt carrier pushes against to lock the bolt into battery:
P1150219_zpskzb7rg0h.jpg

Bolt face:
P1150221_zpsnvtvapes.jpg
At the 9 o'clock position is seen a little tab sticking out under the extractor. I have seen at least one picture where this has broken off.

Bottom of the bolt:
P1150222_zpsqpfnwjxi.jpg
Rear is to the left. You can see bluing worn off where it engages the locking block in the receiver. The rib running along the entire bottom of the bolt is what SSD has narrowed to clear the ears at the rear of the receiver we saw earlier.

Rear of the bolt showing the back of the firing pin:
P1150223_zpscecgzepc.jpg
The large cut out on the left side is where the ejector passes. Also seen is bluing loos at the bottom where it hits the locking block.

Tip of the firing pin:
P1150227_zpsjamznsny.jpg
This part is free floating but is friction held in the bolt by an internal spring. To remove the firing pin, you simply tap the rear of the bolt on a hard surface. The firing pin will pop out a bit and you can then just pull it out the back with you fingers. To reinsert, turn the firing pin so that one of the flutes is at the 6 o'clock position and push it in until is stops. Then, rotate it a bit until you feel a "click" and push it in the rest of the way. Done.
 
Next up is the carrier. The pictures that follow represent 50 rounds through the rifle.
First up is the unlocking lug that grabs the bolt as the carrier travels to the rear during recoil:
P1150231_zpspn9luijk.jpg
P1150232_zpsdlbgqbed.jpg
With repeated use, this entire area is almost guaranteed to shear clean off the carrier. That equals a BAD day at the range and it can't be good for the sheet metal receiver either.

Here is the cam surface that pushes down on the bolt forcing it into engagement with the locking block in the receiver:
P1150233_zps671d98fu.jpg
To the left of the picture is seen a round thingee in the carrier. This is the intermediate striker. When you pull the trigger, the hammer hits the rear of this part which in turn hits the rear of the firing pin. The part sticking out of carrier and exiting out of the bottom of the photo is the charging handle. We also see the bottom of the unlocking lug and the rear of the gas piston exiting the right side of the picture.

Bottom of the carrier which has been narrowed by SSD; again, to pass by the ears at the rear of the receiver:
P1150235_zpsgamvsyfj.jpg

Detail of the gas piston where it threads into the front of the carrier:
P1150236_zpsl5eb78x7.jpg

Left rear of the carrier:
P1150237_zpsinf0srfw.jpg
Notice that no machining was done here, giving away the fact that the carrier is forged. Originals ware made the same way. To the left is a round lug sticking out the rear of the carrier. This engages the end of the recoil spring.

More evidence that the part is forged:
P1150238_zpsza3dbpvb.jpg
Again, originals were forged too so this is not to say that SSD has tried to cut corners in production here. It's just the way they are/were made. The round bit at the top of the picture is the rear of the gas piston. You can also see the rear of the intermediate striker.
That's it for this post. In the next one, we'll compare the carrier shown in this post to a new made one manufactured by SSD.
 
In this post, we'll take a look at a new made oprod/carrier produced by SSD and bought to replace the one that came with the rifle. This was done because, as pointed out earlier, the original is most likely over hardened and will fail with use. This new one is current production and, according to SSD, is properly hardened by them in house instead of being outsourced as the original was. It arrived in packaging that was way more than was probably necessary and it was packed well enough to survive being run over. Thank you for such care D-K Production Group! It slid right into the receiver and was a perfect fit. It differs in a few areas cosmetically but otherwise looks to be nearly identical down to the machining marks on the bottom behind the unlocking claws. It had a few small (really small) rust spots on it but they'll clean right off and any marks left behind just adds to the patina if you ask me. While the original is all blued, this one is a mixture of finishes. The cocking handle and piston are bright steel while the carrier itself is a dull grey. I guess it's blued but it's almost the color of graphite. Whatever the finish is, I like it better as it looks more like a vintage part. Anywho, all I care about is whether or not it holds up. Tor (the guy at DK Prod.) says it is warranted and others have contacted me speaking very highly of both him and replacement parts that he has supplied so I am very optimistic. Let's take a look. These pictures show the replacement part as it came out of the wrapping with no oil applied.
The new replacement part is on top:
P1150241_zpsgctb7ynf.jpg

Replacement on the right:
P1150242_zpsjdvypsro.jpg

Replacement on bottom:
P1150246_zpsm01l4awr.jpg
The new part is closer to the camera so the charging handle diameter looks to be larger. As far as I can tell, they are actually the same size.

Replacement on bottom. Notice the graphite grey color compared to the black on the one that is numbered to the rifle. Also notice that the upper one has its intermediate firing pin retaining pin ground flush:
P1150247_zpsrm5hgdzg.jpg
Also notice that the new part has the full auto lever trip machined into it while the one that originally came with the rifle does not. SSD says they did this so that the part can be used in an original, select fire MP44 should you have one. Of course it has no function in the semi-auto version because, not only is there no cut out in the receiver for a full auto trip, but there are no full-auto components in the trigger housing anyways.

Replacement is on bottom:
P1150248_zpscmdborlj.jpg

Replacement on the left. Notice that the machining marks behind the unocking claws are very similar. The webbing on the new part is a bit beefier than the numbered one I think. When engaging the claws on the bolt with the claws on the carrier, there seems to be less side to side movement on the new one.
P1150251_zpsij5o6wvf.jpg

The new part looks good and seems to fit perfectly. Time will tell but, as I said, Tor says the part is guaranteed so I am very optimistic. It was expensive but I don't care so long as it works!

And.......that's all I have to this point. I should be updating this thread in a few days on the original forum and when I do, I'll post it here too if you folks are interested. Thank you for your time.
 
Last edited:
On the contrary, thank you for your time. I've been interested in these, the up and coming HMG version, and SMG's FG42 as well. Not sure if I'll ever bite the bullet and shell out for any of them though.
 
Combloc1

Well done! Excellent job with both your narrative and the detailed, close-up photos of the PTR44.
 
Thank you guys!

Alrighty. By August 13th, I had taken the rifle out to the range twice, both times with the magazines that came with the rifle. The first time was 30 rounds of reload ammunition that came from someone who used to own an original matching MP44. I saw the rifle some years ago but I never fired it nor do I remember who made it or when. I only remember that it was in VERY nice condition. He passed on and the family sold the rifle but I was given all of the ammunition including German wartime, Czech, East German and reloads made from 30.06 and .308 cases. I was also given components including empty fired cases and formed cases that were ready to reload as well as Hornady and Speer 125gr bullets. Bear with me, as I am going somewhere with all of this. I know that the reloads must have worked in his original MP44 even though the shoulder profile is quite different than the factory steel case stuff. I know this because I have a large bag of fired brass that looks just like the loaded rounds. Now, my question was....would it work in my rifle? Why no, no it wouldn't. Out of 30 rounds I tried (ten rounds per magazine each time), only 13 would allow the bolt to close. Those thirteen had shoulder profiles most like (although still unlike) period factory rounds. They fired but either he down loaded them or they stuck in the chamber pretty good because all but a couple fell out of the ejection port about three inches and plopped down on the table. A couple flew but only about five feet. However, they are now fire formed to my chamber so I pretty much know what it looks like in there. The ones that would not chamber would bind the action up pretty good, requiring me to bang the charging handle on the edge of the table to get the action open. So, did his original rifle have a sloppy chamber? I don't know....maybe? So the first range trip was a failure but I kind of expected it given the shoulder profile on the rounds.
That night night after cleaning, I removed the firing pin and put five rounds of East German in the magazine. They fed and ejected just fine although I did have one case of the bolt not picking up a round. I know that is a problem with SSD magazines. So, I was confident for the second range trip. I picked out the most beat up box of 1961 DDR rounds out of the stash and another box of 11 mixed DDR rounds from 1958 and 1961.
The nest day, I headed out again with 19 rounds of 1961 DDR and 7 rounds of 1958 DDR. One magazine had 15 rounds while the other had 11. I had one case of the bolt not picking up a round in each magazine. I also had 7 dud rounds that did not go off. However, I had no jams of any kind and, while I was primarily testing function and not accuracy, I had no problem hitting approx. 5 " rocks at 100 yards. I didn't even bother to take a target, preferring instead to just aim at objects lying in the berm.

Let's look at some rounds first:

P1150253_zpsekv60jyr.jpg

Starting from the left, we have a 1943 German round, a 1946 Czech, 1962 East German, fired 1961 East German, form fired reload from my rifle and reload that would not chamber in my rifle. Remember that all of the reloads are formed from 30.06 and .308 brass. Note the much less distinct shoulder profile on the unusable reload compared with everything to the left of it.


Here are 5 random DDR cases that I fired:

P1150254_zps1zk5dr0x.jpg

P1150255_zpsjd40hzwu.jpg

I will get some Privi Partisan as my primary ammo but I don't have any yeti. I'll probably end up reloading too at some point.


Now on to the bolt and carrier. First up is the bolt. At this point its round count is 82. I'm using the one numbered to the rifle until Dingo's are imported. It looks like it is a getting good purchase on the locking block:

P1150256_zpsvmk0pnru.jpg

P1150259_zpsc6vttp1a.jpg


Where it interacts with the locking cam on the carrier looks ok:

P1150260_zpssgttydf0.jpg


Looking at the bolt from the front, we can see that the left claw on the carrier is engaging it more than the right BUT it was like this before I installed the new carrier so that doesn't tell us much given the low round count:

P1150261_zps2roh9krt.jpg


There is also a bit of peening where the web on the carrier hits. BUT these marks were there BEFORE today and ARE NOT caused by the new carrier:

P1150269_zpsgf4he7qs.jpg

There is some crud in there that makes the curved area look rough and beat but it's smooth. The peening is on either side of that area just where the radius begins. Problem or normal? I have no idea as I have no prior experience with these rifles.

The carrier has a round count of 32.

Left side of unlocking claw area looks fine:

P1150265_zpskcnqbdfr.jpg


Several shots from different angles of the right side showing some peening of the web.

P1150264_zpsc5axdtcu.jpg

P1150266_zpsknsixrlz.jpg

P1150268_zpsgmjnezhx.jpg

These marks were not there before I fired it. Again, normal or not, I do no know. I only post them because they are there. I have rifles that exhibit peening of parts as they mate so it does not particularly bother me so long as it does stop at some point. You guys with original carriers, have you seen this before? Again, I am NOT saying this is bad because I have zero experience with these rifles so I don't yet know what is normal and what is cause for concern. Time will tell.


After writing this, I spoke with Tor at D-K Production Group about the peening on the carrier. He agreed with me that it looks like normal wear as the parts wear in to each other. Others who looked at the wear agreed as well. There is a man I call the "MP44 Wizard" (he wishes to remain anonymous) who knows these rifles like the back of his hand. Soon, I will be sending the rifle to him for a thorough going over but he wanted me to run some rounds through it first to see what I had so that he would have some idea what needed attention and what did not. So, I ordered some Privi Partizan ammunition and wait for it to arrive.
Two weeks later I had some Privi Partizan ammo in hand and off to the range I want again. I managed to get 75 totally frustrating rounds down the pipe before giving up and heading home. The rifle was nothing short of a jamomatic. Every single stoppage was a failure to feed which led me to believe that the magazines were the problem. The factory manual says quote:
" NOTE THE 30 RD MAGAZINES SHOULD ONLY BE LOADED TO 20 RDS FOR IT TO FUNCTION PROPERLY. The reason for this is that the magazines were made to original WWII ammunition specifications which differ from present German proof house specifications. The slight difference in the cartridge dimensions cause feeding malfunctions if the magazines are loaded with more than 20 rds."
Being that it fed pretty well with East German ammunition, I can believe that there is a dimensional difference between PPU rounds and WWII/DDR/Czech rounds. However, it didn't matter how few or how many modern rounds were loaded into the new made magazines, they just simply were not going to work with the PPU ammo.
Now, original MP44's were known to be magazine sensitive and troops were told not to load more than 25 rounds in the magazines in any event so I have every reason to believe that the new ones are picky about what you shove into them as well! To compound the matter, it is a well known fact among PTR44 owners that the magazines shipped out with the PTR44's were highly suspect both in dimensioning and quality control.
There was also the potential problem of an undersized chamber. Yep.....another potential issue. Apparently, some of the PTR44's had chambers that were undersized which, of course, is a bad thing. Some customers noticed that their chambers appeared to be reamed, sometimes rather crudely I might add, in an effort to correct the problem. Some had chamber issues and some did not. Mine shows no sign of reaming but that doesn't mean there isn't a problem. Whatever the case, you can't diagnose something when you have multiple things going on. You HAVE to remove as many variables as possible so that you can tackle the problem systematically. So, to that end and at 157 rounds, I was done shooting this thing until I could get my hands on some proper government produced magazines of known Quality. We'll take that up in the next post.
 

Attachments

  • P1150264_zpsc5axdtcu.jpg
    P1150264_zpsc5axdtcu.jpg
    251.6 KB · Views: 5
Last edited:
This past Friday, I picked up two magazines at the MAX show. One is East German production and the other was made by Haenel during the war. What I paid for the pair made me sick to my stomach but I didn't have a need for them back when they were 50 bucks a pop.....oh well. Anywho, once I got them home and compared them to the SSD magazines, it quickly became obvious that the SSD ones are pretty much a lost cause. When it comes to magazines feeding properly, it's all about geometry and SSD clearly got all the angles wrong when they made mine. Up to this point, almost everything I read pointed to the dimples on the sideplates being stamped in the wrong place. That is true but that is only the tip of the iceberg; we'll do some comparisons in a minute. First, I want to talk about how well the ones I just bought work/do not work.
The Eastie produced magazine clicked right in, the dimples were in the right place and there was no front to rear rock in the magazine well. As stated earlier, the MP44 was/is known to be magazine sensitive and front to rear rock is usually the kiss of death in the reliability department. So, I was hopeful about the DDR magazine.
The Haenel magazine clicked right in and the dimples were in the right place BUT there was significant rock.....not good. Then I remembered a conversation I had had with the MP44 Wizard. He told me that he had a number of WWII magazines that rocked in his original rifles and caused feeding problems. His fix was to layer tape on the front of the magazine until it fit properly in the magazine well with no rock. If it worked for him, I might as well give it a try. I found that ten strips of cellophane tape layered on the front of the magazine made it lock up tight. Interesting.
On Saturday, I headed out to the range with 80 rounds and the new magazines. Two sets of 20 in the DDR produced only one jam and it was a stovepipe on ejection which is not a fault of the magazine. Next up was the Haenel with tape. The first set of twenty worked perfectly. On the second set, I removed the tape. The first round charged fine and ejected fine but round two jammed on feeding leaving it nicely bent so that the bolt would not close. The exact same result occurred two more times. At that point, I removed the magazine and put the tape back on. After that, the rest of the magazine went off without a hitch. 80 (77 when you figure in the three destroyed rounds) rounds does not reliability make but the initial results are promising. Alright, let's look at some pictures and I'll show you why I think the SSD magazines that came with my rifle are pretty much scrap.

First though, let's look at some markings. SSD production has no manufacturing mark but is marked "MP44":

P1150324_zpsemuvwfhk.jpg

P1150329_zpspqtybpbd.jpg


DDR production is marked "1001" one side and "MP44" on the other. 1001 is a common mark seen on various Eastie produced firearm bits including Lugers, PP's, P38's and K98K's. It's probably on other stuff that I haven't seen too. Some say 1001 is a manufacturing code associated with the old Walther plant renamed the Ernst Thälmann Werk under GDR occupation. Others say no. I don't know exactly which plant it represents but I do know that it means it was made by the East Germans. That's good enough for me. Enough talk. Pictures please:

P1150325_zpshkb29zzv.jpg

P1150330_zpsgrn6g7aj.jpg


Haenel:

P1150326_zpsvmujhbmm.jpg

P1150331_zpssqljxeko.jpg

A little better picture showing the E/37 waffenamt a bit clearer:

P1150332_zpsjzcwe9uf.jpg

Notice in the pictures above that the "MP44" stamp is distinctly different on all three.


Some pictures showing the dimples in relation to the bottom of the magazine well when locked in place.
SSD:

P1150317_zpsitkob5ky.jpg

Note how low they are. The side to side play is negligible. That never seems to be an issue no matter who made them but the front to rear movement is SLOPPY. Both magazines look and fit identical. I have not tried the tape trick yet to get rid of the movement (I will though) but, as will be explained later, I still don't think they would work correctly.


East German:

P1150316_zpshmjgoc9r.jpg

Minimal clearance between dimples and bottom of magazine well. Minimal movement, no slop.


Haenel:

P1150315_zpsbrx5tpb2.jpg

Looks just like the DDR magazine but just as sloppy as the SSD magazines. Again, ten strips of cellophane tape on the front of the magazine eliminates all slop.

While I personally believe that the vast majority of the PRT44 was made using original dies and molds, I think the magazine side plates were 100% reverse engineered and possible the body too. If the body was made using original dies, it was done poorly. As evidence for my side plate theory look at the following picture:

P1150318_zpsu0mnp347.jpg

From left to right we have Eastie, SSD and Haenel. Notice the little reinforcement hump above where the magazine catch engages. On the DDR and Haenel, that bump is rectangular and identical. But on the SSD it is square. Interesting.


The dimples are different too. Here is the Haenel:

P1150320_zpsmfal38wj.jpg

Notice that the top of the dimple is sharp and flat. In fact, the stamping process has pierced the side plate. The DDR is identical.


Now take a look at the SSD:

P1150321_zpskzjbo2fo.jpg

It looks completely different. From the size to the shape to the fact that the stamping does not pierce the steel, it's just different.


I keep talking about putting tape on the Haenel magazine to get rid of the rock. Here is what that looks like:

P1150314_zps5hc7zata.jpg

The DDR is on top for comparison. It isn't pretty but if you are careful with how long you make the strips, they can't be seen when the magazine is seated. The tape just acts as a shim. It's kind of a rig job I guess but it works and I don't plan on using this in battle! When the tape gets too ragged, just slap some more on there. My tape is longer than it needs to be but I just put it on there for testing.


Here we see the front top of all four magazines showing the cut outs for bullet clearance:

P1150322_zpsvwr3op6t.jpg

From left to right we have SSD, SSD, DDR and Haenel. Notice that the cut out is different on both SSD magazines. That's kinda' weird if you ask mebeing that they are made in the same factory and only in limited numbers The DDR is different than the Haenel too being pretty much flat at the bottom as opposed to the continuous radius on the Haenel. Also, IIRC, the followers in the SSD's are US made parts. They fit very poorly in the magazine bodies which cannot be good for reliability.
 
Here we see an SSD on the left compared to the DDR:

P1150334_zpshv90lsxs.jpg

P1150335_zpsl6vrdi0o.jpg

P1150336_zpsih2kayqu.jpg

Notice that the follower on the SSD does not reach the front of the body and there is a little nub sticking out the front of the follower. If you try to twist the follower in the DDR and Haenel magazines, they do not move around in there. But on the SSD magazines, you can twist the follower quite a bit and they "click" into different positions. As I said, they just don't fit right. Notice too that the left bullet guide (the little humps inside the body) is misshaped on the SSD.


Here we see some rounds in the magazines, SSD on the left and DDR on the right:

P1150337_zpsemkfdkef.jpg

All kinds of problems with the SSD are becoming apparent. The feed lips point up much more on the SSD as opposed to the more flattened lips on the DDR. This causes the rounds to be held much less securely on the SSD. Notice too that the top round in the DDR is riding ALONG the bullet guide. This is critical to proper feeding. On the SSD the round is riding OVER the bullet guide.


Here is a closer shot of an SSD:

P1150339_zpsfsmkhfpj.jpg

And Haenel:
P1150340_zps70zgimwp.jpg

Again, notice the different geometry of the feed lips and the critical placement of the top round in relation to the bullet guide.


SSD:

P1150341_zpst3ngo6zk.jpg

East German:
P1150344_zps6zjs9tfg.jpg


OK.....Why is this bullet guide thingee so important? Take a look at the following photo:

P1150346_zpsdy3rno2f.jpg

Here, we see the SSD on the top and the DDR on the bottom. The rounds are in the process of feeding. Notice on the DDR how the guide is BESIDE the round and positioning it toward the centerline of the magazine? Guess what's along the centerline of the magazine........the centerline of the breech. That bullet is being pushed right into the barrel. Now look at the SSD. The round is riding OVER the guide and, while it is still angling in somewhat, it's far off from the centerline. There is a decent to good chance of it hitting the rear of the barrel instead of going into the breech. I can't show it in pictures but the combination of the flattened feed lips and the position of the bullet guide along side the round in the DDR firmly holds it from flopping around as it moves forward. None of this holds true with the SSD magazine. If I turn the DDR magazine upside down with the round in the position shown, the round stays put. If I do the same with the SSD magazine, the round drops free of the magazine. When it comes to magazines, reliability is all about geometry man!!


Lets look at some more shots showing the bullet guide problem.

This shows the SSD on the left with the round clearly riding over the guide while the DDR on the right is riding along the guide:

P1150347_zpsqqvreot4.jpg


SSD first with DDR second:

P1150341_zpst3ngo6zk.jpg

P1150344_zps6zjs9tfg.jpg

They don't really even look like they are for the same rifle.


Here is a different angle. The SSD is shown first and the DDR is second:

P1150349_zpswxhrmahl.jpg

P1150348_zpszz1kzp5k.jpg

Notice how much more the SSD is angled up. So, not only is it NOT pointed IN far enough but it's also pointed UP too much. It's a double whammy!!


Here, they are shown side by side with the DDR on the left. The difference is telling:

P1150350_zpsoqrh9bvf.jpg

I took more pictures but by now, you should get the point. The SSD magazines have serious flaws. In my case, they are so bad as to be useless.


Now lets look at the jams I got when I removed the tape from the Haenel magazine:

P1150355_zpstkeudyn3.jpg

YEOUCH!! Those rounds look like they are in a limbo dance!! This is the result of a magazine that has too much front to rear slop. As the rifle is recoiling and the bolt is going home, your rifle is jumping all over the place and so is your magazine if it isn't secure in the magazine well. If your rifle is moving one way and the sloppy magazine is going the other, the tip of that round isn't feeding straight into the chamber. Instead, it's diving under or flying over the barrel resulting in bent rounds as shown above. There's a lot of force behind that recoil spring thingee!


Here are five random normal looking ( I think) spent casings:

P1150356_zpsool8js9h.jpg

P1150357_zpsyxo3mflx.jpg

This thing chucks rounds out with almost as much force as my HK91. I mean they go zipping down the firing line. They fly more or less flat and in a small arc ranging from straight out the side to a slight angle to the rear. I have no idea whether or not this is a normal ejection pattern but it's the one I have. If you have an MP44, let me know what your ejection pattern is please.

So......to recap this post. In my case, the SSD magazines are essentially trash. They don't fit in the rifle correctly, rounds don't fit in the them correctly and they make my rifle a jammomatic. They are useless to me. I bought one WWII magazine and one DDR magazine. Both seem to have fixed the jamming issue but the WWII one needs to be shimmed for fit to work properly.
I am currently at 234 rounds. Next up is to send the rifle off to the MP44 Wizard so that he can reinforce the bottom of the receiver, correct the hammer hitting the bottom of the receiver and generally go over the rifle looking for potential problems. After that is more rounds down the pipe to see if anything breaks. Meanwhile, I'm looking for a WWII bolt to replace the possibly over hardened SSD one. All of this is expensive and I'm nearly out of ammo at the moment so testing will be on hold for a but until I can restock. That's where I'm at and I'm optimistic.
 
Combloc1

Excellent write-up and photos describing the problems you are having with your PTR/BD44.

All of this is expensive and I'm nearly out of ammo at the moment so testing will be on hold for a but until I can restock. That's where I'm at and I'm optimistic.

Sounds like a true labor of love though I hope it doesn't get to be too expensive or too impractical to continue on with your efforts. Best of luck to you in your endeavors!
 
That was amazing work, thank you for sharing. I certainly understand the "true to the original"specs, but I would hope like crazy if I bought a post war commercial made rifle it would have the war time crudities polished away. That's just me, and the only STG44 in my house is my son's cheap 22lr GSG clone...which he loves, BTW. I wonder, can the SSD mags be fixed by forcing those feed lips over farther until the cartridge is running along side the bullet guide? I agree, the differences in magazines is remarkable that they were all made for the same rifle, but the rifle really didn't have a long time to "mature" as it were, before the war was over.
Too bad all of those STG44s and parts found in Iraq were destroyed.
 
Combloc1 welcome to Thehighroad.
Superb, write up. I read it back forward many times here and there.

Czhen
 
Status
Not open for further replies.
Back
Top