What gunsmithing or repairs have you done today

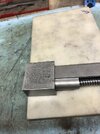
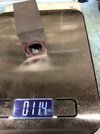
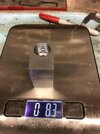
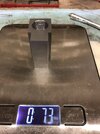
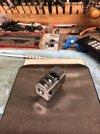
So, I was assembling a Geissele buffer tube (with their Super 42 braided wire H1 buffer spring and a Leitner-Wise bolstered buffer retainer) to a Arizona Rangers legacy M4 receiver. Wanted to use the TechCo reaction block. The problem was unlike using the Geissele block wherein the back of the castle nut can be abutted against the block to shoulder support the castle nut wrench, which prevents the wrench from slipping off / out of the castle nut notches as the torque wrench is being manipulated to spec. I needed to fabricate a wrench shoulder-support-spacer for the TechCo block as its integral buffer-receiver alignment notch does not allow the rear surface of its reaction block to support the wrench.....too much space. Fabricated aluminum spacers (0.3" & 1.2" length) to solve the current problem and future installations.


, IMG_9084.jpg IMG_9088.jpg IMG_9089.jpg IMG_9091.jpg IMG_9101.jpg IMG_9102.jpg IMG_9104.jpg IMG_9105.jpg IMG_9108.jpg IMG_9120.jpg
 
Last edited:
A neighbor brought me is Rem 742 with a loose stock that needed tightening and cleaned. It had been several years since I went through is guns ( 3 742) all in in 30-06. With the junk metal receivers I was able to get 2 to work, using 1 as a part gun. When I removed the grip screw it was all rusted up like it had been wet. So I ended up cleaning it up and applied some vibrate-tite to the threads and waxed the shaft to keep it from rusting anymore. While I had it I removed some spot rust off the receiver and applied a coating of floor wax to protect it. Oil attracts dust and where were at there is a lot of dust. When he gave me the gun it took a lot of effort to remove the magazine. Discovered it had swelled and squeezed it back down to size. Now it slides in and out easily. Cleaned up the bore and chamber, lubed the action and ready to go home.
 
I have a bunch of the WarComp's mounted on SBR's. It's a cleverly designed device.
A few setups.
I have only used the SureFire shims accompanying the device to properly time them.
I have these precision accu-washers that are pretty well received in the muzzle device community, haven't used any for installation yet. Screen Shot 2023-10-24 at 7.11.51 PM.png IMG_0182KAC SR-25 WITH SUPPRESSOR BLACK SCOPE & SLING RMR MOUNTED POOLSIDE 07.30.21 ANNOTATED ...jpg IMG_3690REALLY RIGHT STUFF CT-34 WITH ANVIL 30 POOLSIDE RIFLES 07.17.22WILSON COMBAT 6.8 SPC 2...jpg IMG_3690REALLY RIGHT STUFF CT-34 WITH ANVIL 30 POOLSIDE RIFLES 07.17.22WILSON COMBAT 6.8 SPC 2...jpg IMG_6328 copy.JPG IMG_7220REALLY RIGHT STUFF CT-34 WITH ANVIL 30 POOLSIDE RIFLES 05.19.23KAC SR-30 copy.jpg IMG_7233REALLY RIGHT STUFF CT-34 WITH ANVIL 30 POOLSIDE RIFLES 05.19.23KAC SR-30 CROPPED copy.jpg IMG_8719Gunsmith AR-15 Accu-Washer Muzzle Device Alignment System 09.22.23.jpg IMG_8720Gunsmith AR-15 Accu-Washer Muzzle Device Alignment System 09.22.23.jpg
 
The "idle mind is the Devil's bake shop". I was tinkering in the shop the other day. I had a simple AR hammer block device to check trigger installations etc. but I wanted a more robust
design so i fabricated one out of Delrin on the mill. Also wanted to fabricate a non-marring punch to displace the AR hammer / trigger pins to allow for gauging their hole diameters for proper
specification dimensions. Brownell's blank screwdriver handles. That's all I have for a hump-day contribution.

IMG_9223Gunsmith AR-15 Delrin Hammer Block Trigger Pin Push Tool Fabricated MJD  Oct 2023.jpg IMG_9190 1Gunsmith AR-15 Delrin Hammer Block Trigger Pin Push Tool Fabricated MJD  Oct 2023.jpg IMG_9221Gunsmith AR-15 Delrin Hammer Block Trigger Pin Push Tool Fabricated MJD  Oct 2023.jpg IMG_9219Gunsmith AR-15 Delrin Hammer Block Trigger Pin Push Tool Fabricated MJD  Oct 2023.jpg IMG_9220Gunsmith AR-15 Delrin Hammer Block Trigger Pin Push Tool Fabricated MJD  Oct 2023.jpg IMG_9193 1Gunsmith AR-15 Delrin Hammer Block Trigger Pin Push Tool Fabricated MJD  Oct 2023.jpg IMG_9214Gunsmith AR-15 Delrin Hammer Block Trigger Pin Push Tool Fabricated MJD  Oct 2023.jpg
 
Man, you guys really do some awesome stuff!! :thumbup:

Again, it’s not really gunsmithing per se, but I added a dot sight to my Gen 3 Glock 19 build. Then I took off the Tru-Glo sights and installed co-witness sights from Ameri-Glo to both the Bottomland Camo 19 and the Desert Camo Glock 17.

IMG_3294.jpeg
IMG_3295.jpeg IMG_3296.jpeg

(Glock 43X is photobombing.)

Stay safe.
 
Last edited:
The Extractor broke on one of my M1 Carbines.
I finally replaced it today.

This is the first time I have taken one down this far.

With the special Bolt Tool and a couple of good videos, I was able to fix it without creating other things that would need to be fixed or replaced.
:p
 
So, I have lots of recoil guide rod springs in new packaging and as many installed in pistols.....how to know if the spring is actually performing as advertised or IF the spring you
are using is worn out before failure to feed issues arise. I used this setup today to measure spring rates. The 0.250" brass "guide rod" (secured in a vise) for 9 mm springs is slid into a 3/8" O.D. x 0.277" I.D. aluminum rod, compressing the spring ends between the vise jaw sides and the free edge of the aluminum tube. The opposite end of the aluminum tube is fitted with a digital force gauge (which I have shown for other uses lately) that is used to compress the guide rod spring until a solid stack of coils is obtained; compression in "pounds" is read directly from force gauge display. I found one spring OEM rated for 15 lbs that was only 12 lbs. I now need to shorten the aluminum tubing to ~ 6".
That's all I have for a Tuesday tinkering in the shop.

IMG_9250A.jpg IMG_9259A.jpg IMG_9254.jpg Screen Shot 2023-11-07 at 7.04.26 PM.png Screen Shot 2023-07-19 at 4.14.02 PM A copy.png
 
After playing with my new to me S&W 28-2 and admiring how amazing the trigger is, I decided my Ruger SP101 needed a trigger improvement. So, I ordered the MCARBO spring and shim kit, and Friday night, I went through the inner workings, polishing any rubbing areas (did not touch the sear), changed out the springs, and added shims to the hammer and trigger as needed. It really improved the trigger pull. It is now smoother than the 28, although in SA, the Smith still wins. I do not have a trigger pull gauge, but it is very obvious the reduced the trigger pull.

It was also a good thing I took the gun apart. Whoever owned it before me obviously took it apart, and put some parts back in incorrectly. It still functioned, but it couldn't have been good for it.

I would love to have the 28-2 get a professional trigger job done to it to see how nice it could get. It already feels great, but I'm sure it could be made even better.
Easy to put the hammer spring strut in backwards at first. Things won’t work right if you do… or so I’ve heard. 😇

Did you polish the tube the trigger return spring fits in? I put 600 grit wet-dry sandpaper on a drill bit and polished mine up along with the other stuff. (That little trick seems to help smooth stuff out every time.)

Stay safe.
 
A little while back I replaced the plastic front sight on my Glock 17L with a green fiber optic blade that looked close to the same height. I didn’t shoot it then, but I grabbed it and shot it today. I guess the new sight was too low, with the adjustable rear bottomed out I had the POI several inches higher than what I prefer out to 20 yards with 124 gr fmj.

IMG_3473.jpeg

My POA is a 6 o’clock, having the red X ring sitting on top of the front sight at 10 yds. My preferred POI would be right on the X with that sight picture. At 10 and then 15, it shot high and left the big hole above the X ring.

At 20 yds with the same POA, shots hit another 2” higher, winding up around the 9. When I brought it in to 5, I held an inch and a half under the X ring and hit low, raised a half inch at a time to finally hit the X

IMG_3459.jpeg

So, I swapped the green FO sight blade for a slightly taller red FO sight blade. Now I will need to run some more through it on Saturday to see if POI is where it needs to be. If it is still hitting low, I will be ordering an even taller one. 😇

Ahh, the joys of tinkering with your guns. :thumbup:

Stay safe.
 
............That's all I have for tinkering in the shop on Monday.
That is the cleanest shop I have ever seen. Every work surface is spotless and clearly labeled.
Who are you and what you done with the real gunsmith or machinist? Please post photos of your whole shop so we can be amazed about your space and ashamed of our grease/dust/dirt covered places.
 
Easy to put the hammer spring strut in backwards at first. Things won’t work right if you do… or so I’ve heard. 😇

Did you polish the tube the trigger return spring fits in? I put 600 grit wet-dry sandpaper on a drill bit and polished mine up along with the other stuff. (That little trick seems to help smooth stuff out every time.)

Stay safe.
yes, I did. reamed it with a drill bit spun by hand first, then polished it with 600 grit as well.
 
A little while back I replaced the plastic front sight on my Glock 17L with a green fiber optic blade that looked close to the same height. I didn’t shoot it then, but I grabbed it and shot it today. I guess the new sight was too low, with the adjustable rear bottomed out I had the POI several inches higher than what I prefer out to 20 yards with 124 gr fmj.

View attachment 1180039

My POA is a 6 o’clock, having the red X ring sitting on top of the front sight at 10 yds. My preferred POI would be right on the X with that sight picture. At 10 and then 15, it shot high and left the big hole above the X ring.

At 20 yds with the same POA, shots hit another 2” higher, winding up around the 9. When I brought it in to 5, I held an inch and a half under the X ring and hit low, raised a half inch at a time to finally hit the X

View attachment 1180040

So, I swapped the green FO sight blade for a slightly taller red FO sight blade. Now I will need to run some more through it on Saturday to see if POI is where it needs to be. If it is still hitting low, I will be ordering an even taller one. 😇

Ahh, the joys of tinkering with your guns. :thumbup:

Stay safe.
Much better, 5@ at 5-10-15-20.

IMG_3489.jpeg

Funny how just that little bit of increased height in the front sight blade put the shots where they need to go. Held at the middle of the red X ring this time. Last time was holding at the bottom of the red ring, and shots hit 3” higher.

Stay safe.
 
Not really "gunsmithing" per se, but I worked a little on the Savage 340 30-30 last night. I noticed that the magazine was binding on removal and installation, and the guide strip for the front of the mag (sheet metal) got twisted in position. I loosened the screw and straightened it out (using the installed magazine as a keeper for alignment). I also stoned some burrs on the sides of the mag and greased the inner guide edges. Works nice now.

Another thing I noticed was the action had a little play in it and the action screw was tight. It had movement right around the receiver area. This gun utilizes one action screw on the recoil lug and a barrel band screw midway down the barrel. I thought "I'm gonna cork bed the action". I bought adhesive backed cork sheet a few years back and it has been nice for stuff like this. Well lo and behold, I pulled the action and I already had cork in the lug area. I laid one more layer and replaced the forward barrel piece and it is snugged up nice.

I also oiled the trigger pivot areas (trigger on this thing is like Rube Goldberg...).
 
Tinkered in the shop this morning to finish digital force gauge spring-rate assembly. Employed 3/8" O.D. hollow and solid aluminum round stock and 3x3" Delrin block.
Center drilled and tapped solid rod M6x1.0 threads to fit the force gauge thread; parted the length of the rod to turn down opposite end diameter to fit within hollow aluminum rod, which slides over 1/4" steel guide rod. Parted aluminum hollow tube and steel tube to length on the lathe. Fabricated a T-block to secure in vise jaws; center drilled to accept 1/4" steel guide rod. Solid aluminum threaded adapter will be secured to hollow aluminum tube with small gap tolerance Loctite 620. That's all I have.

IMG_9311Gunsmith Digital Force Gauge Measurement Pistol Recoil Guide Rod Spring Rates MJD 11.1...jpg IMG_9312Gunsmith Digital Force Gauge Measurement Pistol Recoil Guide Rod Spring Rates MJD 11.1...jpg IMG_9313Gunsmith Digital Force Gauge Measurement Pistol Recoil Guide Rod Spring Rates MJD 11.1...jpg IMG_9314Gunsmith Digital Force Gauge Measurement Pistol Recoil Guide Rod Spring Rates MJD 11.1...jpg IMG_9316Gunsmith Digital Force Gauge Measurement Pistol Recoil Guide Rod Spring Rates MJD 11.1...jpg IMG_9317Gunsmith Digital Force Gauge Measurement Pistol Recoil Guide Rod Spring Rates MJD 11.1...jpg IMG_9318Gunsmith Digital Force Gauge Measurement Pistol Recoil Guide Rod Spring Rates MJD 11.1...jpg IMG_9319Gunsmith Digital Force Gauge Measurement Pistol Recoil Guide Rod Spring Rates MJD 11.1...jpg IMG_9320Gunsmith Digital Force Gauge Measurement Pistol Recoil Guide Rod Spring Rates MJD 11.1...jpg
 
Last edited:
zTEoyaq.jpg


Took my 4 inch 617 and installed a RevUp Action Hammer Kit. It's truly a drop-in kit, the hammer just drops in, replace the firing pin and spring and put in a lighter rebound spring ( comes with the kit)

Trigger pull is amazing. It actually get lighter as you pull.
 
Back
Top