S&W Model 10-5: Firing Pin Not Protruding Frame

Status
Not open for further replies.
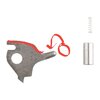
Installed a Power Custom Hammer Nose in my S&W M28-2. It was not a drop in item. It does come with instruction, spring, rivet & Hammer Nose.
The top of the Hammer Nose had to be trimmed. It hit the frame & was above the profile of the hammer. The tip was not round. It stuck in the hole in the frame. Had to be rounded with a file.

The spring is smaller & lighter then factory. The Rivet is thicker then factory.
20201125_154230.jpg Protrusion measured around .048" Test fired 10 slow, 10 double action. Worked well.
 
  • Like
Reactions: BWS
*Edit/Add- The protrusion of .030" from online now seems wrong? My new M28-2 Hammer nose is about .048" The M28 has pinned barrel and recessed cylinder. *

*Does a recessed cylinder make a difference?*
NO.

The distance from breech face to primer measures .018" to .020" (flush with case head) on both types of cylinders. If primers are seated .008" below the case head, more primer protrusion is needed then .030" This would require a pin protrusion of at least .039" ? My 38 M 337PD protrusion measures .039"

As long as there are no misfires or pierced primers all is OK.
 
Last edited:
if you own a revolver and are going to do any work on it yourself, you need a feeler guage or gap gauge set - available at every hardware store to check the headspace, and a set of proper drivers and a punch set. I have a little winchester driver set with bits that swap, and the handle is like a half plastic half rubber material. To remove the side plate on my 10-7, once the screws are out, I just tap the grip frame firmly with the soft end of the driver and it pops loose in 2 or 3 easy womps. there are also several revolver checks, midway has a youtube video with Pottefield going over a smith and wesson that is pretty good.
 
if you own a revolver and are going to do any work on it yourself, you need a feeler guage or gap gauge set - available at every hardware store to check the headspace, and a set of proper drivers and a punch set.

I'll buy some when I feel the need to buy them. I may be a humble electrical engineer, but I have my ways with things of a mechanical nature. To be honest, a caliper is all that's really needed. For example, for the sake of argument, lets say I need at least .048" of hammer protrusion. A dime is about that same width, according to my caliper, thus I can compare the hammer protrusion to the dime and get a solid answer as to how much the hammer protrudes, relatively speaking. The same can be done with other material: pennies, sheet metal, wood shavings, component legs, clothing, etc.

It's just how I'm being taught, make do with what I have. A prime example is if I have a TTL circuit in which I need to use an XOR gate, but I only have the base OR,AND, and NOT, I use a combination of OR and NOT gates to make a single XOR.

As for drivers and punches, i just 3D print them from the Polymer Extrusion Lab.
 
When you only need a tool once, and it's an expensive tool, don't buy ... make one or make do.

Here's a couple examples of tools made by me from something else to do one other thing and that one thing only - no sense buying a special purpose tool to do one job:

View attachment 959187

If I remember right, it's from left to right, drivers for the Enfield firing pin, for one of those weird screws with the two little dimples instead of a slot, and one for the M1 Garand gas tube cap.
 
Last edited:
Don't know if it would work with a wheelgun, but I check semiauto firing pin with a pencil. Drop a pencil, eraser first, down the barrel. Point up at an angle and fire. It will usually go 4-6 feet on an angle if the firing pin force is normal.
 
Don't know if it would work with a wheelgun, but I check semiauto firing pin with a pencil. Drop a pencil, eraser first, down the barrel. Point up at an angle and fire. It will usually go 4-6 feet on an angle if the firing pin force is normal.
It works, and that’s exactly how I have checked my antique revolvers when I reassemble them. Straight up and they should just about tap the cieling. On angle they should travel a few feet, usually aimed at the couch so they don’t roll under something.
 
WestKentucky and Cemetery21, I just did that with two autoloaders and two other wheelguns ( That I know for a fact work) and none of them went that far. For the sake of doing fun things, I decided to do that with a BP wheelgun just to see what would happen. It went a little far, and burned my eraser. All in the name of science!

The Bushmaster, think you could verify this behavior with yours?

in other news, I received the hammer nose from whatever company was suggested, fitted it and it protrudes about the same.
 
I'll buy some when I feel the need to buy them. I may be a humble electrical engineer, but I have my ways with things of a mechanical nature. To be honest, a caliper is all that's really needed. For example, for the sake of argument, lets say I need at least .048" of hammer protrusion. A dime is about that same width, according to my caliper, thus I can compare the hammer protrusion to the dime and get a solid answer as to how much the hammer protrudes, relatively speaking. The same can be done with other material: pennies, sheet metal, wood shavings, component legs, clothing, etc.

It's just how I'm being taught, make do with what I have. A prime example is if I have a TTL circuit in which I need to use an XOR gate, but I only have the base OR,AND, and NOT, I use a combination of OR and NOT gates to make a single XOR.

As for drivers and punches, i just 3D print them from the Polymer Extrusion Lab.
fair enough. I fabricate tools and things on my own too sometimes. Usually if I think i can do it fater than a trip to see if I can find one. my intention was really more to reference the need to fully check all the revolvers specs.
 
Put some Painter's tape over the firing pin hole on the recoil shield. Close cylinder, after checking to be sure it is empty. Pull trigger. Open and inspect tape. If it is punctured to the full firing pin size, it's working. If not, send to gunsmith, or get Kuhnhausen's book on S&W revolvers, as edwardware says, and start reading.
 
Alright Folks... I was able to source exactly three (3) rounds to test. Two were .38 Special, one was .357 magnum. I was able to test the two .38, and I cut the .357 magnum so that it fit ( used it only as a snapcap). And... it works!

I know it took so long for me to test it, but I could not find any ammo. These, I got from an old man while I was pawn shopping. Long story short, Thank you Mesa Pawn & Jewelry for sourcing this ammo for me.

In conclusion, I did some judicious filing to give the pin the desired contour so that it properly moves and fits through the pinhole.

Thank you, to each and every one of you who contributed.
 
Status
Not open for further replies.
Back
Top