http://stevespages.com/pdf/remington_1148.pdf
This might help you?
--------------------------------------------------------------------------------
Remington 11-48 Semi-Auto Shotguns
Model 11-48: This model was the first of the "New Generation" semi-auto shotgun produced after the war & is considered a recoil operated firearm.
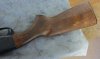
It's model number was derived from the older model 11 that the recoil system was copied from & the newer stamped out internal parts that have become so popular since, developed in 1948, but not introduced until 1949. It was discontinued in 1968. It was made in 2 3/4" 12, 16, 20, 28 ga, & 3" 410. The walnut stocks were machine checkered. There was no engraving on the receiver. It utilized many stamped out sheet-metal parts, & an aluminum trigger housing that became common to most all of the Remington line of pumps & semi-autos that allowed easy removal by pushing out 2 pins that are spring detented to hold them in place. It 's magazine held 4 or 5 rounds.
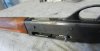
Remington 11-48
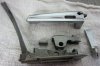
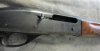
The receiver was machined from a solid billet of steel. The magazine tube & action spring tube were silver-soldered into the receiver.
This firearm functions by using 2 opposing springs. One small diameter, but strong spring is housed in a approx 1/2" tube that is silver soldered into the rear of the receiver & protrudes into the buttstock. The rear external portion is threaded that then is utilized to hold the buttstock onto the receiver with. Inside this tube the spring has a follower fitted to the front & 2 heavy sheet-metal links pinned from the breech bolt drive the follower rearward & subsequently back forward to close the action.
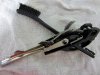
At the same time there is a large coil spring around the magazine tube that puts friction against bronze plated steel friction rings on the front that are pinched in the barrel hanger bracket on firing & subsequent recoil. This recoil spring is made in different compression strengths & is critical to the actual power of the round used in the gun. It is critical that the magazine tube be lightly sanded lengthwise with light emery cloth & a light coating of oil of about 30 weight motor oil on this tube for the gun to function properly
Also any recoil operated firearm can be very sensitive to how the person firing it holds the gun. The word is that you have to "Back it Up". This means that you need to hold it tight against your shoulder. A skinny 110# weakling will have trouble with the gun not cycling, while a 250# logger may well have no trouble at all. The guns have to have some resistance to function properly.
One of the Remington service personnel said that this gun never really worked when it was new & that he was glad that he came onto the scene right after it was discontinued as the factory repairmen could always count on something to do when they showed up for work. He said that they could get it to function with one brand of ammo & another brand would malfunction.
I used one for a good number of years & never really had a problem, even with reloads.
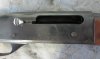
Gunsmithing the11-48: Spare parts are not available from Remington if you order from the 11-48 list. However the firing pins, FP springs, extractor, spring & plunger for the 870 will interchange. The 11-48 operating handle is held in by a detent plunger putting pressure on the bottom of this handle. The current model 1100 handle #91197 is designed to accommodate both the 11-48 bottom plunger & the 1100 plunger which comes in from the rear. Therefore you can use the 1100 handle on the 11-48 series guns.
The friction piece & shell latch are usually the first to need replacement. Recently Gun Parts Corp. has listed these friction pieces in their catalog.
When this gun starts spitting operating handles, the usual things to look for will be a weak detent plunger spring. These detent plungers are however factory staked into the bottom of the bolt slide & not really designed to be replaced.
I had one customer bring a gun in with a hole drilled in the outer end of the handle & a piece of fish line tied into it & on to the trigger guard, so that he could recover the handle when the gun spit it out.
In all actuality the handle is only needed to charge a live round into the chamber or to extract a live round. It does not effect the firing of the gun.
On the above gun, after much trial & error, then some head scratching, I finally, many years ago (about 1975) called the factory & was fortunate enough to be able to talk to a repairman that worked on these guns at the time they were being factory serviced. The real problem is that there is too much headspace. A harmonic vibration is set up at the firing/unlock time that results in spitting these handles out like popcorn.
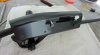
Look at the locking lugs on the barrel & on the locking block. These will usually be worn & or set back This repairman said the method of deciding if this was the problem, was with the gun unloaded, place a ½" dowel down the barrel until it rests on the face of the breech bolt, mark on the dowel the muzzle location with a pencil. Now push the dowel down until you feel the locking block unlock from the barrel lugs, but before the bolt starts to move rearward. Mark this position on the dowel.
Ideally there should be minimal movement. I do not really remember his exact dimension, but it seems that if it moved more than about .040", this was the problem, and the symptoms get worse as the wear increases. The solution that they used then, was to replace the locking lug with a oversize one. These lugs were numbered using letters, I have encountered many with just the ga. stamped on them, & a few with letters. I assume the non lettered are standard & the A size to be the next oversize or longer. Not sure how many oversize sizes were made
Since no spare parts were available from the factory or any of the parts suppliers even then, I cleaned the barrel lugs up & then annealed the locking block, TIG welded 3% nickel material onto the back of the locking block lug. I figured that if I screwed up that maybe I could find another locking block, but to find a barrel extension would take time & perseverance. I then refitted it, using lay-out die as a wear marker, and then heat treated & tempered the whole block. If anyone would try this I recommend you take a Rockwell hardness reading of the locking block before you start, so that you have a known hardness to return to (mine read 53 Rockwell C). It could be slightly softer by a point or two, but not any harder, since it would break off.
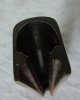
I however think a simpler solution would be to soft solder a piece of steel shim stock to the bolt face. In order to determine the proper thickness, a piece of different thickness shim stock cold be cut to the approximate shape of the bolt face & tried under a loaded round until one too thick was placed there so that the locking block would not close. Then back off & use a thinner one. You might even Super Glue a shim onto the bolt face as a trial to see if it would work first.
Heating it to a soft solder condition would create no problem since the breech bolt only is a means of holding the locking block. To do this tin the bolt face and the steel shim with solder. Then heat them up & place the shim on the bolt. After it cools you can cut the shim off with a sharp knife or a Dremel tool. You would of course have to have enough clearance for the extractor to hook the shell's rim.
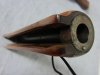
Model 48 Sportsman: The 48 Sportsman was the same gun except it was made so that it would only accept 2 rounds in the magazine, conforming to the Federal Migratory bird regulations. It was introduced in 1949 & discontinued in 1959.
This magazine restriction was made possible by simply taking a 11-48 magazine tube & stamping 3 detent dimples around it thereby restricting the follower from going beyond this & limiting it to 2 rounds in the magazine.
You can modify these dimples by using a long rat tailed file & filing off these detents inside the magazine tube. Do not try to swage them out, as you WILL deform the outside of the tube. These tubes are what the recoil spring’s friction piece slides on to make the gun function.
Model 48 Mohawk: This gun was apparently a final clean up of the 11-48 & the 48 Sportsman parts. They appeared a few years after the previous models were discontinued. They were usually found with walnut stained birch wood. Possibly distributed thru some of the mass merchandisers
__________________

")