1911 gurus: Kimber Super Carry Pro FTF first round

Status
Not open for further replies.
1K, if you've got a caliper...just for grins...carefully measure the distance between the two small rectangular guide blocks at the bottom of the breechface. You're looking for .482-.484 with a maximum of.488 inch, and while I've never seen a Kimber that went over that maximum...anything is possible.
 
the an is a true Genius with these guns

Nah. Just know where to look...and that came from scratchin' my head a lot.

The distance between those blocks is important in setting the extractor deflection. If they're too far apart...say .490 inch...you need more of the extractor showing in the breech area, and that can cause a problem.

I like to see .482-.484 inch so I can keep it to a minimum, but I can work with as much a .486 inch apart so enough tension will be applied on a minimum spec case rim without imposing a speed bump on a maximum spec rim...or even one that's grown from multiple firings.

The dimension on most modern slides falls between .484 and .486 inch, and one will occasionally be as narrow as .480. That's not really a problem until your case rim diameter grows from repeated firings. A small thing, but something to consider.

You don't need a lot of deflection...extractor movement sideways...to get sufficient tension. .003 inch will do.
In any event, I don't like to see more than about a 64th inch of the wall in the breech area. Much beyond that, and you need to use a heavier bevel on the bottom corner.
 
OK, so it takes me a while to get things done. :) I measured the distance between the blocks and it varies depending on how you measure it from .485 to 491. I measured it six or eight times. Most of the time it was about .488.
 
I fired two or three mags yesterday with UMC ball and three different magazines and didn't get any first round failures to feed. It does feel ka chunky and seemed like several times later in the mag it wanted to jam but didn't. I also noticed that when retracting the slide it is much easier the first half inch or so and then it stacks almost like the spring is progressive. Where do I get a new recoil spring that fits the super carry Pro?
 
For what's it worth....I'm late to the party on this discussion but I had a semi-auto that had the same failure to battery a round. It needed that extra shove to get it in the chamber. I "tuned" the extractor which seemed to help for a while but it got progressively worse to the point the slide totally hung up. I returned the gun to the manufacturer who found a burr on the slide and removed same. They also replaced the slide stop. The gun has worked perfectly since.
 
I ordered this flat wire spring kit (which I will try first) and a wilson HD extractor for good measure. Looks like 1911Tuner is MIA but if anyone else could help me with filing/adjusting the Wilson HD extractor I'd appreciate it.
Let's start at the back of the extractor. The firing pin stop should fit into the groove at the back of the extractor snugly. It doesn't have to be so tight as to require tools to install or remove but it should prevent the extractor from rotating or moving fore and aft. If your firing pin stop allows this movement, replace it with an EGW oversized firing pin stop. It will have to be filed or sanded to fit correctly.

Once that is done you can look at the extractor deflection fitting pad. The easiest way to set deflection is to make yourself a simple flat metal guage of a specific width that will slide up between the extractor and the left guide block. Think of it as a fat feeler guage. I set the width of my homemade gauge to .466" and it works fine. You can buy flat pieces of aluminums stock from home depot which will be much faster and easier to file than steel. You will need a set of calipers to do accurate measurements.

The concept is to install the extractor then slip your homemade guage in. If the extractor tensioning wall doesn't touch the guage, remove material from the extractor fitting pad until it does contact the guage. Now that the deflection is set you can gently break the the bottom edge of the tensioning wall and round the bottom of the claw slightly.

Finally, slide a round under the extractor. The base of the case should be able to be pushed back flush against the breechface. If it will not, look carefully at the claw. The edge of the claw should just barely clear the bottom of the case extractor groove. Also, the forward face of the claw should not be in contact with the case bevel. If it is touching the case bevel, you need to carefully file it until it until it clears the bevel.

Now you can worry about tension. Bend the extractor a little and install it. Slip a loaded round in place and shake the slide a bit. The round should stay in place. If you shake the slide vigorously, the loaded round should drop free.

Go shoot the pistol. If you experience any failures-to-feed where the cartridge is not quiite all way in the chamber but with a push on the rear of the slide the cartridge will go all the way in, you'll probably want to unbend the etractor just a little to reduce the amount of tension.

Step at a time. Fit the firing pin stop. Set the deflection. Closely inspect the relationship of the claw to a case and tweak as necessary. Add some tension. Go shoot. Go slowly and remember it's much easier to remove metal than put it back on.
 
Thanks much. I assume the above will work even if the distance between the 2 edges of the breechface walls is greater than typical?
 
Thanks much. I assume the above will work even if the distance between the 2 edges of the breechface walls is greater than typical?
That is correct. The home made guage simulates the diameter of a case rim minus 0.010". That 0.010" is the deflection. The wider you make the guage the larger the deflection and the narrower the guage the less deflection.

There is a fair amount of variability in the diameter of case rims so the guage cannot guarantee perfect deflection with all ammunition. However, the 0.466" guage should work well with the vast majority of ammo out there. Stay away from Russian manufactured .45 ammo. Tuner has educated us all that it is manufactured based on the earliest specs for that ammo which were changed shortly thereafter but the Russians failed to update their manufacturing specs accordingly.
 
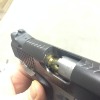
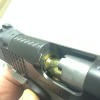
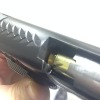
Installed the Wilson flat spring assembly and fired 50 rounds Perfecta ball. Had 4 first round FTF as above but no other malfunctions. It was apparent that the bottom inside edge of the extractor was digging into the rim groove rather than letting the case cam smoothly up the breechface. I carefully stoned a little more radius there and I will try again tomorrow. Looking closely it appears the tip of the claw is not contacting the rim groove with the casing in place, so that is good.
 
5 magazines of WWB went okay, but the first round definitely doesn't feel smooth. One lock back with rounds in the mag, which I may have bumped with a loose grip under recoil, and 6th magazine, I got the same first round jam.

Should I keep trying to radius that lower inside edge? What's the danger if I remove too much there?

It's obvious to me that that corner is the one causing the trouble. It may be because of excessive deflection I suppose, but to me it seems that corner is the one binding up against the case and stopping everything.

IMG_2516_zps6uknii5i.jpg
IMG_2517_zpsrzgvhnii.jpg
IMG_2518_zpscwi6hpvh.jpg
 
Should I keep trying to radius that lower inside edge? What's the danger if I remove too much there?

It's obvious to me that that corner is the one causing the trouble. It may be because of excessive deflection I suppose, but to me it seems that corner is the one binding up against the case and stopping everything.
You are going to have decide based on what you see. I often find that no matter what part I'm fitting there will suddenly come a point at which it fits perfectly. The trick is to avoid going too far. The only way I've been able to stop myself from going too far is to remove half as much as I think I need to then test. Rinse and repeat until perfection is achieved.

Good on you for running the Hilton Yam extractor test. It's the fastest, most fool-proof way I've found to determine if the extractor needs attention.
 
All of the above is the reason I'll never buy another Kimber. I own two of their top of the line pistols, both have been back to the factory on several occasions. Worst part of the experience, Kimbers customer service.
 
All of the above is the reason I'll never buy another Kimber. I own two of their top of the line pistols, both have been back to the factory on several occasions. Worst part of the experience, Kimbers customer service.
I had a similar experience.

Kimber CS explained to me that their 1911s only run on certain types of ammo. I asked what types of ammo? They said they didnt know, that I would have to figure it out. Pitiful.


1K, I hope you get it worked out. My Kimber went back twice (on my dime) and it still didnt work. Took a hard loss, but learned a valuable lesson.
 
Well I diamond filed a little more radius in areas D, F, and G and it fed ok for a couple of mags but still ka-chunky, and occasional brass to the face (which it has always done). Just for kicks I dropped in the EGW HD extractor (forgot I ordered that one rather than Wilson) and it fed the first rounds out of the mags perfectly and did a couple mags without issue other than brass to the face nearly every shot. I was surprised it ran without modification but perhaps I shouldn't be. I'm a little disappointed the increased radius where I thought the problem was appears to be doing little to help.

I also did Yam's extractor test with the HD and it works fine with no mag. And no brass to the face. Must be some influence of the magazines? Or the following round?
 
Wow sorry to hear your still having problems I'm sure you paid a lot for that kimber I wouldn't own one after hearing about this
 
Tried the Dan Wesson extractor, fed first rounds fine, ran fine. Got brass to face with Wilson, Kimber, and Checkmate extended 8-round mags with hybrid lips and dimpled followers.
 
Status
Not open for further replies.
Back
Top