1911 VS Non-1911

Status
Not open for further replies.

wbwanzer

Member
Joined
Dec 12, 2006
Messages
1,249
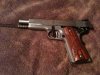
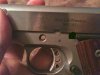
I have several threads on various forums concerning non-1911s that I'm considering. I'm looking at non-1911s in 45 because I have a several problems with the 1911 that I already own. Here's the story:

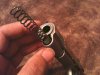
My 1911 was bought used. The trigger has been slicked up a bit too much. I'm always getting unintentional double taps and the trigger is slapping my finger to the point of discomfort. Also haven't figured out how to grow a third hand to help put the thing back together after taking it apart. Took me 45 minutes of swearing to complete the last reassemble.

So, I could get a non-1911 in 45 or I could get a factory new 1911 that would not have the above mentioned action problems, but I'd still need to take it apart. What's the trick to putting the slide stop back in through that hole that keeps moving? If I could get that mastered maybe I'd get a new 1911. I realize that I'll be considered a doofus for having trouble putting a gun back together that the rest of the shooting world doesn't seem to have a problem with (or at least won't admit to).

Are there any tricks to making the reassembly easier? If not, this dummy will probably get a non-1911.
 
Last edited:
Every gun owner needs a 3/32" punch. Handy tool for many uses. Try to find a steel, brass, and plastic punch.

-I put the 1911 slide on without the recoil plug in. Spring sticking out loose.
-Under a bright light I look to see where the barel link is. If isn't lined up I move it with a quick wiggle of my punch.

You can also make sure the link is where you want it before sliding on the slide and move slowly so it stays put, but a little wiggle with my punch is easier.

-Then I insert the SS lever. But I let it hang straight down in the trigger guard area. I don't snap the whole lever in. Just slide the shaft in leaving the tail of the SS lever dangleing straight down.

-Pull on the barrel to make sure it's locked in. Silde the slide.

-Pull the slide back so the notch lines up. Lift the SS lever slightly, rotate into position over the notch holding it with my thumb and index finger so it can't swing down. Then I push it in gently. You may have to wiggle a little.

-turn the bushing where it needs to be and push recoil spring plug in/down with thumb.

-try to get a wrench on the recoil plug and remove my thumb
-push down on plug with wrench and spin the bushing to lock it down.

- if your 1911 has a loose bushing, just push the recoil plug down and turn the bushing by hand to lock the plug down. Then use the wrench to push the recoil plug down and turn the bushing. Way easier.

[note: It only takes 14psi to knock out your eye, flying recoil plugs have more than that, I have a DW spring plug shaped bruise on my forehead, it hurt, and was definately enough force to knock out my eye.....I had glasses on though.]


Once you get the hang of it, it's easy. Reassembly....not eye removal.
 
Last edited:
I'm sure every gun has its own personality. Never have any problem taking mine apart of reassembling.

Mine has a conventional 1911 guide rod.


just make sure you have the barrel link against the barrel before you push the slide onto the frame. Keep the tension off the recoil spring. I usually have the slide upside down so gravity will keep the barrel link down. Then just slide the frame back toward the takedown point on the slide..you should be able to see the barrel link through the hole in the frame. Make small movements with the frame back and forth until it lines up. If you can't get it to fully line up you could probably use a thick paper clip to help line them up.
 
It might be easier if you describe how you are doing it and allow others to make corrections.

There are many variations. The following is from Hiltom Yam's 10-8 Consulting site

• Slide the barrel in through the front of the slide, about halfway in.
• Install the bushing and turn counterclockwise to 7:00.
• Install the recoil spring plug (this step is unnecessary with non GI spec guns with spring tunnels bored straight through) then turn the bushing to 6:00.
• Slide the barrel into full lockup.
• Load the recoil spring and guide assembly from the rear. Keep the spring captured with your left hand as you feed the spring in with your right. Ensure that the link is pointed downward, not to the rear of the slide.
• Slide the top end assembly onto the frame rails, leaving the slide in its forward most position.
• Align the link with the slide stop pin hole and install the slide stop. If necessary, tip the slide back about 1/4" or so to allow the slide stop pin to move past the barrel lugs. The slide stop will easily depress the plunger by pressing it into place from only about 1/8" or 1/16" below the plunger tube. It is not necessary to swing it in a big arc - you'll only guarantee that you'll slip off the detent plunger and scratch the frame and slide. The "idiot mark" is the sure sign of an amateur. Installing the stop with the slide forward allows you to position the stop without having to worry about keeping the slide from slamming shut.
• Move the slide back to line up the slide stop with the takedown notch, and snap the slide stop into place.
 
I've never really had a problem getting a 1911 back together, but yes getting the slide stop back in can be a little aggravating especially when you are trying not to scratch the frame.

If you want a utterly simple/easy .45ACP gun to disassemble/reassemble I highly recommend a Glock 21. Glocks couldn't be easier to field strip, and a G21 is just a great all around gun that does pretty much everything right.

http://www.youtube.com/watch?v=IuUDBVwJ5Cc&feature=player_embedded#at=25

http://www.youtube.com/watch?v=IkdEhsPovqY&feature=related
 
Last edited:
Unless it's adorned with all sorts of bells and whistles...in its original guise...the pistol can be field-stripped in about 12 seconds, and reassembled in about 15.

Starting fully assembled, it can be detail-stripped...slide and frame...in about a minute...and reassembled in two.

In its original configuration, it can be detail-stripped without tools in 75 seconds and reassembled in 2.5 minutes.

Instruction from an experienced hand is the path to 1911 enlightenment.
If you're within driving distance of Lexington, NC...I'll be glad to oblige.
 
The trigger has been slicked up a bit too much. I'm always getting unintentional double taps and the trigger is slapping my finger to the point of discomfort.

Try bending the sear spring to put more tension on the sear.

When reassembling the slide stop into the frame, make sure the recoil spring is not under tension and use a flat-head screwdriver to push the little spring loaded plunger out of the way. Then cap the recoil spring and lock it in with the barrel bushing.
 
To 9mmepiphany - I don't have access to the gun right now so I can't descibe how I reassemble. It is a Springfield, probably a Mil-spec, that has been upgraded. I follow the instructions in the manual, which pretty much says to do the reverse of breakdown, if I remember correctly.

To 1911Tuner - I'm in Maryland so you're not too close, but thanks for the offer to help. I have in-laws in the Chapel Hill area. Don't know how close that is to Lexington. I'll have to check. If not too far then maybe I could get with you when we visit the in-laws. Thanks again.

Here is a picture of the Springer:
SA1911001.jpg
 
Last edited:
Could you tell us which part is giving you trouble?

My suggestion would be to find a smith in your area to help you out. Clear the pistol, case it up and take it in. Most smiths would be happy to show you how things work since, as an owner you're a potential future customer. At that time you could also discuss properly adjusting the trigger pull to a sensible-for-you weight.

I'd bring $50. If he charges you're covered. If not, you can still pay him for his time. When you look back 20 years from now you'll realize it was money well spent if it keeps you from selling your 1911.

Best of luck.
 
Well, I'll look you up if time permits the next time we're in NC.
 
Last edited:
Here are a few pics that hopefully help with the proceedure. The areas most people have trouble with are the bushing (they forget it turns one way to remove and the other to insert the spring and cap) and reinserting the slide stop.

attachment.php


attachment.php


attachment.php


attachment.php


Remember before reinstalling the spring plug to engage the slide lock or let the hammer down so the slide isn't moving around on you and always point the spring in a safe direction. A credit card can be used to assist the slide stop insertion as the slide stop will push the card toward the plunger to eliminate friction. It also helps to have the pistol upright and give it a little jiggle to align the pin. If inserted correctly, you should not be able to pull the barrel forward.

Hope it helps.
 

Attachments

  • 1911 Reassembly 1.jpg
    1911 Reassembly 1.jpg
    69.9 KB · Views: 326
  • 1911 Reassembly 2.jpg
    1911 Reassembly 2.jpg
    44.9 KB · Views: 323
  • 1911 Reassembly 5.jpg
    1911 Reassembly 5.jpg
    43.6 KB · Views: 650
  • 1911 Reassmebly 8.jpg
    1911 Reassmebly 8.jpg
    50.9 KB · Views: 324
Last edited:
Are there any tricks to making the reassembly easier?
One thing that I've found helpful was replacing the full length guide rod with the correct part.

I spent an afternoon taking mine apart and putting it back together until I got good at it.
 
Tool

1911Tuner taught me years ago that one of the best tools to have on hand for a 1911 is a M16/AR15 firing pin rather than a punch.
 
Skylerbone - Thanks for the pictures. I'm on a 'low' strength, 'stolen' internet connection at the moment. The pictures aren't totally filling in. I'll look at them at home on Sunday evening.
 
You gotta start staying at Holiday Inn Express! ;-). If I were you I'd definitely take the side trip invitation to visit Tuner. I picture something like Graceland for 1911 owners but without the tacky furniture.
 
A full-length guide rod only makes the gun a little more tedious to field-strip, and I consider it a non-issue. The ones that require an allen wrench to remove the front section are actually a little easier once you get that out of the way.

The AR15/M16 firing pin is actually about as close to the perfect armorer's tool that you can get for less than 10 bucks from Brownells.

I get the impression that this thread is about field-stripping, though...and that's mostly a matter of making the right moves.
 
I don't think I could "detail strip" one that quickly. "Field strip" no problem but not a full detail strip to individual components. YMMV.

1911 Suggestion to the OP: Instead of buying another 1911, take yours (especially if it's a nice model) to a gunsmith and explain the problems. I would wager they could fix whatever you don't like for cheaper than even a very low end NIB 1911.

Non-1911 Suggestion: Try a Springfield Armory XD45 Tactical (that's the 5" version). They are very fairly priced, have a comfortable grip "somewhat" like a 1911 with an arched MSH and thought highly of by many respected shooters. (FWIW ordinary guys like me like them too.)
 
InkEd - Both good suggestions. The XD-45 is already at the top of the list of non-1911s I'm considering.
 
RIATAC45 - That's kinda what I'm thinking. On the other hand, millions use and love their 1911s seemingly without the problems I've got.
 
Last edited:
Zach, the OP's Springer doesn't have a FLGR. Insulting me won't help him.
Actually, it does. A look through his photobucket album will reveal that. It wasn't intended as an insult to you, I apologize if you took it that way.

With a FLGR, you have pressure from the recoil spring, a spring plug with a rather annoying edge, which requires a wrench, tightly fitted bushing or not. With the original guide rod, you can actually push the spring plug into the slide a little more, making it easier to turn a tightly fitted bushing, without a wrench.

Sorry for the crappy pic. My phone doesn't take closeups very well.
0626111338.jpg
 
Status
Not open for further replies.
Back
Top