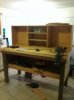
I'm making progress, glued, clamped, and screwed the benchtop plywood together, and I glued & screwed the three pieces of the torsion beam together. Everything is drying overnight, so I will try assembling the frame tomorrow or the next day.
Questions:
1 - How many screws to put the top on? One every inch, two inches? A double row or just singles along the edge? Should I use wood glue/liquid nails on the frame as well? And should I add some screws into the torsion bar as well, or only around the edge of the frame?
If you glue the top on, screws every 6" is plenty....no glue double that. Gluing the frame isn't necessary as long as you screw it together with doubled 3" deck screws (see drawing).....especially if you ever plan on moving it. But you can of course. Screw into the torsion beam across the front member and the rear member.....but plan ahead...try not to put screws where your press bolts want to go through. Also screw to the back and side supports.
2 - I was going to ask about using a water based stain on wood putty, but I did a quick search and found Minwax® Stainable Wood Filler, which can be stained with their water based stains and finished with their topcoats. One problem solved, just gotta find some since Home Depot didn't have it.
You are on your own with the water-based stains. I've never used them. Not that they're bad, I just don't have any experience with them....old fashioned oil base type. Oil-based stains aren't blotchy, but sometimes some woods don't take stains well everywhere. The trick is to add just a little stain to tint the finish varnish.....to even things out. I'd think you could do the same thing with water-based finishes....but make sure stain and finish are compatible chemically.
3 - I'm still a little confused about the leveling process. I haven't tried the measuring yet, so I will and get back to you
Read and do one step at a time.
4- When mounting presses on the front edge, the big bolts will be going through the torsion bar, right? I hope I don't hit any of the many screws I used in between those three layers! I guess a metal drill bit will chomp right through?
Yes you go through the beam with 6" bolts. Use large fender washers above the nuts. Try to miss the nails. If you can't, don't try to drill too fast with too much pressure or the bit will try to go around.
5 - Is it worth putting on the pre-treatment for the water based stain? I usually use oil based stains, so it isn't an issue. I know I'm making a giant blueberry colored bench, not a fine rifle stock, but I don't want it to be blotchy. I've done several stocks and other items before with stain, so I have some experience with this. Also, I'm planning on assembling everything first, then doing some light sanding on the legs and benchtop prior to staining.
Again, not an expert with water-based stains. See answer above. Blueberry!....amazing. Should be an interesting experience.
6- Tell me more about adding the trim pieces. I assume that I would be purchasing 3 pieces of 3/4"x1-1/2" lumber or just screwing them onto the sides to cover the laminated plywood. Do you need to know the dimensions of your press prior to notching the trim, or can you do it after the long piece is installed?
The plywood should be the same size as the frame. I used putty covered finish nails to mount the trim. I mounted my presses first, then trimmed around them. I used a drum sander in a drill to make an indent for the press handles where needed. I didn't glue it, because I may want to change equipment some day, and re-trim.
I was tempted to PM, but I figure other people will be building and the knowledge is a good thing to share.