Jenrick
Member
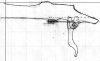
As I contemplated making a jig to ensure I didn't mess up the sear or hammer angles on my Beretta 92, I thought back to a lot of the exercises I did when I was first learning how to metal work back at a local vo-tech program. You spent the whole program learning to make progressively more involved tools and fixtures, using the tools, fixtures, etc. that you had made previously.
Having read through a lot of threads here on THR (particular here in the G&S forum), a lot of people seem to be very hesitant (or overly enthusiastic with the dremel) when it comes to working with metal. Most of this seems to come from unfamiliarity with the tools and techniques, and of course the best way to get familiar is with practice. I'll post what I remember in terms of basic exercises, please feel free to add to the list.
As most action work involves filing and stoning:
Start with a piece of 1/4" plate at least 2 1/8" x 2 1/8", file a 2"x2" square.
Start with a piece of 1/4" plate at least 4 1/8" x 4 1/8", file a 4"x4" square. Lay out a centered 2" square. Drill a 1/2" hole, and then file out the square.
Fit the 2"x2" square into the hole in the 4"x4" square. Ensure that no matter what sides of the 2"x2" square are in the hole it fits correctly. (You can keep adding sides, doing an octagon is not particularly enjoyable.)
Start with a piece of at least 1 3/4" round stock at least 1 1/8" thick. Lay out a 1" square on the face of the disk. File a 1" cube.
File a 1" cube. Find the center point of 1 side and mark it, the opposite side will be the base. File 4 sides forming a pyramid.
File a 2" cube, find the center point of 2 opposites sides. File a 1" tall pyramid at each end with the same base creating a 2" diamond shape.
Start with a piece of at least 3" round stock at least 1 1/8" thick. File it into a 2"x2"x1". Lay out a 1" square on the face of the square, drill a 1/2" hole and file out the 1" square. File a 1" cube. Fit the 1" cube into the hole, so that any face can be inserted and the cube fits square and flush.
I'll post more when I have more time. Learning to do these will give you great confidence in your ability to work with metal. The first time you make and fit a perfect cube is an experience you wont forget.
I recommend using simple mild steel as it's cheap and readily available. A basic metalworking file set, file card, a square, machinist ruler, and permanent marker/layout fluid/scribe, and a bench vise are all you need. You can scale the projects up for more difficulty, as the larger the surface to be filed is, the harder it is to keep it all flat and true.
-Jenrick
Last edited:
")