New reloading bench build

GravelRider

Member
Joined
Mar 14, 2010
Messages
282
Location
Pennsylvania
After moving nearly a year ago now, I'm finally ready to rebuild my reloading bench.

This will be my fifth reloading bench build. I started with a single stage press mounted to a tiny particle board desk 20 years ago that moved with me to a few different houses in my younger years while in college and grad school. I have then rebuilt with each subsequent move. I was quite happy with my last bench, and if I hadn't moved, I would have been quite content keeping it just as it was.
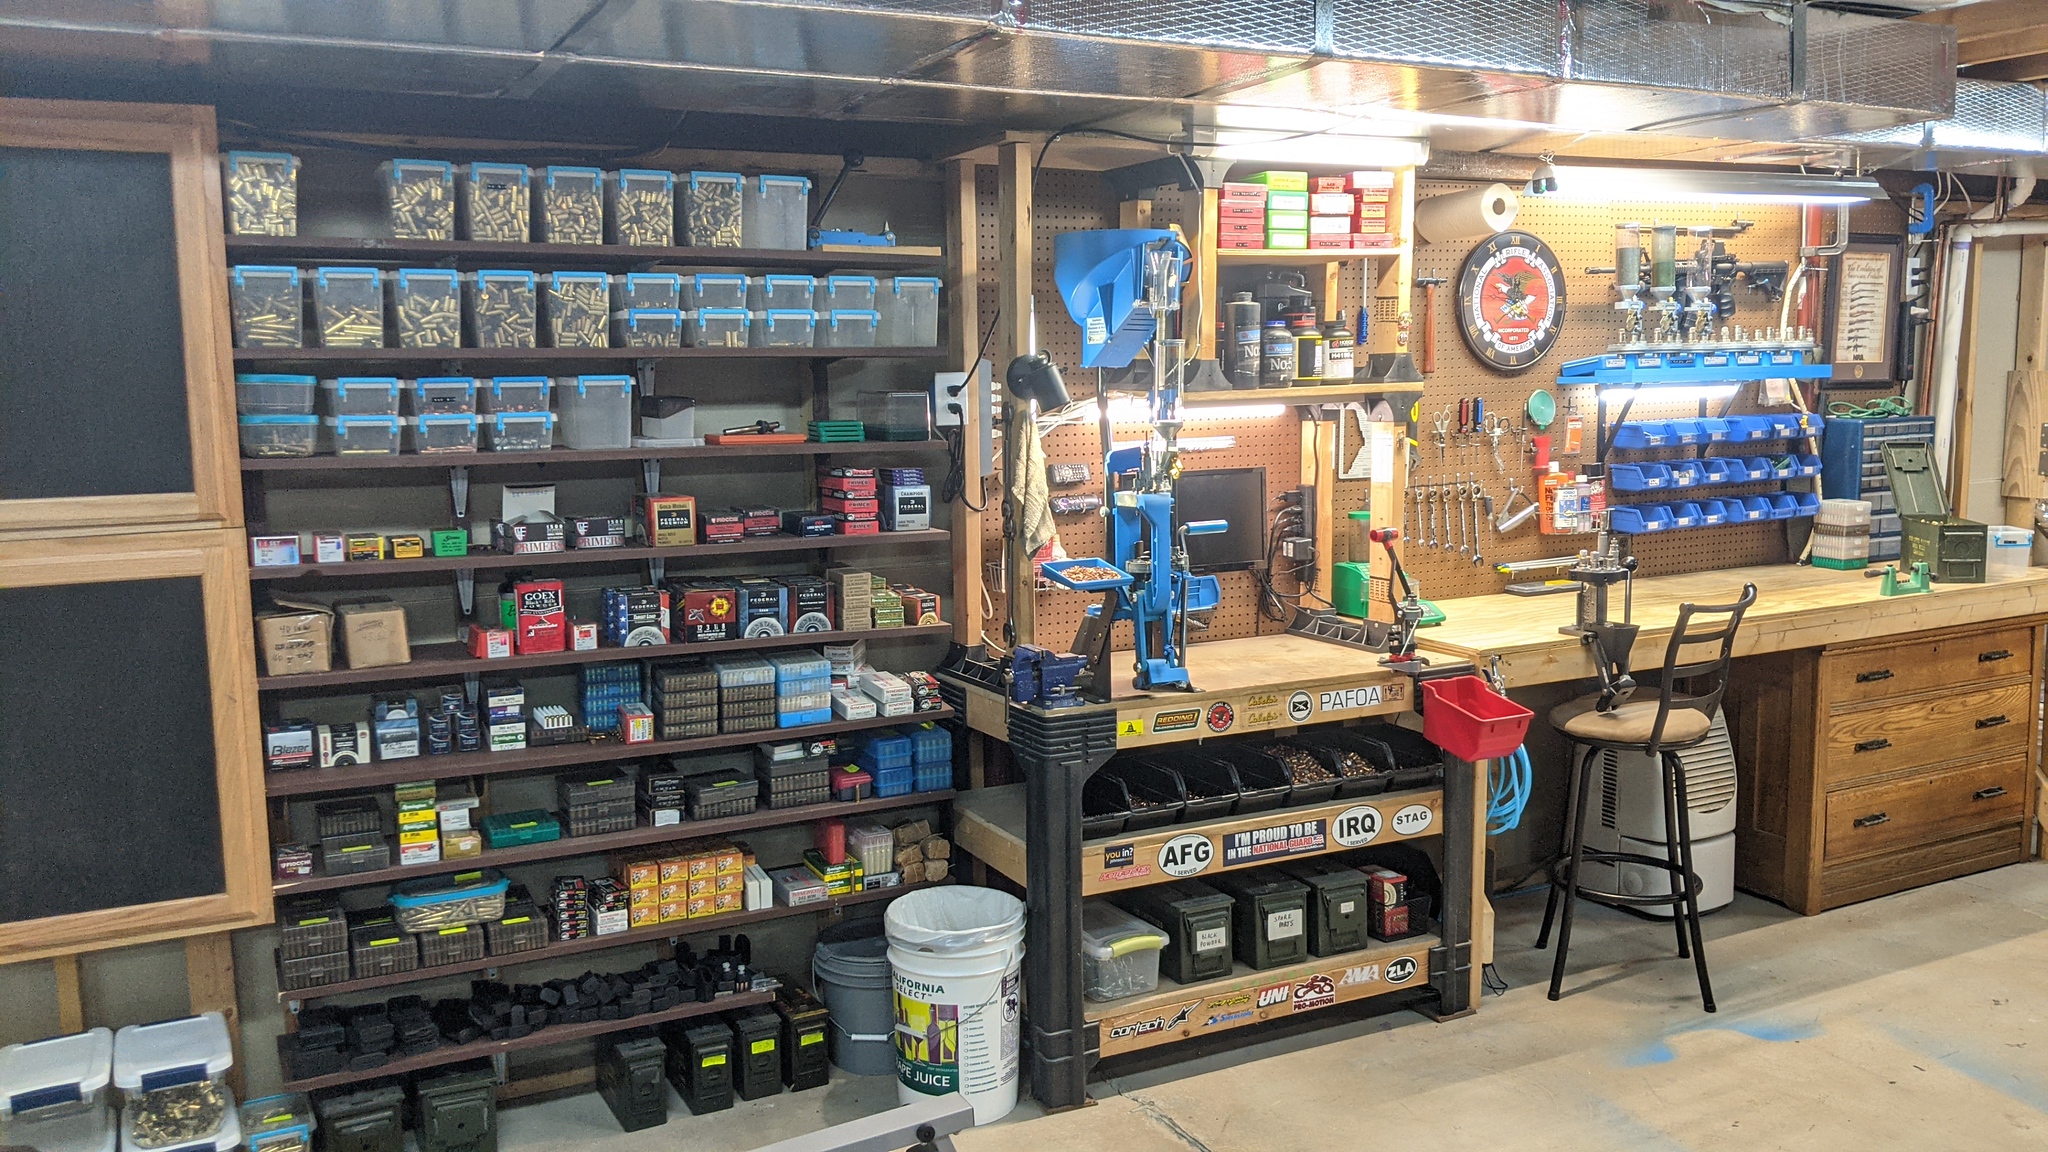
My last bench:

PXL_20201216_232240771-X4.jpg


My progress:

Starting on the framing
20231210_213226-X4.jpg


20231230_234315-X5.jpg


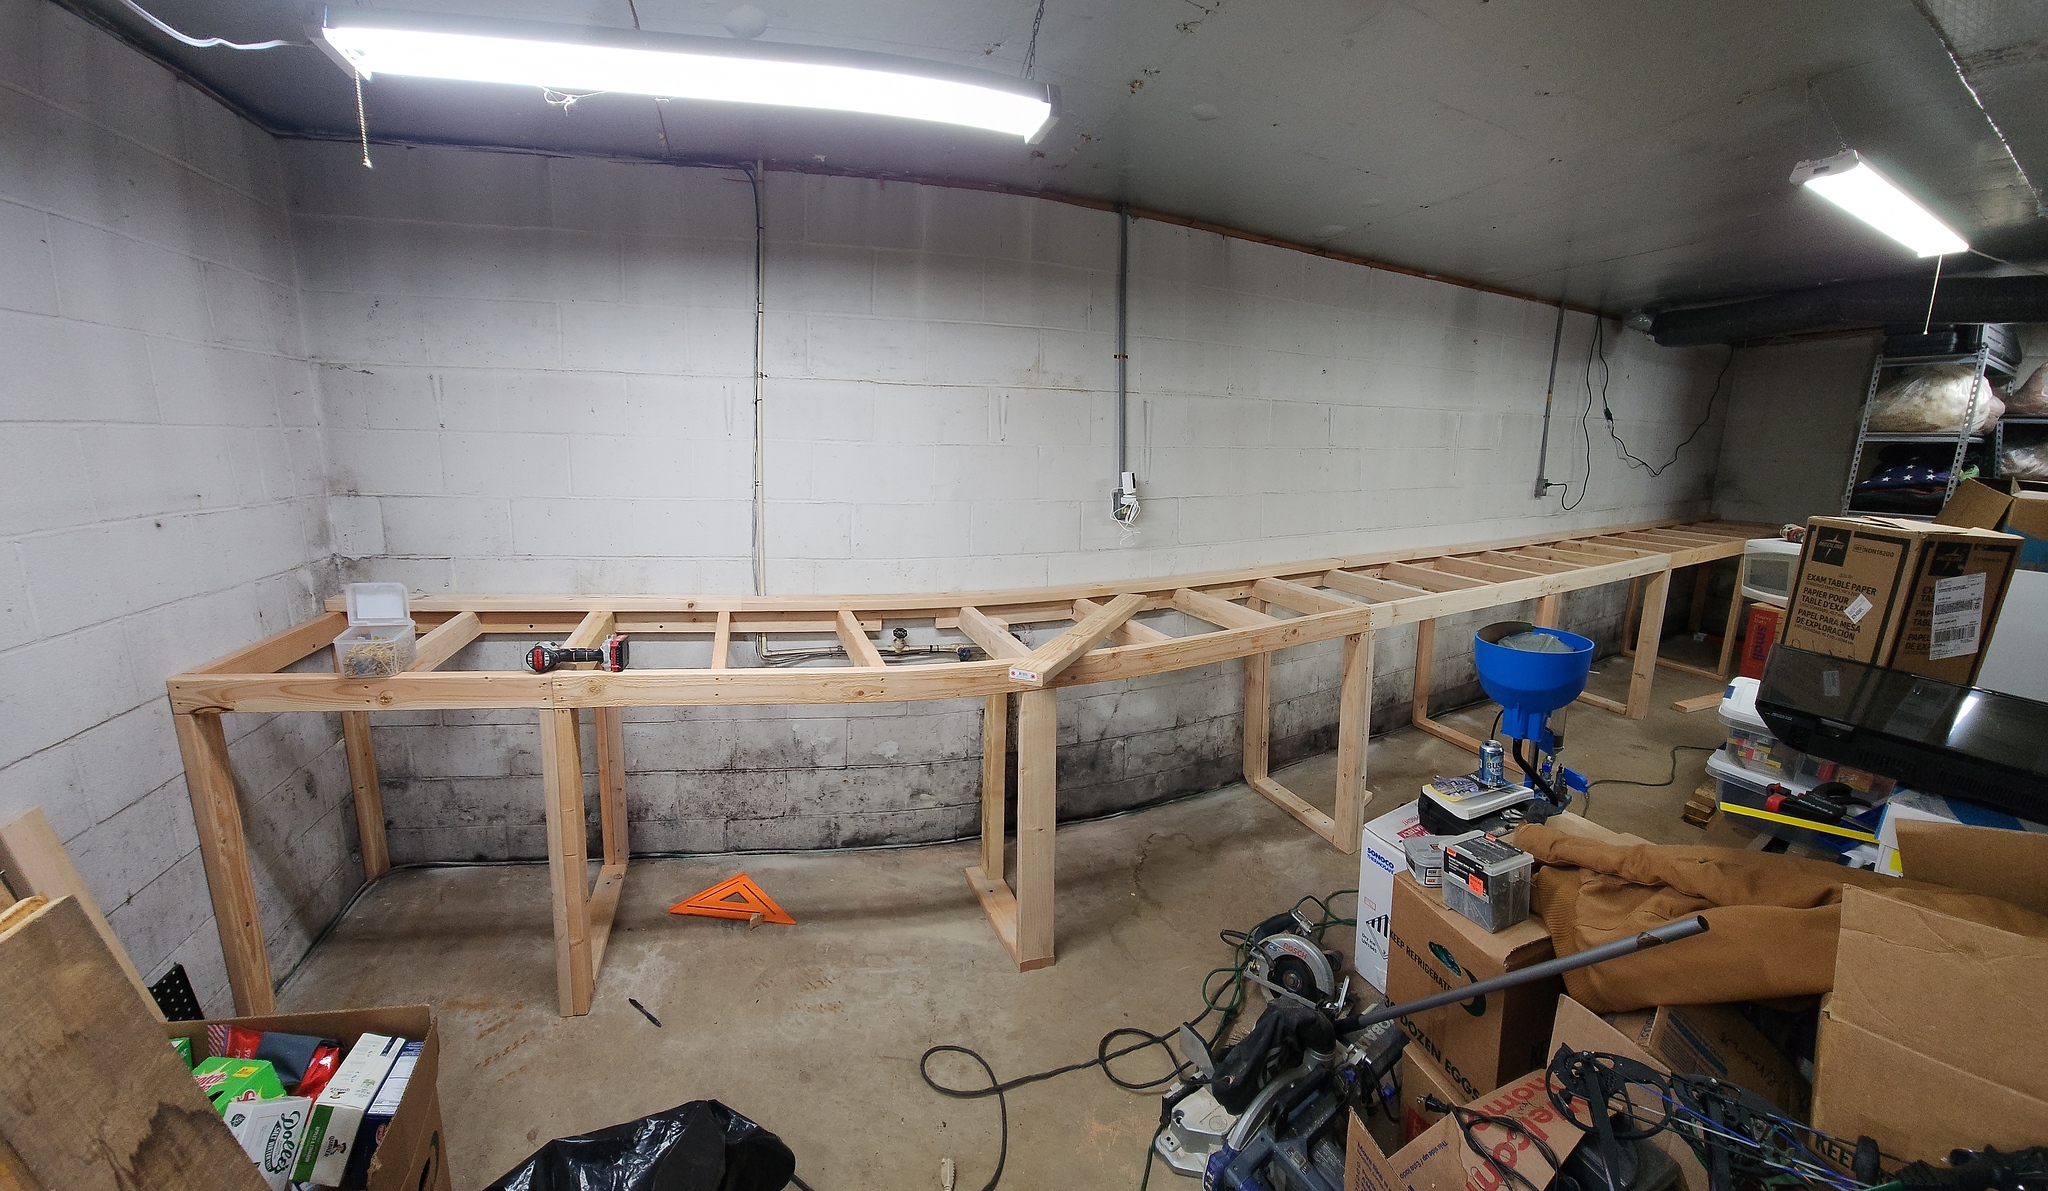
Getting the electrical started

20231231_173848-X5.jpg


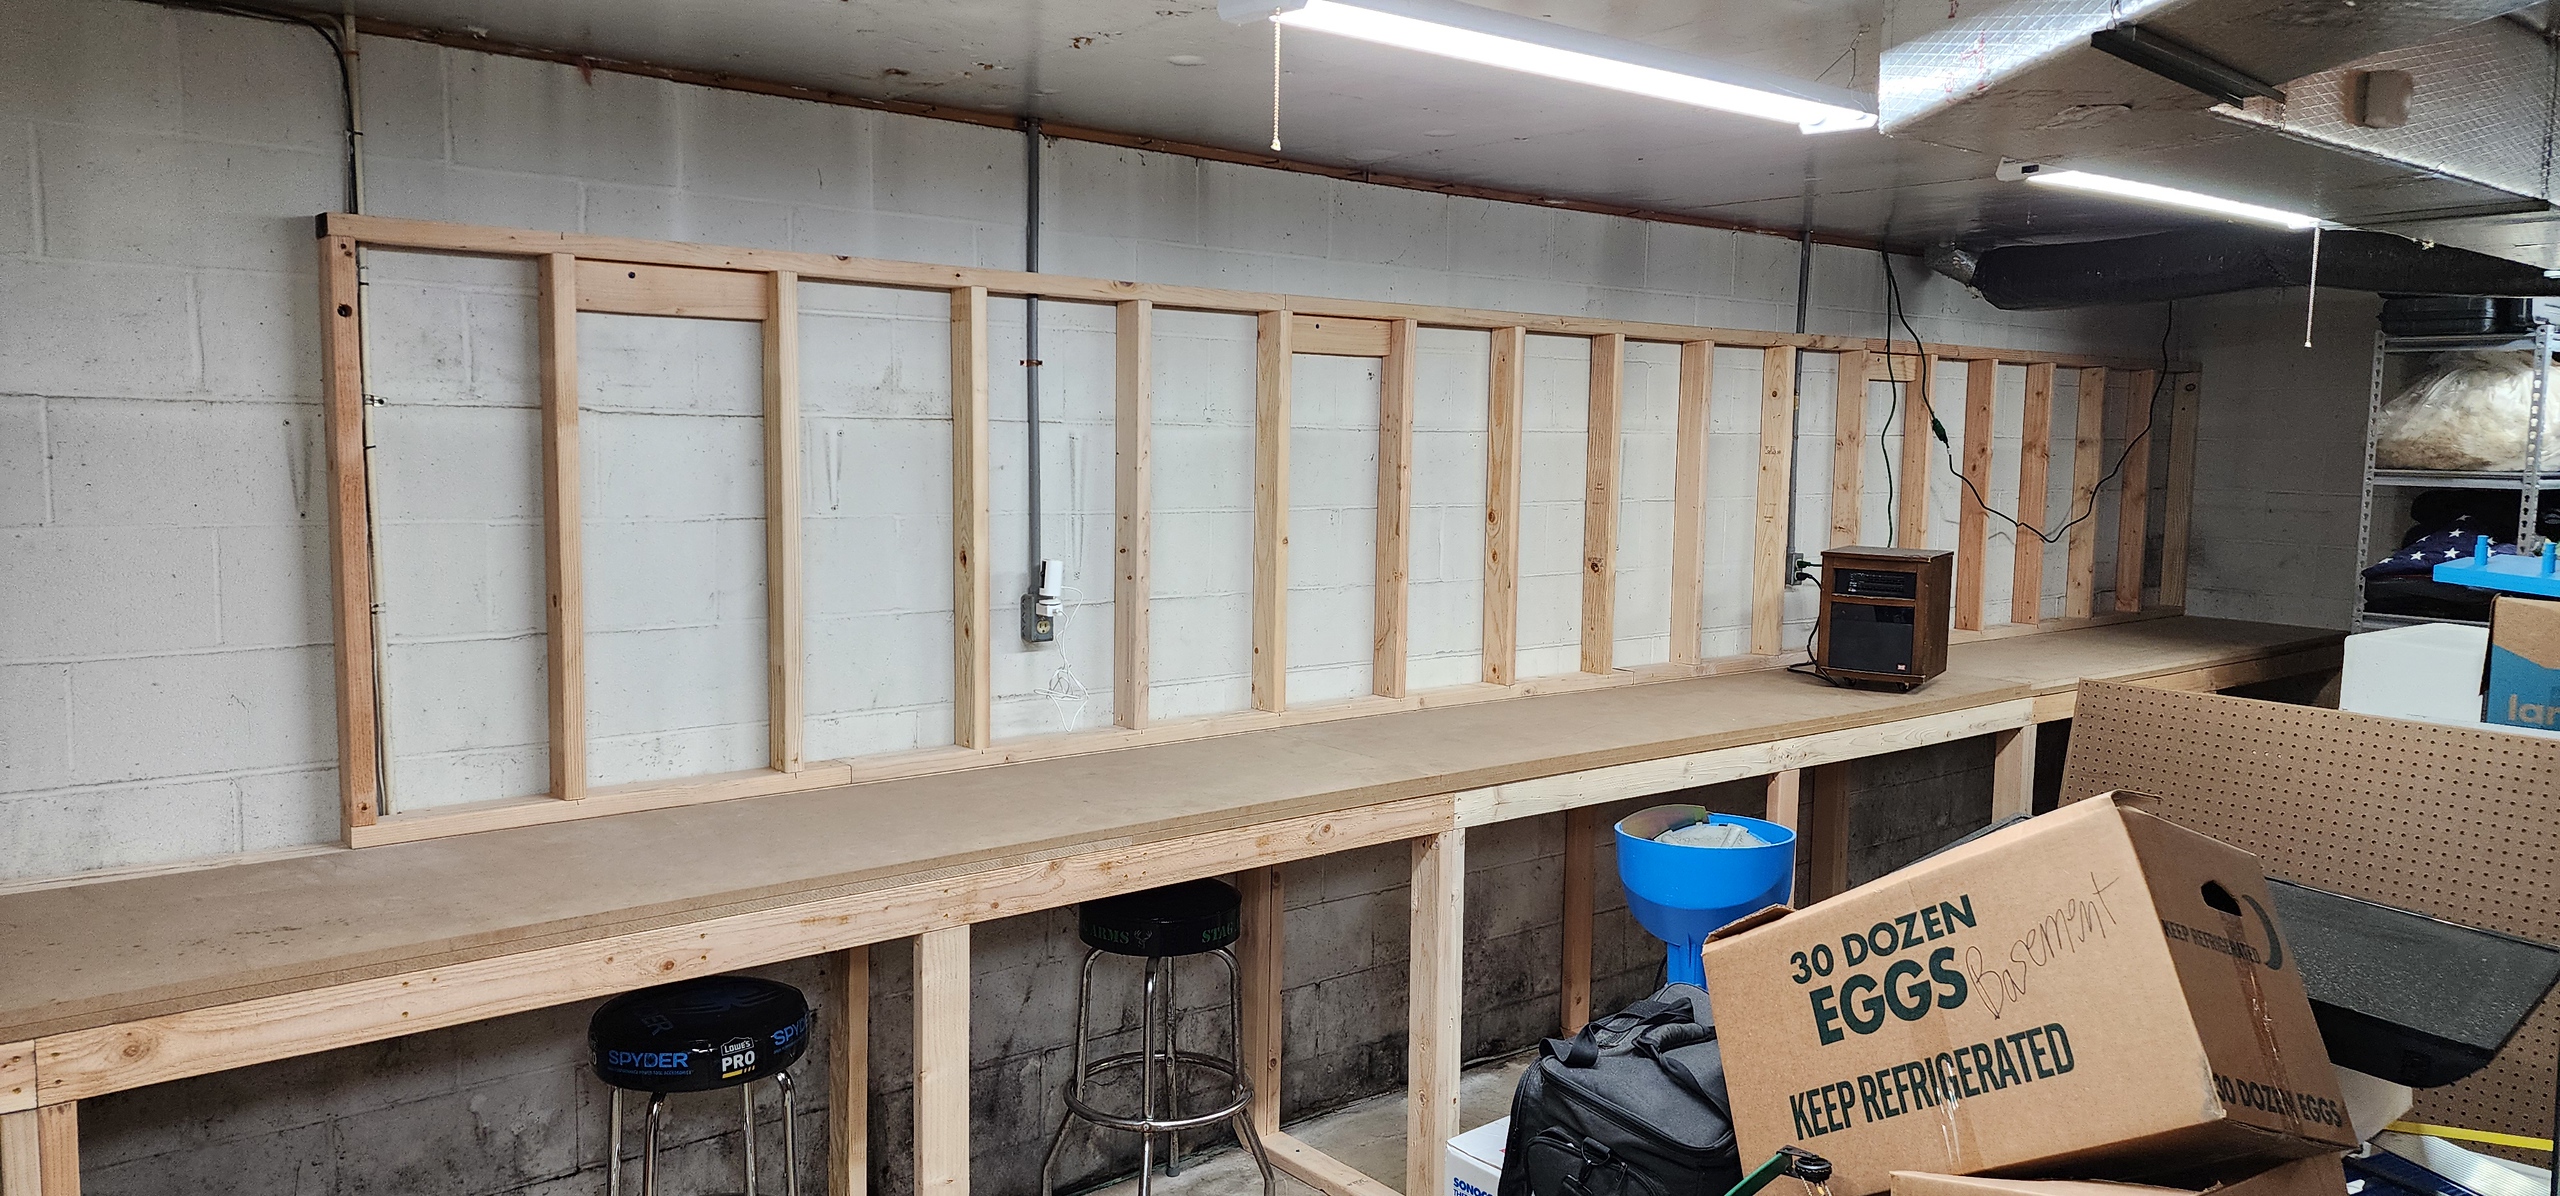
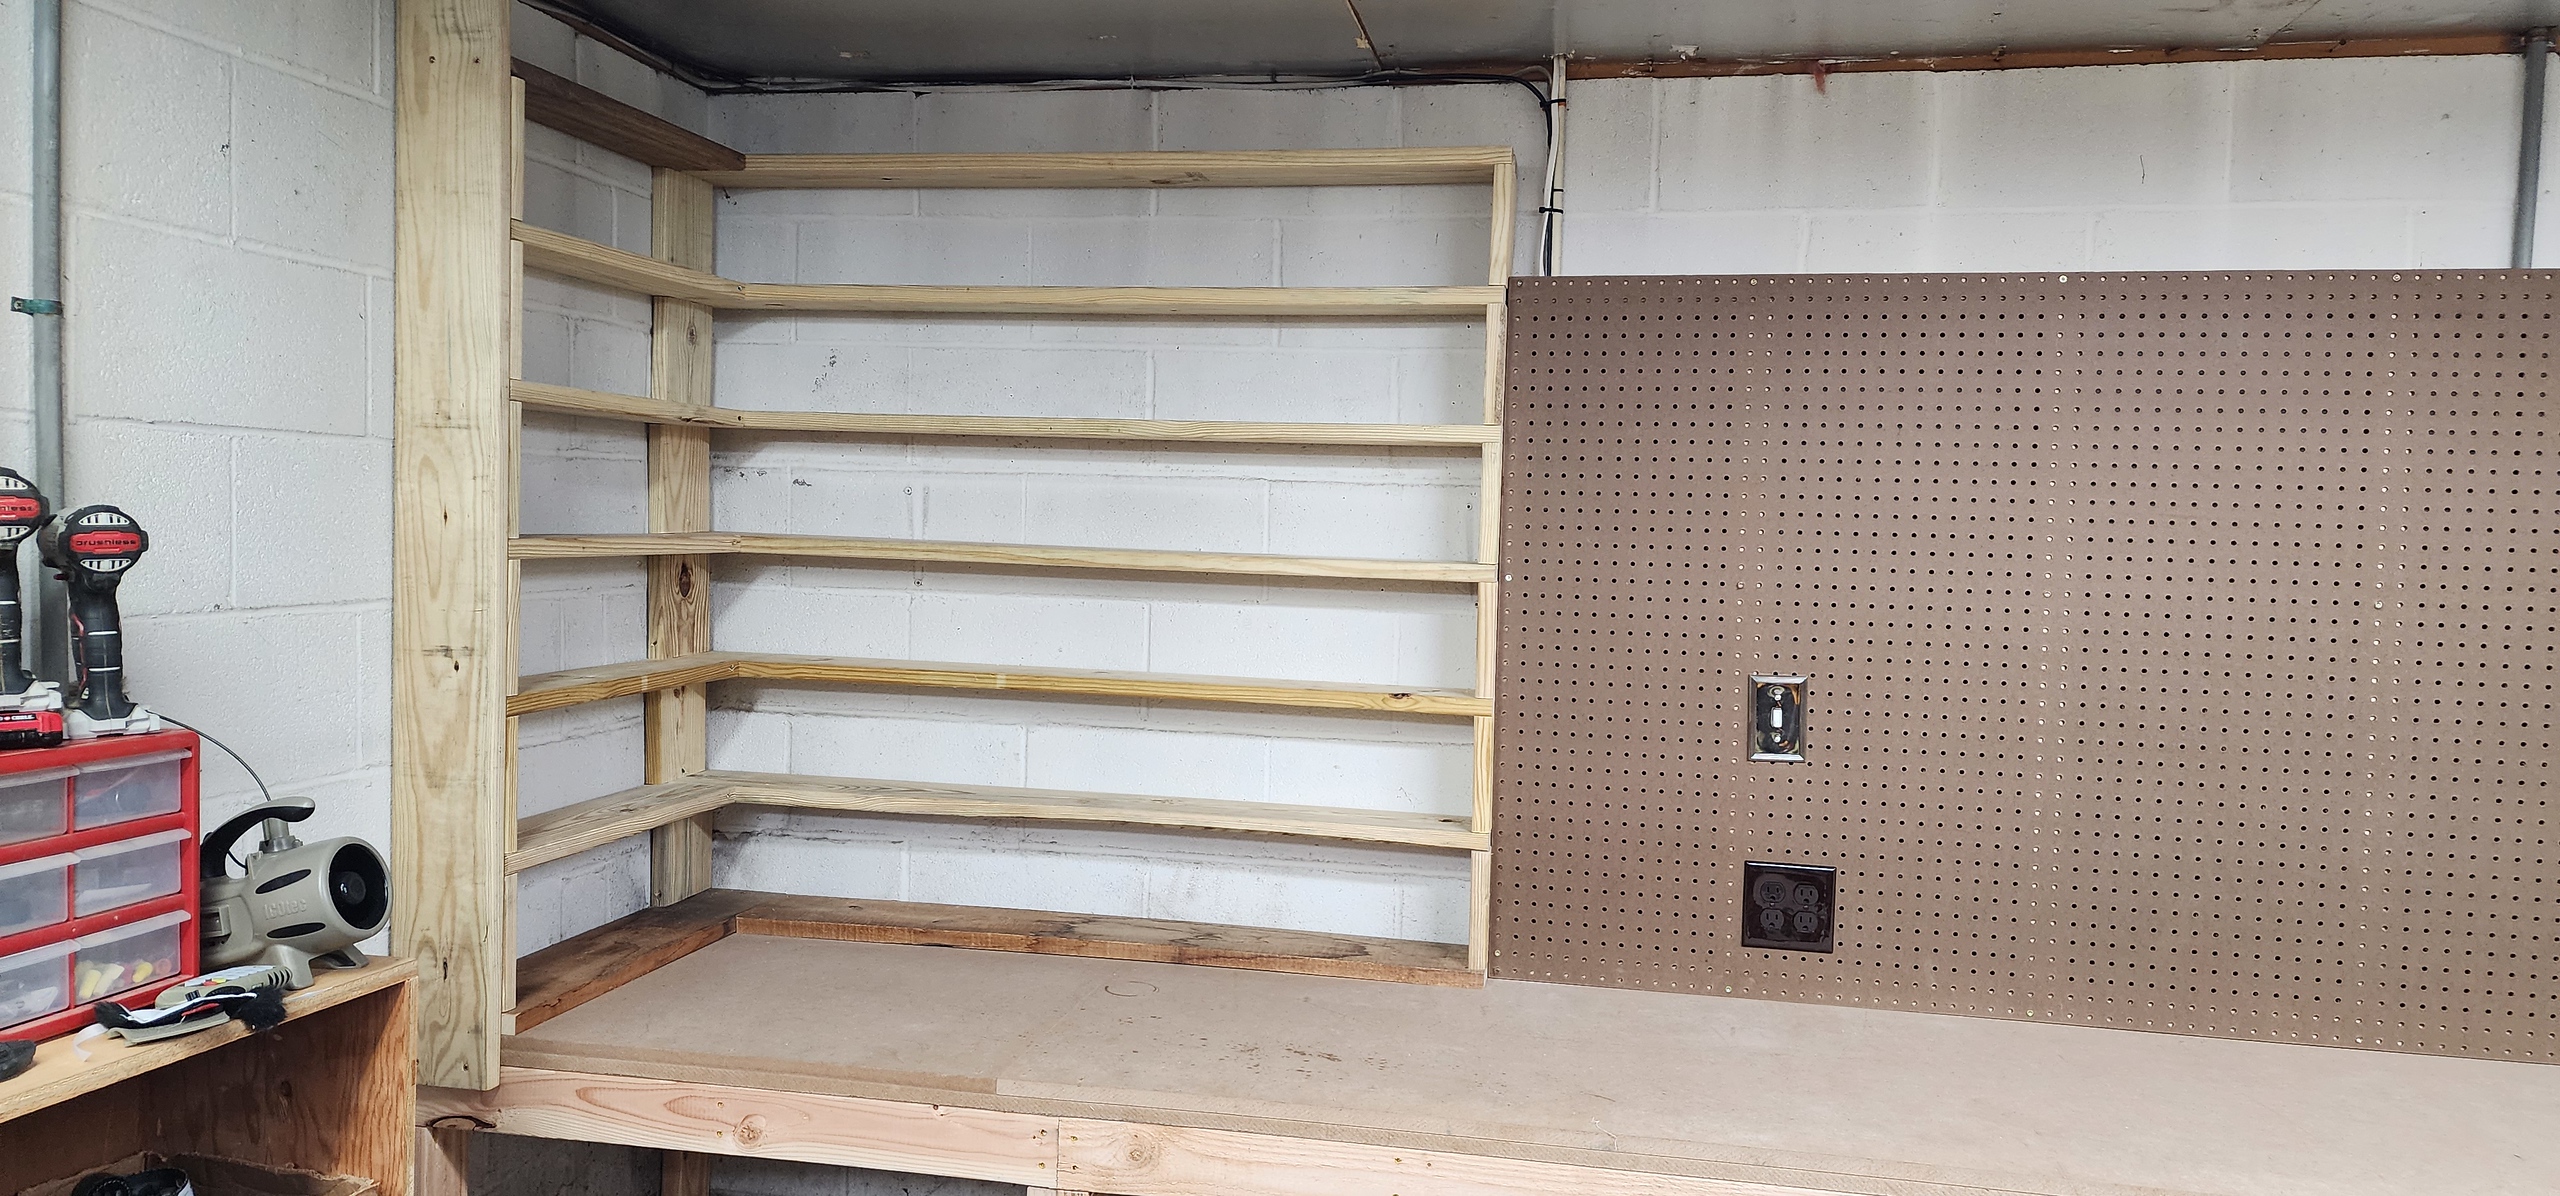
I also put in some shelving on the left side of the bench with leftover decking boards I had on hand.
20240101_222535-X5.jpg


I then finished up the electrical work. I have dual duplex receptacles every five feet for a total of 12 duplex receptacles. I also put a ceiling mounted receptacle with light switch controlled at the bench for the benchtop lighting.

20240102_223855-X5.jpg


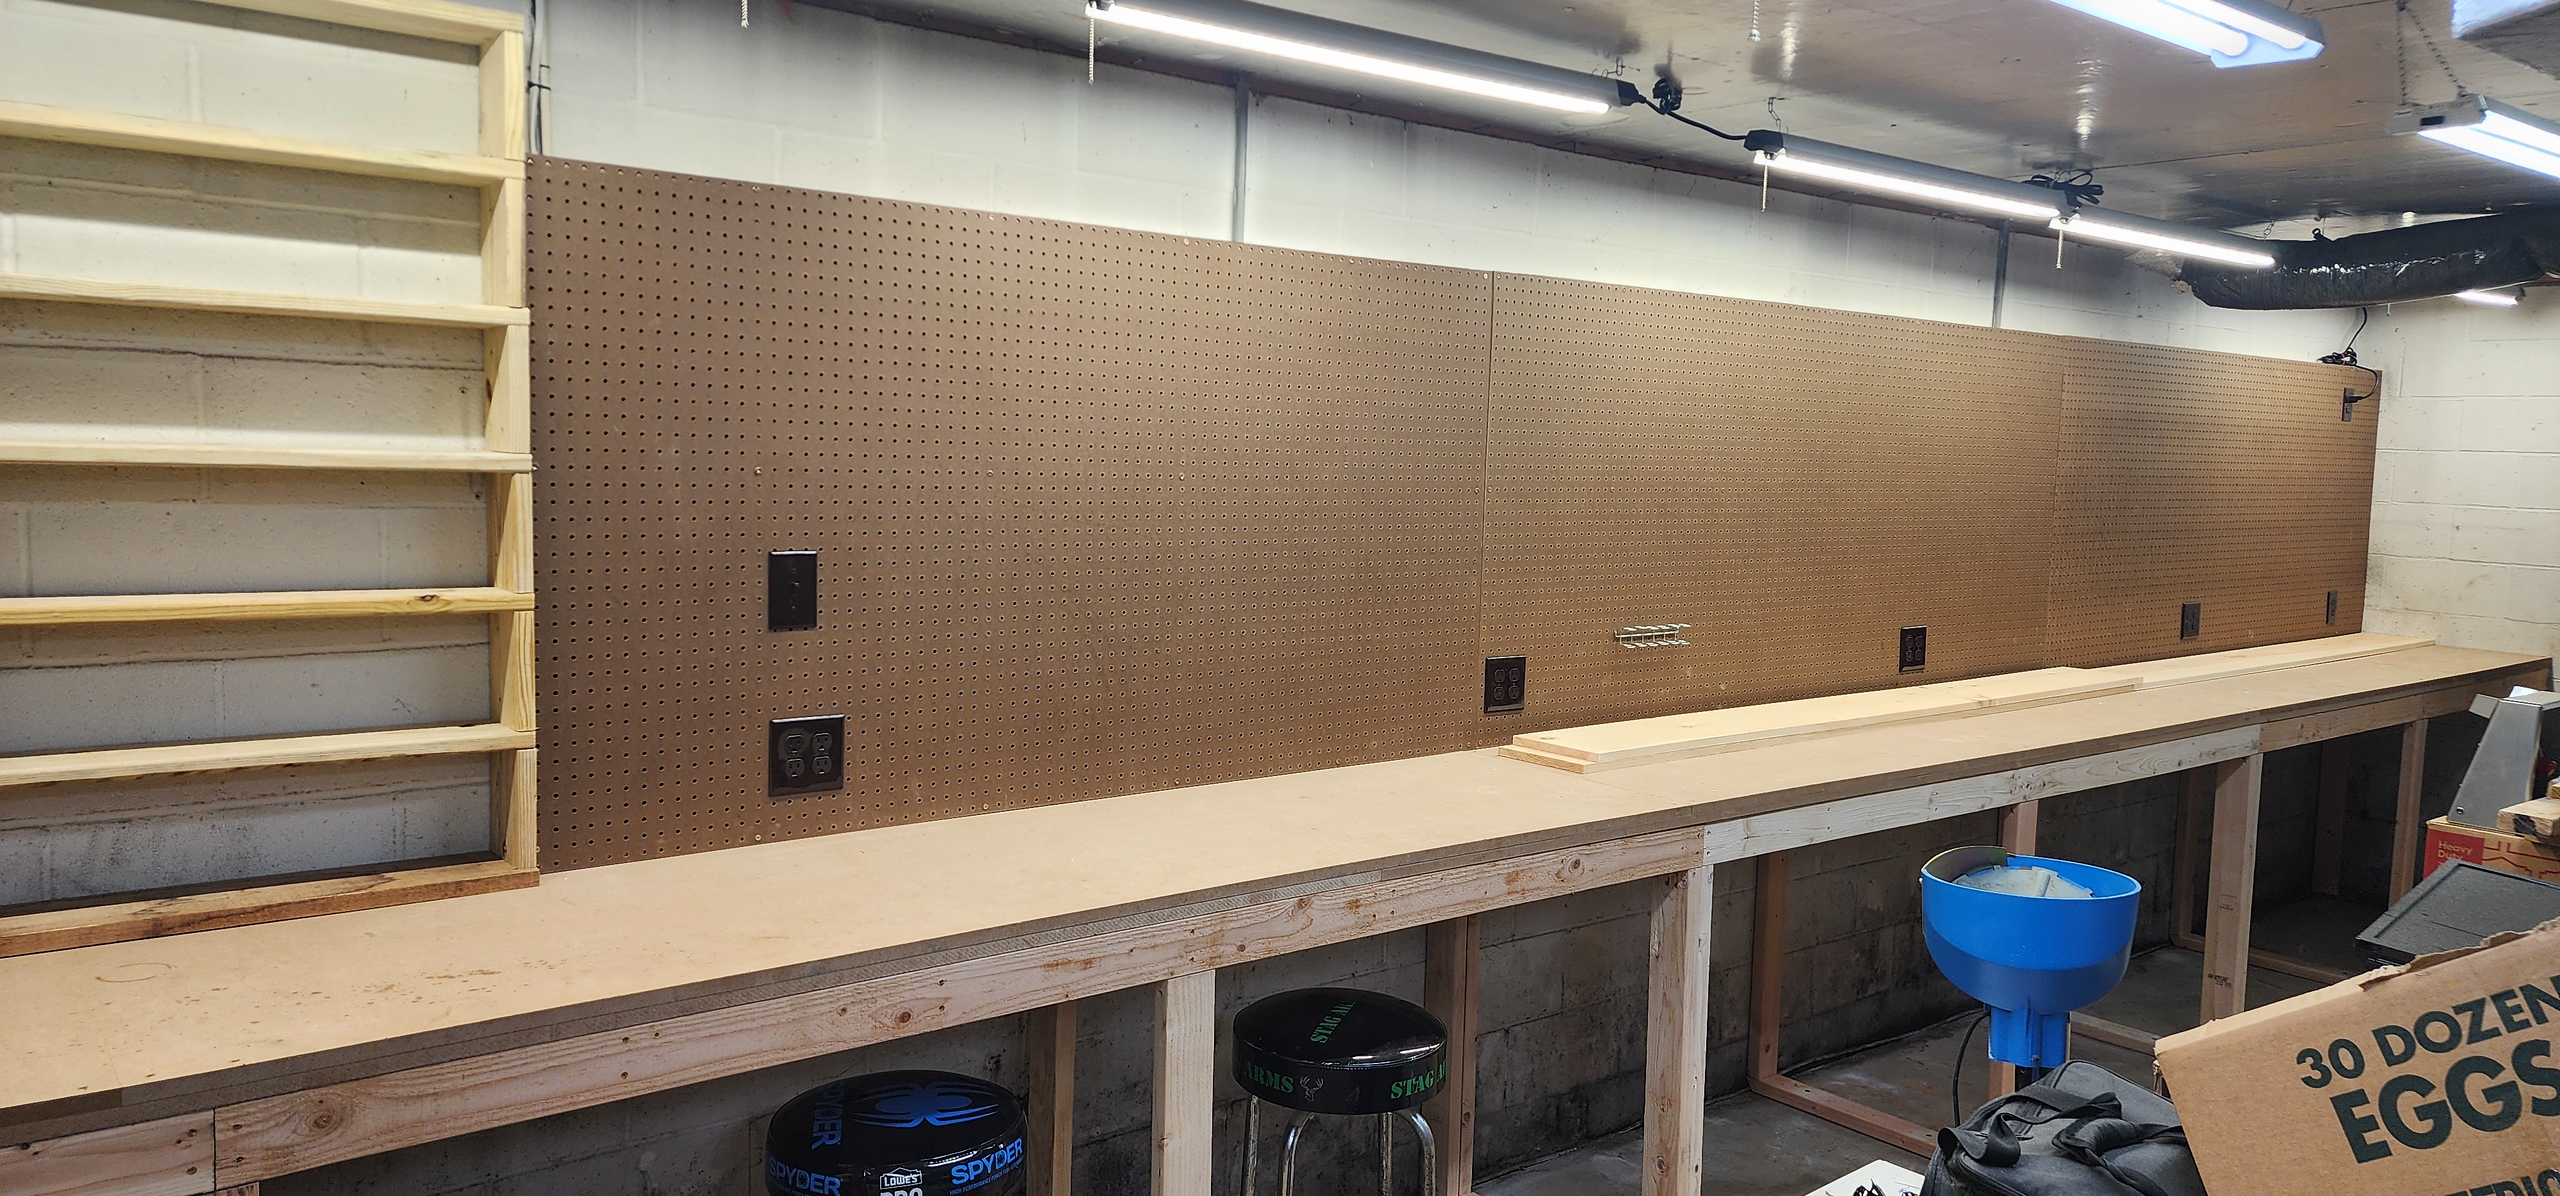
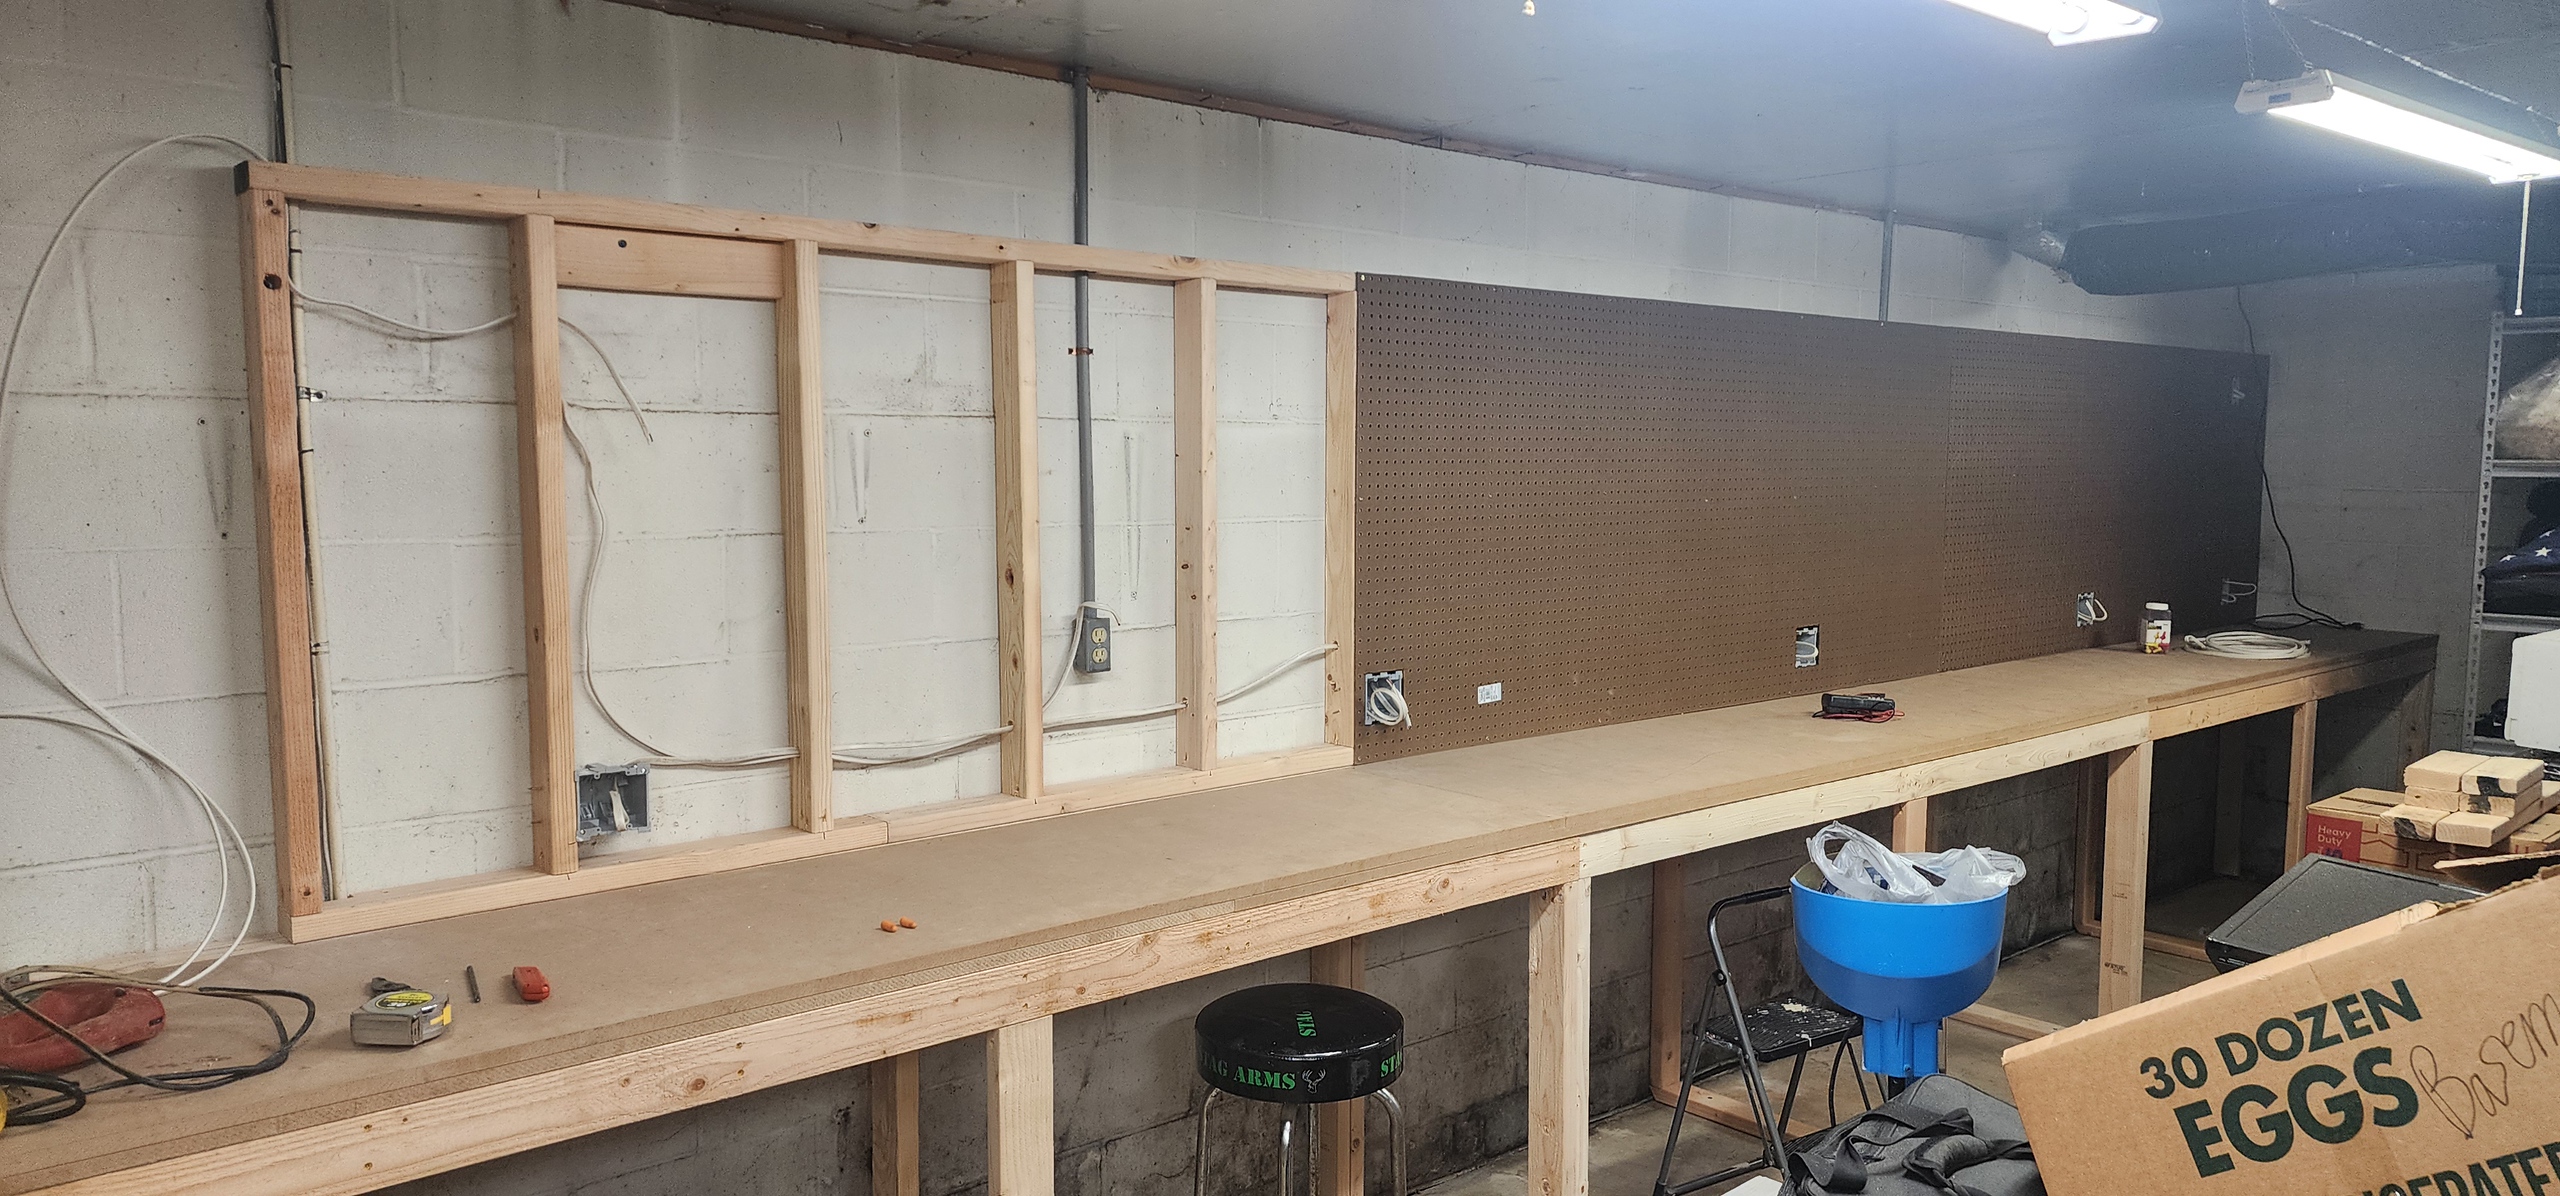
This is how the bench currently sits. I still need to put a top shelf over the peg board, put shelves all along the back wall underneath the bench, and then comes the fun part. Mounting my presses and putting away the tools on the peg board!
 
You put me and my handpress to shame.
Granted I have since built a table bench thing that I have mounted a turrent press unto. It works albeit the bench is wobbly. Needs more support added.

You literally are building the bench into the structure. What type of press is that black one and also the blue one ?
Mounting the bench to the wall and floor is the best way to make a bench stable. If that's not possible, adding weight to it will help, as will adding triangular braces, assuming bolts are tight and it's square.

The black one is a Lyman that I've since gotten rid of and replaced with a Redding turret press. The blue one is a Dillon XL650.
 
Hope that basement is dry.

There is an old boat building trick that may be of use for reloading benches. Never seen anyone try it, but if you have never seen it done, you may not be aware of it.

Basically it would be a way to create threaded fastener holes in the bench top, so as to be able to replace steel mounting plates. There would be two variations on the theme. One is to just create a bushing that bolts and nuts won't pull thru. Drill out a large, oversized hole, place tape beneath it, then backfill hole with thickened epoxy. When set, sand it smooth, then mark where you want your holes to go and drill it out. It will not pull thru.

The other is a threaded bushing in the bench top itself. To make one of those, you mark out the position where you want the hold down bolt to thread into. Say it is a 1/4" bolt / cap screw...........drill out the 1/4" hole all the way thru exactly where you need them to mount your press or device. Then drill out a larger hole.......say 1/2" this time.......but not all the way thru. Then when ready, screw in a short piece of all thread (waxed beforehand) into what remains of the pilot hole.......and when you know that is in the correct place......lift the press off, then back fill around the threaded rod with thickened 2 part marine epoxy. It will adhere to the wood base, and create a perfect image of the threaded rod. Once epoxy is set, you back the threaded rod out. The plug itself is stronger than the wood it is set into. Like sinking a bolt into a steel plate that has been drilled out and tapped for threads.......except cheaper, no steel plate, hole out of the way and threaded plug every bit as strong as steel. Only flex you get is if the bench top is not thick enough.

If that sounds promising, I may be able to whip up a demo to post with photos as following these types of instructions in text is lost on most of us.
 
That has got to be the dream bench of the year.
I was looking at the before & after of the ceiling area as well and wondered what happened there too.
New duct work???
 
Last edited:
Hope that basement is dry.

There is an old boat building trick that may be of use for reloading benches. Never seen anyone try it, but if you have never seen it done, you may not be aware of it.

Basically it would be a way to create threaded fastener holes in the bench top, so as to be able to replace steel mounting plates. There would be two variations on the theme. One is to just create a bushing that bolts and nuts won't pull thru. Drill out a large, oversized hole, place tape beneath it, then backfill hole with thickened epoxy. When set, sand it smooth, then mark where you want your holes to go and drill it out. It will not pull thru.

The other is a threaded bushing in the bench top itself. To make one of those, you mark out the position where you want the hold down bolt to thread into. Say it is a 1/4" bolt / cap screw...........drill out the 1/4" hole all the way thru exactly where you need them to mount your press or device. Then drill out a larger hole.......say 1/2" this time.......but not all the way thru. Then when ready, screw in a short piece of all thread (waxed beforehand) into what remains of the pilot hole.......and when you know that is in the correct place......lift the press off, then back fill around the threaded rod with thickened 2 part marine epoxy. It will adhere to the wood base, and create a perfect image of the threaded rod. Once epoxy is set, you back the threaded rod out. The plug itself is stronger than the wood it is set into. Like sinking a bolt into a steel plate that has been drilled out and tapped for threads.......except cheaper, no steel plate, hole out of the way and threaded plug every bit as strong as steel. Only flex you get is if the bench top is not thick enough.

If that sounds promising, I may be able to whip up a demo to post with photos as following these types of instructions in text is lost on most of us.
If you're taking about threaded inserts, I had those in my last bench, and will incorporate them into this one as well. However, for the presses themselves, they'll be bolted to the bench.
 
Yeah I'm very jealous lol.
Here's my pitiful work bench.
View attachment 1187634
Mine is my kitchen table . I am not married and was going to get a new kitchen table even though no one sits there . I decided to use it as a reloading bench instead . It worked out great . Plenty of natural light and all the comforts of being indoors .
 
Fabulous work.
Much more bench than I would ever need. Though I have two in my room. One is an old industrial computer desk that I do most of my prep work on and also use for lead bullet casting. The other bench is home built from two recycled kitchen base cabinets with a 2'X4' work surface that is dedicated to just reloading. Anything bigger would just become a catch-all for other unrelated projects. But that's the beauty if this hobby, it's total flexibility.
To be fair, I'll be mounting my drill press and grinder on the other end of the bench, so it won't be 100% a reloading bench.
 
Lol on the eggs! That damn box has ended up in most of the pics. I live on a 40 acre farm with chickens, and haven't purchased eggs in awhile. I've got more than I know what to do with.
Eggcelent work and great Eggsample for the rest of us to keep organized.
 
Nice looking setup so far! Personally, I'd have cleaned the block wall and thrown a coat of waterproof paint at it before starting, but that's just me.
 
Back
Top