hotwheelz
Member
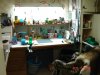
looks good Drumz, how many diagonal supports do you have I would think maybe one in the middle of counter tops would help stiffen it up. Nice lighting and good idea on the exhuast fan ,,,,
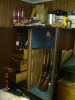
You are going to mount it on or near the rear wall? Or at the front of the bench on the rear wall? Guess I am confused (like that's never happened before) with you're statement.My presses will be mounted on the rear wall
Boy, been there a million or so times.things tend to get lost in translation somewhere between the brain and the keyboard sometimes for me.
I can strip, clean and reassemble a Ruger Mark III in less than ten minutes.

 ]).
]).

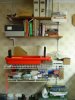
drumz, I used 3" deck screws when I rebuilt my benches about 10 years ago, and have been using my presses on it ever since with no signs of weakness. I used two screws at every wall stud. As long as you hit studs with all of them, you should be good. I do think you need more diagonal bracing, though.