IDriveB5
Member
That looks like a good start chavist, a lot nicer than what I started with. If it is located in an unconditioned space, watch the humidity! I dont know your location, but a little bit of humidity can ruin your equipment in a hurry.
I've updated my bench again:
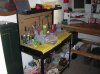
Reloading Bench v2.1:
I got a good deal on a little bit of flat bar from my company's fab shop...

Now I can easily move my presses and other equipment around and maximize the space:


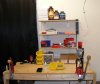
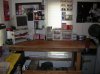
I've updated my bench again:
Reloading Bench v2.1:
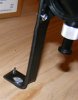
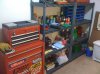
I got a good deal on a little bit of flat bar from my company's fab shop...
Now I can easily move my presses and other equipment around and maximize the space:


.jpg")
.jpg")