Show us a picture of your reloading bench

After not having any of my stuff set up for the last 5 years, I finally got around to it. I welded up some home made strongmounts for the RockChucker and one of my 650's. Actually they work better than the one from Dillon with the way my bench is set up.

P2280252.JPG


P2280255.JPG


Here is the last setup

New_bench2.jpg


Here is the one before that

Open_Full.jpg
 
l_5a5265dc26a84975914e8efed766d1f5.png
Puny considering what you all are posting, but it shares space with my archery gear and small project area. Not to mention I use it in the back of my car too.
 
Finally got it done

Finally got my reloading/woodworking workbench built. It’s been on the back burner for a while due to other projects and some consignment pieces.

It’s 24” X 77” X 1 1/2" and 36” tall made from birch plywood and solid wood banding. The frame is 2X4 construction; all lag bolted together and to the wall. The leg is bolted to the floor for rigidity as well. It’s rigid enough that nothing moves or flexes.

I made birch mounting adapters for all the presses, Dillon, MEC, RCBS so I only had to drill one set of holes in the bench as it doubles for a woodworking workbench as well. You can see that that Dillon is on a riser so it provides more leg room and a method to hold the empty brass box. I built both the brass and bullet box from walnut with dovetail construction. I still need to build the shelf for the back wall but that will come later when I decide on a height and width.

Here’s pictures as well as cabinets for reloading stuff.

RLbench0.jpg

Dillon1.jpg

Dillon2.jpg

RLcabinet2.jpg
 
Sorry pics didn't transfer on earlier post. Here is the "traveling" loading bench. Read sign on top of wood tool chest.. I agree..
 

Attachments

  • DSC03880.JPG
    DSC03880.JPG
    62.5 KB · Views: 507
  • DSC03846.JPG
    DSC03846.JPG
    57.8 KB · Views: 389
Last edited:
The frame

Thanks for all the comments.

Others have asked about the frame/construction so I added a couple of pics.

Yes I'm a furniture builder. Just finished a consignment display cabinet for a neighbor before building the bench. My real job is a mainframe systems programmer.

There is one coat of Purtian Pine stain and four coats of Varathane.

Yes it is bolted to the wall on two sides, hence no right leg. The frame rests on haunches on the leg and a brace goes up the inside of the frame so all the weight is actually supported by the leg. The top is a full sheet of plywood cut in half, glued and screwed together with 3/4 X 11/2 banding. When the top gets too abused I can replace if for under $50 and about 4-6 hrs start to finish.

You could park a small car on it if it would fit. Here's the frame for those wanting to know and the garage shop with WIP project before the cabinets were built recently and less some new tools. I'm also a woodworking tool junkie too :D

I also have heat and air that I installed last summer. Winter time when it's 20 outside it's 65 in the shop and summer when it's 100 outside, its 72 in the shop :cool:

WBframeSs.jpg

SH4.jpg
 
This is my first post here so I figured I post a picture of the tiny setup I have. It's not much, but it works for me.
P1010206.jpg
 
Here are a couple shots of the bench I just finished. Wife said it had to look like furniture if I wanted it inside the house. :)

It's made from pallet and skid wood, mostly oak, no parts were longer then three feet. It cost about $75 to build, mostly for the drawer slides, finish, and plastic bins. Top is 2'x3'x1.5" thick. Legs are 1.25" x 3" lap joined to the stretchers. It's elbow height for me.

Has room on the right for the future purchase of a Lee classic turret. The large drawer helps contain the clutter that usually accumulates. There are a couple threaded inserts in the top to screw the powder station and zip trim to when in use. Eventually the bottom shelf will store the vibratory cleaner, when I get one.
 

Attachments

  • IMG_0538.jpg
    IMG_0538.jpg
    74.2 KB · Views: 331
  • IMG_0537.jpg
    IMG_0537.jpg
    68.4 KB · Views: 361
Last edited:
here's mine...
 

Attachments

  • 19977_1273568372789_1637321696_699169_4972235_n.jpg
    19977_1273568372789_1637321696_699169_4972235_n.jpg
    61.1 KB · Views: 301
  • 19977_1273568412790_1637321696_699170_6045230_n.jpg
    19977_1273568412790_1637321696_699170_6045230_n.jpg
    59.9 KB · Views: 420
My Reloading Space / Cave

I have done some updates to my reloading space so for fun I thought I would post a couple of pictures.
 

Attachments

  • DSCN5839.jpg
    DSCN5839.jpg
    281.8 KB · Views: 643
  • DSCN5840.jpg
    DSCN5840.jpg
    273.1 KB · Views: 413
Reloading Area

My reloading area---it has been a pain--had to rebuild this room in 3 different houses over 40+ YEARS......

PISTOL RELOADING

pistolreloading.th.jpg
[/URL][/IMG]

RIFLE & SHOTGUN

shotgunrifle.th.jpg
[/URL][/IMG]

8" LATH & MILLING MACHINE FOR SMALL PARTS

dsc02997d.th.jpg
[/URL][/IMG]

GUN SAFE & STORAGE
Photo not available...................
 
Folks... try to remember that this is a show us thread, not a finger pointing thread. People are showing off their pride so keep it cool. The last thing we need is to have the mods lock this thread. That would suck. If you can't say something that is both positive & respectful, please keep it to yourself.

With respect,

LGB
 
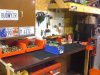
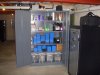
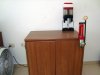
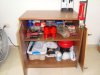
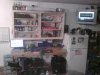
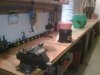
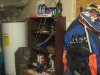
My comments regarding having propellants and primers on a loading bench "within easy reach" were in fact directed toward the safety of reloaders themselves. Though it is indeed wise to keep such items out of reach of unauthorized hands, the "accidents waiting to happen" are increasing the result of carelessly using inproper components, sometimes with tragic or near-tragic results. I am occsionally employed by a group of ballisticians and engineers who investigate gun and ammo related accidents for the firearms industry. In very recent years there has been a significant increase of accidents involving reloaded ammo. The principal causes being the careless and unknowing use of incorrect propellants, causing catastrophic pressures that result in firearm destruction and sometimes, unfortunately, personal injury. Our finds indicate there is a relationship to the increasing numbers such accidents to reloaders whose primary concern is producing large amouts of reloads in shortest possible times. While the industry is happy that there are more shooters and handloaders, there is also concern about numbers of accidents caused by carelessness. which is often the result of rushed and improper practices. One solution being recommending keeping all propellants out of the loading area except the one being used for a specific loading program. Ideally, propellants should be stored in a seperate room and only one at a time being in the loading room. Which is a practice recommended by the industry and, in fact, strictly enforced by professional ballistic laboratories. While this rule may be difficult or impossible for amateur handloaders, at least components should be stored in a such a way that retrieval will require more careful (less rushed) identification of the product. In other words, out of easy reach. We like to think of ourselves as safety minded, and feel "that won't happen to me." But almost invariably that was the attitude of handloaders we interview who have been a victum of their own carelesness.
 
Wow, you guys have such awesome setups!
Well here's mine, I reload on my room so I try to be as clean and with much ventilation as possible.

I only reload like 100 rounds per week for pistol (to shoot IDPA) and a few slugs for shotgun.

It does the work :D
 

Attachments

  • bench01.jpg
    bench01.jpg
    56 KB · Views: 169
  • bench02.jpg
    bench02.jpg
    87.9 KB · Views: 217
  • bench03.jpg
    bench03.jpg
    67.8 KB · Views: 119
I used this thread extensively when I was searching for ideas to build a new reloading bench and found what I was looking for within certain photos.

This thread is the most valuable thread in the reloading section as despite all the equipment differences we ALL need to work on a bench.

I have never posted here but have been meaning to snap a photo of my old versus my new bench.

My fear in it being 'stickied' :)confused:) would be that the content of replies changes from photos to narrative.

It's really the massive collection of photos of all types of benches that fit our wide and varied requirements that makes this thread so valuable.

In line with that I will post again only to post photos of my new versus old bench.

Thank you to all who have posted in this thread, it was the most useful resource I had in building my bench.

Cheers! ;)
 
The Hornady is now setup for .41 mag, and the RCBS is used for setting .308 load's. I will post some better one's once I, get some pant on the walls.
 

Attachments

  • Picture 034.jpg
    Picture 034.jpg
    274 KB · Views: 270
  • Picture 016.jpg
    Picture 016.jpg
    269.9 KB · Views: 163
Update: Three of the four wall's are finished, I, just used two coat's of primer sealer, it was getting to late, and to cold down there to push the paint around. The pink insulation in the back ground was removed when I, decided to go with just the plain block. Next time I, move the bench with the Dillon on it around it, will be with a chain saw!:D
 

Attachments

  • Dillon mounted on the new beanch early may of 2008.jpg
    Dillon mounted on the new beanch early may of 2008.jpg
    280.5 KB · Views: 222
Ok.. today is the big day!! My basement is finished, painted the ceiling last night. I have all of the wiring done and it is time to build my bench!!

I have dowloaded a bunch of images, and have settled on 2x4 construction... standalone but lag screwed to the wall with l-brackets securing the front legs to the floor.

I am going to go with two 2' x 4' 1/2" peices of finished plywood glued and screwed together for the surface, with a lot of poly finish on it and the 2x4's all painted white. I do not have a lot of clamps so the screw/glue is all I can think of other then putting it in my garage, glueing it and parking my Goldwing on it overnight. Will the screws be a major pain in the butt?

Peg board on the wall above and selves to the side.

Anyone see any major problems?
 
My Bench

I used this thread a bunch when I built my bench. It is 42" off the floor and solid as a rock. The second bench is not as tall but 16' long, I use it for case prep. I also have a 48" square table. I have a computer, TV, Stereo, Fridge in my Man Cave. If I could only figure out how to keep the wife and kid out of the garage it would be paradise.:)
 

Attachments

  • rambosreloadingbench1.jpg
    rambosreloadingbench1.jpg
    89.9 KB · Views: 385
  • rambosreloadingbench2.jpg
    rambosreloadingbench2.jpg
    81.7 KB · Views: 412
I did some last minute organizing this morning and moved my safe down to the room and attached it to the wall. I don't have a cool metal locking cabinet but some day.
 

Attachments

  • IMG_0370.jpg
    IMG_0370.jpg
    271.9 KB · Views: 632
  • IMG_0369.jpg
    IMG_0369.jpg
    275.4 KB · Views: 369
Here's my new set up.I used the 2x4 Basics kit for the frame and shelves.3/4" Oak plywood for the top and lower shelves.Minwax Gunstock wood stain with four coats of Minwax Poly.Still have to tack on the trim on the shelves.Painted all the wood with Glidden Porch and Stair paint, one coat does the trick. I am building two other benches with the same kit,one dedicated to gunsmith work and the other for general woodworking/garage tinkering. You guys certainly have some really nice set ups ! I got many ideas viewing them !
 

Attachments

  • Photo0098.jpg
    Photo0098.jpg
    243.3 KB · Views: 1,009
You guys are way too fancy for me.

Here's my reloading bench, aka living room table. I reload .357 Mag and .308 with my little Lee hand press. Works great for me :)
 

Attachments

  • reloading.jpg
    reloading.jpg
    90.5 KB · Views: 291
Back
Top