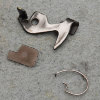
Last week I got the Gray Guns Inc Upgrade Kit and the GGI Stainless Guide Rod. I didn't have a cup tipped punch so I ordered one and installed it on Monday. I installed it in my P226R ST that has the GGI Competition Reduced Reset Action Package with Tungsten Guide Rod. This one was done before he developed the Titanium Firing pin block, so it's an upgrade for me.
For those that don't know the Gray Guns Competition Upgrade kit includes the following:
Reduced Power Main Springs (19x and 17x)
Reduced Power Sear Spring
Increased Power Firing Pin Spring (because competition shooters dry a lot)
Reduced Power Firing Pin Block Spring
Titanium Firing Pin Block
Replacement Firing Pin Position Pin (this is a one time use pin)
Anyways you can read more about the kit here:
http://sigforum.com/eve/forums/a/tpc/f/430601935/m/9141039551/p/1
The start, and most of the tools I need to start working.

Field Stripped.

Grips off, I haven't cleaned this in a while.

The locking insert, spring, and take down lever. Note the that the area near the feed ramp is polished.

Both sides of the trigger parts, included is the trigger sent with the gun when it was at GGI. Note how the original full sized trigger, trigger pivot pin, trigger bar are polished.


Main spring seat, main spring, and hammer strut. Not how the hammer strut is polished.

Both sides of the fire control parts, the sear safety lever, sear, and pivot pin. Note that the sides are polished. The safety lever is blurred out, Bruce asked me not to show that part, I forgot to substitute it with a stock lever, but since it's blurred you can see how silver and polished it is.


Various views of the hammer and pivot pin. Note how both are polished.


Decocking lever, bearing and spring. Note that the lever and bearing are polished.

For those that don't know the Gray Guns Competition Upgrade kit includes the following:
Reduced Power Main Springs (19x and 17x)
Reduced Power Sear Spring
Increased Power Firing Pin Spring (because competition shooters dry a lot)
Reduced Power Firing Pin Block Spring
Titanium Firing Pin Block
Replacement Firing Pin Position Pin (this is a one time use pin)
Anyways you can read more about the kit here:
http://sigforum.com/eve/forums/a/tpc/f/430601935/m/9141039551/p/1
The start, and most of the tools I need to start working.

Field Stripped.

Grips off, I haven't cleaned this in a while.

The locking insert, spring, and take down lever. Note the that the area near the feed ramp is polished.

Both sides of the trigger parts, included is the trigger sent with the gun when it was at GGI. Note how the original full sized trigger, trigger pivot pin, trigger bar are polished.


Main spring seat, main spring, and hammer strut. Not how the hammer strut is polished.

Both sides of the fire control parts, the sear safety lever, sear, and pivot pin. Note that the sides are polished. The safety lever is blurred out, Bruce asked me not to show that part, I forgot to substitute it with a stock lever, but since it's blurred you can see how silver and polished it is.


Various views of the hammer and pivot pin. Note how both are polished.


Decocking lever, bearing and spring. Note that the lever and bearing are polished.


