What gunsmithing or repairs have you done today

Gunsmithing 101 but it's entertaining. Mounting a Leupold Delta Point Pro red dot optic on a Smith & Wesson M&P10 mm C.O.R.E. (Competition Optics Ready Equipment) slide.
The pistol comes with a number of polymer "adapter" plates (~0.04" thick) to accommodate various manufacturer optic fastener mounting patterns; the Leupold is steel plate 3x (0.125 ") thicker than the polymer plates. I substituted the hex head fasteners for torx drive fasteners, which I do routinely anytime I get the opportunity. Used a dab of blue Loctite on the fasteners and torqued to 25 in-lbs; I prefer to use the torque tool which has its highest range closest to the fastener specification, a 0-40 in-lb range Snap-On Qdriver4 model in this instance. The factory tall sights are useless with the Leupold DPP optic, as they are too short to co-witness thru the optic window.
IMG_3458SMITH & WESSON M&P10 2.0 CORE PLATES copy.jpg IMG_3459SMITH & WESSON M&P10 2.0 CORE PLATES copy.jpg IMG_3460SMITH & WESSON M&P10 2.0 CORE PLATES copy.jpg IMG_3462SMITH & WESSON M&P10 2.0 CORE PLATES copy.jpg IMG_3465SMITH & WESSON M&P10 2.0 CORE PLATES copy.jpg IMG_3467SMITH & WESSON M&P10 2.0 CORE PLATES copy.jpg IMG_3547SMITH & WESSON M&P10 POLISH FIRING PIN BLOC copy.jpg IMG_3548SMITH & WESSON M&P10 POLISH FIRING PIN BLOCK INy.jpg IMG_3550SMITH & WESSON M&P10 POLISH FIRING PIN BLOCK INS.jpg IMG_3553SMITH & WESSON M&P10 POLISH FIRING PIN BLOCK Icopy.jpg
 
Last edited:
A lot of the striker-fired pistols have safety striker blocking plungers that are engaged by the trigger bar during the trigger pull. Their surface and the channel lining in which the plungers travel are often somewhat rough; this contributes to scratchy or ratchety feel during the trigger pull. It's easy to isolate in most pistols where the undesirable mechanical roughness contribution is originating; trigger components in the frame ("downstairs), or safety plunger / sears in the slide ("upstairs). I like to separate the frame-slide and work the trigger; most of the time I find production polymer triggers are fairly smooth in function when working the trigger without the slide assembly. Then add the slide assembly on top and work the trigger; all the mechanical dislikes are felt, so this isolates the majority of the unfavorable trigger feel to the upstairs of the pistol. The frame trigger bar during the trigger pull engages the safety plunger blocking the striker; the combination of less than ideal surfaces on the plunger and its cylindrical slide guide. Once identified as the culprit, it can be challenge as to how best hold the small parts for smoothing or internal small cylindrical guide channel polishing. I have using the methods described below for 15 years and just cleaned up the new M&P10 show in prior post.

Most plungers have asymmetric diameters at their opposite ends, the retaining diameter and the exposed diameter that greets the trigger bar upright.
For the plunger, since most have a hollow cavity to accommodate their spring, I found slightly reducing the diameter of slotted roll pins to allow them to be tapped in to the plunger, now one has axle to use in dremel or hand drill to rotate them to effect smooth surface sanding / or rouge polishing.

For the slide plunger channels using a slightly undersized slotted roll pin, into which desired sand paper (usually 600 grit) can be secured with ~ 2 wraps of sandpaper to make a snug fit into the channel, hand drill rotate the pin-sandpaper arbor.

A few photos of the technique.

Screen Shot 2022-07-08 at 4.43.42 PM.png Screen Shot 2022-07-08 at 4.44.32 PM.png Screen Shot 2022-07-08 at 4.45.03 PM.png Screen Shot 2022-07-08 at 4.45.35 PM.png Screen Shot 2022-07-09 at 8.46.45 AM.png Screen Shot 2022-07-09 at 8.48.17 AM.png Screen Shot 2022-07-09 at 8.49.20 AM.png IMG_3565SMITH & WESSON M&P10 POLISH FIRING PIN BLOCK INSTcopy.jpg IMG_3566SMITH & WESSON M&P10 POLISH FIRING PIN BLOCK INSTAcopy.jpg IMG_3568SMITH & WESSON M&P10 POLISH FIRING PIN BLOCK INSTAL copy.jpg
 
Just cleaned some rifles from my last range trip, yes it counts lol.
Boy the bore in my cz 7.62x39 gets caked up with powder fouling, probably from the Russian steel case.

A lot of brass slivers in the bolt face on my mauser m18 the lot of hornady brass is soft and the double ejectors chew the bases pretty good. The new nosler brass leaves much less ejector marks even on the warmer loads.
 
Hi guys, tell me if it would be appropriate to create a topic in this section on converting the P-411 starting pistol into a real Makarov 9x18?
I understand that for the Americans, such a remake will seem like a stupid occupation, but in Russia pistols are not sold to the civilian population, what if they kill someone?

before
before_resize.jpg


after
after_resize.jpg
 
Yesterday morning project. Modifying a gunsmiths' tool.

So, I have had this Menck shotgun magazine spring retainer removal tool for a long time. I always disliked how short and thin the T-handle was when
one needed to apply some muscle to remove some retainers, the T-handle will dig into finger flesh.

Desired larger diameter / length T-handle. Used ¼” drill rod stock; ends shaped with ¼” rod-end-forming lathe tool; flat milled in the center for engagement with 10-24 set screw.

Body of tool is hardened tool steel; step-drilled T-rod diameter to 17/64” being supported with parallels in the vise; #25 bit to tap 10-24 set screw.

T-handle polished on the buffing wheel.

The tool feels much better in the hand now. Final step will be to bead blast removal of the old finish and powder coat it.

CIMG2491 copy.JPG CIMG2496 copy.JPG IMG_3586Menck Tool Modification 07.08.22 copy.jpg IMG_3587Menck Tool Modification 07.08.22 copy.jpg IMG_3588Menck Tool Modification 07.08.22 copy.jpg IMG_3591Menck Tool Modification 07.08.22 copy.jpg IMG_3594Menck Tool Modification 07.08.22 copy.jpg IMG_3596Menck Tool Modification 07.08.22 copy.jpg IMG_3597Menck Tool Modification 07.08.22 copy.jpg IMG_3601Menck Tool Modification 07.08.22 copy.jpg
 
Last edited:
............
Master Gunsmith Art Issacson recommends a common 20 penny nail head tapped into his work bench that he uses to pull the Browning Auto-5 magazine cap out.

Who knew a tool could be stronger than the part?

This result reminded me of the old adage, Good Judgment comes from Experience, Experience is often the result of Bad Judgment.

Screen Shot 2022-07-10 at 8.49.11 AM.png
 
Last edited:
Finished fitting the extractor on my .22TCM 1911. Feeding is smooth, as is extraction and ejection. I opted to forego polishing the hook until I take it to the range. The geometry on the new part looks pretty good and the parkerizing should wear in on its own. I can always help it along if needed. :)

I tested out the new extractor at the range yesterday--successfully. 50 rds of new factory .22TCM ammo, 50 rounds of my TCM reloads, and 50+ rds of my 9mm reloads. Everything fed and extracted smoothly, no stoppages, so I think I've got a great result! The old extractor would have had a FTE after 50+ rds of TCM. This new one seems immune to the problem of a dirty chamber, so I am pleased.

I should have made this switch a while back, but better late than never.:)
 
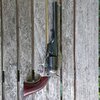
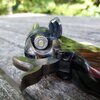
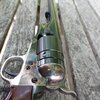
Outside of my ordinary tuning day, I had the opportunity to be the first to test a new product for Kirst Konversions. It's the first offering of a 45acp for Uberti/ Pietta 1860 Army!! For those that have a hard time acquiring 45C ammo or reloading components, the more readily available 45acp may be THE option! Here's a few pics.

20220715_182608.jpg

20220715_182238.jpg

20220715_181954.jpg

The revolver is a Cimarron import of the Uberti 1860 with a silver plated trigger guard from 2018. It was new in the box and I was saving it for something special and figured this was special enough!!
Features include a removed and re-torqued arbor (because of being anal!), arbor length corrected ( by installing a ss spacer in the arbor hole) which yields a tight .002" barrel /cyl clearance (endshake), coil torsion springs, coil and pushrod hand spring, bolt block, action stop , action shield, hardened and fire blued screws, and install of a 2 finger hand which is also a Kirst product.

Mike
 
Last edited:
Outside of my ordinary tuning day, I had the opportunity to be the first to test a new product for Kirst Konversions. It's the first offering of a 45acp for Uberti/ Pietta 1860 Army!! For those that have a hard time acquiring 45C ammo or reloading components, the more readily available 45acp may be THE option! Here's a few pics.

View attachment 1090186

View attachment 1090187

View attachment 1090188

The revolver is a Cimarron import of the Uberti 1860 with a silver plated trigger guard from 2018. It was new in the box and I was saving it for something special and figured this was special enough!!
Features include a removed and re-torqued arbor (because of being anal!), arbor length corrected ( by installing a ss spacer in the arbor hole) which yields a tight .002" barrel /cyl clearance (endshake), coil torsion springs, coil and pushrod hand spring, bolt block, action stop , action shield, hardened and fire blued screws, and install of a 2 finger hand which is also a Kirst product.

Mike
Nice what would this conversation cost.
 
Well, I never charge for a conversation !!!! Lol!
( I know, don't cha love auto corr.)
Anyway, I'd assume the same as any of the normal conversions already offered. I know they are a little high but cheaper than a new 45C SA (in 45C or 45acp). The Open top revolvers offered today (from either co.) are quite nice as offered but with some "massaging" along with a conversion you end up with a rather "high end" cartridge revolver!

Mike
Do the make a cylinder for the 58 rem, I need to get something to send you some day, be nice to see that there supposed to work right.
 
Had to take a screw out of my S&W 617. Mounted a red dot with blue loctite. I couldn't budge the screw so I had to go to a friend's house to use his drill press.

Turns out it's my drill press. I let him borrow it 5 years ago and never got it back.

We had to drill the head off of one of the screws and then use a vice grip to get the rest of the screw out. The other screws came out with just a little pressure like they are supposed to.

Now I'm going to mount an LPA rear sight on my 6 inch 617 and a Burris First Strike on my 4 inch.
 
Does buying a closet full of exotic and domestic semi-exotic wood from the estate of a 45 year Luthier count? I know a bunch will get used on guns and knives. It looked to be about a full 8ft truck bed full of wood.

Now just to wait for it to come freight...
 
4 inch FS Right.jpg
Put the Bushnell First Strike 2.0 on my new 4 inch 617. I also opened it up and polished the rebound slide and trigger a little. I installed an 11 pound rebound spring just to smooth everything out.

It's working with CCI Mini Mags and I'll test some other ammo tomorrow.
 
Does buying a closet full of exotic and domestic semi-exotic wood from the estate of a 45 year Luthier count? I know a bunch will get used on guns and knives. It looked to be about a full 8ft truck bed full of wood.

Now just to wait for it to come freight...
Good to have some nice wood around, I've been wanting to build a nice hunting/ bushcraft knife, don't know what to use for the handles yet. I have some cherry but not to much figure to it. May make some cast iron pan Spatulas out of it tho.
 
Back
Top