What gunsmithing or repairs have you done today

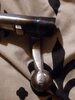
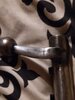
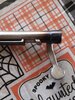
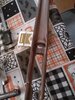
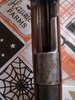
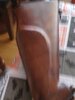
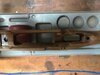
I put the new mount on my 6mms arc build, it's a leupold mark ar mount and looks nice and secure well made to. I'll probably have to move it once I get the butt stock in, hard to figure eye relief without one lol. Also up on the new aero breach large charging handle, feels nice. And of course today I find one on sale for $20 less. Still need about $400 to finish this gun, so will be over a grand into it and that's with a few parts I've got free.
 
That is essentially what I've done by drawing lines on the heads of the bolts to index the work with a wrench. I hadn't given a thought to using a cheap protractor. That is a good idea. I'll be perfectly honest this jig is something I have copied online from the Mauser Central site before it had gone down offline about 6 years ago. They had design plans for it posted on one of the threads.
Some of my other tools that I have made are from plans that I have found in books, magazines and sources online.
 
Musing on the lathe this morning.

First time installed a JP Enterprises AR10-H2 "silent captured spring system" in my KAC SR-25 SBR. The buffer tube (receiver extension) was 1" longer than the mechanism which was supposed to be under "slight spring tension" against the buffer retainer when properly installed for a Law Tactical folding stock adapter. A modified buffer retained was provided with the JP kit, looks like a Leitner -Wise bulldog retainer (which I have installed in other AR's), very stout kit. I needed a full 1.0" of spacer between the rear of the buffer tube and the back-end of the captured spring mechanism. Sourced some Delrin (acetal) 1" o.d. round stock from McMaster-Carr. The nominal i.d. of the mil-spec buffer tube is 1.00". I turned the Delrin rod down to 0.97" o.d. and 1/4" center-bored the spacer to reduce some weight, which was 0.5 oz. when finished.

To make the morning complete the Snap-On truck stopped by in order to purchase more drawer filling stuff!

IMG_4875 copy.jpg IMG_4872 copy.jpg IMG_4874 copy.jpg IMG_4898 copy.jpg IMG_4900 copy.jpg IMG_4902 copy.jpg IMG_4906 copy.jpg IMG_4909 copy.jpg IMG_4912 copy.jpg IMG_4913 copy.jpg
 
Some of you may remember seeing some of the pictures I'm posting again from the other threads I have posted here before. The pictures will be in order form start to where the Spanish lady is at today.

The beginning.
IMG_0409.jpg
The stock I picked up at the local gun show on Oct 02 for $30 and the Fajen butt plate and white Spacer for $5. The stock is a semi in-letted and was hand carved from
black walnut. The fore end tip is a block of cherry that I got for $5. I decided not to use it for this build though.

IMG_0500.jpg
Before the in-letting is started.
IMG_0501.jpg

The in-letting is started.
IMG_0506.jpg

It is obvious that this stock wasn't made for a Spaniard.
IMG_0507.jpg
Some accur glass will be necessary.
IMG_0508.jpg

IMG_0509.jpg IMG_0510.jpg

Since I have some scrap walnut laying around I'll be able to fill in some of the gaps with tight bond III and make a pillar forward of the re-coil lug. I also made a laminated fore-end tip blank from yellow birch and walnut out of some scrap I have laying around.


Stay tuned more pictures to follow.
 
Fast forward to today. Here is what she looks like. The receiver is a much better fit with the gaps filled in with the scraps I spoke of in the previous post.
IMG_0519.jpg
The stock is sanded to 120 grit and the butt plate has been fitted with the white spacer.

IMG_0520.jpg

IMG_0521.jpg IMG_0522.jpg IMG_0523.jpg IMG_0524.jpg

The fore end tip blank made from scraps laying around. I plan on using it starting with the yellow birch as the first layer.
IMG_0525.jpg

I still have lots more work to do and more pictures to follow.
 
Last edited:
I've been filing my bolt handle, and sanding the stock on my LA Coruna 1951 most of the week have it pretty well inletted for my fajen stock I do need to sand off the original finish do one repair, do the finish and glass bed it. Meanwhile I bought a second stock that I'm also inletting for the same rifle that has plainer wood, straighter grain for carrying into the woods hunting.

I ordered a Leupold one piece scope mount for 98 mauser action, 37.99 sale at midway, with free shipping with over 49 dollar purchase, I included a pair of insulated gloves to get over 49. Total cost was 55.00.mount is due to arrive next week..

Will post pics of my progress later today.
 
As promised my progress
 

Attachments

  • 20221025_200136.jpg
    20221025_200136.jpg
    63.9 KB · Views: 8
  • 20221025_200057.jpg
    20221025_200057.jpg
    67.2 KB · Views: 8
  • 20221030_171428.jpg
    20221030_171428.jpg
    136.1 KB · Views: 8
  • 20221030_171523.jpg
    20221030_171523.jpg
    120.6 KB · Views: 9
  • 20221030_171643.jpg
    20221030_171643.jpg
    107.2 KB · Views: 10
  • 20221030_171646.jpg
    20221030_171646.jpg
    129.6 KB · Views: 9
  • 20221030_171747.jpg
    20221030_171747.jpg
    97.1 KB · Views: 10
  • 20221030_171824.jpg
    20221030_171824.jpg
    61.4 KB · Views: 10
IMG_0526.jpg IMG_0528.jpg
IMG_0529.jpg

IMG_0530.jpg

The rear feral is made from a lamp threaded tube and the front pillar is made from aluminum flat bar stock and is 0.22" thick forward of the recoil lug.

IMG_0532.jpg IMG_0531.jpg

That's all folks at least for now. It has taken me about 9 months to get to where I am with this build. There were 3 ahead of this one. Finding suitable parts is the biggest challenge.
 

Attachments

  • IMG_0531.jpg
    IMG_0531.jpg
    103.2 KB · Views: 3
View attachment 1111829View attachment 1111830
View attachment 1111831

View attachment 1111832

The rear feral is made from a lamp threaded tube and the front pillar is made from aluminum flat bar stock and is 0.22" thick forward of the recoil lug.

View attachment 1111834 View attachment 1111835

That's all folks at least for now. It has taken me about 9 months to get to where I am with this build. There were 3 ahead of this one. Finding suitable parts is the biggest challenge.
It's kinda funny you two are working on the same stock. Are you going to think the trigger bow on that bottom metal, I have some pictures showing how I do it if you'd like to. I've been trying to find a Smith that's affordable to weld on new bolt handles but most want like $300. I'm tempted to buy a cheap tig welder since I've got 3-4 rifles that need bolts done. This 09 I may get everything fitted and held in place with a home made jig and have a welder weld it for me.
 
Honestly I hadn't given the trigger guard much thought. I'd like to see what you've done. I too have given thought to tig welding a bolt handle on or forging the original to clear a low mounted scope. That is why I have been exploring the idea of a heat sink as you can probably gather from some of my other posts.

I have measured the length of pull at 14.25'" which is perfect for me because I am 6' 1" and the military trigger breaks at 5.25 pounds which isn't bad for trigger I haven't really messed with yet. I'm on the fence about putting a Timney trigger on it. If you look closely the stock was I suspect in-letted for an after market trigger with a safety.
You can make a mauser trigger pretty good, I polish the cam on the trigger and on the bottom of the receiver, but not to much of you will remove to much metal and will mess it up. Changing the spring helps but you can go to light because there has to be enough spring to reset the trigger. 3-4 pound is very doable with a crisp break. I really like a mauser trigger so I don't spend the money for a timney. You can ad a shim under where the stop is to prevent it from going forward, this will take up the first stage. I like to leave some of the first stage of you can take it all out.
 
My pictures suck but you can get the idea, some bow are wider then others even tho the bottom metals used on the 09 Argentine are the same as the commercial rifles they were wider then what's needed.

I used a caliper and scribe line on both sides to the finished with or shape you like, you can even just do one side, it makes your finger not hit the bow and is more comfortable. Then use a hacksaw and cut down to just shy of the line every half inch or so. Use a file or a dremel to remove the metal inbetwen the cuts. Then file it flat with a good wide file to the line. Blend it in with where the bow meets the floorplate. But knock the sharp edges off this gives the bottom a nice look that custom but seems like a commercial rifle.

Blend in the floorplate release of you bottom has one. I still have to make the button part to make pushing the release easier on this one.

IMG_20220403_025657_hdr.jpg IMG_20220403_025632_hdr.jpg IMG_20220404_203124_hdr.jpg IMG_20220404_203239_hdr.jpg
 
It's kinda funny you two are working on the same stock. Are you going to think the trigger bow on that bottom metal, I have some pictures showing how I do it if you'd like to. I've been trying to find a Smith that's affordable to weld on new bolt handles but most want like $300. I'm tempted to buy a cheap tig welder since I've got 3-4 rifles that need bolts done. This 09 I may get everything fitted and held in place with a home made jig and have a welder weld it for me.

You've seen both of the stocks I bought from gunbroker and did quite a bit of work on the fajenas well. I got a timney for the 280 aiand swapped out the trigger, sear and spring with my dwm cause I liked the LA Coruna trigger than the dwm 6.5x55 build. Still planning on another timney fir the 6.5x55 but it's good for now. Also picked up two 1/2" thick pachmar decelarator pads, grind to fit, but the screw spacing doesn't fit the fajen really well.

There were a couple of fajen sticks on gunbroker over the last week or so, so not a bad option.

20220921_174745.jpg 20220921_174731.jpg 20221030_221153.jpg 20221030_181646.jpg
 
My pictures suck but you can get the idea, some bow are wider then others even tho the bottom metals used on the 09 Argentine are the same as the commercial rifles they were wider then what's needed.

I used a caliper and scribe line on both sides to the finished with or shape you like, you can even just do one side, it makes your finger not hit the bow and is more comfortable. Then use a hacksaw and cut down to just shy of the line every half inch or so. Use a file or a dremel to remove the metal inbetwen the cuts. Then file it flat with a good wide file to the line. Blend it in with where the bow meets the floorplate. But knock the sharp edges off this gives the bottom a nice look that custom but seems like a commercial rifle.

Blend in the floorplate release of you bottom has one. I still have to make the button part to make pushing the release easier on this one.

View attachment 1111862 View attachment 1111863 View attachment 1111864 View attachment 1111865

I do like the mauser trigger and do polish the triggers and can get very good results about 4 pounds is what I try to keep them at because I use my rifles to hunt with. I like the idea of what have done to the trigger guard. I might have to try it.
 
I do like the mauser trigger and do polish the triggers and can get very good results about 4 pounds is what I try to keep them at because I use my rifles to hunt with. I like the idea of what have done to the trigger guard. I might have to try it.
The trigger pull on my 7x57AI 09 is about 2.5 pounds and very nice break but I think that one turned out so well because everything on that action is new. New trigger that was polished then case hardened, bolt shroud, cocking piece, safety, firing pin and spring, are all new and the main spring is a heavy one for better lock time. Only thing original on that action is the bolt body, bottom metal and the ejector. All new bolt parts really make it nice.

I just have to finish that gun someday, a little more polishing a nice rust blue and full action bedding and it will be finished.
Just some random pics I have to take some better ones, the stimmpling came out nice on the stock. For the 9.3x62 in thinking about sending it to get rehardend but still need to find a place and get a price.


IMG_20200323_145902.jpg IMG_20180703_184817.jpg IMG_20200323_153748.jpg
 
My winter project this year is a Springfield 1911 Defender. Replacing a couple of parts and doing some polishing. This will be my first time doing any work on the internals of a 1911. My regular gunsmith has been encouraging me to try this for a couple of years now with the caveat that hammer and sear work are his department. I have stripped it down to the bare frame a half a dozen times already.
Yesterday I fit and started polishing a new trigger.
 
Back
Top