You are using an out of date browser. It may not display this or other websites correctly.
You should upgrade or use an alternative browser.
You should upgrade or use an alternative browser.
What gunsmithing or repairs have you done today
- Thread starter troy fairweather
- Start date
Not sure this rises to the level of "gunsmithing" but here's Saturday morning musing in the shop.
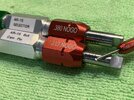
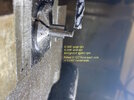
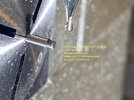
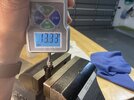
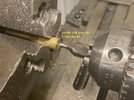
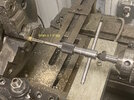
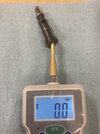
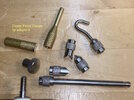
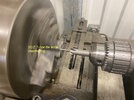
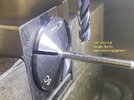
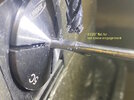
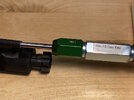
First up, create a new adapter tip for my new gadget Digital Force Gage to specifically engage the AR-15 ejector and measure its spring tension. Of the gage included adapter tips only one had a
pointed enough to compress the 10-13 lb ejector spring which had two problems; (1) the tip length was short so upon complete ejector compression the included angle of the pointed tip
tendency to displace the tip from the ejector (2) the pointed tip could mar an ejector finish, not a big deal if it's not new or not mine. So I used the lathe to fabricate a new brass adapter tip from a brass punch. Shorten the punch on the chop saw, center drill prep for 5 mm tap drill bit to follow-on with 6 mm x 1.0 tap (gage thread pattern).


Second project.
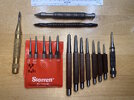
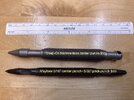
I was enlighted this week by learning of the existence of hammerless center punches. Who knew ? I purchased the Snap-On and Mayhew for gunsmithing sized staking opportunities.
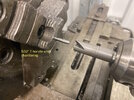
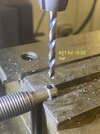
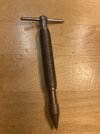
The Snap-On had a thru-hole for a T-handle presumably, of course none exist. So a 5/32" drill rod stock, cut to length, chamfered ends on lathe, milled a central flat for 10-32 set screw to
secure its position. Arm strength much greater than pinch strength to pull that robust spring. The Snap-On had a serious tool hardening, finally got #21 tap drill for the set screw fitting.
However, the HSS 10-32 taps did not create good threads. Tips of handle need buffer polishing. Going to get some super-taps for stainless / tool steel and re-thread the hole. That is all.


Tallinar
Member
I needed a shorter sight to match a Skinner rear sight I put on one of my Rossi 92’s. I also wanted to ditch the bead and move to a more patridge-type picture.
Then it hit me. Why not just file the front bead off, and see how it goes? So I did. Took about .1 inch off, test fired it, and it got me exactly where I needed to be. Sight now operates within the rear elevation range.
A little cold blue and we’re back in business.
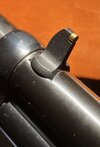
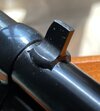
Then it hit me. Why not just file the front bead off, and see how it goes? So I did. Took about .1 inch off, test fired it, and it got me exactly where I needed to be. Sight now operates within the rear elevation range.
A little cold blue and we’re back in business.


hutch51
Member
Not "smithing", more like "tinkering".
Changed out a long trigger for a short trigger on a Rock Island.
Science Project
Changed out a long trigger for a short trigger on a Rock Island.
Science Project

Prepping the stock from an 870TB which is cracked at the juncture with the receiver. Have Dremelled a groove on the inside along each crack and drilled a 1/16" hole through the center of each to give more glue area. All that's left is to push the Titebond down the drilled hole on each side, clamp and then reassemble and put her back in the rotation. No clue how many of these I've saved. This one wasn't bad so no pins.
that's my wheel house.Not "smithing", more like "tinkering".
RandoMilsurp
Member
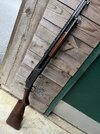
Recently I have acquired my Winchester 1897 project from my local smith. A few months ago, I acquired a relatively junk receiver and take down assembly off Gun Broker with the plan of turning it into a trench gun replica and making my dream gun come to life. After spending some time and allocating the parts and getting them together it went out for a full Re-assembly and Re-blue, along with the proper machine work to allow all the parts to fit. This project wouldn't have been able to be completed without some help from a fellow forum user, Rover Guy. He graciously sold me a heat shield that he had lying around when no major distributors had any in stock, along with minor distributors throughout the U.S.
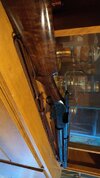
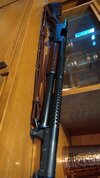


troy fairweather
Member
Looks great, I'd love to find a project gun like that. Those heat shields are hard to find. I've debated making the westerfield model 30 I've got into a trench gunRecently I have acquired my Winchester 1897 project from my local smith. A few months ago, I acquired a relatively junk receiver and take down assembly off Gun Broker with the plan of turning it into a trench gun replica and making my dream gun come to life. After spending some time and allocating the parts and getting them together it went out for a full Re-assembly and Re-blue, along with the proper machine work to allow all the parts to fit. This project wouldn't have been able to be completed without some help from a fellow forum user, Rover Guy. He graciously sold me a heat shield that he had lying around when no major distributors had any in stock, along with minor distributors throughout the U.S.
View attachment 1168692View attachment 1168686View attachment 1168687View attachment 1168688
Hurricane Idalia hunkered down tinkering in the shop. Fabricated a AR-15/M4 carrier gas key-receiver alignment rod. The Colt M4 technical data package calls for the "Go" gauge pin size to be 0.181". "Sourced close tolerance 0.180" dia tool rod from McMaster-Carr.
Had to reduce the diameter on the forward aspect of the rod to 0.179" in order for the BCG with rod installed to fall freely in alignment thru the receiver gas tube aperture. That is all.
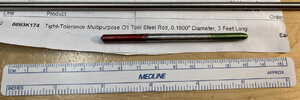
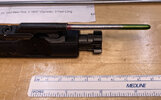
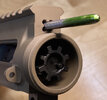
Had to reduce the diameter on the forward aspect of the rod to 0.179" in order for the BCG with rod installed to fall freely in alignment thru the receiver gas tube aperture. That is all.


BBBBill
Member
Fabricated a AR-15/M4 carrier gas key-receiver alignment rod. The Colt M4 technical data package calls for the "Go" gauge pin size to be 0.181". "Sourced close tolerance 0.180" dia tool rod from McMaster-Carr.
Had to reduce the diameter on the forward aspect of the rod to 0.179" in order for the BCG with rod installed to fall freely in alignment thru the receiver gas tube aperture.
I wonder what the upper receiver gas tube clearance hole diameter spec is.
A new assignment to research. I think in this case the receiver cerakoting on four points of contact was the cause for it being tight.I wonder what the upper receiver gas tube clearance hole diameter spec is.
troy fairweather
Member
I'd like to know why they drill the hole like that and not just a round hole. I'd love to have some of these gauges, a set for a few hundred bucks would be cool.
Blue68f100
Member
The odd shape may be to allow gas to escape if something goes wrong. aka.... bolt/piston stuck in bcg
^^^When I finish this gunsmith scavenger hunt it will be close to $2K in precision gages & instruments.I'd love to have some of these gauges, a set for a few hundred bucks would be cool.
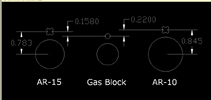
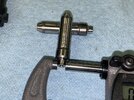
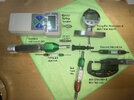
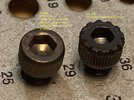
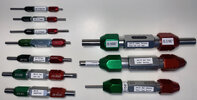
Well, several months ago I stuck my curiosity proboscis down that AR-14/M4A1/M16 civilian gunsmith gaging cult black hole - you know the websites being referenced. Still have some bolt tail ring gauges (Field / NoGo O.D.'s) to get, for those to lazy to use a Starrett micrometer for a single measurement and some Class 2&3/A&B thread gages for the receiver extension / buffer tube thread analytics. It's taken several months to get the technical data package (Colt's proprietary TDP) mil-spec #'s and order the various gages; still have several PTG gages back-ordered (muzzel / throat erosion/ chamber dimensions/ etc) for months now. Unless the black rifle in hand is a U.S. Govt issue specimen, no civilian rifle will ever be "Mil-Spec" or "Mil-Standard".....yet the hound continues this hunt. Why? No good answer. It is interesting however to see how many high quality black rifles will not have certain dimensions (pin holes, gas blocks etc) that would not be passed by Colt / government inspectors. And who knew there are special carrier key staking OCKS hex screws?
Maybe I should start a GoFundMeGage account on social media.
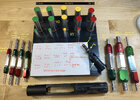
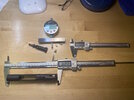
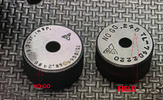
Last edited:
troy fairweather
Member
All tho gauges would settle my ocd I get sometimes when things aren't perfect lol, I'd like to get one of those Chinese/Taiwan pin gauge sets there not supposed to be to bad for the money. My dad years ago have over a hundred different gauges from mauser, they were for pretty much anything to measure on a 98 rifle. Many did more then one job, there were like 25 just for the bolt. Dad sold it sometime in the late 90s, wish he still had them all.^^^When I finish this gunsmith scavenger hunt it will be close to $2K in precision gages & instruments.
Well, several months ago I stuck my curiosity proboscis down that AR-14/M4A1/M16 civilian gunsmith gaging cult black hole - you know the websites being referenced. Still have some bolt tail ring gauges (Field / NoGo O.D.'s) to get, for those to lazy to use a Starrett micrometer for a single measurement and some Class 2&3/A&B thread gages for the receiver extension / buffer tube thread analytics. It's taken several months to get the technical data package (Colt's proprietary TDP) mil-spec #'s and order the various gages; still have several PTG gages back-ordered (muzzel / throat erosion/ chamber dimensions/ etc) for months now. Unless the black rifle in hand is a U.S. Govt issue specimen, no civilian rifle will ever be "Mil-Spec" or "Mil-Standard".....yet the hound continues this hunt. Why? No good answer. It is interesting however to see how many high quality black rifles will not have certain dimensions (pin holes, gas blocks etc) that would not be passed by Colt / government inspectors. And who knew there are special carrier key staking OCKS hex screws?
Maybe I should start a GoFundMeGage account on social media.
View attachment 1169240View attachment 1169241View attachment 1169242View attachment 1169243View attachment 1169244View attachment 1169245View attachment 1169246
I think someone could make a guage set pretty adorable, just to measure the most important parts.
BBBBill
Member
When I finish this gunsmith scavenger hunt it will be close to $2K in precision gages & instruments.
I suffer from the same disease. I've been accumulating gunsmithing tools and gauges since the mid 70s. My initial fixation was the 1911, then Smith revos, Ruger Revos, Modern Colt revos, Ruger Mk series 22s, Smith semi's, Remington shotguns, etc, etc, etc.... Lathe, mill, surface grinder. And it is all just a hobby. Where does it stop? Most likely when I cross that rainbow bridge......
Last edited:
Riomouse911
Member
I painted the front sight of my S&W Model 617 white-then-orange so I can see it better when shooting. The little Patridge style blade of this .22 disappears too easily when I shoot.
Once it’s all dry I will clean up the edges with a razor.
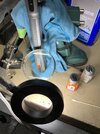
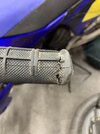
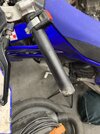
Then, since my gun room doubles as a motorcycle garage, while the paint dries I regripped the kids Yamaha. She keeps tearing the grips with tipovers on the Grand Prix courses and dirt can get under the throttle.
Stay safe.
Once it’s all dry I will clean up the edges with a razor.

Then, since my gun room doubles as a motorcycle garage, while the paint dries I regripped the kids Yamaha. She keeps tearing the grips with tipovers on the Grand Prix courses and dirt can get under the throttle.


Stay safe.
troy fairweather
Member
Need some bark bustersI painted the front sight of my S&W Model 617 white-then-orange so I can see it better when shooting. The little Patridge style blade of this .22 disappears too easily when I shoot.
Once it’s all dry I will clean up the edges with a razor.
View attachment 1170531
Then, since my gun room doubles as a motorcycle garage, while the paint dries I regripped the kids Yamaha. She keeps tearing the grips with tipovers on the Grand Prix courses and dirt can get under the throttle.
View attachment 1170534
View attachment 1170533
Stay safe.
Riomouse911
Member
If we were play riding, absolutely! No wrap around hand guards are allowed in the events we run, just the floppy’s are approved. (Those wrap arounds would occasionally save me some control levers, too!)Need some bark busters
Stay safe.
^^^That's the sequence trick to get a bright colored gunsight.I painted the front sight of my S&W Model 617 white-then-orange
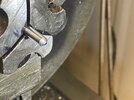
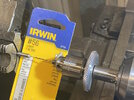
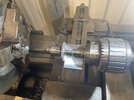
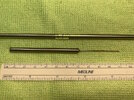
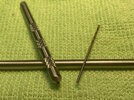
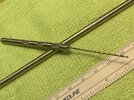
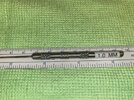
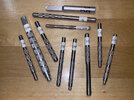
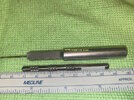
All the chit-chat on cup tipped punches on the other thread, I have been wanting to make a 1.0 MM roll pin holding starter punch for the small profile punch collection. So, today I used McMaster-Carr sourced close tolerance 0.180" 01 tool steel rod stock. Short length, ends faced on the lathe, #0 starter drill followed by #56 drill bit (1.18 mm diameter) chucked in Sherline sensitive drill adapter. Used Severance chamfering tool bit, then Eagle Rock knurling tool for some functional bling. That is all.


Last edited:


