
You are using an out of date browser. It may not display this or other websites correctly.
You should upgrade or use an alternative browser.
You should upgrade or use an alternative browser.
What gunsmithing or repairs have you done today
- Thread starter troy fairweather
- Start date


EMC45
Member
- Joined
- Jul 20, 2008
- Messages
- 1,941
Not necessarily “gunsmithing”, but when cleaning the new-to-me Pro Carry 2 Kimber, I wanted to have a look at everything, so I took off the grip panels. 3 out of 4 grip screw bushings came out locked onto the grips screws. Thankfully I have a bin of old WW1 and WW2 1911 parts and was able to scrounge up 3 spares after having to grab the threaded portion and crack the screw loose on the Kimber panels. I degreased everything with acetone and applied a very small amount of threadlock to the bushing - NOT the grip screws! I re-installed all the bushings and locked it all back down. Clean and all back together.
1976B.L.Johns.
Member
EMC45
Member
- Joined
- Jul 20, 2008
- Messages
- 1,941
z
")
Agreed. This was left to me from a deceased family member and I believe some parts (grips, msh) were swapped out. The grip screws were definitely red loctited. Overall a good gun. Not used much. I plan to change thatEMC45
The only reason I liked your post is you fixed the problem.
That should not happen on a new gun, even if new to you.
Did a little bit of work on my Marlin 25MN 22mag this week. When going through my "random parts" box I found a new in package Williams peep sight with a 3/8 dovetail, and since I hate the factory sights on the Marlin, decided to fit it. Had to do a little file work to get it fit. Once it was fit I realized the front sight is WAY too low, and a one piece unit. After some looking I found that the front sight from a Remington 788 has the correct screw and radius on the bottom of the sight, just needs some work to not be dangling off the front of the barrel. Found one for $13 shipped, and did some mill work to it when it showed up. Mounted it up and it looks great, now it's time to zero it(probably going to need to file the height down a bit) then cold blue it when I'm all finished!


TinNePa
Member
Put a Volquartsen accurizing kit into my new-to-me stainless Ruger MK3 target. Picked one up used last month. Also put on a Hogue wraparound target grip with the thumb rest. I have the same setup on my blued MK3 target. Now I need to pick up a mount and red dot. This gun will be the wet weather plinker.
Went to the range today and filed the front sight on my 22 Mag down till it zeroed at 50 yds. Back on the bench at home I filed a radius on the back of the post, did a little sanding to make it pretty, and cold blued it. Turned out pretty darn good!


OP
OP
troy fairweather
Member
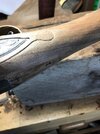
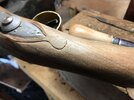
Did some Surgery today on my 6mm arc ar-15, I'm running a diamondhead had guard that is super Comfortable, heavy but on this build doesn't matter. I'm using a superlative adjustable gas block which is awesome. Problem is when the handguard is tight it doesn't stay strait down the barrel and after shooting it works its way closer to the gas block. I had already filed the screws flat on the gas block, even the gb sticks over a 1/4" below the barrel. When first installed there's just under 1 /8" space from the gas block hitting the handguard , after a range day it's less then 1/16" and I'm paranoid it will hit. Gun has been sighted in to shoot a deer this year so didn't want to take the handguard off to cut it for some clearance and have to check my zero again.
if didn't come out to bad, it keeps my mind at ease it won't hit the barrel and string a shot. Not very clear pictures as usual but you get the idea.


if didn't come out to bad, it keeps my mind at ease it won't hit the barrel and string a shot. Not very clear pictures as usual but you get the idea.
Blue68f100
Member
If your hand guard is moving I would be looking at the mounting screws to the upper. I've use the Superlative adjustable gas block on many builds, works very good.
OP
OP
troy fairweather
Member
Moves the more you tighten the handguard, have another of the same one but longer and does the same thing. This has happened to me a few times now and why I don't like the clamp on handguards anymore.If your hand guard is moving I would be looking at the mounting screws to the upper. I've use the Superlative adjustable gas block on many builds, works very good.
Blue68f100
Member
I had a handguard that did that, don't remember what brand it was. The mounting screws holes were slotted which allowed it to move. What I ended up doing was add 2 more screws at 4:30 & 7:30. Counter sinked the holes so the heads were smooth.
OP
OP
troy fairweather
Member
I had made a shim from soda can and seemed to work but really didn't fix the problem so took it out.I had a handguard that did that, don't remember what brand it was. The mounting screws holes were slotted which allowed it to move. What I ended up doing was add 2 more screws at 4:30 & 7:30. Counter sinked the holes so the heads were smooth.
Musing on the lathe and Bridgeport today for a simple project: fabricate brass depth control collettes for small diameter taps.
Used 3/8" brass round stock, center drilled with #29 bits for tap clearance and 8-32 set screws. Using cylindrical finger tension turning rather than
small t-wrench for tapping #5 screws or lesser diameters provides a better feel for the tap torque application before it snaps!
Never can have enough simple tools.


OP
OP
troy fairweather
Member
Any reason you made the holder out of brass.Fabricated same style lathe tool bit adapter as above, except from 3/4" square stock and a knurled aluminum small tap (3-56 and less) driver using
the 1/4" tools. They are handy to get into small spaces.
View attachment 1176321View attachment 1176322View attachment 1176323View attachment 1176324View attachment 1176325View attachment 1176326View attachment 1176327View attachment 1176328View attachment 1176329View attachment 1176330
D
The brass adapter worked nicely today. Next i am going to try some intermediate hardness steel stock to fabricate another .
Yes. I initially (see above posts) attempted to fabricate the same tool adapter features from square stock M -2 steel (rockwell hardness =65!) using carbide everything (drills,endmills,taps) ... I am 95% there on that work...Have yet to be able to thread the 8-32 holes due to breaking $100 a piece carbide taps. Machine shop talent 101 exhausted. i need to find someone who can thread-mill those holes on a CNC machine.reason you made the holder out of brass
The brass adapter worked nicely today. Next i am going to try some intermediate hardness steel stock to fabricate another .
OP
OP
troy fairweather
Member
What about trying to spot annealing with the torch were the holes are tapped, on that brass maybe make the other side a holder to, gets the most out of that nice piece of brass.D
Yes. I initially (see above posts) attempted to fabricate the same tool adapter features from square stock M -2 steel (rockwell hardness =65!) using carbide everything (drills,endmills,taps) ... I am 95% there on that work...Have yet to be able to thread the 8-32 holes due to breaking $100 a piece carbide taps. Machine shop talent 101 exhausted. i need to find someone who can thread-mill those holes on a CNC machine.
The brass adapter worked nicely today. Next i am going to try some intermediate hardness steel stock to fabricate another .
I thought about annealing with a torch as I don't have any such oven to do so. Maybe red hot over the holes and random air cool time ? No prior experience doing it.
A few examples of my needs to use small taps on hardened steel. Mostly on sights, particularly when new models have limited or no factory options for styles I would prefer and / or
sight base - dovetail profile mismatch.
I have replaced the plastic white inserts on the rear sight of a Walther PPQ because no paint or Sharpie would adhere to them to black them out. Replaced the inserts with
2-56 screws.
Last edited:
A few examples of the rear sight set screw modifications, some require small tapping operations. Again tip of rear sight set screws from the factory usually are engaging a friction force to a flat surface in the dovetail. All the thread lockers will do is make the screw hard to remove; the violent force impulse of slide recoil is like a impact hammer
incrementally causing many sights to move off center over time. I prefer to convert the surface engagement of the screw to a close tolerance hole the
set screw can settle into prohibiting any lateral movement off center. One example has factory screw size different than aftermarket size so a turned down
screw tip to secure the sight centered was employed. Still interference fit the dovetails when option is available, belt-and-suspenders philosophy. I like to have about 25-30% of the dovetail be inserted by hand pressure before any tapping or sight movers are used. That's all I have.


a2x4bbl
Member
Moving along on my 2011 project .


aaaaa
Member
Modded the safeties on my Phoenix Arms .22LR pistol so that I now can drop the magazine while in the fire position, and can put it in the fire position while the magazine is not in it. Cut off the tab that blocks the mag release when it is in the fire position. And shimmed the bar that blocks the safety from moving to the fire position without a magazine in it.
