Difficulty in building AR upper

Status
Not open for further replies.

Tim Pierce

Member
Joined
Dec 18, 2007
Messages
82
Location
Cincinnati, Ohio
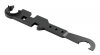
I've assembled several AR15 lowers, but always bought complete uppers to complete them. How difficult is it to properly assemble a complete upper from parts? I know the bolt has to be head spaced, but is it something that I could do myself? What are the specialized tools required for assembly?
I have built a complete custom 10/22 rifle and installed trigger kits in several MkIII and 22/45 pistols.
I enjoy working on my guns, I just don't know enough about upper assemblies to know if I should try it or not.
Any advice is appreciated.
 
It is as easy to build an upper as it is to build a lower. If you get a good barrel there is no need to have to adjust the head space. You simply torque down the barrel retaining nut. 30 foot pounds if I remember correctly.
 
If you have an in-spec barrel with extension installed and an in-spec bolt, the headspace is already taken care of. And quite frankly, these are two parts you should be spending the bulk of your money on for the upper, as they are the two biggest factors in accuracy, reliability and longevity.

However, it's never a bad idea to drop a set of go/no-go gauges in it to verify you didn't get some parts that slipped by the QC department.

Assuming you have the tools, grease the barrel nut and receiver extension threads, torque to 80 footpounds, break it loose, then torque to minimum of 30 footpounds. Reset wrench to 80 and line up the next notch in the barrel nut with the gas tube hole in the upper receiver.

As suggested by Basinman, there are plenty of videos online, I'd suggest Brownells website because they're reputable. You don't want to be following the advice of "Bubba" who does it by feel with a breaker bar.
 
The only "specialized" tool would be the barrel nut wrench (or armorer's wrench). Otherwise, just a vise, upper receiver blocks (or soft pine blocks, which is my preference), a torque wrench with a range that covers 30-80 ft lbs, a hammer and some decent punches.

As 1911 guy said, headspace is not really something that the end user needs to set (or is typically capable of setting) with the AR-15. the go/no-go gauges are not a bad idea, but I have yet to find a problematic barrel assembly from any maker, and if it is not correct, there's really nothing you can do about it; adjusting is done by increasing or decreasing extension depth relative to chamber, and would render the gas port alignment incorrect. Gas ports are drilled after barrel extensions are installed.

If you are using a new barrel and planning to install a standard front sight, be aware that you'll have to drill the taper pin holes. Not difficult if you have the right equipment, but that means more than a hand drill and 13-piece bit set.
 
Agreed. If headspace isn't correct, your only recourse is to figure out which one, barrel or bolt, is wrong and take it up with the manufacturer or distributor.

Also, like MachIVshooter, I have yet to find one that wasn't correct. But if it concerns you, drop the gauges in.
 
The only "specialized" tool would be the barrel nut wrench (or armorer's wrench). Otherwise, just a vise, upper receiver blocks (or soft pine blocks, which is my preference), a torque wrench with a range that covers 30-80 ft lbs, a hammer and some decent punches.

As 1911 guy said, headspace is not really something that the end user needs to set (or is typically capable of setting) with the AR-15. the go/no-go gauges are not a bad idea, but I have yet to find a problematic barrel assembly from any maker, and if it is not correct, there's really nothing you can do about it; adjusting is done by increasing or decreasing extension depth relative to chamber, and would render the gas port alignment incorrect. Gas ports are drilled after barrel extensions are installed.

If you are using a new barrel and planning to install a standard front sight, be aware that you'll have to drill the taper pin holes. Not difficult if you have the right equipment, but that means more than a hand drill and 13-piece bit set.
Mach, do you have any pictures or links showing the pine block method for securing an upper into place? I've been too cheap to buy the actual blocks, but I also keep wishing I had a good way to clamp the receiver in place so I could do a flash hider or barrel or free float tube swap.
 
It's EASIER.. if you own a torque wrench and buy the wrench. NO trigger springs, no safety detent springs.. OK really those 2 are not that hard, but torqueing to the spec (watch videos or read the how to) and you are set.
 
Greyling, watch sales at Palmetto State Armory. They sell upper and lower block sets for as little as 25 or 30 bucks once in a while.
 
To add for barrel/bolt head spacing, many barrel makers will sell a head spaced bolt with their barrel.

In my opinion, while the specifications for the barrel and bolt are very good and one rarely finds an out of spec combination, it is good to buy a barrel with a matched bolt or check it yourself with a set of go-no go gauges. Easy to do and relatively cheap insurance.

Lots of good information already posted.
 
so if i buy a complete upper with the BCG and charging handle, then the headspacing is already done and just install it on the lower and shoot?

i've been looking to replace my A2 upper with a flat top and want the easiest way to do it.
yep.
 
I have built a ton of AR uppers and using quality parts (barrel/BCG) headspace has never been a problem. I have gauges but rarely find a need to use them. Get yourself a clam shell upper vise block they are cheap, easy to use and will save your upper when torque is applied. Anti seize on upper receiver threads and I use Locktite on gas block threads. These things go together simply and can be changed around as you choose (remember you used anti seize on the threads) so a different cal. or barrel is easy, just remember to keep the bolt with the barrel you take off as they wear together. A new bolt can be used with an old barrel (this is where gauges come in) but problems could arise when stuffing a used bolt into a used barrel.
 
I built AR-15's for a manufacturer a few years back. They really aren't that difficult and there are enough videos out there to help you out. I went to the extent of getting all of the proper armorer's tools for my home setup but I am that type of guy. I bought the tools that I used professionally and were designed for production work. Here is a bare minimum tool set for building an AR-15 upper:

Thick towel or bench carpet
4 oz. Ball peen hammer
Receiver clamp
Bench vise
Piece of leather or rag (for holding the bolt to take the ejector out and reinstall)
Roll pin punch set (you can get some cheap ones from Harbor Freight)
A block of wood 1" thick or a hockey puck (tapping gas tube roll pin)
A combo wrench for doing the barrel nut and flash hider
A torque wrench (borrow one if you can otherwise wait until it goes on sale at Sears)
Headspace go and no gage rental or have a gunsmith check it(reamerrentals.com)
1/16" punch
1/4" punch

It is strongly recommended that you use torque values on the barrel nut (min. 30 ft/lbs) and the flash hider (20 ft/lbs). If you plan on building more than two guns, I would recommend investing in roll pin holder punches, and a better set of roll pin punches. Get a combo wrench like the one pictured with the three tooth castle nut wrench on the back side. That way you can torque your buffer tube nut down the road.

A final note on headspace. It is set at the barrel manufacturer for the barrel extension but because headspace is the measurement from the datum point on the cartridge (half way up the shoulder) to the case head (front of the bolt) it can vary as many as .005" from manufacturer to manufacturer. Most of the issues I have seen are on the tight side of headspace (where the go gage will not drop) and somebody chambers a round and gets it stuck in the barrel. That's why I do a quick check with the gages. Hope that helps.
 

Attachments

  • Wrench.jpg
    Wrench.jpg
    9.4 KB · Views: 6
Thanks for all great tips! I do have a combo wrench, and a good set of roll pin punches and torque wrenches. I'll have to get a set of blocks for the receiver to clamp in vice, but I think I'm good to go otherwise. I will look up some videos and watch while I'm accumulating parts.
 
I assembled my first upper not too long ago. It was very simple. You can buy the go/ no go gauge for headspace, but as others mentioned, it's really not necessary if your barrel and bolt are new and from even a halfway decent manufacturer. Unless it has the integrated carry handle it is a simple build. The rear sight assembly on a carry handle can be a PITA, but that's really the hardest part if the asembly.
one thing of note, the dust cover hinge pin C clip... have extras. They are very small, and very easy to lose.

The forward assist is just a matter of lubeing and installing a roll pin. I found it easier to use padded channel lock pliers for most of my roll pins on my build.

The torque wrench is a must have, and if you have a Harbor Freight nearby, you can pick one up for about $10. Not the best quality, but for a home build, it'll be suitable enough. 30-80 foot pounds is ideal, since 30 foot pounds is your goal torque. Then tighten to the next hole or slot for your gas tube. If you are using a free float system, it's super simple. If you are using a delta ring, a good pair of offset snap ring pliers is also a necessity.

An A3 flat top with a free float hand guard install should be less than an hour, start to finish. Closer to 30 minutes. An A1 with front and rear sights, and delta ring guard, every minute of that hour, maybe more.

The MidwayUSA AR15 build video is on YouTube. Very easy to follow.
 
The biggest problem with assembling the upper is all the wrong advice and misinformation on what is needed to be done.

Buy a bolt with a matched headspaced barrel with extension, you don't have to check a thing. Buy a bolt separate from the headspaced barrel with extension, you will be over 99% good to go.

Install barrel assembly in upper, torque the barrel nut to at least 30 pound three times, then far enough to get the sprocket tooth to allow the gas tube past. A MAXIMUM of 85 foot pounds is allowed to prevent stripping the aluminum threads off the nose. If you can do it with less, fine.

If it won't line up by 85 pounds, either add a barrel shim (hard to find) or dress the nose of the upper, which requires it be done square and flat. It doesn't take much, barely 2/3's of the anodizing is often enough. Try tightening it down again.

Some recommend expensive tools, some just use channel lock pliers because they are experienced mechanics and know how much torque is involved by feel. Head bolts, lug nuts, etc are how they learned.

I would say the less experienced the assembler with using hand tools, the more they depend on expensive ones and involved instructions on how to do it. And when you think about who the armorer's instructions for assembly were written by, and to who, it makes sense.

There's a lot less rocket science to it than many want, and that is because Stoner eliminated time consuming high level assembly steps as much as possible.
 
I had a good way to clamp the receiver in place so I could do a flash hider or barrel or free float tube swap.

You want to clamp the barrel, not the upper for muzzle devices. V-blocks, leather scraps and a decent vice have always worked for me.

You clamp the upper receiver when torquing the barrel nut or removing it.
 
armorers wrench is the only tool. I also have built plenty of lowers and recently built my first upper. I took it to my LGS to get it head space or buy the gauge and he sincerely told me that was an absolute waste of money and that if it didn't head space it wouldn't align properly and you would know it. I have 40 rds thru that rifle with NO issues.

Only tool you need is an allen ey or screwdriver for the gas block and then an armorers wrench. One where you can determine how to properly align it and torque it is also needed. They are about $35
 
While the manual states the barrel nut torque is 30-80 ft/lbs, it's designed so it will pretty much line up within the proper torque specs. But if you are going to use a torque wrench, don't cheap out. I'd my calibrated elbow before I trusted a cheap torque wrench
 
The one thing I've found to be invaluable is the upper clam shell clamp that you insert in your vice, as you don't want to break the assembly ports at the base of the upper. I believe I bought mine from Brownell's years ago, for like $24.00 or so. Like what was said earlier it is quite simple to build, I've got a torque wrench that I've had for over 30 years and is still very accurate, but it is a Craftsman brand, I wouldn't skimp on that item. Use a good quality lithium grease to insert the barrel into the receiver, and your set to go.
 
Status
Not open for further replies.
Back
Top