Stoeger conversion

Status
Not open for further replies.

Franco2shoot

Member
Joined
Oct 17, 2006
Messages
857
Location
The Right side of D.C.-NOVA(Springfield, Va.)
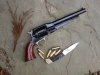
Just got home with my new SA Army Uberti conversion revolver in .45 long colt. I've had the BP version of the 1858 Remington and love it. So I must be doing something wrong cuz it's harder that cold snot to get the Cylinder back in.

I started by placing the hammer in the half cock position, I rotated the cylinder and could hear the click click of the advance lever, but the cylinder rotated out easily. Getting it back in is a WHOLE different thing and it took me 20 minutes of giggling until I got it to reassemble. I think the problem is getting the advance lever to accept the notch in the cylinder, and I sure as he el el don't want to bend anything.

What am I doing wrong... is there another position for the hammer to make the cylinder drop easier?

KKKKFL
 
Ok the answer

Alright, I spent this morning re-examining the Uberti Remington Conversion (Stoeger, not Mason-Richardson) very closely. First off the instructions that come in the box are nearly worthless. They do a good job on the open-top conversion, but the instructions for the Remington, simply say reverse the dis-assembly process.

This is WRONG.... Sorry Uberti, you guys must have lost something in the Italian-English translation. If you try to just jamb the cylinder back in you will bend the advancement prong.

OK so here's the key. Take out the cylinder just like they say on the sheet. Half cock the hammer, open the loading gate, drop the front lever ensuring it doesn't go all the way in as it would to load BP. Now take the center rod pull back, the cylinder will nearly fall out, but I rotate as I remove. The missing words for re-assembly are next.

If you look in at the advancement prong, you will see that it would be nearly impossible for you to get the cylinder back in with it exposed. Even trying to snag it with a rotate and press just doesn't work. What I found is that by pulling slightly back on the hammer, then pulling the trigger back as I ease the hammer down, you now see the firing pin and the advancement prong disappears. If you start to pull the hammer back even the slightest, the firing pin disappears, but the advancement prong is still retracted, it is at this point that I drop the cylinder back in and then slide the center bearing rod back in. You will need to look closely and make sure the center rod is all the way in. Finally, return the hammer to half cock position. Rotate the cylinder and you should hear the clicks as the advancement prong clicks. Return the loading lever into its position, close the gate and you're good to go. Check to make certain you've been successful by traditional full cock, and do a soft fire (where you hold the hammer and let it down gently). I do this if I don't have snap caps.


I'll take some photo's if there are folks out there that would like a pictoral walk through this, but judging from the initial response to this thread, I might be the sole owner of one of these.


KKKKFL
 
Pictures

Maybe I'll get responses if I post pictures:
attachment.php


And from the loading gate.

attachment.php


Very sweet, nice balance, can't wait til the range opens.

KKKKFL
 

Attachments

  • RemConv.JPG
    RemConv.JPG
    276.6 KB · Views: 18
  • RemConv2.JPG
    RemConv2.JPG
    330.8 KB · Views: 20
Status
Not open for further replies.
Back
Top