What gunsmithing or repairs have you done today

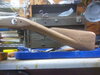
......the cobbler's children have no shoes.
Incidentally, I have decided that installing the "shoes" into their respective specific pistol slide is good internal support insurance not to deform a slide when installed in a vise when working on said slide for other gunsmithing purposes.
IMG_2680 copy.JPG IMG_8915 copy.JPG IMG_4626 copy.jpg
 
Almost 20 years ago I was studying the Wilson Combat custom gunsmiths videos (Lenny McGill vintage). The gunsmiths used "polishing sticks" for hammer / sear / safety etc. fittings. A very austere manner to get a nice finish on small parts. I have now been using them since I learned of them. So I needed to re-stock the inventory today. Using free Home Depot paint stirring sticks, 3M Adhesive Spray and selection of sandpaper grits. Link to a video that demonstrates the same simple method I prefer. A few examples of using them.

Palmgren angle vise securing small parts with malleable lead vise jaw inserts covered in painting tape for the benefit of those in the Republic of California.

https://www.dropbox.com/s/igy3n10f3lycmve/Gunsmithing - Making Polishing Sticks copy.mp4?dl=0


CIMG3627 copy.JPG CIMG3628 copy.JPG IMG_4674 copy.jpg IMG_4676 copy.jpg IMG_4677 copy.jpg IMG_4678 copy.jpg IMG_4666 copy.jpg IMG_4667 copy.jpg
 
See a grizzly mill on Craigslist for $600 looked up the model and there like $950 new so maybe a good deal. Said it wasn't used much and is 4 years old, does have the assortment of hold downs and the bolts. I could really use a little mill.

thinking about milling, the bottom metal on my 09 Argentine done u John van Patten was clearly on a mill, the holes in both sides lineup perfect and spacing are to. He must have been bored, this was his last rifle so he would have been 81-82 years old. Don't think the time spent was worth the oz saved, but it's kinda neat.

IMG_20200323_145902.jpg
 
Last edited:
I upgraded my 2010 screw jack jig this weekend. Started with some 1/4"x3/4"x12" tool steel bar stock from McMaster Carr. Divided the stock on the chop saw to 6" pieces, cleaned up the edges on the belt sander. Milled the bar stock for accepting six 1/4" bolts top and bottom supports, with a 7/16"-20 center threaded hole to accept a Wiha modified
hex bit adapter, using an adjustable die threaded to same thread pitch. Padded the firearm contact plate with thin leather, using 3M spray adhesive (same as polishing sticks), clamped in vise for a few hours after using hole punches to match the steel plate pattern. Grade 8 bolts. Polymer wing nuts. Powder coated plates in FDE color. A very stable jig!
Even took the time to calculate the SFM speeds for tool steel / drill bit diameters (1200 rpm for 1/4" bit / 650 for the 15/64" bit); lots of lubrication and gentle on the mill quill drill (say that 3x fast) press lever.

IMG_2827GUNSMITH SCREW JACK V2.0 MJD 04.24.22 copy.jpg IMG_2828GUNSMITH SCREW JACK V2.0 MJD 04.24.22 copy.jpg IMG_2829GUNSMITH SCREW JACK V2.0 MJD 04.24.22 copy.jpg IMG_2831GUNSMITH SCREW JACK V2.0 MJD 04.24.22 copy.jpg IMG_2833GUNSMITH SCREW JACK V2.0 MJD 04.24.22 copy.jpg IMG_2834GUNSMITH SCREW JACK V2.0 MJD 04.24.22 copy.jpg IMG_2838GUNSMITH SCREW JACK V2.0 MJD 04.24.22 copy.jpg IMG_2844GUNSMITH SCREW JACK V2.0 MJD 04.24.22 copy.jpg IMG_2846GUNSMITH SCREW JACK V2.0 MJD 04.24.22 copy.jpg IMG_2848GUNSMITH SCREW JACK V2.0 MJD 04.24.22 copy.jpg
 
For the life of me I don't understand why mfg.'s don't use a perfectly centered front / rear sight location in the dovetail. At least Glock uses a screw in front sight perfectly located.
The rear sights are the ones that really chafe my shorts. Why is "windage" necessary at 25 yards? IF one cannot shoot straight at 25 yards unless you offset your rear sight to accommodate horrendous trigger pull manipulation, just learn to shoot right of the actual target. I like to perfectly center my rear sights and not future worry if there is going to be some slow migration of the rear notch , right / left. I mill the center of the rear dovetail to accept the tip of the set screw, if present, if not create one, so the rear sight can never drift. Any error in impact, is operator error!

Example, M&P9 2.0 swapping factory for preferred TFX glo rear sight; differential thread size in this instance, but that's incidental.

IMG_3933 copy.JPG IMG_3936 copy.JPG IMG_3941 copy.JPG
 
Tore down my sister's Ruger pocket 9MM (LC9). It had an energy drink burst all over it in her purse and was rusty and gross. I got it apart and checked for movement of all important parts (ensuring nothing was seized or "frozen"). She said her husband was gonna do the final clean-up on it. I was out of town visiting her so I didn't have any of my gear with me or I would've done it.

*Not really "gunsmithing" per se, but inspection and functions check.
 
A few S&W revolver action smoothing operations I prefer to impart. Grab your favorite beverage.
Using the Powers Custom sear block; machinist clamp and Dykem. All the contact surfaces of the rebound spring block; trim / smooth the ends of the snagging spring, polish the internal spring chamber. All the axles got a light polish with a fabricated slotted roll pin- sanding paper holder I devised. Carefully truing the single / double action sear surfaces. Cylinder hand & stop. Adjust the hammer spring tension / spring as needed. I find a smooth 8-9 pound DA trigger feels pretty nice; 10-12 lb. gritty trigger, not so much. A recent pristine acquistion, 1983 S&W 65-3 , 3" , .357 Mag, heavy barrel, I acquired, as new; initially favorite for the DEA in the 80's, then all the other agencies fell in love with it (mom said, never finish a sentence in a preposition). A half box of ammunition had been used, sent with the revolver. Obtained a new hammer from Numrich Gun Parts to bob, and I did. Converted it to double-action-only (DAO) for carry. Replaced with Hogue combat grips. Added hi-viz front size application. Chamfered the cylinders, polished edges with dremel bob and Spyderco ceramic round file.

IMG_8490 copy.JPG IMG_8493 copy.JPG IMG_8548 copy.JPG IMG_8829 copy.JPG IMG_8833a copy.jpg IMG_8703 copy.JPG IMG_8706 copy.JPG IMG_8783 copy.JPG IMG_8808 copy.JPG IMG_8839 copy.JPG
 
Reworked the trigger on my S&W 617. It's pretty close to where I want it but the trigger return is a little sluggish.

My double action is set at 6.5 pounds and lately the trigger isn't moving forward as fast as I'd like so I replaced the 11 pound spring with a new 12 pounder. Just what the doctor ordered, no more problems.
 
Replaced the firing pin bushing on a Ruger LCR9. It’s a threaded spanner type fastener with a central aperture for the firing pin exposure. The fastener is 8 mm in diameter with two 1.5 cylindrical mortises for the tip of the mystery unobtanium factory spanner driver. I had some small WIHA spanners however their tips were square and just a tad to wide to fit. Initially I fabricated a working mans’ spanner from common hex head slotted driver bit and hardened the tips; worked fine but looked like a Flintstone tool. I searched the internet for a proper tipped & sized spanner, no joy. Pen to paper this morning and off to the shop; 3/8” drill rod & large blank polymer screwdriver handle (both from Brownells). First used chop saw to cut the rod to length; then to the lathe to face both ends in case I screwed up one; used 5C round collet to hold work on Bridgeport; Starrett wiggles on the sides of the collet holder to find center; small center drill for 2.5 mm off center 1.5mm holes; carbide 1/6” bit to start holes to depth; finished with 1/16” jobber length; back to the lathe to turn the tip down to size to fit within frame walls of fastener location; belt sander to fabricate a flat on screwdriver end of rod; drilled 3/8” driver handle hole square on the mill; tapped the rod into the handle. Decision about type of spanner tips to use ( cut 1/16” drill rod, cut 1/16” drill shanks or slotted roll pins? I tested to force to bend one of the roll pins and I couldn’t do it; it one were to bend I could pull it out and replace it foregoing drilling out hardened drill rod which would ruin the work. Used 1/16” roll pin starter punches to tap them in held in my new Wilton vise with angled aluminum vise jaw inserts. The pins are longer than the arms of the makeshift tool so I did not need to mill a center clearance with ball end mill. Now I’m ready to replace another bushing with a nice tool..

Lots of project photos.

Screen Shot 2022-04-30 at 5.10.19 PM.png IMG_1966 copyGunsmith Screwdriver Spanner Type Wiha and Other Bits copy.JPG IMG_2866Gunsmith Screwdriver Spanner Type Wiha and Other Bits copy.jpg IMG_2868Gunsmith Screwdriver Spanner Type Wiha and Other Bits copy.jpg IMG_2896 copy.jpg IMG_2897 copy.jpg IMG_2899 copy.jpg IMG_2903 copy.jpg IMG_2904 copy.jpg IMG_2906 copy.jpg
 
Last edited:
Mfg. in 1956, a Smith & Wesson 2” Model 36-no dash .38 Special round butt with classic “flat latch” cylinder release, old school diamond checkered walnut grips (discontinued in 1968), case colored trigger and hammer. Never fired outside factory. Original box, manual and oil papers.

In 1950 Smith & Wesson hosted the National Police Chief’s Convention to introduced their new as yet un-named (Model numbers replaced Pronoun model in 1956-57) revolver and polled the attendees as to their choice of pistol name. Shockingly, conventioneers voted that “Chief’s Special” was their favorite name, the rest is history.

I disassembled this one and a few other old ladies recently, just to refresh the interior after 65 years. Did not modify any internal parts. Half the fun is doing so and not leaving any tracks of being inside. IMG_8743Smith & Wesson Model 36 Chiefs Special Guns & Coffee 04.06.21 copy.jpg IMG_8759 copy.jpg IMG_8923Smith & Wesson Model 36 No Dash Diassembly & Cleaning 04.25.21 copy.jpg IMG_8927Smith & Wesson Model 36 No Dash Diassembly & Cleaning 04.25.21 copy.jpg IMG_8928Smith & Wesson Model 36 No Dash Diassembly & Cleaning 04.25.21 copy.jpg IMG_8929Smith & Wesson Model 36 No Dash Diassembly & Cleaning 04.25.21 copy.jpg Screen Shot 2021-03-25 at 12.11.35 PM copy.png
 
Mfg. in 1955 this Smith & Wesson Military & Police (pre-Model 10) 2” 5-screw rare square butt , distinctive ½ moon front sight , acquired as new in the classic gold box.
I disassembled this one too just to refresh the interior after 65 years. Did not modify any internal parts.
Like to use cardboard template to keep the screws properly located for installation; idea not mine, following Larry Potterfield CEO Midway USA.

Screen Shot 2022-05-06 at 6.00.15 PM copy.png Screen Shot 2021-03-25 at 12.01.37 PM copy 2.png IMG_8853Smith & Wesson M&P Square Butt Disassembly 04.18.21 copy.jpg IMG_8856Smith & Wesson M&P Square Butt Disassembly 04.18.21 copy.jpg IMG_8859Smith & Wesson M&P Square Butt Disassembly 04.18.21 copy.jpg
 

Attachments

  • IMG_8854Smith & Wesson M&P Square Butt Disassembly 04.18.21 copy.jpg
    IMG_8854Smith & Wesson M&P Square Butt Disassembly 04.18.21 copy.jpg
    237.8 KB · Views: 1
index.php

index.php


eh...progress

PXL_20220507_044524299.jpg
 
Mfg. in 1955, this Military & Police (pre-Model 10) .38 Spl is the sensuous round butt cousin of the above. 2" barrel, case-colored trigger / hammer, matching grips-frame #'s. Properly selected hollow ground screw bits; some citizen had slightly burred the grip screw on this otherwise pristine example, which was an easy clean up. I like to use custom Grace wooden screwdriver blanks with modified Wiha bit holders for working close to the firearm art. I find most of the Brownells Magna-bit drivers are too long for optimal driver control for small revolvers.As an aside, Grace no longer offers wooden blank screwdriver handles, I used to get them via Brownells and Grace site. So, in 2021 my supply-chain drought took hold; I messaged Daniel Morrison, CEO of Grace and he graciously authorized to his staff my purchase of the various sizes I needed, good stuff.

IMG_8661Smith & Wesson Pre Model 10 Military & Police .38 Special Guns & Coffee 03.27.21 copy.jpg IMG_8664Smith & Wesson Pre Model 10 Military & Police .38 Special Guns & Coffee 03.27.21 copy.jpg IMG_8914Smith & Wesson Military & Police .38 Spcl Round Butt Diassembly & Cleaning 04.25.21 copy.jpg IMG_8915Smith & Wesson Military & Police .38 Spcl Round Butt Diassembly & Cleaning 04.25.21 copy.jpg IMG_8916Smith & Wesson Military & Police .38 Spcl Round Butt Diassembly & Cleaning 04.25.21 copy.jpg IMG_8917Smith & Wesson Military & Police .38 Spcl Round Butt Diassembly & Cleaning 04.25.21 copy.jpg IMG_8918Smith & Wesson Military & Police .38 Spcl Round Butt Diassembly & Cleaning 04.25.21 copy.jpg IMG_8919Smith & Wesson Military & Police .38 Spcl Round Butt Diassembly & Cleaning 04.25.21 copy.jpg IMG_8920Smith & Wesson Military & Police .38 Spcl Round Butt Diassembly & Cleaning 04.25.21 copy.jpg IMG_8921Smith & Wesson Military & Police .38 Spcl Round Butt Diassembly & Cleaning 04.25.21 copy.jpg
 
Back
Top