• You are using the old High Contrast theme. We have installed a new dark theme for you, called UI.X. This will work better with the new upgrade of our software. You can select it at the bottom of any page.

Where can I get foam rubber that you pull apart to fit an AR-15?

Status
Not open for further replies.

wichta5003

Member
Joined
Jun 27, 2021
Messages
57
Location
Wichita, Kansas
I'm trying to convert a guitar case into an AR-15 case. Can anyone here tell me where I can buy the kind of foam rubber that pulls apart into little cubes? I'm going to need to get chunks of the stuff large enough so I can make it form-fit into both of the halves of the case, and then start plucking out the cubes to allow my AR-15 inside.
Unless there's a better way to do it... in that case, I'm all ears...
Thanks in advance...
 
I agree with @jmorris . Cubes pick and pluck foam just really isn't worth it IMO. Some people spray it with rubber sprays to solidify it more once they get it how they want, but IMO closed cell foam is still better. I had a thread awhile back where I showed some of the stuff I've done and others did as well. I prefer Kaizen if the size available will fit your case, as you don't have to go all the way through and can do different depths.

https://www.thehighroad.org/index.php?threads/custom-case-on-a-budget.863139/
 
Last edited:
Hey thanks guys! BigBL87, the previous thread you referred to is a goldmine. Like both of you said, the cube "pick & pluck" stuff can fall apart over time - I've had that happen with other projects, but I didn't think about cutting individual sheets. The Kaizen stuff looks to be just what the doctor ordered... it's closed cell foam too, instead of the open cell which is better for repelling moisture.
Thanks again guys! That was enough to kick off new ideas for me. The heated wire idea is a good one, too.

Glad you found it useful! If you have any questions, I can try to help out however I can. A hot wire setup is great, I just didn't want to invest in one, haha. The drywall cutter is probably my favorite tool so far, especially for non-full depth cuts.
 
All of the methods mentioned above work well. That being said I decided to build a hot wire setup. It is not as fancy as Rembrandt built but it worked very well for me.

The overall size of the table is 2 ft x 4 ft 3/4 plywood. I then sanded the top and applied several coats of polyurethane.

upload_2021-11-6_10-0-35.png

Then I traced the outline of all the parts on poster board and pined them to the foam with sewing pins.

upload_2021-11-6_10-8-24.png

upload_2021-11-6_10-9-52.png

By keeping a little pressure against the template with the wire, you can cut the shape out very quickly.

upload_2021-11-6_10-14-23.png

upload_2021-11-6_10-21-27.png
 
All of the methods mentioned above work well. That being said I decided to build a hot wire setup. It is not as fancy as Rembrandt built but it worked very well for me.

The overall size of the table is 2 ft x 4 ft 3/4 plywood. I then sanded the top and applied several coats of polyurethane.

View attachment 1036361

Then I traced the outline of all the parts on poster board and pined them to the foam with sewing pins.

View attachment 1036368

View attachment 1036369

By keeping a little pressure against the template with the wire, you can cut the shape out very quickly.

View attachment 1036372

View attachment 1036380


That's a pretty sweet setup, consider me jealous!
 
All of the methods mentioned above work well. That being said I decided to build a hot wire setup. It is not as fancy as Rembrandt built but it worked very well for me.

The overall size of the table is 2 ft x 4 ft 3/4 plywood. I then sanded the top and applied several coats of polyurethane.

View attachment 1036361

Then I traced the outline of all the parts on poster board and pined them to the foam with sewing pins.

View attachment 1036368

View attachment 1036369

By keeping a little pressure against the template with the wire, you can cut the shape out very quickly.

View attachment 1036372

View attachment 1036380
Please accept my application to join your fan club! In all seriousness, that's a great setup. I have a couple of questions, though.
1. In your first picture, is the "L" bracket that supports the wire able to be tilted at an angle? Straight up and down is great, but it seems like the option to set your wire at an angle would be useful for some projects.
2. What kind of wire do you use for cutting? My first guess was guitar strings, but then I thought nope, that can't be it. Tungsten wire, possibly?
3. What do you use for a power source? The rotary knob must be a voltage controller to set your heat....

Thanks for posting those awesome pictures!!!

1. The "L" bracket is bolted to the frame using blind nuts. Home Depot calls them "T-Nuts". I bolted it solid vertical but you could cut a radius slot for the bottom bolt hole to set any angle you want. You could even drill some pin holes at some preset angles.

2. The wire I used is 26g Nichrome 80 Wire I bought from Amazon.

3. The power source Is a 110 volt primary, 12 volt secondary, 40VA transformer also bought on Amazon. When I bought one in January of this year it was $19.95, now it is $31.90. :cuss:

The rotary knob is a standard dimmer switch bought at Home Depot.

As luck would have it, I will be setting it back up today to cut some foam for a project my wife is doing. I will take some more picturs of the underside and the nichrome wire attachments.
 
NiChrome wire is what you want.
Keep an eye on it, too, as it will "gunk up" with melted material--replace it when it does for crisp, clean edges.

The wire is bend-able, somewhat, to cut profiles, if that is desired.

Note that this setup will cut nearly any foam product (if poorly in the case of isocyanurate foam), meaning you can cut various foam products to create school projects or the like. (If possibly being of less help if the 5th grader announces they need a diorama of the Alamo at 0730 with bus coming in 10 minutes . . . YMMV)
 
1. The "L" bracket is bolted to the frame using blind nuts. Home Depot calls them "T-Nuts". I bolted it solid vertical but you could cut a radius slot for the bottom bolt hole to set any angle you want. You could even drill some pin holes at some preset angles.

2. The wire I used is 26g Nichrome 80 Wire I bought from Amazon.

3. The power source Is a 110 volt primary, 12 volt secondary, 40VA transformer also bought on Amazon. When I bought one in January of this year it was $19.95, now it is $31.90. :cuss:

The rotary knob is a standard dimmer switch bought at Home Depot.

As luck would have it, I will be setting it back up today to cut some foam for a project my wife is doing. I will take some more picturs of the underside and the nichrome wire attachments.
Many thanks for that, RMH. Thanks especially for providing actual links to the Nichrome wire and the transformer that you used.
I'm hoping you post a few more pictures, as well.
 
I'm trying to convert a guitar case into an AR-15 case. Can anyone here tell me where I can buy the kind of foam rubber that pulls apart into little cubes? I'm going to need to get chunks of the stuff large enough so I can make it form-fit into both of the halves of the case, and then start plucking out the cubes to allow my AR-15 inside.
Unless there's a better way to do it... in that case, I'm all ears...
Thanks in advance...

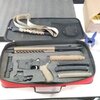
I don't know if it's better, but depending on your budget these guys do some nice work. I had no idea how much something like this costs, but now I know. :eek:

They will just sell you foam that can be custom cut yourself. More work than the "plick and pluck" foam, but a nicer fit in the end.

IMG_8235__83290.1596562511.jpg

https://www.carolinacustomfoam.com/commission-a-guitar-case/
 
Sorry it took so long to get the pictures I promised. Sometimes life just gets in the way.

First up is a view of the underside that shows the component and wiring layout.

upload_2021-11-10_18-12-26.png

up next is a closeup of the transformer and electrical boxes.

upload_2021-11-10_18-21-57.png

Here is a closeup of the lower nichrome wire attachment. I made it with all brass parts. I cut off the brass angle brackets just above the bottom hole. Then I used brass machine screws, flat washers and nut to attach the nichrome wire and the power wire secondary from the transformer.

upload_2021-11-10_18-40-9.png

The next two pictures are of the top wire mounting system. A 6 inch piece of 8-32 all thread, a fender washer, a wing nut, standard nuts and a spring. With the all thread I ground off approximately 1 inch of thread. Then I took a small torch to heat the end and bend it into a "J" hook.

upload_2021-11-10_18-52-51.png

upload_2021-11-10_18-55-38.png

I hope this helps
 
Last edited:
Sorry it took so long to get the pictures I promised. Sometimes life just gets in the way.

First up is a view of the underside that shows the component and wiring layout.

View attachment 1037269

up next is a closeup of the transformer and electrical boxes.

View attachment 1037270

Here is a closeup of the lower nichrome wire attachment. I made it with all brass parts. I cut off the brass angle brackets just above the bottom hole. Then I used brass machine screws, flat washers and nut to attach the nichrome wire and the power wire secondary from the transformer.

View attachment 1037275

The next two pictures are of the top wire mounting system. A 6 inch piece of 8-32 all thread, a fender washer, a wing nut, standard nuts and a spring. With the all thread I ground off approximately 1 inch of thread. Then I took a small torch to heat the end and bend it into a "J" hook.

View attachment 1037277

View attachment 1037279

I hope this helps
Thanks RMH! Bravo on a great job! The pictures you took really made it crystal clear how you connected all the parts. I had a random thought myself... if I build one of those, for the top work surface I might use whatever that material is that you use for kitchen countertops. Thank you again!
 
I don't know if it's better, but depending on your budget these guys do some nice work. I had no idea how much something like this costs, but now I know. :eek:

They will just sell you foam that can be custom cut yourself. More work than the "plick and pluck" foam, but a nicer fit in the end.

View attachment 1037111

https://www.carolinacustomfoam.com/commission-a-guitar-case/
Hey FAS1, believe it or not, I looked into ordering one of their guitar case builds! I think they do a great job, but they're too expensive for me. I do keep the company bookmarked as a source of foam rubber sheets, though.
And guess what, there's another company I found who does the same thing for a little less money: Savior Equipment.

EDIT: It's been a while since I looked into buying a ready-made guitar case built for an AR styled weapon, but I seem to remember seeing an online review from an unhappy customer. He was griping about the low quality of the closing latches - but now I've forgotten what company it was. As a former rock bass player myself, I can tell you guys that latches make or break a case's effectiveness. The latches on the hardshell case I'm trying to convert have four heavy latches that use a principle similar to the French cleat system. Extremely positive and sturdy.
 
Last edited:
if I build one of those, for the top work surface I might use whatever that material is that you use for kitchen countertops. Thank you again!
If you can find it, the slick answer is "melamine faced" sheet goods (plywood, MDF, strandboard or the like).

I have seen the melamine-covered shelving (available at more big-box home stores) used to build the table.

Skipping the part where you need a pot of contact cement, roller & pan for same; a whole sheet of plastic laminate; a laminate trimmer, and all the fiddly bits you need to glue up laminate is a net boon. Having invested far too many hours in gluing up plastic laminate (sometimes actually profiting from the labor hours billed o_O), "labor saving" (more time for guns) is a high priority for me.

Your mileage may vary.
 
Status
Not open for further replies.
Back
Top