nofishbob
Member
The purpose of this thread is to help those who are having problems priming on their LNL AP press. When I read about folks having these problems I feel lucky that I have escaped these problems for tens of thousands of rounds.
I feel that if I could get together with someone who is having priming problems, we could compare my working press with the one having problems and see a solution relatively quickly. Since we are all spread around the country (world?) I hope that these pictures and descriptions can help someone who is having problems see a LNL AP that works, and then figure out what might be out of spec on their press.
Here goes.
I have split priming problems into two groups: the feeding of the primers from the primer tube to the primer punch, and the seating of the primer in a case.
Primer feed:
The only real adjustment on the entire priming system is the primer shuttle cam wire. This wire is adjustable both vertically and horizontally. If this cam wire is misadjusted, there will be no priming joy.
The two goals are to have the hole in the primer shuttle PERFECTLY centered when the ram is at the top of its stroke, and to have some dwell time at the top of the ram’s travel where the shuttle does not move for a significant amount of press ram movement. This allows the primer enough time to drop into the hole in the primer shuttle without catching or tipping.

Please note the geometry of the primer shuttle slot in relation to the primer shuttle and the primer tube base. The primer punch and primer punch nut are absolutely flush with the bottom of the primer shuttle slot so that they do not catch and tip the primers as they are slid over the punch assembly.

Note also that the primer itself is below the level of the top of the primer shuttle, again, so the primer does not get caught on the case as it slides over it.

The hole in the primer shuttle is EXACTLY centered over the primer punch. This is where I have had powder or dirt get between the front of the primer shuttle and the end of its slot, causing misaligned primers trying to be forced into the case.

Cleanliness is really important here. I use Hornady One Shot dry lube on the primer shuttle and slot with good results.
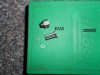
Finally here is a picture of how the primer feed tube should look when properly assembled:

Primer seating:
There is no adjustment on the LNL AP for seating depth, nor is one needed if the system is working correctly. The press is designed to be able to seat a primer deeper than ever required so that the operator stops the upstroke of the press handle when he feels the primer bottom in the primer pocket. A lot of parts have to work together to allow this to happen.
There are many threads about the “dimple” or “divot” that the primer punch makes in the press frame. This dimple introduces another variable that, while unwelcome, is not hard to eliminate as a problem.

The concept here is that when the primer punch nut bottoms out against the press frame, the primer punch should extend up a sufficient distance to fully seat a primer, PLUS a bit of a “fudge factor” to account for variations in case head dimensions, shell plate flex, coaralis forces, etc. An easy way to check this is to place a primed case over the primer punch (with no loose primer on the punch) and then lower the ram as if priming a case. The case will be jammed up against the shell plate with the punch in the primer pocket, stopped by the primer there. While holding the press handle in this position, look to see if there is a gap between the primer punch nut and the press frame. I see about 0.040” on my press.

If there is no gap here, the primer punch is not able to reliably properly seat a primer. Common causes for this are a press frame dimple that is too deep, a primer punch that is too short, a primer punch nut that is too long, or best of all, a combination of all of these.
If your dimple seems too deep (is this too personal?) an easy way to see if it is a problem is to repeat the above test with a thin, flat piece of metal over the dimple. If you still cannot achieve a gap between the primer punch nut and this piece of metal, I would look at replacing the primer punch assembly. I have heard good results from people dissembling the primer punch assembly and grinding the primer nut slightly to allow the ram to stroke down a little further.
The primer system on the press shown works without drama. I never modified it or polished it. I have fed all common brands of rifle and pistol primers without a glitch that was not related to some foolish thing that I did. I think that tolerance stacking, as in some minimum-sized parts assembled with some maximum-sized parts, conspire to make other’s LNL AP priming experience 180 degrees different than mine. Hopefully, my description and pictures will help those having priming problems to diagnose and repair their press in less time than without.
Good luck!
Bob
I feel that if I could get together with someone who is having priming problems, we could compare my working press with the one having problems and see a solution relatively quickly. Since we are all spread around the country (world?) I hope that these pictures and descriptions can help someone who is having problems see a LNL AP that works, and then figure out what might be out of spec on their press.
Here goes.
I have split priming problems into two groups: the feeding of the primers from the primer tube to the primer punch, and the seating of the primer in a case.
Primer feed:
The only real adjustment on the entire priming system is the primer shuttle cam wire. This wire is adjustable both vertically and horizontally. If this cam wire is misadjusted, there will be no priming joy.
The two goals are to have the hole in the primer shuttle PERFECTLY centered when the ram is at the top of its stroke, and to have some dwell time at the top of the ram’s travel where the shuttle does not move for a significant amount of press ram movement. This allows the primer enough time to drop into the hole in the primer shuttle without catching or tipping.
Please note the geometry of the primer shuttle slot in relation to the primer shuttle and the primer tube base. The primer punch and primer punch nut are absolutely flush with the bottom of the primer shuttle slot so that they do not catch and tip the primers as they are slid over the punch assembly.
Note also that the primer itself is below the level of the top of the primer shuttle, again, so the primer does not get caught on the case as it slides over it.
The hole in the primer shuttle is EXACTLY centered over the primer punch. This is where I have had powder or dirt get between the front of the primer shuttle and the end of its slot, causing misaligned primers trying to be forced into the case.
Cleanliness is really important here. I use Hornady One Shot dry lube on the primer shuttle and slot with good results.
Finally here is a picture of how the primer feed tube should look when properly assembled:
Primer seating:
There is no adjustment on the LNL AP for seating depth, nor is one needed if the system is working correctly. The press is designed to be able to seat a primer deeper than ever required so that the operator stops the upstroke of the press handle when he feels the primer bottom in the primer pocket. A lot of parts have to work together to allow this to happen.
There are many threads about the “dimple” or “divot” that the primer punch makes in the press frame. This dimple introduces another variable that, while unwelcome, is not hard to eliminate as a problem.
The concept here is that when the primer punch nut bottoms out against the press frame, the primer punch should extend up a sufficient distance to fully seat a primer, PLUS a bit of a “fudge factor” to account for variations in case head dimensions, shell plate flex, coaralis forces, etc. An easy way to check this is to place a primed case over the primer punch (with no loose primer on the punch) and then lower the ram as if priming a case. The case will be jammed up against the shell plate with the punch in the primer pocket, stopped by the primer there. While holding the press handle in this position, look to see if there is a gap between the primer punch nut and the press frame. I see about 0.040” on my press.
If there is no gap here, the primer punch is not able to reliably properly seat a primer. Common causes for this are a press frame dimple that is too deep, a primer punch that is too short, a primer punch nut that is too long, or best of all, a combination of all of these.
If your dimple seems too deep (is this too personal?) an easy way to see if it is a problem is to repeat the above test with a thin, flat piece of metal over the dimple. If you still cannot achieve a gap between the primer punch nut and this piece of metal, I would look at replacing the primer punch assembly. I have heard good results from people dissembling the primer punch assembly and grinding the primer nut slightly to allow the ram to stroke down a little further.
The primer system on the press shown works without drama. I never modified it or polished it. I have fed all common brands of rifle and pistol primers without a glitch that was not related to some foolish thing that I did. I think that tolerance stacking, as in some minimum-sized parts assembled with some maximum-sized parts, conspire to make other’s LNL AP priming experience 180 degrees different than mine. Hopefully, my description and pictures will help those having priming problems to diagnose and repair their press in less time than without.
Good luck!
Bob