Mini Milling Machine

Status
Not open for further replies.
Quote: "I understand how to square the vise with the feed axis using my Starrett dial indicator. So how do I level an item? Can I use the dial indicator mounted in the spindle to do this as well? Could I -0- the dial indicator then run it along the part to be milled using the X axis feed, for instance?

How about leveling a small part?"

I use one of these.......
 

Attachments

  • FlatDialInd.png
    FlatDialInd.png
    23.3 KB · Views: 12
Good stuff Madcrate, and the shopswarf site has been help for a whole span of stuff for me over the years.

Schmeky, there's practically nothing you can't do.

There's a guy in Italy who built a completely authentic running (you had to hear his little V12 rev to 10,000 rpm!) Ferrari sports car in about 1/3 scale. It was six feet long as I recall, looked exactly like the real model of Ferrari he'd copied and was authentic right down to the type of leather used for his seats. I had a link to it but don't find it now. I think he said it took him over six years to build in an interview on the news site where I saw it, and when the interviewer asked him what's next after that he said that he had a different model of Ferrari already begun. He said he'd wanted a Ferrari car since he was a child but accepted that he'd never be able to afford to buy one, so he built it.

One of my favorites is this Canadian gun maker - http://www.craftsmanshipmuseum.com/Kucer.htm
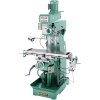
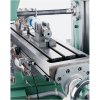
who not only makes guns but also built his own machine tools to do it. Made a small version of Bridgeport mill, a small lathe, a pantograph, a bandsaw, - all of it homemade.

Watch out for the time it takes to make some of the simple tooling you'll need. I think if you add up the time and material cost to make a set of 1/8" parallels, just using the example previously discussed, it'll amount to a lot more than the cost of buying an imported set. This runs true for a lot of 'making own tooling' endeavors and if all your time goes to projects like that you'll never get around to your Ferrari. :)

Tooling from Poland is often nicer than the Chinese equivalent, BTW, and not always much more expensive. I don't mean the machines - they're nicer too but a WHOLE bunch more expensive.
 
I understand how to square the vise with the feed axis using my Starrett dial indicator. So how do I level an item? Can I use the dial indicator mounted in the spindle to do this as well? Could I -0- the dial indicator then run it along the part to be milled using the X axis feed, for instance?

How about leveling a small part?

Yes you can. You'll need to alter the pin's movement direction obviously but once it's sensing the correct axis you can then just move the table under the indicator pin and correct for any runout by shimming or just lightly gripping the piece and tapping it until it indicates within your required tolerance for the item.

By the way. Something you should do at some point is to indicate the milling quill with the table to check that your cutting axis is dead on vertical to the table. The way to do that is fab up a temporary arm that fits into the qull and that you can rotate in a circle that is about the same diameter as the width of the table. Then you run the indicator around and take notes of the readings at the most forward, rear, right and left points. Likely there will be a bit of a difference. This can be shimmed out by loosening the column at the base and using shims as needed to alter the column angle. Recheck until you're within a thou difference over a 4 inch or so diameter. Brass shim is the best but in a pinch for fine tuning household aluminium foil has always mic'ed out at .001 inch for me. It's soft though so make sure you can open up the column gap enough to slide it in cleanly. If you have to jack in a diagonal direction try to put two layers of whichever under the low corner and 1 layer under the adjacent two corners so the pads are all supported as evenly as practical.

Now yes, astute machinists may have realized by now that depending on the column to quill alignment that this may actually result in a column that is out of true vertical. And this needs to be taken into consideration. For myself I've got a round column mill/drill so the only Z axis I can use during cuts is the quill itself. The column travel is only used for setting up prior to cuts. So if the column in my case isn't vertical it's not a big deal. For a dovetail column that supports Z axis travel cuts you would not want to do it this way. The shimming aspect is still viable but you'd want to check the Z with the indicator using a precision square and then set the quill axis using some other method depending on the machine.

Once you've zero'ed your quill to the table then it is well worth checking your milling vise. I'd suggest you indicate the bed rails of the fixed portion as well as the tops of the jaws. If it is practical you may want to look at shimming or skim cutting the vise mounting surfaces and/or jaws to end up with the moving jaw bed and the tops of the jaws true to a quill within a small tolerance. Considerable study of the vise and how to support it for this work would be needed. Alternately if only a hair of adjustment is required then "lapping" the base or other parts in some manner may do the job. The "how" is purely up to how far out the vise is and if the design permits removal of material to correct it. Each case would be unique. But regardless it's time well spent to do this so that you can rely on it in the future to be in alignment to your machines. Even if you find it's close enough or the design and materials prevent you doing any corrective actions at least keep track of the small about of skew so you can compensate for it during critical setups.

tool steeel does not have guarenteed square edges i just measured some 3/8 sq tool steel and it varied a heap!

Yeah, it's definetly a case of YMMV. The samples I've checked were close enough for "poor man's parallels" but they aren't perfect by any means. But when I need something closer than what I can get from the tool bits I switch to indicating the work instead of relying on parallels. Actually for one job where this wasn't practical (repetitive pieces) I made my own parallel. It's not hard, just tedious. It requires a support block to hold the thin material straight up and down and a known flat area to put the wet or dry sandpaper onto for the abrasive plate to do the forming. In my case I bought a 12 x 18 granite surface plate years ago when a local tool place had them on sale for $40. But if you check something like your table saw table with shims you can soon tell if it's dead level or not. Alternately a 12 inch square of super heavy plate glass makes for a pretty nice poor man's surface plate. 1/2 inch or thicker glass works well. Get a shop to cut and bevel the edges. You should be able to get this for cheap. That and some blueing from a felt pen to ensure the progress is even. So now I've got a set of one.... :D
 
BCRider said:
Something you should do at some point is to indicate the milling quill with the table to check that your cutting axis is dead on vertical to the table

I understand exactly what you are saying. I saw a tool on a website that does just that, however, I feel with a little ingenuity, one can be made. You essentially need something that will securely clamp around the quill and extend the dial indicator in a rigid manner to the outboard reaches of the table.

Thanx for pointing this out, I can see how this could pose a problem if you're using a lot of table feed.

I've learned more on this thread than I've learned in quite some time. Thanx to all for your input. I'm soaking all this up.
 
I just this week treated myself to one of these: http://spindlesquare.com/

Enco put it on sale and after years of trammeling by chasing an indicator round the table with a flashlight and reading glasses it's just like magic.


Schmeky, I'm not recommending this tool to you. My mill needs trameling both on x-axis and on y-axis making it double the chore and the big mill is surrounded now with tires, a shopvac and just plain built up stuff making it more difficult each year for my old bones to perform the contortions needed to do that nasty both directions.

What I DO recommend is that in starting out you think of ways in which you can manuever your workpiece under the as much as permanently trammed in spindle. Your tooling will become more versatile and you'll be late checking into the funny farm. :)


Now having read BCRider's excellent assistance I would add that it's best to not rely on any zeroing or trammel markings placed on your machine or a rotary vice mount or any other such marking. They're not always, even not often correct in what they're supposed to be, so form the habit of verifying everything to your own satisfaction. This one might save you a lot of grief, particularly with the Chinese machinery and accessories, but also with some of the highest regarded equipment. Trust nothing unless you've measured it yourself.

(dinnertime...)
 
Be sure and sign up for ENCO's news letter and special offers. They have free shipping often, and that can really help if your wanting that granite surface plate.
http://www.use-enco.com/CGI/INSRHM

This place was everything, I find it a good source for tiny shims in stainless, nylon, Teflon, plus odd nuts and bolts. That pack of S&W hammer shims that sells for $16, here's it's $8.
http://www.mcmaster.com/#

Good place to buy steel, brass.....
http://www.discountsteel.com/index.cfm/go/main.home.htm

Eye candy
http://www.craftsmanshipmuseum.com/index.html

If you want to do micro work, these folks have great stuff.
http://www.gesswein.com/catalog/home.cfm?CFID=1033905&CFTOKEN=14751577

Another good material supply house.
http://www.smallparts.com/
 
I understand exactly what you are saying. I saw a tool on a website that does just that, however, I feel with a little ingenuity, one can be made.......

I've seen that too. If it's the one that sits the dial guage up front and so it can't move while the arm moves around that's a sweetheart of a toy. But it's not all that often that you need to do this sort of deal. What I did is just make up an L shaped arm that I bolted my bigger dial guage to using the eye tab on the back. For reading the back side where it was facing away I just used a small pocket mirror.

Trust me, you'll have LOTS of gizmos and tooling to make up for your machines. Try to be pragmatic about it and keep some of the lesser used stuff as simple as you can for now. Later on you can make up the fancy stuff and put it into a presentation box.... :D
 
Grizzly

Here is a nice set up for any garage.... it is of course expensive compared to a minimill but has so many capabilities. It is single phase as well. I have machined for 25 years and a minimill can have capabilities beyond the norm with experience of years of understanding backlash in a manual machine, climb milling, verses conventional milling etc. they are not forgiving on these circumstances and can cost you enourmously when dealing with slides etc. even when trying to take small cuts they can grab your part and its all over.

The mini mill will do the job... no question about it.

But! I have made the mistake before just trying to get the minimum and ended up wanting more, only to end up there later.

This machine is an awesome home package at $3395.00 and free shipping.
The G3617 - Single Phase, Horizontal & Vertical. I will also mention that although most of these import machines are made from a few importers and painted different colors.... The owner of Grizzly took his business to a different level when he intoduced his own in house shop to inspect and fine tune the machinery as it comes in... before it gets to you! I for one have been impressed with my Grizzly purchases over the years. Customer support is great as well. I ordered a large belt sander and it came in with the switch broken from shipping....reported it to customer service... sent digital pic of damage and they immediately sent me a replacement switch!
 

Attachments

  • g3617.jpg
    g3617.jpg
    25.9 KB · Views: 26
  • g3617_det1.jpg
    g3617_det1.jpg
    47.8 KB · Views: 20
Grizzly is decent to work with, but we have had our fair share of problems with some of the equipment. In the last two years I have purchased 3 of their 9x42 mills, (5) 9x19 lathes, and one 6x12 surface grinder. I ended up replacing the motors on two of the mills, replacing the switch on the surface grinder, and two of the lathes had to be sent back to the factory for repair. Granted Grizzly has been decent about sending spare parts for the repairs; however, I have lost a lot of time doing repairs myself.

Most of the problems we have had have been with the electrical, but I wouldn't say that Grizzly is checking all of the machines when they leave the factory as we have had problems with some of the equipment right out of the crate. Mechanically the mills are great machines, but I sure wish that the factories could sort out the electrical problems as changing a motor out on the mill takes some time.
 
Most of the problems we have had have been with the electrical, but I wouldn't say that Grizzly is checking all of the machines when they leave the factory as we have had problems with some of the equipment right out of the crate. Mechanically the mills are great machines, but I sure wish that the factories could sort out the electrical problems as changing a motor out on the mill takes some time.

I have been doing a no load run in on all my equipment. 1 min run, 2 min run, up to a 5 minute run with a cool down between. I may not do a thing but it does give me a liitle more peace of mind. Plus I have not had motor problems with any of the motors I have run it.
I agree that Grizz is a step above the other importers and their customer service is great.
 
44-Henry, you've got to special order for machines that came over in the hold of their container ship. The ones that ride on the deck get splashed in a heavy sea. :)


Grizzly really shines in their woodworking tools. I think metal cutting was an afterthought to the guitar and furniture making hobbyist who started the company. Boy have they got some neat wood tools!

One of those vertical/horizontal mills such as the one shown by Tomcat above would be the replacement for my Bridgeport, except the Bridgeport shows no sign of needing replacement. Looks like I'll croak before it will.

But there've been times I'd have liked a horizontal mill. It's only laziness that makes something combined seem attractive though, as most any mill can be made to do pretty much any cut desired IF there's room for the workpiece to be mounted within range of the cutting head.

So instead of thinking that bigger and better machines are what will make you successful in what you want to do learn to use what you've got, and spend your ingenuity on ways to manipulate your workpiece and lock it in place for a cut.

Spend your money on the best cutters you can find and afford.
 
As this thread winds down, I wanted to post a pic of a "starter" project I just completed. I had a really nice Wilson Stainless Steel Commander 1911 hammer I ruined a few years back. Being the pack rat I am, I kept it in my parts bin. In my feeble attempts a few years ago to be a hobby gunsmith, I cut the hammer hooks to shallow.

I set the hammer up in the mini-mill and re-cut the hooks adding about .006" to the depth and squaring up the sear engagement area. I have a really nice Colt 1911 38 Super I converted to 9mm a few years back and didn't want to take the risk of ruining the original high polish spur hammer. But this pistol has the standard grip safety, not a beavertail that you need to work with a Commander hammer.

I decided to cut the rear of the hammer to see if I could make a Commander hammer work with a standard grip safety. I did, it does, and after some judicous trigger work, wound up with an ice crisp 4.0# trigger pull. I don't care if you laugh at my bastardized hammer; even in the up position, it looks unique, and different.

Man I love this mill. So, if anyone is thinking of taking the "mini-mill" plunge in the future, I say go for it. I could not have made an informed decision to do this without all the help, invaluable information openly shared and given, and experience of those that posted on this thread.

To you guys, all I can say is thank you.
img0902.jpg
 
Well done for your first project.

It's a heady thing being the master over metal, isn't it? The sound of a happy cutter peeling shavings off is one that makes me smile even now some 43'ish years after making my first metal bit on my dad's lathe.

Tomcat, thanks for the post about your combo mill. I'll be looking to invest in a more sizable mill for my new retirement shop and I like the looks of that Grizzly machine. There's more than a few times I have wished for a horizontal mill.
 
Wow, Schmeky, I would not have thought o do something that precise for a starter project.
In fact, I'm not sure I'm up to that level yet!

Good job, and thanks for sharing
 
Last post with a pic. Same Colt 9mm 1911, but I wanted a better target type rear sight. This tactical sight is from the CZ Custom shop. I recut the dovetail, resurfaced the face (I had drilled some small "dot" holes I didn't like) and even figured out a way to cut new serrations on the face. Notice the dovetail fit, it's absolutely perfect; looks like it was made for this pistol. This is the re-cut Commander hammer as well in the "up" position, it looks good. Over and out!!
img0908u.jpg
 
Cute little thing, ain't it? :)

madcrate, he calls it "Kurt style" but does the movable jaw rise at all when it's clamping?

That's what made the Kurt vise's reputation - that their patented "somethingorother" mechanism prevented the rear jaw from deflecting upward under pressure.

Now, after one old Bridgeport and one new Kurt copy before I broke down and bought the Kurt I use I wouldn't want to own a vise that did not prevent any displacement of a part when clamping.
 
madcrate, he calls it "Kurt style" but does the movable jaw rise at all when it's clamping?

As near as I can tell it's a clone of the Kurt. I have not put a DI on it to check, but mine feels as tight as the real thing I have used at work, just a lot smaller.
It's a lot of vise for the money, even if only saw drill press duty.
 
OK. It must be that Kurt's patent on their 'anglelock' mechanism (or whatever the name is) has run out. I know that there's at least one other maker that works the same way that Kurt vises work and it would be only a matter of time before every manufacturer in any country would duplicate and offer vises that work the same but cost a lot less.
 
OK, I'm dipping back into the well of knowledge. I want to center my spindle over an existing bore. I have a lug mounted dial indicator. Is there an attachment that would allow the indicator to be mounted in a collet, then offset sufficiently to provide indicator contact to achieve -0- round out (in an existing bore)? I also have a permanent post mounted dial indicator (Starret).

Or do I need an indicator like the one in post #101, as suggested by Alchymist?

Lastly, is there a way to set to the thousanth, the tool cutting depth on an indexable boring bar? Please forgive me, for I am not that bright in the ways of the mill as of yet.
 
The simplest thing is a little set of center finders called wigglers as shown on this page: http://www.generaltools.com/Departm...igglers--Edge-Finders-and-Center-Finders.aspx, : another idea is one of these http://www.blakemanufacturing.com/pages/aboutus.html

The page is only to show the tool type. I don't think I paid $28. for the Starrett set of wigglers I've had a long time. I'd bet they come up in ebay almost all the time.

That's called a Blake coax indicator in the second link and there is a Chinese made copy available for about $50. I have one of them and it works beautifully because it allows keeping the indicator visible while the contact point of the indicator is rotated. Wish I'd have invented that one.

Basically what you want is something to chuck in the spindle that is bent to an offset that will make contact with both sides of your diameter when rotated above the hole. The trick is in knowing exactly when equal contact is made at the four compass points of your diameter. Indicators show the contact more easily than trying to see a wiggler point under lights with the target part in your shiny reflective holding fixture.
 
Status
Not open for further replies.
Back
Top