Mark_Mark
Member
- Joined
- Jan 9, 2021
- Messages
- 17,985
quick question, does it come with a brass feed like the simple Lee Pro 4000?I am really happy with my press. Glad i made the decision to get it.
quick question, does it come with a brass feed like the simple Lee Pro 4000?I am really happy with my press. Glad i made the decision to get it.
wonder if they sell the case feed without the motor hopper. Just a tube is all I needOnly feed it comes with is for the primers.

If you don't want a motorized collator, you'll need more than a tube.wonder if they sell the case feed without the motor hopper. Just a tube is all I need
too much workIf you don't want a motorized collator, you'll need more than a tube.
You'll need a device to feed the cases from the tube into the shell plate. You should look into one of the 3D printed case feeds designed for the Hornady...then you can use it with the Lee tubes from their Universal Case Feeder
Glad to hear that.I am really happy with my press. Glad i made the decision to get it.
I have found the biggest bang for your buck is adding a bullet feeder "die".I like running mine hand fed, so far.
The Lee Pro 4000 case feed is quite good. IDK, I invested so much time on the Lee Progressive system, Like the flush mount die sleeves thing, figuring the powder check, case feed setup.I like running mine hand feed so far.

Bullet feed die with a powder check!!! yesI have found the biggest bang for your buck is adding a bullet feeder "die".
It allows me to only load a case with my left hand and my right hand never leaves the lever.
I don't have a collator and just use long (3') preloaded tubes for the bullets (50 in each tube).
I don't have to take my eyes off of the shell plate to look around for the container of bullets to pick one up.
My left hand goes back to the container of cases without even looking that way.
jmo,
.
That was my idea when I cut off the LNL arm that would hold a case feeder. Brass is no problem at all.I have found the biggest bang for your buck is adding a bullet feeder "die".
It allows me to only load a case with my left hand and my right hand never leaves the lever.
 www.youtube.com
OK… nice speed and rhythm. A little bragging here. But I can do that 2X as fast or faster with a Lee APP.That was my idea when I cut off the LNL arm that would hold a case feeder. Brass is no problem at all.
Sizing & Decapping 38 Spl
Without a case feeder?But I can do that 2X as fast or faster with a Lee APP.
Lee APP has a simple tube case feeder. Even without the tube, I would just have to drop cases in a hole and the plastic would put the case in the shell holder.Without a case feeder?
That's how i started. The LNL case feed placement is ideal for handfeeding casesI like running mine hand feed so far.
This is what I found also.I have found the biggest bang for your buck is adding a bullet feeder "die".
It allows me to only load a case with my left hand and my right hand never leaves the lever.
I don't have a collator and just use long (3') preloaded tubes for the bullets (50 in each tube).
I don't have to take my eyes off of the shell plate to look around for the container of bullets to pick one up.
My left hand goes back to the container of cases without even looking that way.
jmo,
.
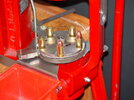
I understand why you feel that way.If you don't have a collator your wasting a lot of time loading the tubes, brass or bullets. I can set a bullet pretty quick and easy since it's up front in station 4, easy to see. I crimp in station 5. That brass is fed from the back left back so I don't have to reach, just have to keep the hopper full. I tried different setups and found the brass feeder gave the most bang for the speed. I did one time setup a bullet feed die with a short fill tube, 2-3". I just dropped the bullet into the feeder instead of setting it on the flared case. Timing it both ways It was a wash so I did away with the bullet feeder. I always take a peak to confirm powder even though I run a powder cop to check after the powder dispenser w/ptx. Now if your going to hand feed the brass the shuttle system makes it very fast since you don't have to slide the brass into the shell plate. You just set it front of the pusher and it does it's thing. A friend of mine was over that has the same press and saw how the shuttle worked and said that alone will speed things up. I don't know if Hornady sells these parts separate from the kit. When I get ready to make a run the only thing I do first is load up the primer tubes for how long I want or need to load. My back tolerance is 500 before I have to stop, something longer but not my much. I take a brake and come back in a hour or so and do another run.
Shucks Mark_Mark, 3d printers took the work out of such things in my experience.....too much work
") Honestly, 3D printers replaced the work with more fun.....
Honestly, 3D printers replaced the work with more fun.....Shucks Mark_Mark, 3d printers took the work out of such things in my experience.....
Before jmorris showed us what his home-assembled 3D printer could do, we had to do it the hard way......harder and more expensive for me than jmorris, since I have no machine shop nor the skills to use one.
This old video shows how I made an old Hornady bullet collator twice as efficient by cutting it up and adding a plate, a ramp and a rubber surround.....in my company's wood shop....for my old feederless RCBS Pro 2000........ a year or so before I knew there was such a thing as the 3D printer.......sure made my hobby more fun and 100% more efficient.
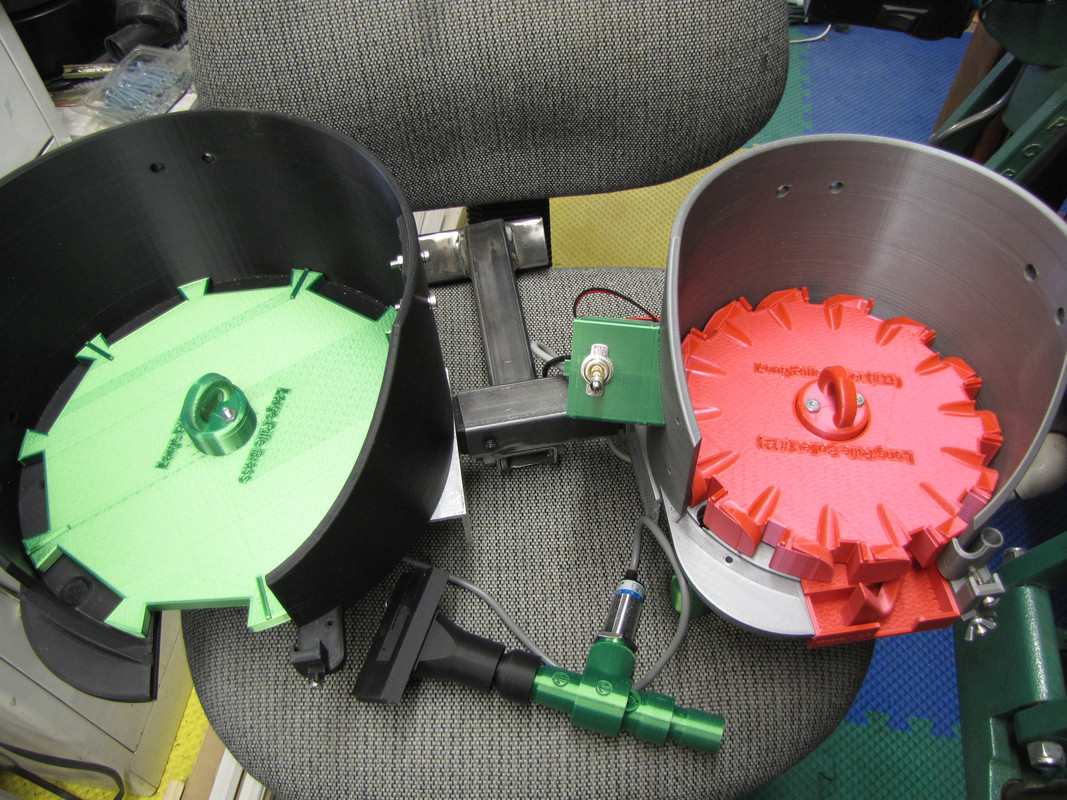
Now with a cheap Lee 6000 and a cheap Creality 3D printer you can make such a thing from already made print files, for about $75....the motor costing 2/3's of it.....the bullet feeder was only the beginning. Look what a 3D printed "case" collator for the same price can do.......(admittedly, It was desirable to buy a lower voltage wall wart to slow it down.......)
that crazy that you can do all that! Ender brand is what I’m looking at!First of all, what you can buy today is different from what there was 3 or 4 years ago. They have gotten a little better and faster........and as for me, I didn't want to pay for the European brands though they might be better.....maybe. I really don't know since I only bought the much cheaper Chinese Creality brand. So I suggest to spend some time looking into it.....watching videos on Youtube by the guys who think they are experts.
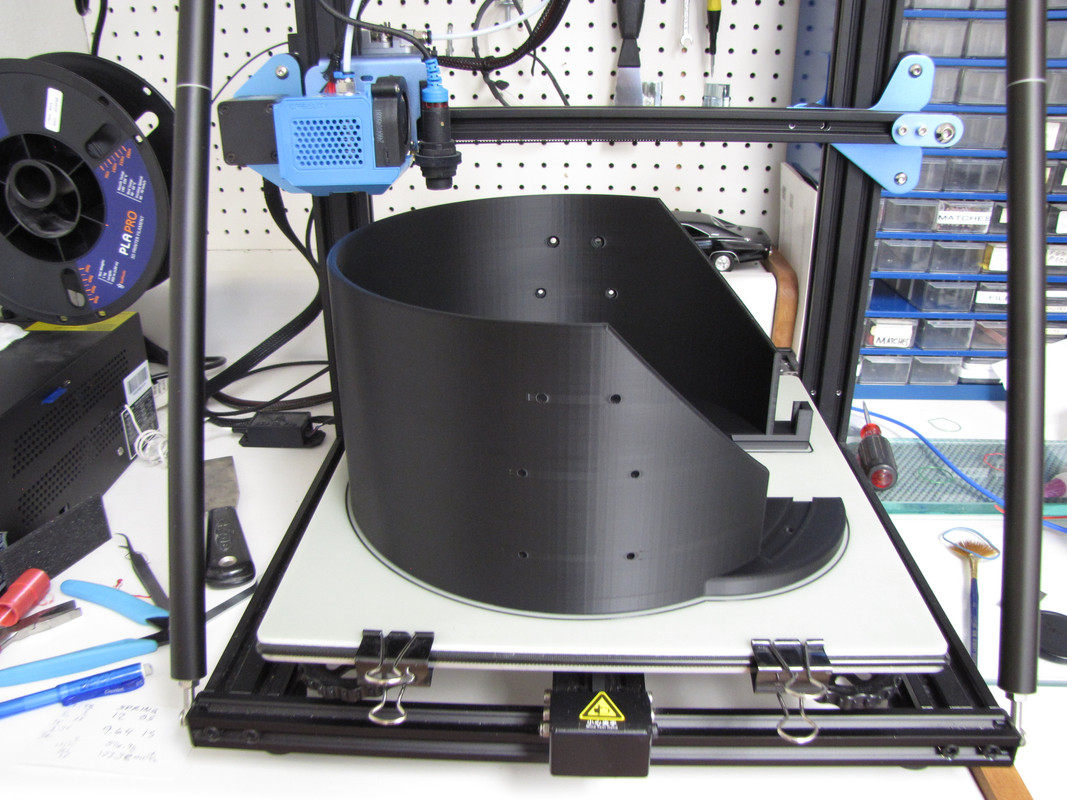
What I can tell you is only what I bought and why...in the November that brought America Covid. A Creality CR10 version 2 for $500. I could have bought an Ender3 for about $200, but I felt I want a print surface larger than 220mm square. The one I chose had a larger 300mm x 300mm x 400mm high print bed. The first thing I had to learn getting used to thinking metric....ugh....for an American Autocad cad designer of homes and commercial buildings. The following picture shows what a 300mm bed can print.
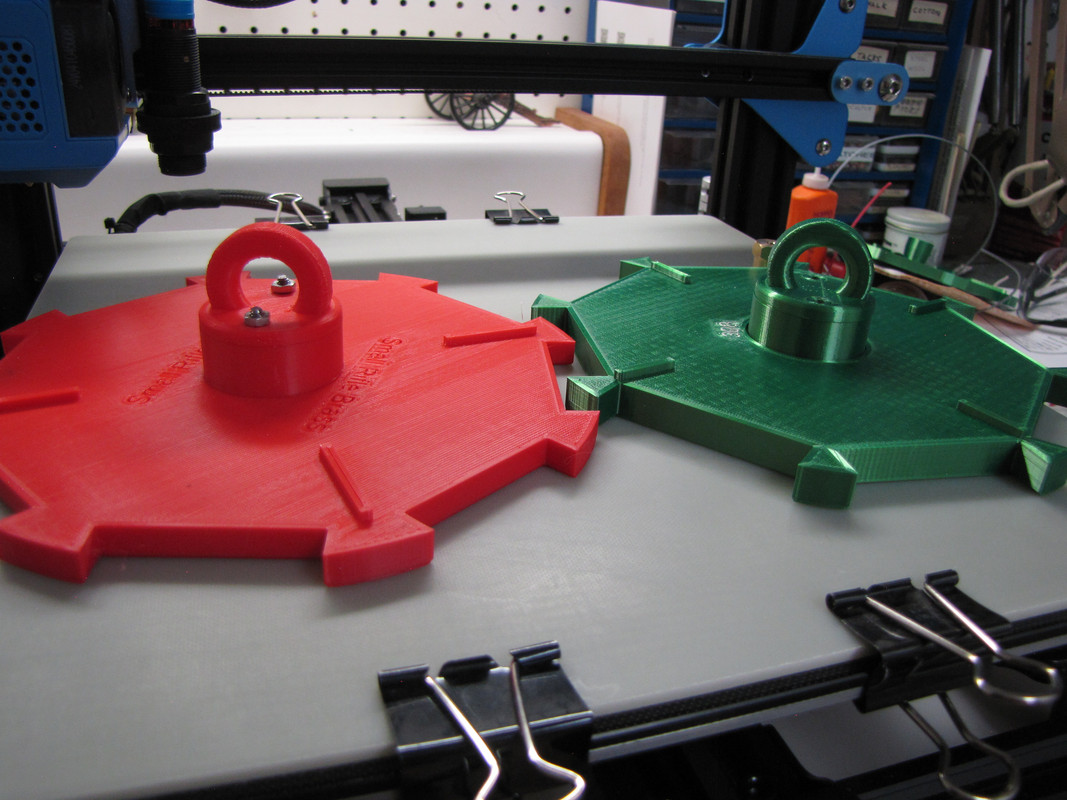
That's a size big enough for rifle cases. The next one shows the same one on the left and a smaller bullet feeder, that the smaller 220mm print bed of the way cheaper Ender 3 can print.....or cases too.....large ones even...but smaller numbers.
So determining budget and what's available on that budget is the first step. Creality's are easy to put together.....but there are improvements that make printing way easier. More on that later today if people are interested. Probably a new thread on the subject might be more useful for those interest.
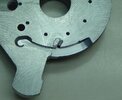
Last Picture......shows rifle case collator plates for the SMALLER one......so see still useful. .223 on the left, .308 on the right. Plates use about $2 worth of PLA plastic. Those big things in the middle with a handle is way more than a handle......they are TylerR designed clutches, so if a case hangs the center keeps turning while you "fix" the hanging case.