Lee Pro 6000 unboxing and testing for OAL consistency

Thanks for the image, LL. :thumbup:
index.php

"If the small protrusions are not pushed down far enough to expand out to cutouts in the slots, assembly base attachment point could loosen to affect performance of primer chute/trough shaking the primers in the tray. And repeated removal/reinstallation could wear/damage the small protrusions to loosen the base of assembly."
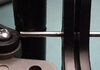
Looking at that pic, I believe some if not all of that wear/damage can be minimized by removing the flash/burs and bevel/chamfering the corners where the plastic slides into/across.
That would be chamfer the Red edges/areas and de-bur the areas marked Blue in this pic:
ChuteMarked.jpg
Just a suggestion for others, as I know you are keeping you press stock/unmolested for testing.
:D
.
Edit: The files I use for this kind of stuff are called Needle Handle Files.
Here is a pic of a set I recently bought at Walleyworld for less than $5.
sorry for the glare:
WallyS.JPG
Every gun owner/re-loader needs to have some of these type files, more with golf-ball handles:
GBHandle.JPG
:D
.
 
Last edited:
Adding to post #390 "New priming system" - https://www.thehighroad.org/index.p...-oal-consistency.911743/page-16#post-12489583

The new priming system not only has a round hole in the slide surface by left side of primer chute/trough attachment point (To push up on primer guide to remove), but also four rectangle holes below the hold down tabs.

Together, in conjunction with the new redesigned "self-cleaning" priming pin, these holes make the new priming system "self-cleaning" to clear powder granules/flakes/debri from the channel/trough as primer slider/guide move back and forth.​

index.php


Close up of "self-cleaning" holes on slider channel/trough

index.php


Another perspective view of "self-cleaning" holes on slider channel/trough

index.php
 
Last edited:
Adding "Updated primer chute/trough assembly with larger diameter pin" to "New Priming System", "Troubleshooting and Solutions" and "Update Parts".

NOTE: Please keep in mind that product operation and update parts information of this newly launched press is dynamic and changing with pre/early production parts; therefore, presses with different mix of production run parts may exist. While I attempt to stay current and be accurate as possible, do realize that information posted on this thread are based on my personal experience with my personal press and parts that have been clarified with contact with Lee Precision. Parts design/update/production runs/lots can vary and influence how they perform in your press.

Press Set Up
:
New Priming System:
Press Disassembly and Reassembly:
Fine tuning press operation for consistency:
Troubleshooting and Solutions:
Lee Precision Update Parts/New Products:
 
Last edited:
I believe some if not all of that wear/damage can be mitigated by removing the flash/burs and bevel/chamfering the corners where the plastic slides into.

Just a suggestion for others, as I know you are keeping you press stock/unmolested for testing.
I think @GW Staar had the right idea of utilizing existing hole left of primer chute/trough to bolt/nut a hold down piece.

If primer trough assembly coming loose at bottom attachment point becomes an issue (primer not sliding out flat for reliable pick up by primer guide), I could DIY a hold down fixture so bottom of chute/trough remains held down flat for reliable primer pick up.

PChuteA.jpg
 
Adding to Updated primer chute/trough assembly with larger diameter pin

When using the updated primer chute/trough assembly with larger diameter pin, some may find there is too much contact pressure to where the pin is binding with the groove rings.

Top carrier cover can be loosened and rotated clockwise slightly to take off some pressure off the pin as pin should ride the frame column up and down without binding in the groove rings - https://www.thehighroad.org/index.p...-oal-consistency.911743/page-16#post-12495371

But email from Calvin provided another tip/solution for pin that has too much contact pressure by supporting the pin end and should be the standard procedure for installing primer chute/trough pin moving forward as supporting the pin end will put less stress/force on the base of primer chute/trough attachment point as mentioned in post #398 - https://www.thehighroad.org/index.p...-oal-consistency.911743/page-16#post-12495371

Hello John,

Just wanted to provide a quick tip/solution to a primer pin that is over agitating. The pin can be pushed further through the trough in order to be supported by the carrier. This will take out some the twisting done when there is strong engagement with the grooves. The pin may be left unsupported if a little more action is needed.

Calvin Katzfey
Lee Precision​

Here is updated larger diameter pin end that is not supported

index.php


Here is pin end that is supported by carrier/case retainer

index.php


Here is old smaller diameter pin that is not supported

index.php


Here is old smaller diameter pin that is supported with addition of pen filler sleeve roller - https://www.thehighroad.org/index.p...-oal-consistency.911743/page-15#post-12482599

index.php
 

Attachments

  • PinNSupport.jpg
    PinNSupport.jpg
    165.2 KB · Views: 1,072
  • PinSupport.jpg
    PinSupport.jpg
    161.4 KB · Views: 1,073
Last edited:
Not sure if I should use this thread to post issues, or start a new one. But I'll start here. Got most of it set up today. Not the case feeder yet because I wanted to run one case at a time. I had some problems, some of which were beginner user error. But the main thing is that when I am only running one case, the primer just sits on top of the primer pin with no support with each pull. Then it goes back down and back into the slider. But what happened was that the primer fell off the pin and went under the shell plate. Then things started jamming. At first I had no idea why it was jamming and the priming pin would not even come up. After a couple more pulls, the primer popped up sideways on the pin. I'm really glad I was cycling the ram with a gentle touch because I imagine that primer could have easily popped inside of there. So, I ran a few more cases through and just moved very slowly, so that the primer wouldn't fall off the pin again. So I guess in the future if I am only running one case, or if I am adjusting the powder drop, I could remove the spring from the slider.

Also, I don't like that the instructions say to screw in the resizing die another 1/3rd of a turn after it touches the shell plate. I feel like at the top stroke, I have to put too much pressure on the lever to make it get a full stroke.

Make sure you are making full strokes up and down, I had similar problems at first. Smooth steady FULL strokes up and down help with this press. On the resizing die, I agree and I think there is a discussion about this in the thread somewhere. I started out that way and did not like the results in OAL. Now, I make sure it is firm against the shell plate, I use a lee Factory Crimp Die in position 6, tighten the FCD and the sizing die to be firm against the shell plate, not the additional 1/3 of a turn. I found this helps with my overall length consistency.
 
Second issue first. If you don't like it, don't do it and see if you are sizing enough to plunk. After it touches is open to interpretation just as 1/3 of a turn is, but you do want to take all the play out of the ram/plate for consistent operation.

I've never had a primer fall off the priming ram. The ram raises and the primer is sitting on top. If you aren't priming, the ram lowers and take the primer with it. The shuttle then carries out of the shell plate in back along it's travel.. I can't even imagine what would cause the primer off fall off the ram as it is surrounded by either the plate or the shuttle
I am not sure either, but there's no question that the jamming was because a primer fell between the pin and whatever surrounds it. In fact, the recovered primer was a bit mangled.
 
Congratulations!

Sorry for the delayed reply ... We are prepping our second house for sale and been busy with clean up work. OK, let's get your press running smooth and reliable.

I had some problems, some of which were beginner user error
And exactly why I developed the "best practices" checklist with mods/QC checks to help prevent issues during "learning curve" phase of new users while they set up the press and become familiar with press operations as most problems reported by new users were due to press parts not tightened or setup properly. Once press was set up properly and things tightened up, problems went away.

Your problems would have been found/resolved going through the check list updated here - https://www.thehighroad.org/index.p...x-pack-pro-pro-6000-kit.913577/#post-12531789

And you can reference the press set up steps here under "Press Set Up" - https://www.thehighroad.org/index.p...-oal-consistency.911743/page-17#post-12495679

when I am only running one case, the primer just sits on top of the primer pin with no support with each pull. Then it goes back down and back into the slider. But what happened was that the primer fell off the pin and went under the shell plate. Then things started jamming.
This is covered by the check list and QC checks would have caught the issue. Loose shellplate and/or primer slider not sliding smoothly can push up on the primer guide (Which moves primer) to move primer from top of priming rod/pin. This may not be obvious when you are cycling the ram slowly but aggravated when ram lever is actuated faster to index the shellplate faster.

I don't like that the instructions say to screw in the resizing die another 1/3rd of a turn after it touches the shell plate. I feel like at the top stroke, I have to put too much pressure on the lever to make it get a full stroke.
Die installation and adjustment steps I used are listed in the check list and "Initial set up of dies" under the "Press Set Up" from this thread - https://www.thehighroad.org/index.p...-oal-consistency.911743/page-17#post-12495679


We are getting ready to eat dinner so I will check back in about an hour. Go over the "best practices" check list and reference the "Press Set Up" steps and post back. If you have any issues, feel free to post here or PM me.
 
Last edited:
I am not sure either, but there's no question that the jamming was because a primer fell between the pin and whatever surrounds it. In fact, the recovered primer was a bit mangled.

I've had this error a few times. I chalked it up to not doing full strokes and my inexperience with a progressive. Things got better. Then my last run I did it again. Not sure it may well be operator error, but I know exactly what Stefan is talking about.


-Jeff
 
I've had this error a few times. I chalked it up to not doing full strokes and my inexperience with a progressive. Things got better. Then my last run I did it again. Not sure it may well be operator error, but I know exactly what Stefan is talking about.
-Jeff
Yeah, I’m thinking operator error too. I checked the tightness of the shell plate and it’s very tight. I think that the issue was that I may have accidentally tried to prime a case that was already primed. I’ve been trying to take cases on and off the press to check things, and I must have put a case or 2 in the wrong station at the wrong time. So, more of a beginner at progressive issue rather than the 6000. Then, when attempting to run several cases at once, forgetting to put a bullet in, taking out cases and putting back, forgetting to insert a new case. It was all just too much.

Although, I wish it were easier to remove and take out cases so I could check the primer and then check the powder etc.

What I think I need to do is set up the case feeder and just run it without futzing with things. Just to see how smoothly it runs and to try to learn the rhythm.
Go slow! Takes a while to get in rhythm.
 
Yeah, I’m thinking operator error too. I checked the tightness of the shell plate and it’s very tight. I think that the issue was that I may have accidentally tried to prime a case that was already primed. I’ve been trying to take cases on and off the press to check things, and I must have put a case or 2 in the wrong station at the wrong time. So, more of a beginner at progressive issue rather than the 6000. Then, when attempting to run several cases at once, forgetting to put a bullet in, taking out cases and putting back, forgetting to insert a new case. It was all just too much.

Although, I wish it were easier to remove and take out cases so I could check the primer and then check the powder etc.

What I think I need to do is set up the case feeder and just run it without futzing with things. Just to see how smoothly it runs and to try to learn the rhythm.

What I did that helped on taking out the cases was taking a razor blade or sharp knife and trimming the plastic retaining ring back to match the carrier opening.
 
I think that the issue was that I may have accidentally tried to prime a case that was already primed. I’ve been trying to take cases on and off the press to check things, and I must have put a case or 2 in the wrong station at the wrong time ... Then, when attempting to run several cases at once, forgetting to put a bullet in, taking out cases and putting back, forgetting to insert a new case. It was all just too much
I agree.

Become familiar with the press operations first and load some dummy rounds (No primer, no powder) to verify die settings (proper resizing/depriming of cases and bullet seating/taper crimp). Once everything checks out and you are familiar with press operations, then I would load with primer/powder.

What I think I need to do is set up the case feeder and just run it without futzing with things. Just to see how smoothly it runs and to try to learn the rhythm.
I would set up the case feeder last after you have successfully learned press operations and can produce consistent loaded rounds.
 
Although, I wish it were easier to remove and take out cases so I could check the primer and then check the powder etc.

What I think I need to do is set up the case feeder and just run it without futzing with things. Just to see how smoothly it runs and to try to learn the rhythm.

Powder Check
The internal stiff spring in the Auto Drum is the reason I stopped using it, and went back to the Pro Auto Disc.
You can operate the Disc measure manually without cycling the press.
You simply hold a case under the power thru the expander die, manually actuate the measure, keeping the case in contact with the expander to throw a test charge.

Case Feeder
Once setup there is no need to add the case feeding magazine.
Cases can be manually fed through the convenient loading port in the top plate of the press.

Check out my sig. line:
""Size/Prime a few cases when starting off with a progressive and put them aside.
You can plug them back into the process when a bad/odd case screws up in the priming station and continue loading.""
jmo,
.
 
when I am only running one case, the primer just sits on top of the primer pin ... what happened was that the primer fell off the pin and went under the shell plate. Then things started jamming
Got an email tip from Lee Precision to prevent primer falling off priming rod/pin when not priming cases:

John,

We made a little revelation in the Six Pack Pro recently that I feel may be useful to your audience.

... When not priming on this press or 'dry running' there are instances where the primer gets knocked off the priming post and fails to return to the guide causing the jam ups that wreck springs and causes issues. Whether that be from movement of the press or some other external factors is unknown and unimportant.

The easy quick remedy for this is to short stroke the press at the bottom of the stroke. The user can listen for the audible click of the detent ball in the shell plate or watch for the alignment pin to just begin protruding into the shell plate. If users are looking for a more positive feeling stop at the bottom, they may place a 9mm case on the press base on the left side of the carrier. The 9mm case is the perfect height to keep the primer pin from engaging but still allow the case feeder and all other key parts to function normally. This method can also be used for individuals that are loading primed brass.

Historically, we have emphasized running the press from stop to stop. It may appear advantageous to short stroke the press at the bottom if there is no case present or the user is not wishing to prime ...

Calvin Katzfey
Lee Precision​
 
Last edited:
Regardless of progressive brand, I have done the same for setting the resizing die:

I initially adjust the resizing die while resizing a case until I do not see daylight between bottom of die and top of shellplate with bottom of die barely "kissing" the top of shellplate. (I know this is different from Lee instructions but I was taught by a seasoned bullseye match shooter and kinda OCD myself ... And have a desire to be more precise)

Then after setting up other dies with shellplate full, I readjust resizing die if I see daylight between bottom of die and top of shellplate due to any shellplate tilt/deflection. (Of course, if I make any adjustment to the resizing die, I recheck the OAL/taper crimp amount)

As several members on the forum may know by now, I have been getting too much of an OAL spread on the new Six Pack Pro. I am new to the progressive loading, except for a short stint with a Lee Load Master several years back, and gave up on it after loading approximately 100 rounds or so. I followed the same process you described above about how you set the resizing die, using the same process I am happy to share that the OAL's have tightened up immensely. To the point that I am looking forward to my time spent on the new press. Thank you, Again, LiveLife for sharing your knowledge of all things reloading.

Edit to add: the new Six Pack Pro is an awesome press (this coming from a long time classic turret press user).
 
Sir, I followed your example for setting up the resizing die on the 6000, and got much better results. However, can I get clarification on the following statement?

"I initially adjust the resizing die while resizing a case until I do not see daylight between bottom of die and top of shellplate with bottom of die barely "kissing" the top of shellplate. (I know this is different from Lee instructions but I was taught by a seasoned bullseye match shooter and kinda OCD myself ... And have a desire to be more precise)

Then after setting up other dies with shellplate full, I readjust resizing die if I see daylight between bottom of die and top of shellplate due to any shellplate tilt/deflection. (Of course, if I make any adjustment to the resizing die, I recheck the OAL/taper crimp amount)"

Are you making the adjustments for the resizing die with a 'case in-place during the process?

Thank you in advance,
Flgolfer29,
Joe
 
Last edited:
Then after setting up other dies with shellplate full, I readjust resizing die if I see daylight between bottom of die and top of shellplate
Are you making the adjustments for the resizing die with a 'case in-place during the process?
Yes, with all the stations full with cases to better duplicate forces applied to the shellplate for final adjustment of dies.

And since mixed range brass can vary with case wall thickness and amount of case base expansion that depends on chamber size of barrels they were fired from, I try different cases to ensure there's no daylight present between bottom of die and top of shellplate.
 
Last edited:
UPDATE: Shellplate carrier cover and priming pin updated with new cover that is "self cleaning" - https://leeprecision.com/carrier-cover.html

Email sent to Calvin inquiring about the new pin and cover ... requesting explanation for the new carrier cover/priming pin and benefit(s) they provide.

My hunch is that Lee Precision redesigned the carrier cover
Received this email from Calvin and updated carrier cover with redesigned priming pin sleeve is "self cleaning" that will be shipped with new press/kit along with the "gold" priming pin that is same as original pin.

The original cover priming pin sleeve trapped powder granule/debri with straight shaft priming pin but the updated cover sounds to have larger opening at the bottom to be "self cleaning" and work with the original pin design.

Hello John,

The “gold pin” is simply the original design primer pin with yellow zinc plating. The “self-cleaning” pin is no longer required on the second production run carrier covers. We wanted an easy way for customers and our production people to identify the pin when installed on the press. Either pin will work in the new carrier cover and will self-clean but the yellow pin will not self-clean in the old carrier cover.

The first production run of carrier covers had the draft reversed on the primer pin hole. The draft or taper allowed spilled fine grain powder to wedge between the primer pin and casting hole causing the pin to stick up.

It is unlikely that anyone will ever need to replace the primer pin or carrier cover. If you require a replacement carrier cover the only type you can obtain from Lee Precision is the current design and any pin will work. The bulk of all the presses that have left the factory have the self-cleaning pin installed we changed the pin November 30th 2022 or have the new production carrier cover.

The whole primer pin issue has been resolved for some time and anyone purchasing a press today should not concern themselves with the primer pin installed on their press. We think any mention of the primer pin configurations may confuse new press owners. A quick check with the larger online distributors still shows little or no stock on the Six Pack so anyone buying is getting a press right off the production line.

Calvin Katzfey
Lee Precision​
 
Last edited:
Adding "Updated Carrier Cover" to "Update Parts"/"Press Setup"/"New Priming System"/"Troubleshooting and Solutions".

Press Set Up
:
New Priming System:
Press Disassembly and Reassembly:
Fine tuning press operation for consistency:
Troubleshooting and Solutions:
Lee Precision Update Parts/New Products:
 
Last edited:
Back
Top