
You are using an out of date browser. It may not display this or other websites correctly.
You should upgrade or use an alternative browser.
You should upgrade or use an alternative browser.
Brother's squirrel gun (32 cal) (formerly horn nose)
- Thread starter 4v50 Gary
- Start date

hawg
Member
Looking good but why do you feel the need to soak the ramrod?
hawg
Member
Deter breakage.
Just get a good hickory rod and don't worry about it. Hold it about 6-8 inches from the muzzle and don't try to seat a ball in one long push.
J-Bar
Member
Just get a good hickory rod and don't worry about it. Hold it about 6-8 inches from the muzzle and don't try to seat a ball in one long push.
Or use a skosh smaller ball!

JCooperfan1911
member
- Joined
- Oct 8, 2020
- Messages
- 2,709
A properly soaked rod has to be seen to believed.
Turner Kirkland soaked his rods in kerosene for 6 months or so and afterwards they could be bent near in two without splitment.
Turner Kirkland soaked his rods in kerosene for 6 months or so and afterwards they could be bent near in two without splitment.

Dave Markowitz
Member
Before you inlet the compass in the stock, set it on there and see if it's affected by close proximity to the steel of the gun.
If it's not, it would definitely be cool.
If it's not, it would definitely be cool.
OP
OP
- Joined
- Dec 19, 2002
- Messages
- 22,524
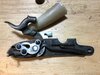
The factory removed too much wood. Made it easier to make the stock but there's a hug gaping hole between the stock wood and where the bolster plate ends on the lockplate.


Another issue arises from the removal of too much wood. When you tighten down the screws to secure the lock, it compresses the the wood and pulls the lock tightly against it. Then the lock won't work.
I'll show the solution in another post.
Another issue arises from the removal of too much wood. When you tighten down the screws to secure the lock, it compresses the the wood and pulls the lock tightly against it. Then the lock won't work.
I'll show the solution in another post.
Last edited:
OP
OP
- Joined
- Dec 19, 2002
- Messages
- 22,524
I grabbed a piece of scrap cold roll and sawed it to length and width and filed away. It was then heat colored with a butane torch. The crescent on the left is to allow for clearance of the screw.

Here the filler is seen with the lock. You can see why the crescent was filed into the filler.

After fluxing, it was soldered onto the lockplate. Allowed to cool, the lock was then reassembled and mounted onto the stock.
Gap begone! I should carve a piece of walnut and pin and epoxy it to hide the tang. You can see they really went hog wild in removing the wood. That would have covered the bolster-gap too, but at least it's stronger now and less affected by compression.
Basic Bench Metal Class at Trinidad teaches you these skills. It is offered during summer as part of the NRA Summer Gunsmithing Program.
Here the filler is seen with the lock. You can see why the crescent was filed into the filler.
After fluxing, it was soldered onto the lockplate. Allowed to cool, the lock was then reassembled and mounted onto the stock.
Gap begone! I should carve a piece of walnut and pin and epoxy it to hide the tang. You can see they really went hog wild in removing the wood. That would have covered the bolster-gap too, but at least it's stronger now and less affected by compression.
Basic Bench Metal Class at Trinidad teaches you these skills. It is offered during summer as part of the NRA Summer Gunsmithing Program.
Attachments
Last edited:
OP
OP
- Joined
- Dec 19, 2002
- Messages
- 22,524
I decided to hide the tang with a walnut filler piece. It's got a brass pin for strength or stability but awaits epoxying

I'll epoxy that after I drill the hole for the compass so I won't be wasting glue. Working on a horn tip for a powder measure now.
I'll epoxy that after I drill the hole for the compass so I won't be wasting glue. Working on a horn tip for a powder measure now.
JCooperfan1911
member
- Joined
- Oct 8, 2020
- Messages
- 2,709
I personally wouldn’t put all that effort into a low end gun like that, but I am guessing it has sentimentality.
.38 Special
Member
- Joined
- Sep 15, 2006
- Messages
- 7,394
I personally wouldn’t put all that effort into a low end gun like that, but I am guessing it has sentimentality.
On one of the blackpowder sites there is a fascinating thread from a machinist who put dozens of hours of precision work into a barely functional India-made scrap heap. By the end of it the thing was a jewel that anyone would be proud to own - and probably would have cost ten grand! For him it was apparently just an exercise in what is possible - or maybe just showing off! - but he seemed to enjoy it. Add in some sentimental value and who knows how far a fellow would be willing to go.
JCooperfan1911
member
- Joined
- Oct 8, 2020
- Messages
- 2,709
On one of the blackpowder sites there is a fascinating thread from a machinist who put dozens of hours of precision work into a barely functional India-made scrap heap. By the end of it the thing was a jewel that anyone would be proud to own - and probably would have cost ten grand! For him it was apparently just an exercise in what is possible - or maybe just showing off! - but he seemed to enjoy it. Add in some sentimental value and who knows how far a fellow would be willing to go.
With the Indian guns, the internal lock parts can wear out quickly. Did he replace those?
.38 Special
Member
- Joined
- Sep 15, 2006
- Messages
- 7,394
With the Indian guns, the internal lock parts can wear out quickly. Did he replace those?
I believe he re-cut everything and then did a proper heat treatment. The goal, I believe, was simply to see what was possible - a technical exercise.
OP
OP
- Joined
- Dec 19, 2002
- Messages
- 22,524
No sentimental value to me or my brother. He just wants it done and for me it's just practice of the stuph they taught us at Trinidad Gunsmithing. The toe line extends beyond the buttplate (igronance of the original kit assembler) and because it was proud, the toe popped out. I didn't take a photo of the toe without the filler but here are three photos of the toe with the filler block glued in:I personally wouldn’t put all that effort into a low end gun like that, but I am guessing it has sentimentality.

Quarter rear view:

View from butt

Here ist is with most of the excess wood trimmed off:

Per se I should redo the toe line to correct it; but I'm reaching the point where I need to work on my own stuph.
Applied more stain to the stock. It's prettier being a bit darker. No more work until the patchbox arrives. That has to be assembled and polished and then inletted.
Last edited:


OP
OP
- Joined
- Dec 19, 2002
- Messages
- 22,524
Laid out the sundial and then my stamping tool bent while I was stamping it. I have to find my older tools.


It was inspired by "Red Ryder BB Gun with a compass and a thing that tells time." This is one of the six original and this one is at the museum.

It was inspired by "Red Ryder BB Gun with a compass and a thing that tells time." This is one of the six original and this one is at the museum.
OP
OP
- Joined
- Dec 19, 2002
- Messages
- 22,524
Never really looked at the wood until today when I was drilling and screwing in the screws for the capbox. Broke off on brass screw and had to dig around the wood to expose the rest of the screw so it could be removed. I think the stock is oak. Have to drill the holes to the length of the screw so I don't strain it. Simple enough to measure with painter's tape on the drill bit.
troy fairweather
Member
Had one of these as a kid, shot pretty dang good. Used to pull down buckshot for ball until dad starting to work at a large gun shop and I got any shot of buck that opened when shipped. I would run a patch after every shot with alcohol to keep it happy.
troy fairweather
Member
Probably beech wood
OP
OP
- Joined
- Dec 19, 2002
- Messages
- 22,524
Beeswax makes the screws go in easier.
Here's the sideplate. Waiting on a counterbore drill and then I can do final shaping and inletting.

The forward hole on the sideplate (one on left in the image) was too low. To correct it, I used a round needle file and lengthened the hole upward. This allowed me to use the counter-sink to widen the hole such that the screw will sit flush to the surface of the sideplate.
Here's the sideplate. Waiting on a counterbore drill and then I can do final shaping and inletting.
The forward hole on the sideplate (one on left in the image) was too low. To correct it, I used a round needle file and lengthened the hole upward. This allowed me to use the counter-sink to widen the hole such that the screw will sit flush to the surface of the sideplate.
Last edited:
J-Bar
Member
Thanks for the project and photos, I admire your ingenuity!
Similar threads
- Replies
- 103
- Views
- 3K