nettlle
Contributing Member
I have been looking at these. Anyone own one?
I watched the video and it looked like you have to replace the shell holder on the ram with a pusher pad, which would interrupt any progressive action.Not a lot of info out there on these but I like the looks of them. Been looking at them for a while. I have an extra station on my T7 that this would fit nicely in. After viewing a couple more videos tonight I ordered one tonight. Give it a review when I get it going.
Or just dedicate an extra station on my T7. T7 doesn't care.I watched the video and it looked like you have to replace the shell holder on the ram with a pusher pad, which would interrupt any progressive action.
When you go to use this it looks like you are stuck in single stage mode.
1. Un-Screw the Main Body from 7/8 Conduit. Drop the Priming Pin of appropriate size from above. Hand tighten
and screw back the Main Body.
2. Remove one of the two bolts above the Top Plate. Loosen the other bolt until the Top Plate can rotate freely.
3. Place the appropriate Shuttle Slide with S/L engraving facing Upwards. The Main Body’s Guide Pin must go
through the oval hole on the Shuttle Slide.
4. Position the appropriate Shuttle Block on top of the Shuttle Slide. The Shuttle Slide should slide freely in the bot-
tom groove of the block, as shown in the photo.
5. Rotate the Top Plate to the side; a recess on the Top Plate will allow the installation of the priming shell holder.
Securely lock the two bolts on the Top Plate.
6. Connect the Shuttle Slide Spring to the hook located at the bottom of the Shuttle Slide.
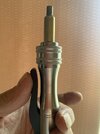
7. Install and lock the PCPS onto your press, similar to a regular 7/8-14 reloading die. Aim to expose more of the
Micrometer below for easier adjustment.
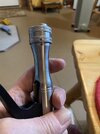
8. Install the Anvil onto the ram rod of your press, following the same procedure as installing a shell holder.Or just set it up
I look forward to reading your review, I believe there is accuracy to be found in proper primer seating.Not a lot of info out there on these but I like the looks of them. Been looking at them for a while. I have an extra station on my T7 that this would fit nicely in. After viewing a couple more videos tonight I ordered one tonight. Give it a review when I get it going.
That’s actually a good point. If you use an adjustable primer seater you’ll have to run a uniformer in every case and measure to cull any deep pockets.why do you need an adjustable primer seater. Just seat them to the bottom of the pocket and everything will be fine.
Ooooh, primer pocket uniforming!That’s actually a good point. If you use an adjustable primer seater you’ll have to run a uniformer in every case and measure to cull any deep pockets.
Without the “feel” of touching bottom the dimensions on all pockets will need to be identical.
It’s the distance from the primer to the bottom of the pocket that’s critical, not how far past the base the surface of the primer is inset.
That, and, isn’t it dependent on the case rim riding in the shell holder? So that point of contact would need to be consistent as well.That’s actually a good point. If you use an adjustable primer seater you’ll have to run a uniformer in every case and measure to cull any deep pockets.
Without the “feel” of touching bottom the dimensions on all pockets will need to be identical.
It’s the distance from the primer to the bottom of the pocket that’s critical, not how far past the base the surface of the primer is inset.
Good point. Updated. So no more mixed headstamps.That, and, isn’t it dependent on the case rim riding in the shell holder? So that point of contact would need to be consistent as well.
It is the “primer is fully seated” that is being discussed.With the adjustable hand priming tools I’ve used, what you are actually doing is changing where the handle stops in relationship to the tool body when the primer is fully seated plus a small crush. Uniformed pocket depth, case rim thickness all play a small part in optimum primer seating depth.
I'm running a Bald Eagle as well, and like how consistent it is. Too bad they don't make them anymore.I've never liked priming systems which mount to the top of presses. We need ~.25" of travel, but press rams travel ~3"... I also hate pick-up tubes - I KNOW they're common, but I hate them. If I have to touch every primer, I'm not really using an efficient system. I have a Bald Eagle Bench Seater which I fed with a modified Lee Safety Prime, and I adopted a Lee APP Deluxe (rebuilt from a Lee ACP, plus the F-Class John depth adjustment screw) last year which REALLY sped up my priming for rifle rounds. I really wouldn't want to wedge my priming system in between dies on top of a turret, and like I said, I don't see a lot of point in running 3" of ram travel for 1/4" of primer travel.
Lots of tools to do this particular task, consistent and proper seating is important, but these tools all do the same job, just mixing up the way they're fed or the shape of their support base.
You mean some people don’t use a uniforming tool on every primer pocket??!!?? How do they sleep at night?!Ooooh, primer pocket uniforming!

Case rim does vary a slight amount however not enough to effect ignition and no serious reloader that’s concerned about primer seating uses mixed up or odd ball brass without some sort of quality control, testing you’ll likely find as I have a (crush window ) of several thousandth, nothing good happens until the primer is fully seated and nothing bad happens when it is fully seated.It is the “primer is fully seated” that is being discussed.
If you correctly set an adjustable primer seater for one case, but the next case has a deeper pocket and a thinner rim then the second primer won’t be “fully” seated.
.... life after the failure of the USA primer manufacturers.
That’s actually a good point. If you use an adjustable primer seater you’ll have to run a uniformer in every case and measure to cull any deep pockets.
I've been looking at priming on an ACP that I picked up on the used market. Looks like I should start a new thread to discuss.
If you use an adjustable primer seater you’ll have to run a uniformer
no more mixed headstamps.